
Support and E-Warranty Certificate www.vevor.com/support
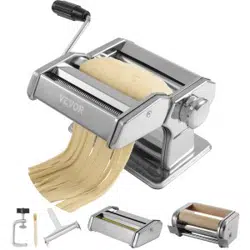
NOODLE MAKER
INSTRUCTION MANUAL
We continue to be committed to provide you tools with competitive price.
"Save Half", "Half Price" or any other similar expressions used by us only represents an
estimate of savings you might benefit from buying certain tools with us compared to the major
top brands and doses not necessarily mean to cover all categories of tools offered by us. You
are kindly reminded to verify carefully when you are placing an order with us if you are
actually saving half in comparison with the top major brands.

- 1 -
MODEL:QZ-T
Have product questions? Need technical support? Please feel free to
contact us:
CustomerService@vevor.com
NEED HELP? CONTACT US!
This is the original instruction, please read all manual instructions
carefully before operating. VEVOR reserves a clear interpretation of our
user manual. The appearance of the product shall be subject to the
product you received. Please forgive us that we won't inform you again if
there are any technology or software updates on our product.
NOODLE MAKER

- 2 -
WARNING: Before operating this device, please read this instruction
manual completely and keep it handy for future reference. Always follow
basic safety precautions when using these devices. These include:
1.Do not allow children younger than 14 years old to use the machine. This
product may only be used or maintained by children 14 years of age or older,
individuals with reduced physical, sensory, or mental capacities, or unskilled
individuals with adequate adult supervision. Children must not play with the
device.
2.For optimal operation and service life of the device, please follow the
instructions.
3.Food acids will make blades dull and corrode the metal. Always clean this food
preparation equipment immediately after every use. To maintain the appearance
and increase the service life, clean it daily.
4.Do not put these devices in a dishwasher or other automatic cleaning device for
cleaning.
5.The use of accessories or modifications not provided by the manufacturer may
cause hazards. This product must only be used for its intended purpose and in
the manner indicated in the instructions. All other types of use shall be considered
inappropriate and hazardous. The manufacturer shall not be responsible for any
improper or incorrect use and installation damage.
6.Avoid contacting moving parts; keep hands, hairs, clothing, spatulas, and other
utensils away from rollers during operation to reduce the risk of injury to the
person and/or damage to the pasta extruder.
7. Do not insert knives or clothes in between the rollers.
SAVE THESE INSTRUCTIONS
PRODUCT PARAMETERS
1. Processing thickness of dough:0.3-3mm/ level 1-9
2. Processing width of dough:1.5mm and 6mm / 3mm and 45mm
3. Product size: 205*205*150mm
4. Weight: 2.6kg

- 3 -
5. Accessories: Brush*1 Slicer*2 Fixing clip*1 Handle*1
Ravioli attachment*1 Cutting wheel*1
OPERATION INSTRUCTIONS
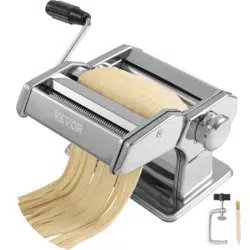
HOW TO PREPARE THE MACHINE FOR USE
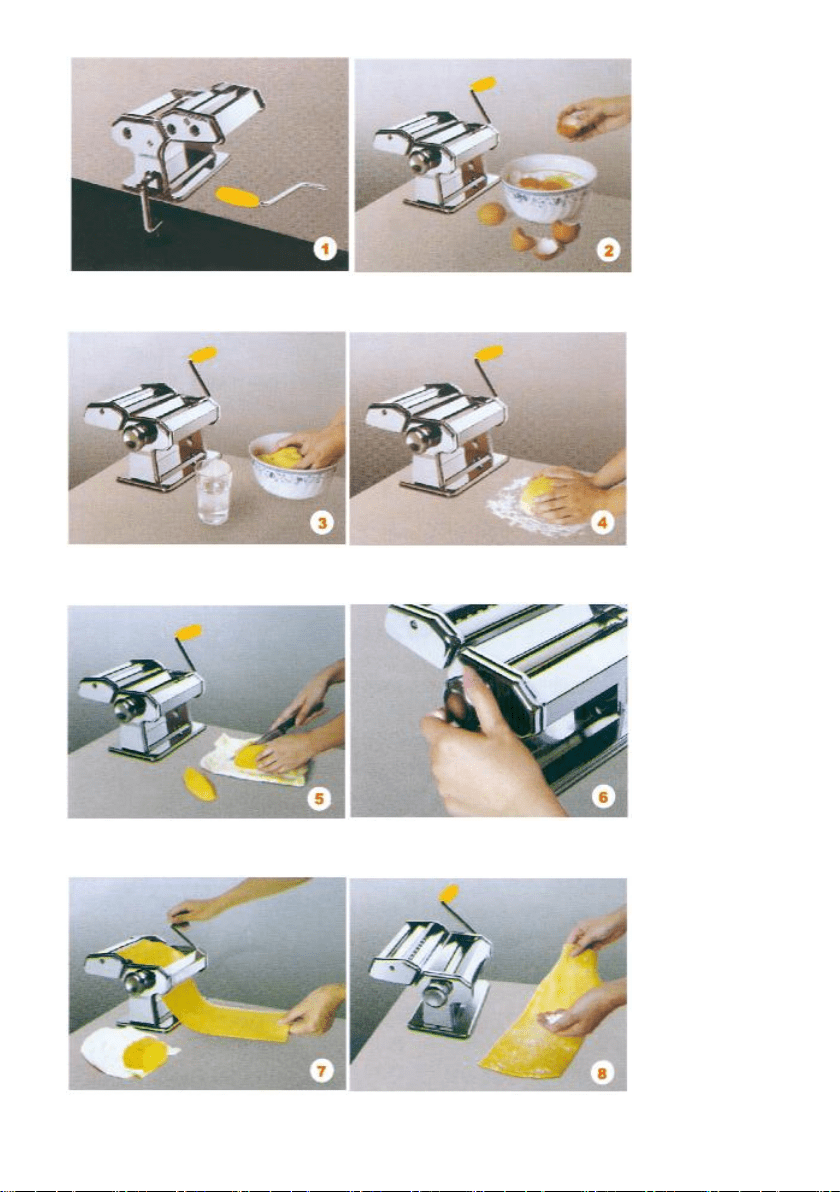
Fix the machine onto the table with the clamp provided and insert the handle into
the roller hole(Fig. 1).
When using the machine for the first time, clean it with a dry cloth to remove any
excess oil. To clean the rollers, pass a small quantity of dough through them and
then throw the dough away.
BASIC RECIPE FOR THE DOUGH
Ingredients:500 g of soft-wheat flour5 whole eggs
To achieve better pasta, for the flour use a mixture of 250 g of soft-wheat flour
and 250 g of durum-wheat flour (semolina/ durum wheat semolina).100 g of flour
will be needed while processing the pasta with the machine.
HOW TO PREPARE THE MIXTURE
Serves 6 people
Ingredients: 1 Ib soft wheat flour and 5 eggs; instead of 5 eggs, you can use a
glass of natural mineral water.
For“al dente”pasta, mix 0.5 lb of soft wheat flour with 0.5 lb of durum wheat
flour.Do not add any salt!
Pour the flour into a bowl and the eggs into the middle of the flour(Fig. 2). Mix the
eggs with a fork until they are completely blended with the flour. Knead the
mixture with your hands (Fig. 3) until it is completely homogenous and consistent.
If the mixture is too dry add some water, if it is too soft add some flour.A good
mixture should never stick to your fingers. Remove the mixture from the bowl and
place it onto a lightly floured table (Fig.4). If necessary, continue to knead the
mixture and cut it into small pieces (Fig. 5).
Advice: do not use eggs straight from the fridge!

- 4 -
HOW TO PREPARE THE DOUGH AND THE PASTA WITH
Set the machine regulator to position 1, pulling it outwards and turning it so that
the two smooth rollers are completely open(approx.3 mm)(Fig.6). Pass a piece of
the mixture through the machine by turning the handle(Fig. 7). Repeat this
operation 5-6 times, folding the dough over and adding some flour to the middle if
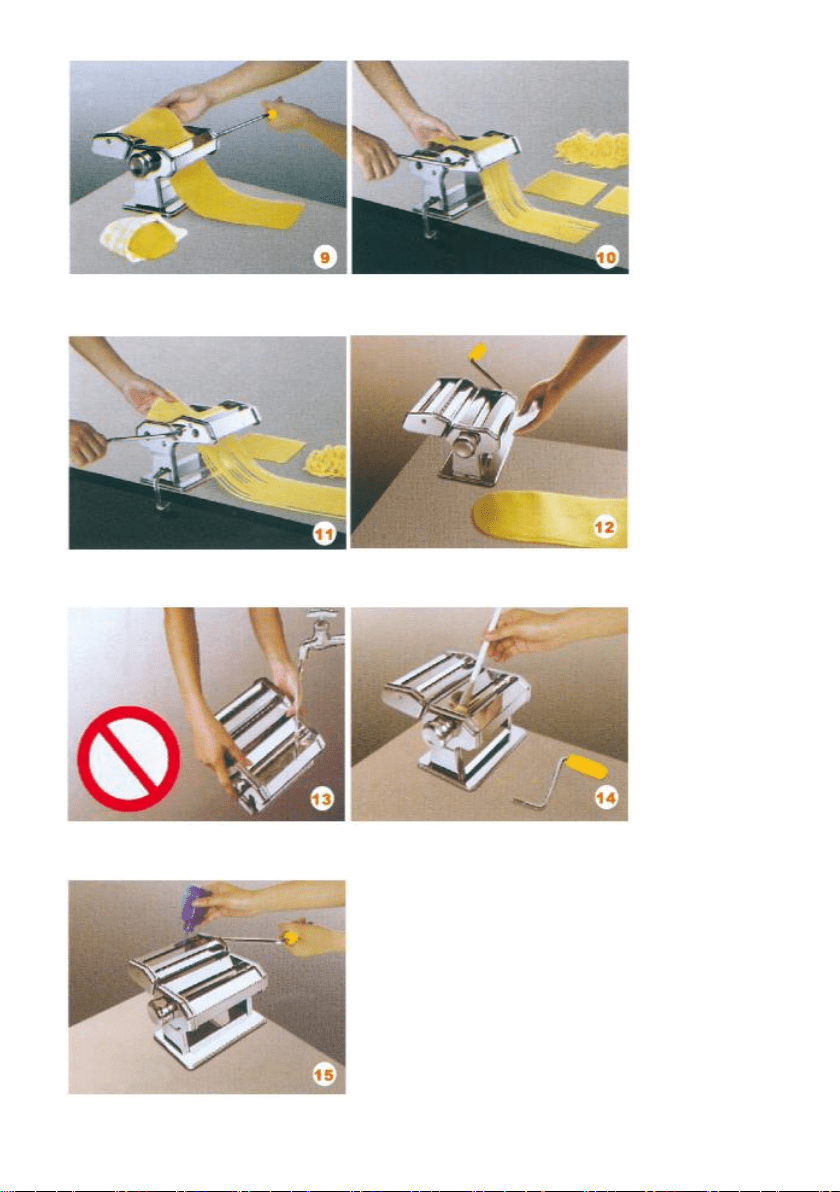
necessary. (Fig.8). When the dough has taken a regular shape, pass it through
the rollers once only with the regulators set on number 2 (Fig. 9), then once again
on number 3, continuing until you obtain the desired thickness (min. thickness at
no.9 approx. 0.2 mm). With a knife, cut the dough cross-ways into pieces
approximately 25 cm(10 inches)long. Insert the handle in the hole for the cutting
rollers, turn it slowly, and pass the dough through to obtain the type of pasta you
prefer(Fig.10 and 11). Note 1 -If the rollers won't 'cut,' the dough is too soft: in this
case, you should pass the dough through the smooth rollers after adding some
flour to the mixture. Note 2 - When the dough is too dry and cannot be 'caught' by
the cutting rollers, add a little water to the mixture and pass it through the smooth
rollers again. Place the pasta on a tablecloth and leave it to dry for at least an
hour. Remember that pasta can last a long time(1-2 weeks)if kept in a cool, dry
place. Bring a pan of salted water to a boil (135 oz per 1 Ib of pasta)to which you
will add the pasta. Fresh pasta cooks in just a few minutes, averaging 2-5
minutes, depending on the thickness. Stir gently and then drain the pasta once it
has finished cooking.
NEW RECIPES FOR FRESH PASTA
GREEN PASTA
* basic recipe dough* 100 g of spinach
The spinach must first be washed. then boiled for about 10-15 minutes and
blended before being added to the dough.
ORANGE PASTA
* basic recipe dough* 150 g of carrots
The carrots must be peeled and sliced. then boiled for 15 to 30 minutes and
mashed before being added to the dough.
BLACK PASTA RED PASTA
* basic recipe dough * basic recipe dough
* l bag of squid ink * l teaspoon of concentrated tomato paste
- 5 -
- 6 -

- 7 -
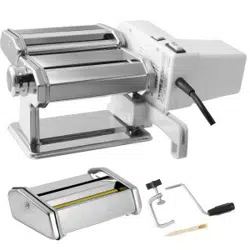
HOW TO USE THE RAVIOLI ATTACHMENT
1. Prepare the dough using the pasta machine. Ensure that the dough is put
through the smooth rollers for the last time with the dial set to position 5.The
dough must be pretty dry but only with moisture.
2. Lay the strips of dough on a cloth and cut them lengthwise with the pasta
cutting wheel. The ideal dough length is 50-70 cm.
3. Remove the fettuccini/spaghetti cutting attachment from the machine.
4. Insert the Ravioli attachment sliding it on to the guides provided.
5. Fold one length of the dough in half and insert it between the Ravioli rollers,
keeping it folded.Turn the handle about 1/4 of a turn to catch the dough between
the rollers.
6. Separate the two strips of dough, laying them between the rollers.
7. Using a teaspoon, insert a little filling between the two strips of dough. You
should need 3-4 teaspoonfuls distributed evenly. (You can use any meat, cheese,
or vegetable filling.)
8. Turn the handle slowly and add filling a little at a time for each Ravioli segment.
9. When the whole strip of Ravioli has passed through the tool, lay it on a cloth to
dry so that the Ravioli can be separated easily.
Clean and Maintenance
1. During use, clean the scrapers underneath the smooth rollers every so often
with a piece of kitchen paper(Fig. 12)
2. Never wash the machine with water or in the dishwasher! (Fig. 13).
3. To clean the machine after use, use a brush or a wooden rod(Fig. 14).
4.If necessary, put several drops of oil on the ends of the cutting rollers(Fig. 15).
5. Do not insert knives or cloths in between the rollers!

- 8 -
Address: Baoshanqu Shuangchenglu 803long 11hao 1602A-1609shi Shanghai
Imported to AUS: SIHAO PTY LTD, 1 ROKEVA STREETEASTWOOD NSW 2122
Australia
Imported to USA: Sanven Technology Ltd., Suite 250, 9166 Anaheim Place,
Rancho Cucamonga, CA 91730
REP
UK
Pooledas Group Ltd
Unit 5 Albert Edward House, The Pavilions
Preston, United Kingdom
REP
EC
SHUNSHUN GmbH
Römeräcker 9 Z2021, 76351
Linkenheim-Hochstetten, Germany
MADE IN CHINA