
Loading ...
Loading ...
Loading ...
Pioneer WYT Series Mini Split
MODEL/Capacity (Btu/h)
A B D
YN009ALFI22RPD (9,000 BTU - 110/120V)
H
YN012ALFI22RPD (12,000 BTU - 110/120V)
YN009GLFI22RPD (9,000 BTU - 208/230V)
YN012GLFI22RPD (12,000 BTU - 208/230V)
YN024GLFI22RPD (24,000 BTU - 208/230V)
Air Inlet
Air Inlet
Air Outlet
438 mm
17-1/4 in.
438 mm
17-1/4 in.
438 mm
17-1/4 in.
438 mm
17-1/4 in.
586 mm
23-1/16 in.
607 mm
23-7/8 in.
278 mm
10-15/16 in.
278 mm
10-15/16 in.
278 mm
10-15/16 in.
278 mm
10-15/16 in.
347.5 mm
13-11/16 in.
390 mm
15-3/8 in.
254.8 mm
10 in.
254.8 mm
10 in.
254.8 mm
10 in.
254.8 mm
10 in.
312.7 mm
12-5/16 in.
397.2 mm
15-5/8 in.
546 mm
21-1/2 in.
546 mm
21-1/2 in.
546 mm
21-1/2 in.
546 mm
21-1/2 in.
699 mm
27-1/2 in.
804.2 mm
31-11/16 in.
727.6 mm
28-5/8 in.
727.6 mm
28-5/8 in.
727.6 mm
28-5/8 in.
727.6 mm
28-5/8 in.
850 mm
33-7/16 in.
910 mm
35-13/16 in.
810 mm
31-7/8 in.
810 mm
31-7/8 in.
810 mm
31-7/8 in.
810 mm
31-7/8 in.
927 mm
36-1/2 in.
978 mm
38-1/2 in.
YN018GLFI22RPD (18,000 BTU - 208/230V)
W1 W2
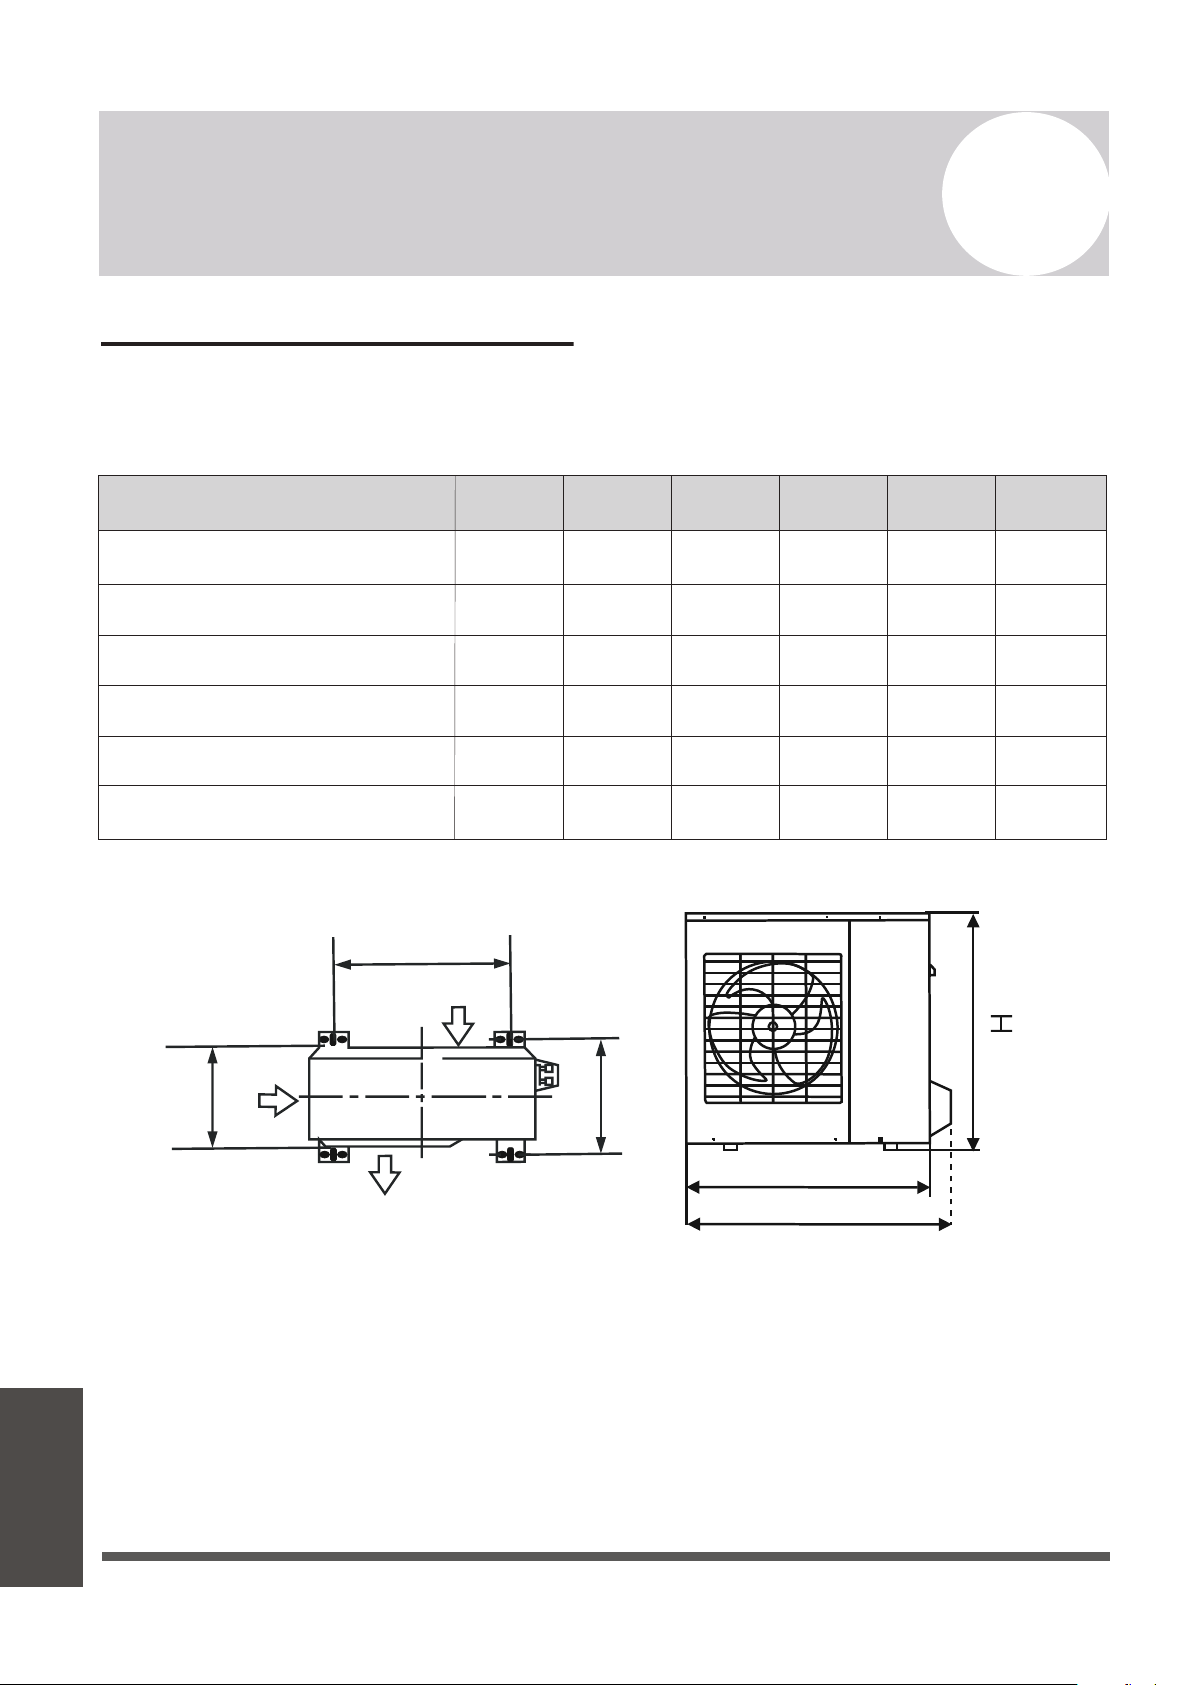
Anchoring the Outdoor Unit
The outdoor unit can be anchored to the ground or to wall-mounted brackets. The following
is a list of different outdoor unit sizes and the distance between their mounting feet. Prepare
the installation base of the unit according to the dimensions found below:
Page 42
A
Appendix
Outdoor Unit
Installation
Appendix
If installing the unit on the ground or on a
concrete mounting platform, do the following:
1. Mark the positions for four expansion bolts
based on dimensions in the “Unit Mounting
Dimensions” chart.
2. Pre-drill holes for expansion bolts.
3. Clean concrete dust away from holes.
4. Place a nut on the end of each expansion bolt.
5. Hammer expansion bolts into each hole.
6. Remove the nuts from expansion bolts, and
place the outdoor unit onto the bolts.
7. Put washers onto each expansion bolt, then
replace each of the nuts.
8. Using a wrench, tighten each nut until snug.
WHEN DRILLING INTO CONCRETE,
WEAR EYE PROTECTION AT ALL TIMES!
A
W
B
D
Air inlet
Air outlet
Air inlet
A
B
D
W1
W2
Loading ...
Loading ...
Loading ...