Loading ...
Loading ...
Loading ...

21
Playing the connected source
About digital sound
If the equipment is digitally connected to the AV Receiver, the
sound from the digital input will automatically be selected and
reproduced instead of the analog sound as explained below.
The initial settings are as follows:
• When the DVD source is selected, the digital sound from the
DIGITAL INPUT COAXIAL connector is reproduced.
• When the CD source is selected, the digital sound from the
DIGITAL INPUT OPTICAL 2 connector is reproduced.
• When the TAPE source is selected, the digital sound from the
DIGITAL INPUT OPTICAL 1 connector is reproduced.
When the digital sound is reproduced, the ŸDIGITAL, DTS, or
PCM (2 channel digital stereo) indicator lights up according to the
received sound system in the AV Receiver’s display.
This section shows you how to play the sources connected to the
AV Receiver.
You may need to see “Connecting to audio/video equipment” on
page 10 while following the steps in this section.
Selecting a sound source
1. Press input selector button to select one of the
following input sources:
• DVD
• VIDEO 1
• VIDEO 2
• VIDEO 3
• TAPE
• CD
e.g. When VIDEO 3 is selected.
Volume level
When MD recorder is connected to the TAPE jacks, you can
switch the source from TAPE to MD (see page 23).
2. Ensure that the indicator(s) for the speaker
system(s) to be used are lit on the display.
If no SPEAKERS indicator is lit, press SPEAKERS A/B on the
unit or SP A/SP B on the remote controller to select the speaker
system(s) to be used.
3. Start playing the selected source.
4. Press VOLUME 5/∞ on the remote controller or
turn MASTER VOLUME dial on the unit to
adjust the volume.
Various functions while playing the connected source
To use the following functions, see pages 26 and 27.
• Turning on/off the SPEAKERS A/SPEAKERS B systems
• Muting the sound
• Listening through headphones
• Changing the display
• Controlling the brightness of the lghts on the AV Receiver
• Using the sleep timer
Enjoying the surround modes while playing the
connected source
See page 30.
VOLUME 5/∞
SP A
SP B
SPEAKERS A/B
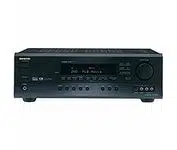
Input Selector buttons
MASTER VOLUME dial
PCMŸDIGITAL
DTS
Input Selector
buttons
Loading ...
Loading ...
Loading ...
