Loading ...
Loading ...
Loading ...
4
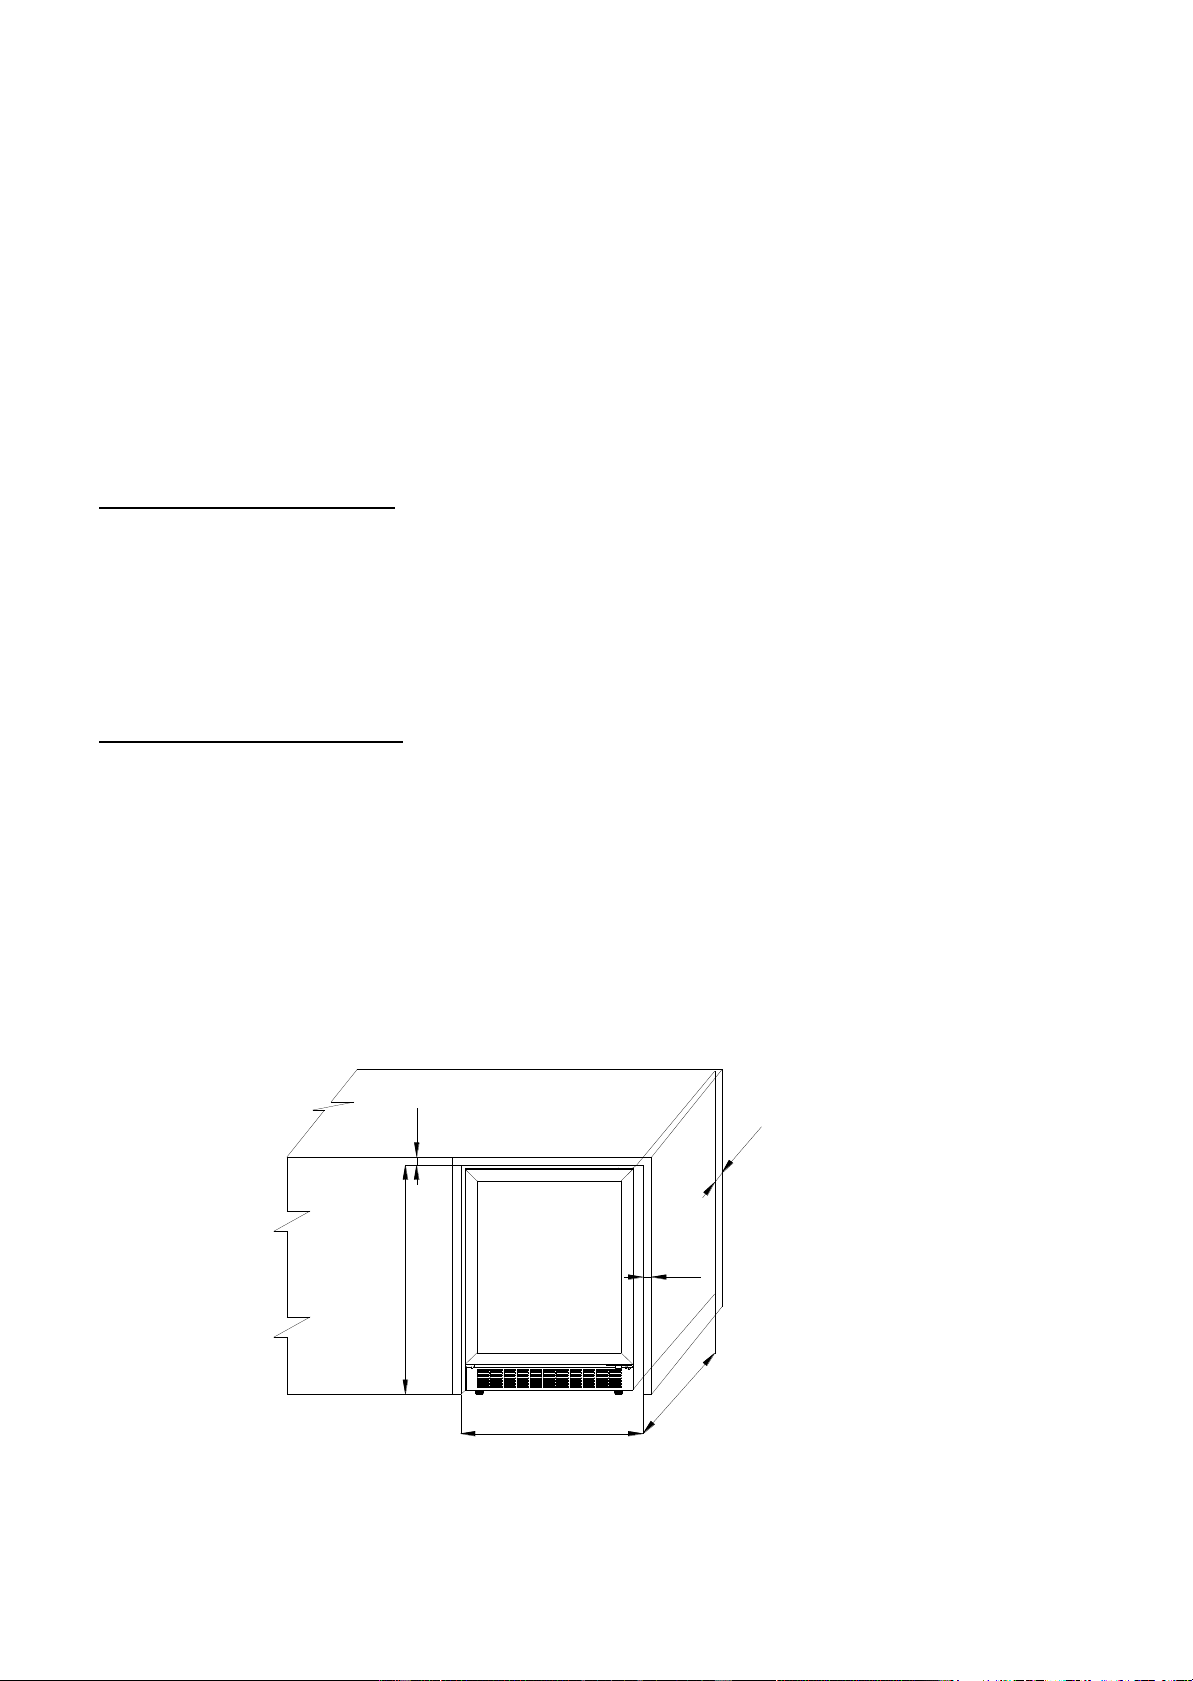
30mm
830mm
610mm
30mm
580mm
50mm
• Only use this appliance for domestic purposes in accordance with these instructions.
• The Wine Cabinet is suitable for storing wine (or other bottled beverages). It is not suitable for storing fresh
or frozen foods.
• This appliance can be used by children aged from 8 years and above and persons with
reduced physical, sensory or mental capabilities or lack of experience and knowledge if
they have been given supervision or instruction concerning use of the appliance in a safe
way and understand the hazards involved. Children shall not play with the appliance.
Cleaning and user maintenance shall not be made by children without supervision.
INSTALLATION INSTRUCTION
Before Using your Wine Cooler
Remove the exterior and interior packing.
Before connecting the Wine Cooler to the power source, let it stand upright and undisturbed for approximately
2 hours.
This will reduce the possibility of malfunction in the cooling system by allowing the coolant to settle after
transportation.
Clean the interior surface with lukewarm water using a soft cloth. Install the handle on the left side of the door.
Installation of Your Wine Cooler
This appliance is designed for free standing installation or built-under (fully recessed). Leave gap of minimum
50mm at back of the wine cellar.
• Place your Wine Cooler on a floor that is strong enough to support it when it is fully loaded. To level your
Wine Cooler, adjust the front leveling leg at the bottom of the Wine Cooler.
• Locate the Wine Cooler away from direct sunlight and sources of heat (stove, heater, radiator, etc.) Do not
install it facing an oven or heat-emanating source.
• Direct sunlight may affect the acrylic coating and heat sources may increase electrical consumption.
• Extreme cold ambient temperature may also cause the unit not to perform properly,
• Avoid locating the unit in humid areas.
• Plug the Wine Cooler Into an exclusive, properly installed grounded wall outlet. Do not, under any
circumstances cut or remove the third (ground) prong from the power cord. Any questions concerning power
and/or grounding should be directed toward a certified electrician.
• Please provide a minimum of 30mm on the top and sides and 50mm at the back of the wine cellar
Note: Leave an additional 15mm gap for access to door handle if installed in a niche
Loading ...
Loading ...
Loading ...