Loading ...
Loading ...
Loading ...

7
Highlight the microphone icon labeled USB Audio Device and click Set Default. To make further
adjustments to the recording settings, double-click on the microphone icon labeled USB Audio Device.
7. Click on the tab labeled Advanced. From the drop down menu you can change the sample rate and
bit-depth for audio recording. Please note that you should verify these settings match the settings in your
recording application.
Your Wondows Vista computer is now set up to use the Mic Mate
™
Pro USB interface with most recording
applications. Some applications will require additional settings be changed within the program. Please see
your recording software manual for proper setup.
Initial setup with OSX (up to version 10.4):
1. To select the Mic Mate
™
Pro as the default audio device, click on the Apple icon at the top of the screen
then select the System Preferences.
2. Click on the speaker icon labeled Sound.
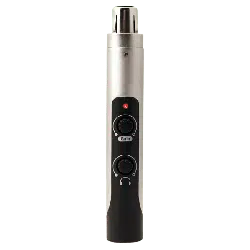
3. Click on the Input tab, then select the device named USB Audio Codec. You will notice there are no input
level controls for this device. This is because the input gain control is found on the Mic Mate
™
Pro.
4. Next, click on the Output tab and select the device named USB Audio Codec. The master volume
output can be changed by adjusting the “output volume fader” left or right. You can adjust this volume in
conjunction with the headphone volume knob on the Mic Mate
™
Pro to create the perfect monitor mix
between music playback and the direct signal from your microphone.
5. Further adjustments to the sample rate and bit-depths can be found in the Audio Midi Setup (Macintosh
HD > Applications > Utilities > Audio Midi Setup.) You should, however, check the settings in the recording
program you are using as they may override or conict with these settings.
Setup
8
A. By selecting the USB
Audio Codec as the “Default
Input,” the Mic Mate
™
Pro will
automatically be selected as the
audio input device the next time
it is plugged in.
B. By selecting the USB
Audio Codec as the “Default
Output” the Mic Mate
™
Pro will
automatically be selected as the
audio output device the next time
it is plugged in. By selecting the
USB Audio Codec as the “System
Output,” the microphone will be
used as the output device for any
system sounds.
C. Select the USB Audio Codec to make adjustments to the sample rate and bit-depth. You will see the
sections D and E appear in the lower portion of the window.
D. Here you can make adjustments to the sample rate and bit-depth for the input (the microphone signal).
E. Here you can make adjustments to the sample rate and bit-depth for the output (the signal to the
headphones).
Your computer is now set up to use the Mic Mate
™
Pro USB interface. However, after changing these
settings you should still check the settings in your recording software. If the sample rate and/or bit-depth in
the recording software do not match your hardware, you will most likely hear clicks and pops, or the audio
will be the wrong pitch.
Loading ...
Loading ...
Loading ...