Loading ...
Loading ...
Loading ...
28 - INSTALLATION 91477A432/A
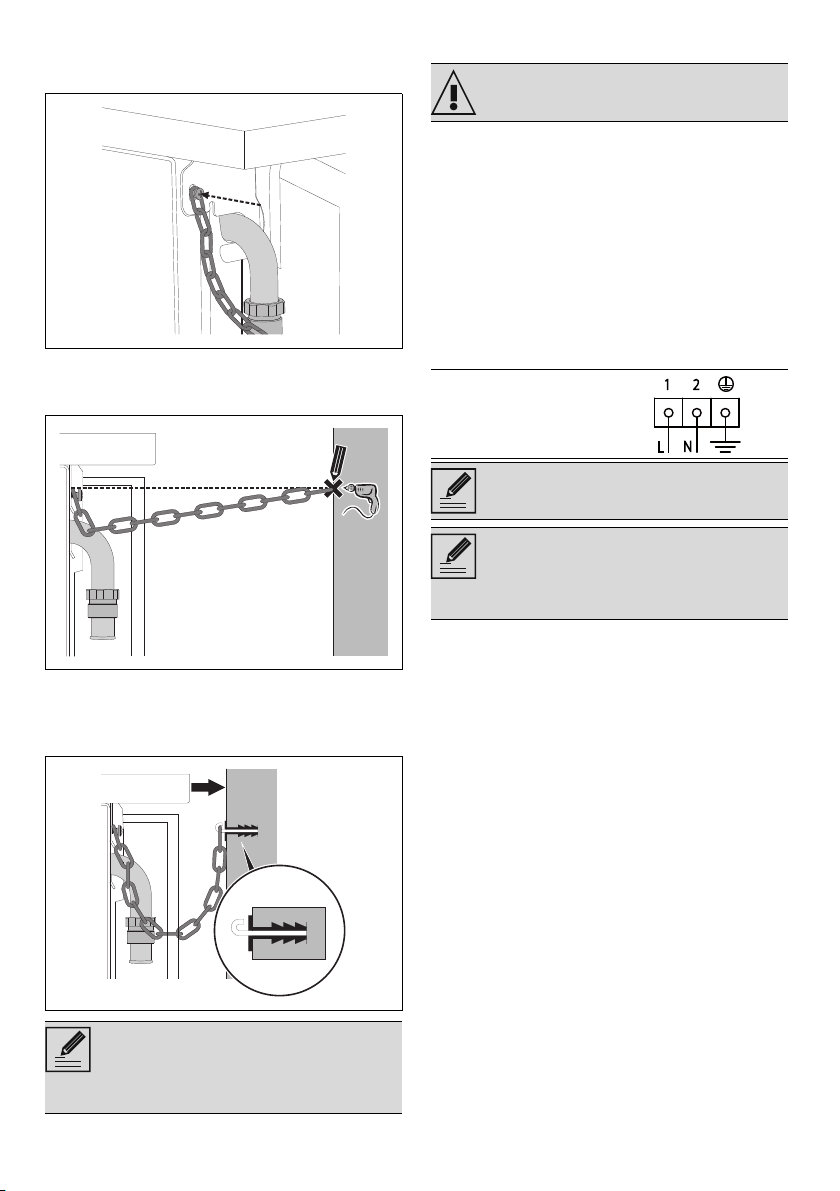
2. Attach the chain to the cooker using the
screw that was removed in the previous
step.
3. Stretch the chain out horizontally so that the
other end touches the wall. Mark the
position for the hole on the wall.
4. Drill a hole at the marked position and insert
a wall plug.
5. Attach the chain and place the appliance
against the wall.
Electrical connection
General information
Check the mains characteristics against the data
indicated on the plate.
The identification plate bearing the technical
data, serial number and brand name is visibly
positioned on the appliance.
Do not remove this plate for any reason.
The appliance must be connected to ground
using a wire that is at least 20 mm longer than
the other wires.
The appliance can work in the following modes:
Fixed connection
Fit the power line with an all-pole circuit breaker
with a contact separation distance sufficient to
provide complete disconnection in category III
overvoltage conditions, pursuant to installation
regulations.
For the Australian/New Zealand market:
The circuit breaker incorporated in the fixed
connection must comply with AS/NZS 3000.
Connection with plug and socket
Make sure that the plug and socket are of the
same type.
Avoid using adapters, gang sockets or shunts as
these could cause overheating and a risk of
burns.
Instructions for the installer
• If you use a plug to connect to the power
supply, the plug must be accessible after
installation.
• Do not bend or trap the power cable.
• The appliance must be installed according
to the installation diagrams.
The length of the chain must be as short
as possible to prevent the appliance
from tipping forwards or diagonally or
from moving sideways.
See General safety instructions.
220-240 V 1N~
3 x 1.5 mm ²
three-core cable
The values indicated refer to the cross-
section of the internal conductor.
The aforementioned power cables are
sized taking into account the
coincidence factor (in compliance with
standard EN 60335-2-6).
Loading ...