Loading ...
FEATURES
Elegant modern design.
Easy to use digital controls.
Small compact footprint.
No freezer required
PRECAUTIONS
To avoid injury or bodily harm, please follow the safety instructions below.
• Do not operate appliance on or near stove top or sources of high heat.
• Avoid placing unit in direct sunlight, as this will compromise the cooling ability of the
thermoelectric system.
• Do not operate appliance if there is any sign of damage to the power cord or any other
part of the appliance.
• Do not disconnect power supply by pulling on cord. Grasp by plug.
• Connect power supply to an approved electrical outlet of proper voltage.
• Ensure proper ventilation around fan intake and output areas at base of machine. Do not
block these areas; to do so will cause unit to overheat and malfunction.
• Use of appliance with an extension cord is not recommended.
• Do not attempt to repair the unit yourself. Please contact Koolatron Customer Service
in the event that you have difficulty with the product, and you will be advised of the
appropriate course of action.
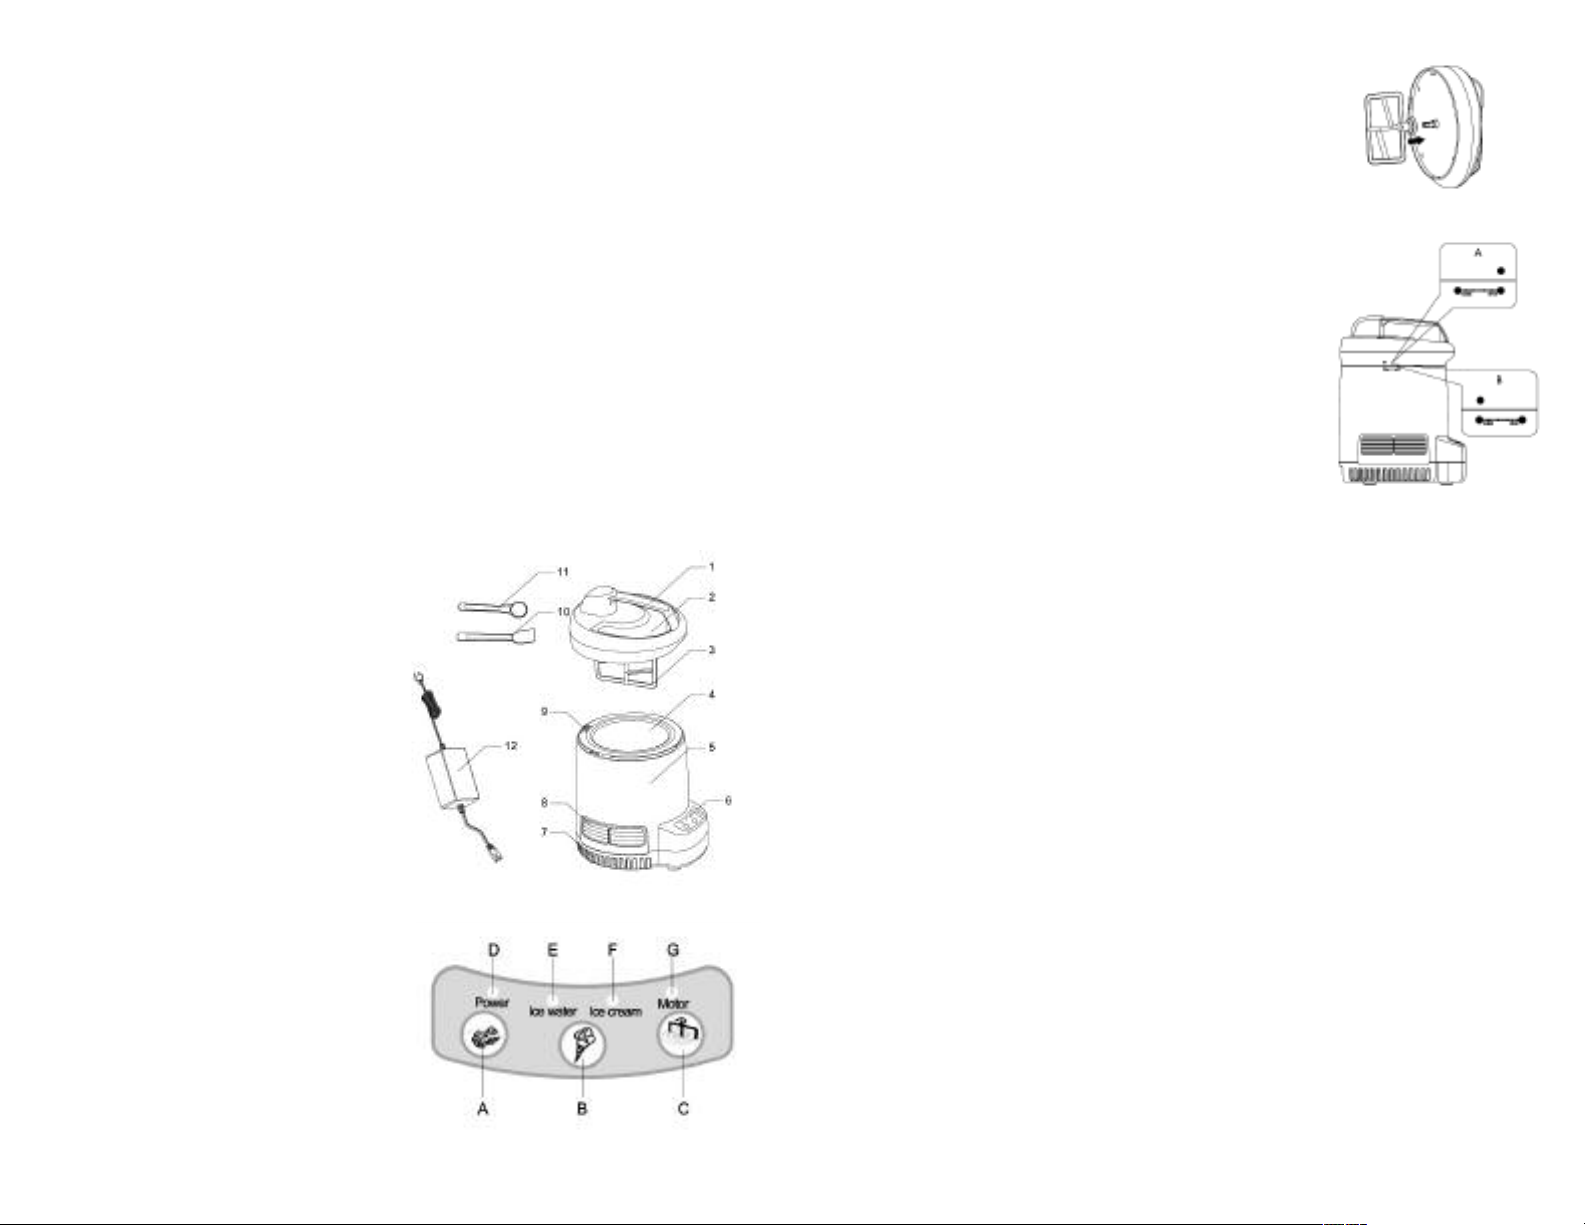
PARTS LIST
1. Lid Handle
2. Power mixing lid
3. Mixing paddle
4. Stainless steel mixing chamber
5. Base
6. Control panel
7. Fan air intake
8. Fan air output
9. Lid power contact points
10. Ice cream spade/scraper
11. Ice cream scoop
12. Power adapter
CONTROL PANEL FEATURES
A. Sorbet button
B. Ice Cream button
C. Motor Stop/Start button
D. Power indicator light
E. Sorbet indicator light
F. Ice Cream indicator light
G. Motor indicator light
ASSEMBLY
- Attach the mixing paddle onto the power mixing lid as
shown in Figure 1.
- To remove mixing paddle from lid, simply grasp paddle and
pull straight out.
- To attach power mixing lid to base, refer to Figure 2. Align
indicator on lid with the OPEN indicator on base, and twist
lid clockwise until lid clicks into closed position and indica-
tor on lid is aligned with the CLOSE indicator on base.
- To remove lid from base, twist lid counter-clockwise to align
the indicator on lid with the OPEN indicator on base.
- Connect power supply to the unit. The two-pin female con-
nection fits into the outlet on the base of the appliance.
Ensure that the rib in the plug is properly aligned with the
notch in the outlet. This ensures proper polarity of your
power supply.
- Connect the other end of power supply to an AC outlet. The
Power Indicator light (D) will illuminate when power supply
is properly connected
OPERATION
Add your prepared ice cream mixture into the stainless steel mixing chamber to begin the
freezing and churning process. Caution: The mixture should be liquid when you add it.
Do not add frozen product to mixing chamber as this will cause damage to the mixing
paddle.
Choose the appropriate program, either (A) Sorbet or (B) Ice Cream, and press the
function button to begin processing your mixture. Refer to the directions for either Sorbet
or Ice Cream for further instructions.
SORBET MODE
To make sorbet, select and press the (A) Sorbet button. The thermoelectric system
will begin to cool the mixture inside the mixing chamber. When the mixture reaches a
temperature of 2°C, the mixing paddle inside will begin to churn the mixture. You will hear
it cycle on and off, with it churning for a period of approximately two minutes, followed by
a one minute pause. Once the mixture has reached the proper temperature, the motor
will stop, and the buzzer will sound, indicating that you should remove the mixing paddle
from the lid. Open lid and pull paddle off and set aside. Replace lid and machine will
continue to chill mixture for approximately 10 minutes. When the mixture reaches the
proper temperature, the cooling cycle will end and the Sorbet light indicator will begin to
flash. Press the (A) Sorbet button to end the processing cycle, and the Sorbet indicator
light will stop flashing. Sorbet is ready to serve, or may be transferred to a freezer safe
container and stored in the freezer to enjoy later.
32
Loading ...
Loading ...
Loading ...