Loading ...
Loading ...
Loading ...

OPERATION
1. Shut off water ow to pump by closing appropriate valves or by plugging both the
skimmer outlet port and return port to pool. Disconnect piping or hoses from the motor/
pump assembly.
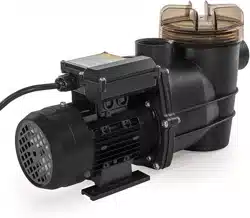
2. Remove the strainer by disengaging and removing the strainer cover. Remove the
basket. Lift up on strainer ‘C’ clip and remove. Finally, slide strainer housing forward and
remove.
3. Unscrew screws and remove pump cover, exposing the impeller.
4. Remove the canopy or the shaft cover plate from the end of motor opposite the impeller.
5. Hold the motor shaft securely by either inserting a screwdriver in slot at end of shaft
or by using an open-end wrench to engage the at surfaces provided near end of motor
shaft. Rotate the impeller in a counter-clockwise direction and remove it from the motor
shaft.
6. Note how the steel spring section of the old seal is positioned on impeller hub and
remove it by pulling from the impeller.
7. Loosen motor through bolts from the back of motor and remove pump housing/shroud
from the front of the motor.
8. Remove the ceramic stationary portion of the old seal by pressing the white ceramic
seat out of the pump housing recess. If assembly is tight, tap lightly from the “motor” side.
9. Clean and lubricate the impeller stem and the pump housing recess with a dilute
solution of non-granulated liquid type soap. Do not use petroleum or silicone lubricants as
these can contribute to seal leakage.
10. Press the new rotating portion of the seal assembly onto the impeller stem with the
polished black graphite surface facing away from the impeller.
11. Carefully press the stationary ceramic portion of the seal into the recess of the pump
housing/shroud, with the polished at surface facing out.
12. Carefully insert the motor shaft through the pump housing/shroud and align with white
ceramic stationary seal assembly in place and secure the motor to pump housing/shroud
with motor through bolts. Be sure motor base and pump discharge port are positioned
properly. Alternately tighten the motor through bolts until the pump housing is secure.
Make certain motor shaft turns freely before proceeding.
13. Screw the impeller (clockwise) with the rotating portion of seal in place onto the motor
shaft. Hand-tighten the impeller in place.
14. Clean (replace if necessary) the O-ring and replace on pump cover. Assemble the
pump cover to the pump housing/ shroud with the screws. Tighten screws alternately and
evenly.
15. Re-assemble strainer by sliding strainer housing onto pump cover. Install strainer ‘C’
clip by pushing clip down onto grooved pump cover coupling. Insert basket and fasten
strainer cover.
16. Reconnect pump to the piping or hoses provided. Open all valves and make sure that
the pump strainer housing is full of water before restarting the pump.
SHAFT SEAL CHANGE INSTRUCTIONS
9
Loading ...
Loading ...
Loading ...
