Loading ...
Loading ...
Loading ...
— 14 —
Installation
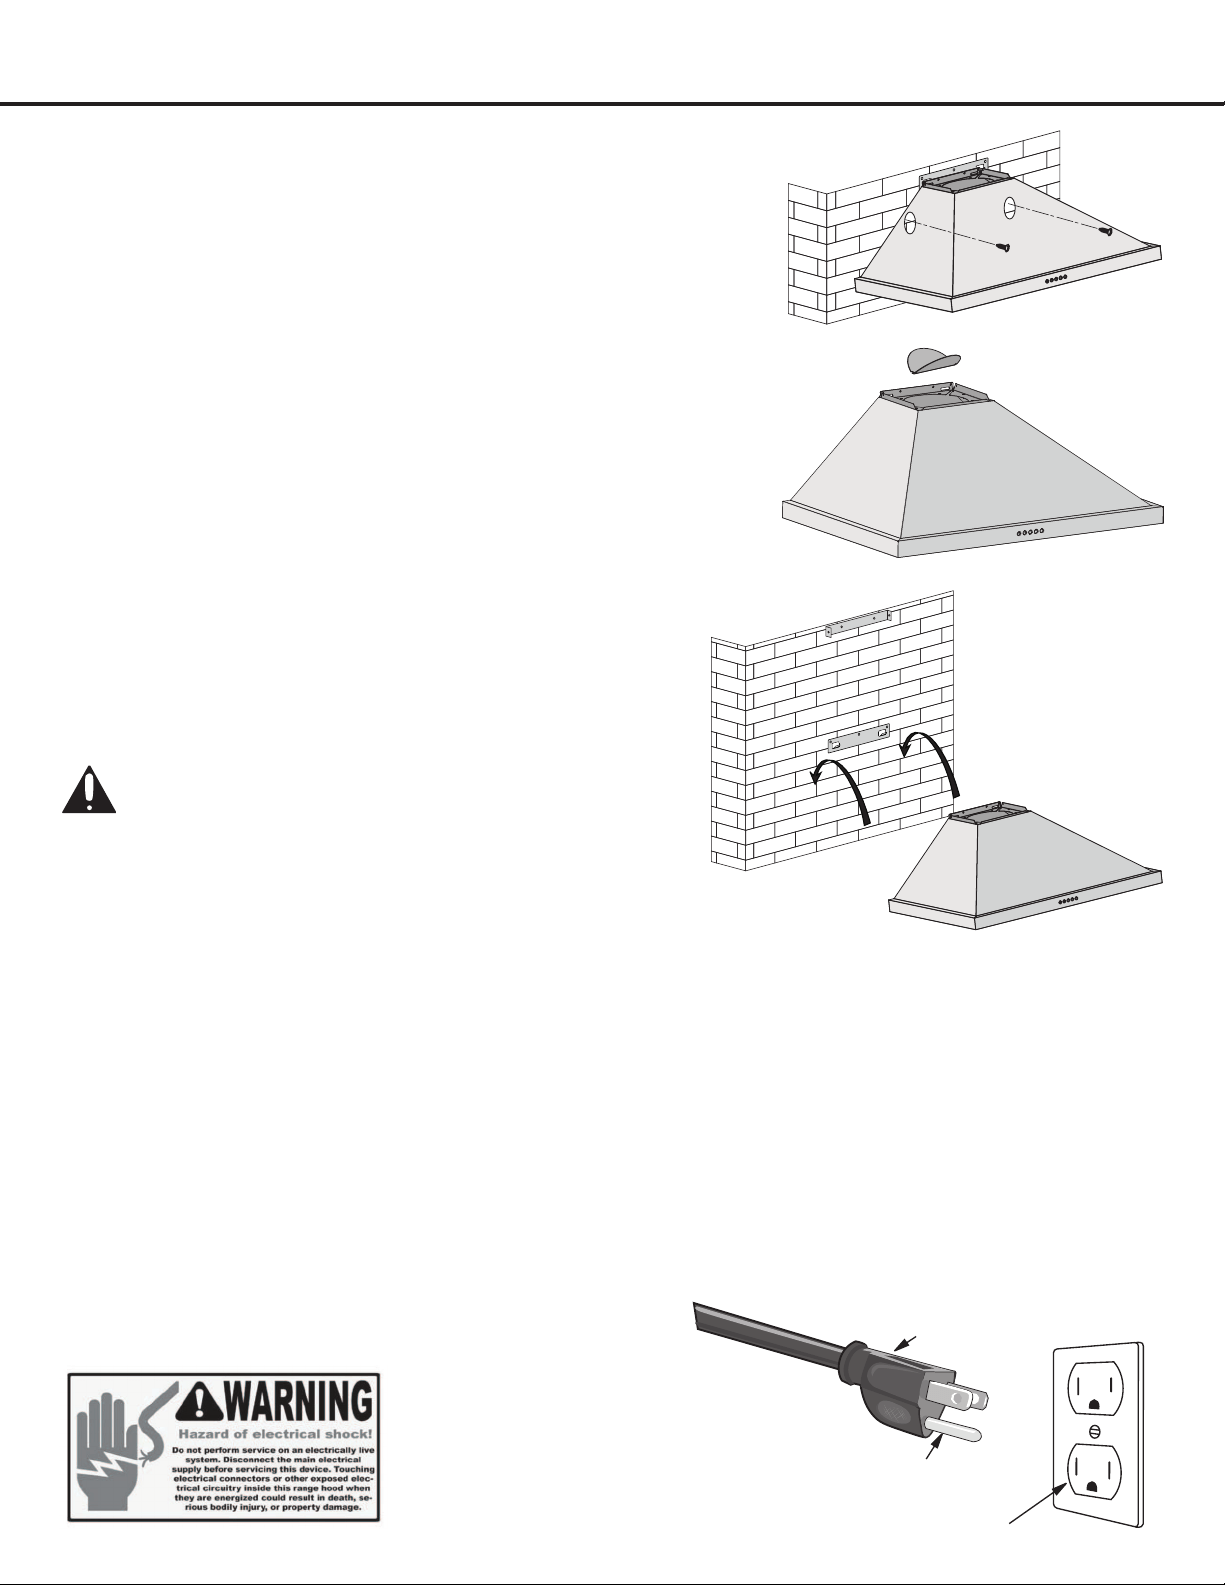
STEP 10A (wall hoods only)
Mount Range Hood onto Wall
• Hang the range hood on the hooks of the hood mounting bracket.
(See Figure #4)
• Screw the range hood to the wall.
CAUTION - Make certain the range hood is secure before
releasing!
STEP 9A (wall hoods only)
Venting
• Fixthedamperaponthetopventofhood.
• If ventilation system is equipped with an external air duct with a different
diameter, apply a reduction tting. However, for maximum performance
and safety, a 6 in. round ducting is recommended. (See Figure #3)
Fig. #3
Fig. #4
STEP 11A (wall hoods only)
Connect Ductwork
• Attach ductwork to duct. Secure the ductwork with duct tape to make sure joints are secure and air- tight.
• Donotinstalltheducttapetootightlyasthismaypreventthedamperapsfromopeningwhichwilloverworkthemotor
and cause improper functioning of the unit.
• Fasten all connections with sheet metal screws and tape all joints with certied aluminum or foil tape. Use caulking to
seal exterior wall or roof opening around the cap.
STEP 12A (wall hoods only)
Connect to AC
• ConnectACplugintoagroundedACoutlethaving120V,60Hz.Placetheoutletatamaximumdistanceof33-1/2in.
(851 mm) from where the cord exits on the hood.
• SEE IMPORTANT INSTRUCTIONS ON NEXT PAGE.
3-Pronged Plug
Ground Plug
3-Prong Receptacle
• Optional step: For extra support, drill 2 additional holes aligned
to hood’s pre-drilled holes, to mount the hood onto the wall. (See
Figure #2)
Fig. #2
Loading ...
Loading ...
Loading ...