Loading ...
Loading ...
Loading ...
— 13 —
Installation
STEP 6
Preparations
NOTE: To avoid damage to your hood, prevent debris from entering the vent opening.
• Determine and mark the center line on the ceiling or wall where the range hood will be installed.
• Make sure there is proper clearance within the ceiling or wall for exhaust vent.
• Duetotheweightandsizeofthisunit,pleasemakesurethatthesupportsystemorframeworkbeingusedisstableand
secure in the ceiling or wall.
• Put a thick, protective covering over counter top, cooktop or range to protect from damage or dirt.
• Removeanyhazardousobjectsaroundtheareawheninstalling.
CAUTION
If moving the cooking range is necessary to install the hood, turn OFF the power on an electric range at the main
electrical box. SHUT OFF THE GAS BEFORE MOVING A GAS RANGE
STEP 7A (wall hoods only)
Installing the Hood Mounting Bracket
• Use a pencil to mark on the wall the desired placement of the range hood mounting screws.
• The range hood will be installed on top of this bracket (See Figure #1).
• Using references in Height & Clearance on Page 11 and Measurements and Diagrams on Page 8 or 9, drill three holes
that will be used to x the lower mounting bracket.
STEP 8A (wall hoods only)
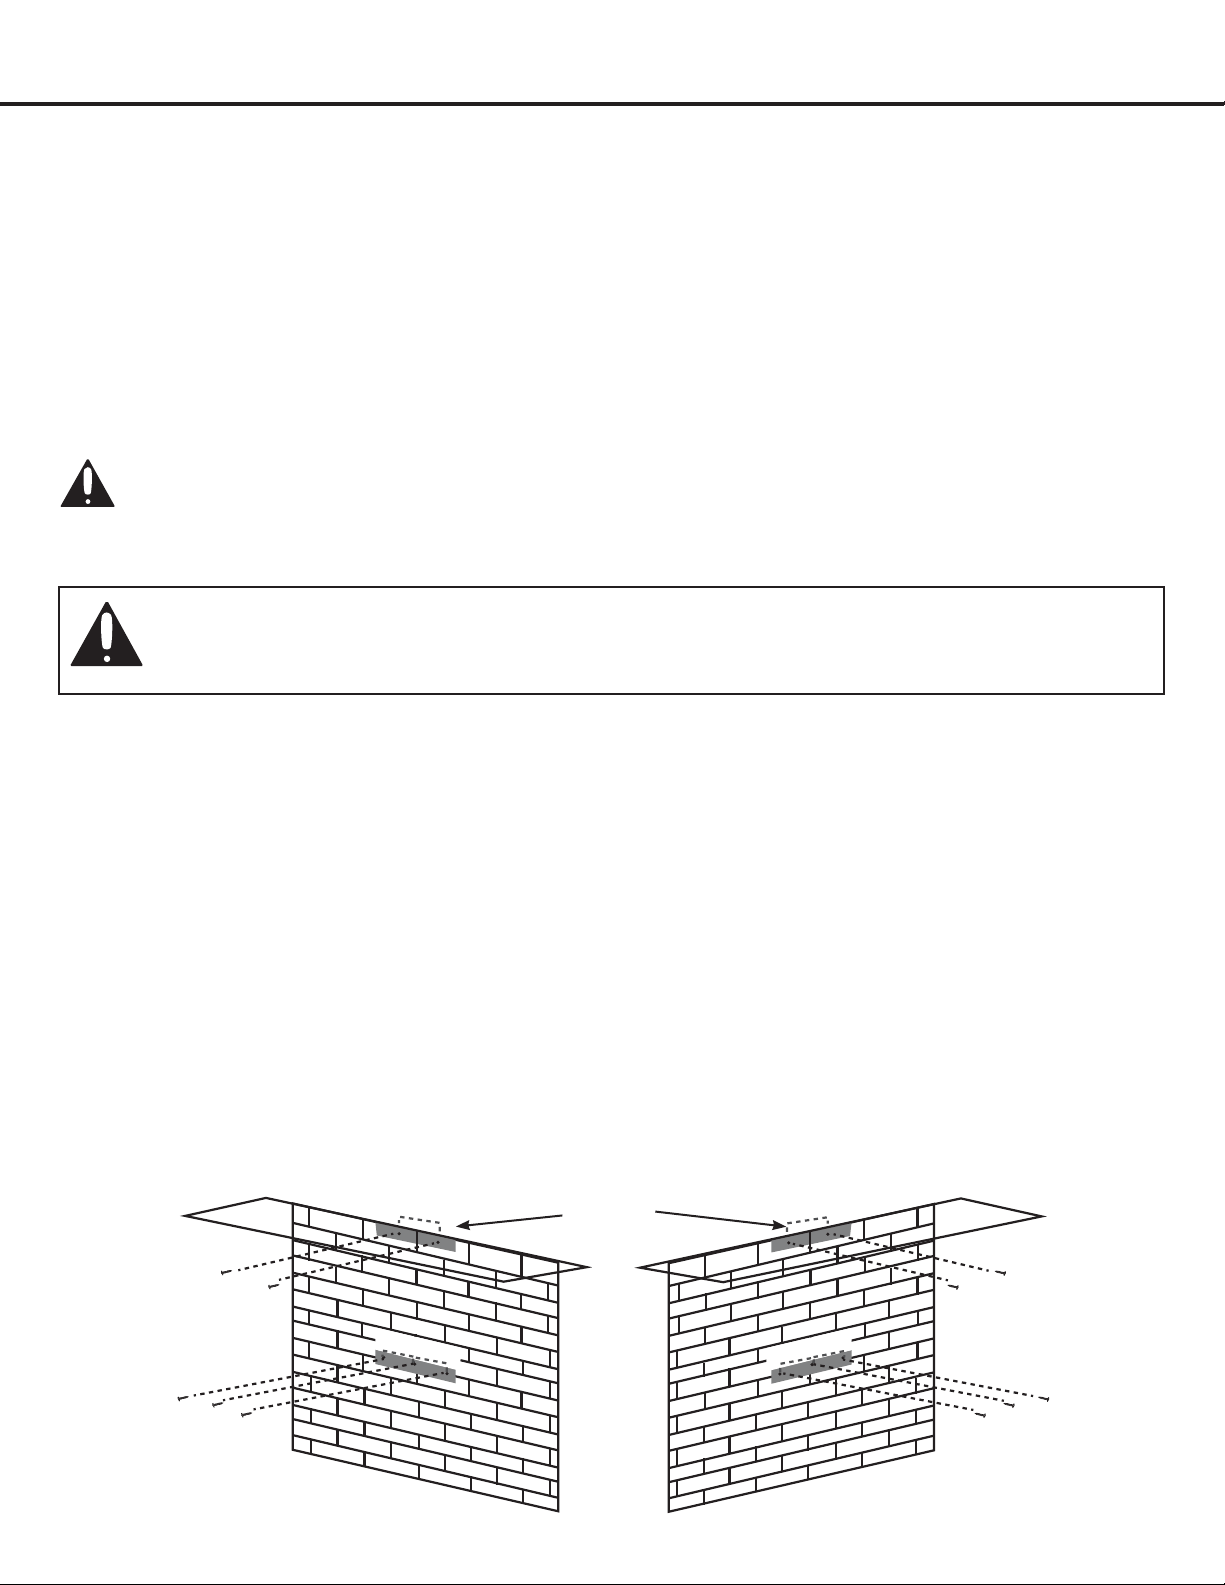
Installing the Upper Chimney Bracket
• Drilltwoholesaccordingtothesizeoftheuppermountingbracket.Theuppermountingbracketshouldbepositioned
ushwiththetopoftheoutsidechimney(SeeFigure#1-1or#1-2)
• Screw upper and hood mounting brackets in tightly.
Fig. #1-2
Flush to
the ceiling
• If performing wall installation, please follow Steps A
• If performing under cabinet installation, please follow Steps B
Fig. #1-1
165
88
88
279
88
88
Type I Type II
165
88
88
279
88
88
Loading ...
Loading ...
Loading ...