IMPORTANT SAFEGUARDS
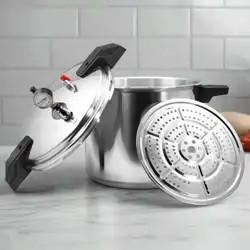
When using electric appliances, basic safety precautions should always be followed
including the following:
1. Read all instructions
2. Do not touch hot surfaces. Use handles or knobs.
3. To protect against electrical shock do not immerse cord, plug, appliance in water or
any other liquid. If the unit accidentally falls or gets immersed in water, unplug it from
the wall outlet immediately. Do not reach into the water.
4. Close supervision is necessary when any appliance is used near children.
5.This pressure cooker is not intended for use by children.
6. Unplug from electrical outlet when not in use and before cleaning. Allow to cool
before putting on or taking off parts. If the pressure cooker begins to malfunction during
use, immediately unplug the cord. Do not use or attempt to repair it.
7. Do not operate any appliance with a damaged cord or plug or after the appliance
malfunctions or has been damaged in any manner. Return appliance to the nearest
authorized service facility for examination, repair, or adjustment.
8. The use of accessory attachments not recommended by the appliance manufacturer
may cause injuries.
9. Always operate this appliance on a stable surface.
10. Do not use outdoors. Household use only.
11. Do not let the cord hang over edge of the table or counter, or touch hot surfaces.
12. Do not place on or near a hot gas or electric burner, or in a heated oven.
13. Extreme caution must be used when moving an appliance containing hot oil or any
other hot liquid.
14.Never immerse the housing or base in water.
15. Always attach plug to appliance first, then plug cord into the wall outlet. To
disconnect, turn any control to off, then remove the plug from wall outlet.
16. Do not use the appliance for other than its intended use.
17. Risk of Electric Shock. Cook only in the removable container.
18.This appliance cooks under pressure. Improper use may result in scalding injury.
Make certain the unit is properly closed before operating. See “General Operating

Instructions.”
19.Do not fill the unit over MAX LINE marked in the inner pot. When cooking foods that
expand during cooking such as rice, beans or dried vegetables, do not fill the unit over
1/2 (half) full. See “General Operating Instructions”. Overfilling the pressure cooker may
cause clogging, which builds up excess pressure inside and may be dangerous.
20.It is not recommended to cook foods such as applesauce, cranberries, pearl barley,
oatmeal or other cereals, split peas, noodles, macaroni, rhubarb or spaghetti. These
foods tend to foam, froth and sputter and may block the pressure release device
(exhaust vent). Recipes that use any of these ingredients must be carefully followed to
avoid problems.
21.Always check the pressure release devices for clogging before use. Always make
sure that the exhaust valve is installed correctly before use. Incorrect assembly may
prevent the pressure cooker to build up pressure or allow steam to come out from the
sides of the lid. See “Product Features” and “General Operating Instructions”.
22.Do not use this pressure cooker for pressure frying with oil.
23.DO NOT open the pressure cooker until it has cooled off and all internal pressure
has been released. If the pressure cooker is difficult to open, this indicates that the
pressure cooker is still pressurized.
24.NEVER force the pressure cooker open. Any pressure built up in the cooker can be
hazardous. If you need to open the lid, refer to the instructions in section “Opening the
Lid” and follow them carefully. Always and most importantly if you follow the Quick
Pressure release method, protect your skin from any contact with escaping steam.
Once all the pressure has been released, lift the lid carefully away from you in order to
avoid skin contact with the remaining heat or steam.
25.This electric pressure cooker generates heat and escaping steam during use.
CAUTION HOT SURFACES. All necessary precautions should be followed to avoid fire,
burns or other personal injury during its operation. Never use or place the unit near
flammable materials such as dish towels, paper plates, napkins, curtains, paper towels,
etc. Allow sufficient space around all sides of the unit, including top and bottom to
ensure proper air flow.
26.This appliance is not intended for use by persons with reduced physical, sensory or

mental capabilities, or lack of experience and knowledge, unless they are under the
supervision of a responsible person or have been given proper instruction in using the
appliance. This appliance is not intended for use by children. Any person who has not
fully read and understood all operating and safety instructions contained in this
instruction manual is not qualified to operate or clean this electric pressure cooker.
SAVE THESE INSTRUCTIONS
HOUSEHOLD USE ONLY

Special Cord Set Instructions
a) A short detachable power-supply cord is provided to reduce the risk resulting from
becoming entangled in or tripping over a longer cord.
b) Longer detachable power-supply cords are available and may be used if care is
exercised in their use.
c) If a longer detachable power-supply cord is used:
1) The marked electrical rating of the cord set should be at least as high as the
electrical rating of the appliance.
2) The cord should be arranged so that it will not drape over the countertop or
tabletop where it can be pulled on by children or tripped over unintentionally.
3) If the appliance is of the grounded type, the extension cord should be a
grounding-type3-wire cord.
Precautions
• Before use each time, make sure to check the anti-block shield, float valve and
pressure release valve for obstructions; wipe the surface of the inner pot and heating
plate to confirm they are free of any foreign object and make sure the pressure
release valve is in the sealing location.
• After cooking, wait until the cooker cools down for a while and release the pressure
using the pressure release valve. Use extreme caution when opening the cover.
Serious burns can result from steam inside the unit.
• If a part such as wire or plug is damaged or the intelligent pressure cooker
malfunctions, stop the operation immediately and consult the Troubleshooting and
Warranty Service sections.
• Insert the plug into the socket firmly. Incomplete insertion may cause electric shock
or short circuit.
• Any dirt or water attached to the insert shall be removed as it may cause fire. When
not in use, unplug the cord from the power outlet.
• Care must be taken on the seals to avoid deformation. Fail to do so may prevent the
product from working properly.

Product Specifications
Model Type Power
Supply
Power Volume Size of
inner pot
Working
pressure
Limit
pressure
Warm
temperature
PPC1058D (10) 120v~60Hz 900W 5L 22cm 0-70kPa 90kPa 140-176
o
F
Before First Use
Before the first use, please take out all accessories from the package and read this
Manual carefully. Pay particular attention to operational instructions and cautions to
avoid any injury or property damage.
Prior to each use, inspect to make sure the seal and anti-block shield are mounted in
the lid. After use, remove any foreign object from the seal and anti-block shield.
Keep clean to avoid odors.
Never pull the seal by force, as pull deformation may affect sealing and pressure effect.
A damaged seal should not be used, and unit shall be sent to the service center for
replacement.

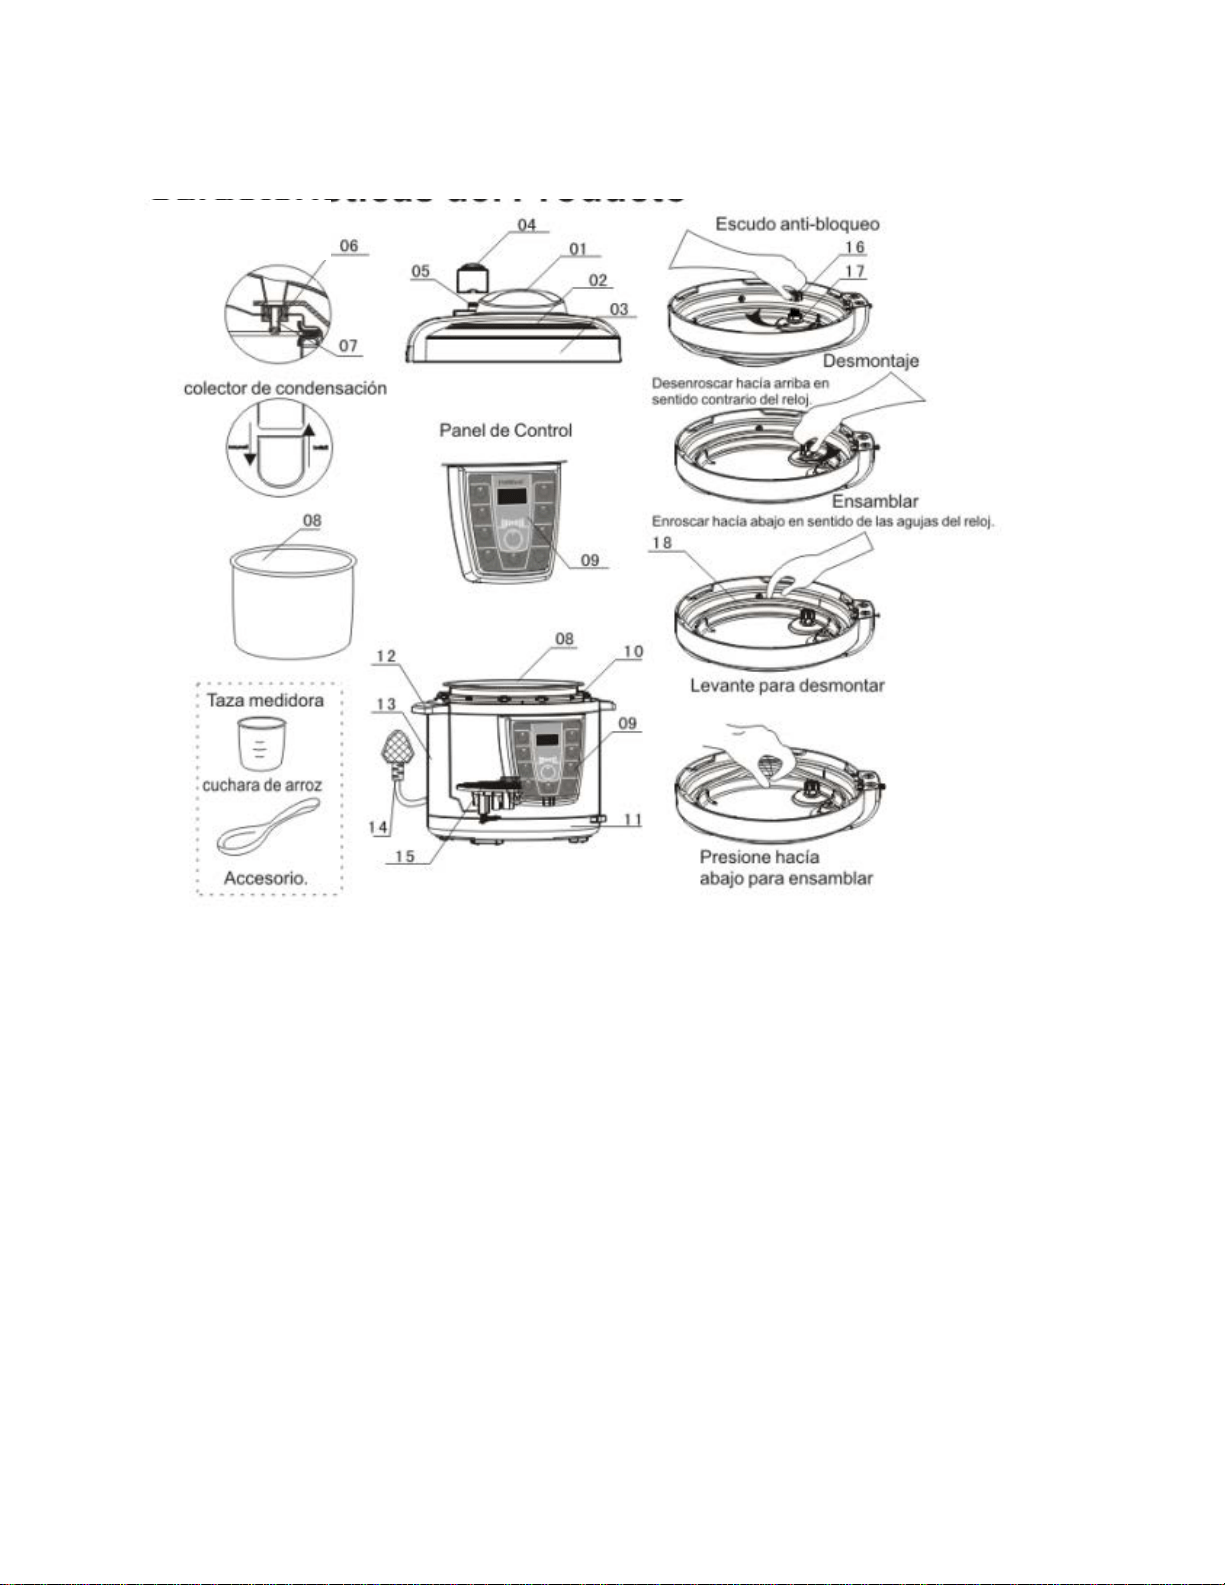
Product Features
01: Lid Handle 02: Lid
03: Top Cover 04: Exhaust / Pressure Release Valve
05: Steel Valve Core 06: Float Valve
07: Floating Valve 08: Removable Cooking Pot
09: Control Panel 10: Stationary Pot
11: Base 12: Pot Handle
13: Housing 14: Power Cable
15: Heating Plate 16: Anti Block Shield
17: Sealing Ring of Steel Valve Core 18: Sealing Ring of Lid

Safe Lid Opening
1. Disconnect the power or the power plug.
2. Releasing pressure:
A. Quick opening (for non-fluid food):
• Slide the exhaust valve to the Release position.
• Put a wet towel on the lid to cool faster until the float valve falls fully.
B. Normal opening: wait until the floating valve drops down, and then open the lid.
3. Open the lid: Hold the lid handle, turn the lid clockwise to the unlock position and
carefully lift the lid up to open.
• Do not open the lid until pressure inside the pot is completely released.
• Never pull out the Pressure Release Valve when it is releasing pressure.
• For fluid foods (thin, thick and sticky liquids), do not slide the Pressure
Release Valve for releasing pressure when cooking is just finished. If you do
that, the hot food fluid may spill from the Pressure Release Valve and cause
bodily burn. Be sure to disconnect the power supply.
• When a large quantity of food is cooked, do not try to release the pressure
immediately after cooking.
• It is recommended to let the food cool down for a while before releasing the
pressure.
WARNING:
Do not hold the pressure release valve. Hot steam/liquid may be ejected.
Keep hands and face away from steam vents, use pot holders when removing the inner
pot or touching any hot items, and never force the lid open. The lid will only open once
the pressure is released. Remove the lid by lifting it away from you to avoid being
burned by the steam.

How to Use
The Premium Electric Pressure Cooker uses a large and user-friendly control panel with
digital touch buttons. The convenient built-in cooking buttons allow you to cook your
favorite food with a simple touch of the button.
The intelligent pressure cooker includes 6 built-in cooking functions: Brown, Rice,
Steam, Soup, Stew, and Slow cook.
The general procedure for using the cooking functions is as follows:
1. Follow the steps detailed in this manual under the heading “General Operating
Instructions.”
2. Connect the power cord.
To ensure safety, it is recommended to connect the power cord to the cooker first and
then connect the plug to the power outlet.
3. Select a cooking method by pressing the corresponding button.
Once the button is pressed, the display will show the default pressure cooking time.
Cooking times may vary depending on the different cooking program selections.
Cooking time may vary slightly depending on the quantity of food and liquid and textures
of food.
The cooking time table below is for reference only. (e. g. food amount +water reaches
scale between 1/5 to 3/5 inside the inner pot):
Cooking time = heating time + default pressure cooking time.
Cooking Function
Slow
Cook
Brown
Rice
Soup
Stew
Steam
Default pressure
cooking time
No
Pressure
Cooking
No
Pressure
Cooking
12mins
30mins
20mins
15mins
Estimated Default
Cooking Time*
135mins
20mins
30mins
55mins
50mins
35mins
* Will change according to the amount of food. More food will imply more time needed to
cook.

Functions Brown and Slow Cook do not have default pressure cooking time
because they do not use pressure cooking.
When you select a function and enter into the program, the display will show the default
pressure cooking time (for rice is 12 minutes), and the pressure cooker starts to heat up.
The default pressure cooking time shows on display will NOT start counting down until
the food or liquid has heated up and the pressure cooker has started pressure cooking.
Heating time normally takes more than 10 minutes depending on food quantity.
4. The menu indicator light will flash for 5 seconds before starting the menu. After 5
seconds, the indicator light will stop flashing to indicate that the cooking process has
started.
During this 5-second interval you can change the default cooking time by pressing the
plus (+) or minus (-) button on the panel.
At any time during the process, the program can be canceled by pressing the
Cancel/Keep Warm button. The pressure cooker will then go into Standby mode.
5. As the pressure increases inside the cooker, the floating valve will pop up.
At this point pressure cooker begins. The lid is now locked and cannot be opened.
CAUTION! NEVER ATTEMPT TO OPEN THE LID
WHILE PRESSURE COOKING!
Note: The Pressure Active indicator will light up a
nd indicate that the unit is
under high pressure.
After cooking time has ended, the pressure cooker will automatically go into Keep Warm
mode. The cooker makes an audible beep. The Keep Warm indicator light is on to show
the cooker is in Keep Warm mode. The display will count up the elapsed minutes and let
you know how long the cooker has been in Keep Warm mode. The Pressure Active
indicator goes off automatically when the cooker goes into Keep Warm mode. Be aware
that the cooker is still under high pressure at that moment. Do not attempt to open the

lid. Release the pressure first.
Opening the Lid
When pressure cooking has come to an end, the cooker will go into Keep Warm mode.
At this point you may choose to open the lid. Therefore, the pressure needs to be
released. This can be done in two ways:
1. Quick pressure release: Move the Exhaust Valve to the VENT position. Steam will
immediately begin to release through the valve. When pressure is fully released, the
floating valve will sink. The lid will now be unlocked to open.
USE EXTREME CAUTION WHEN OPENING THE COVER.
SERIOUS BURNS CAN RESULT FROM STEAM INSIDE THE UNIT.
CAUTION: KEEP HANDS AND FACE FROM THE VALVE WHILE
VENTING.
Hot steam escaping from the valve may cause serious injuries if precautions are not
followed. Use pot holders, tongs or other tools to adjust the valve.
2. Natural pressure release: is recommended when cooking foods that will not have
the tendency to overcook, such as potatoes, beans, soups and stews. When in Keep
Warm mode, the pressure will begin to drop. This will take from 12 to 30 minutes.
During this time cooking continues slightly. When pressure is fully released, the float
valve will sink. The lid will be now unlocked to open.
CAUTION: KEEP HANDS AND FACE FROM THE VALVE WHILE
VENTING.

Hot steam escaping from the valve may cause serious injuries if
precautions are not followed. Use pot holders, tongs or other tools to
adjust the valve.
USE POT HOLDERS WHEN REMOVING THE REMOVABLE COOKING POT. NEVER
FORCE THE LID TO OPEN.
THE LID WILL ONLY OPEN WHEN ALL PRESSURE IS RELEASED.
REMOVE THE LID BY LIFTING IT AWAY FROM YOU TO AVOID INJURES CAUSED
BY HOT STEAM.
General Operating Instructions
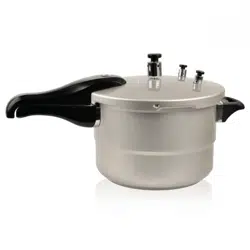
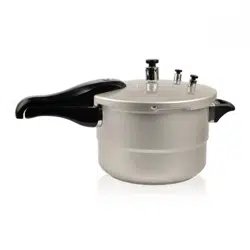
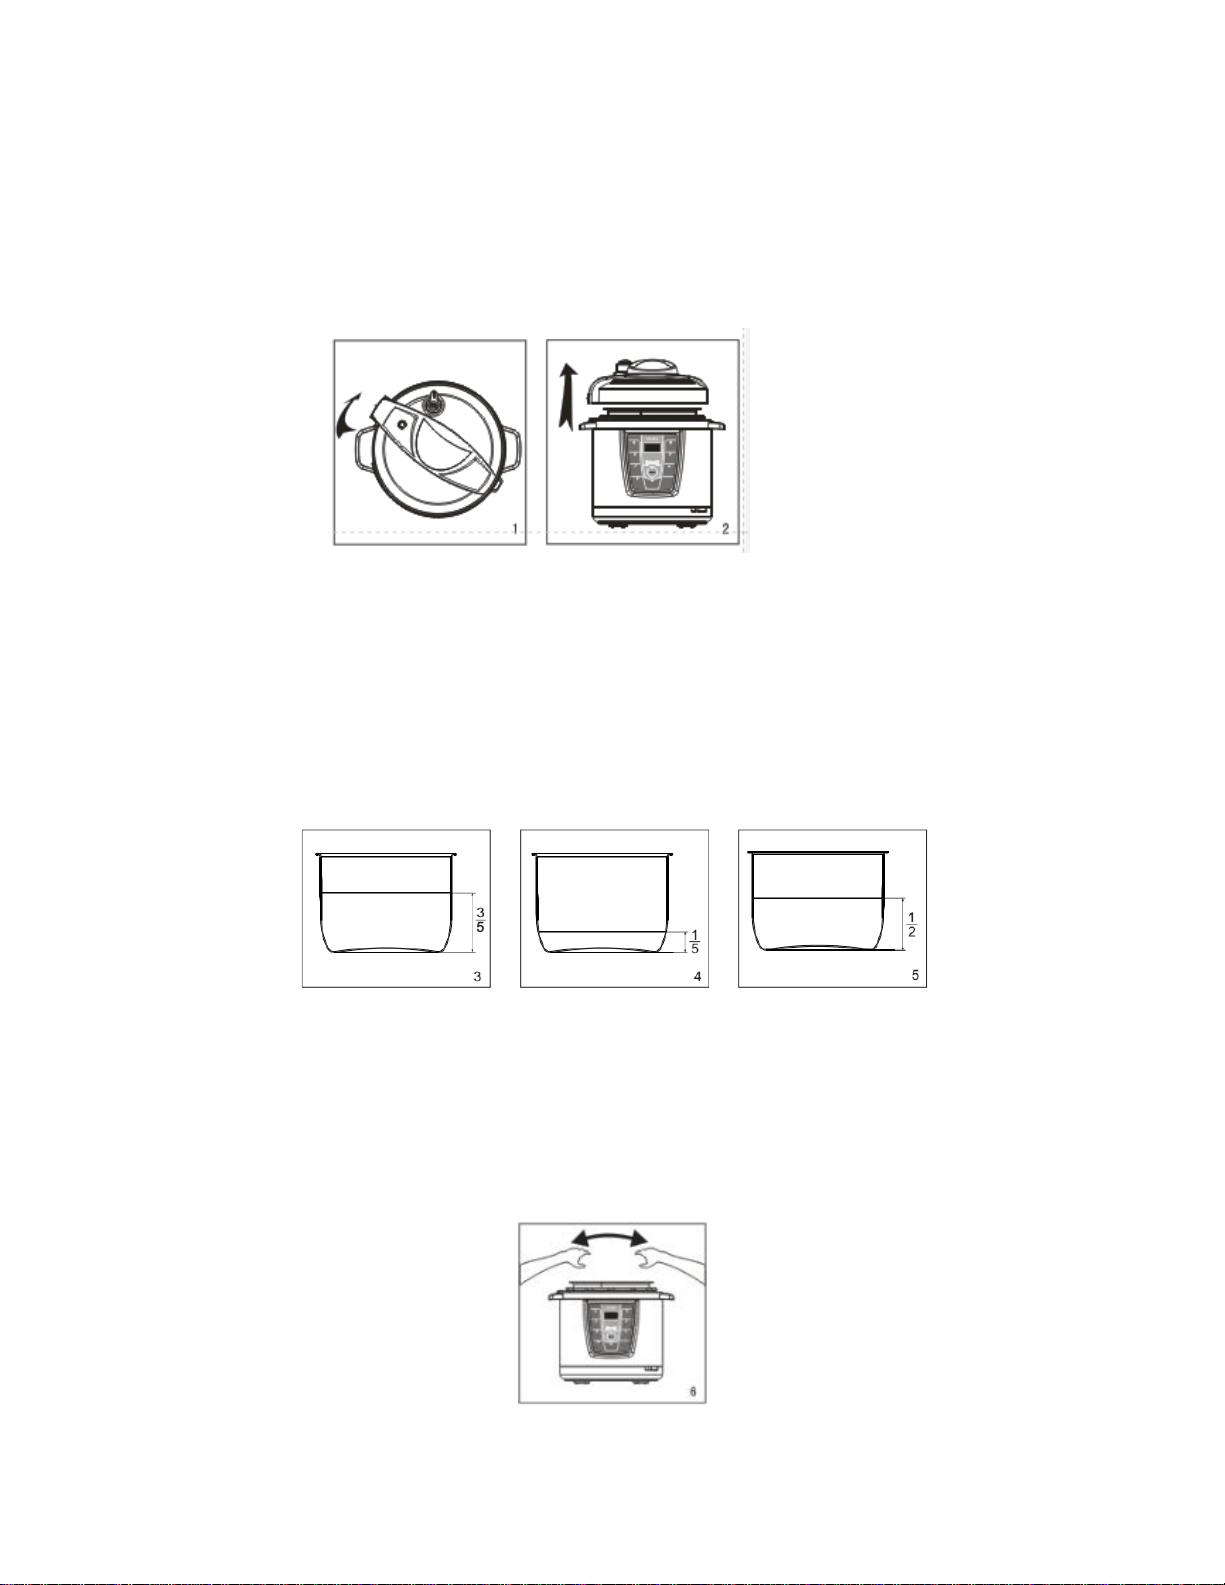
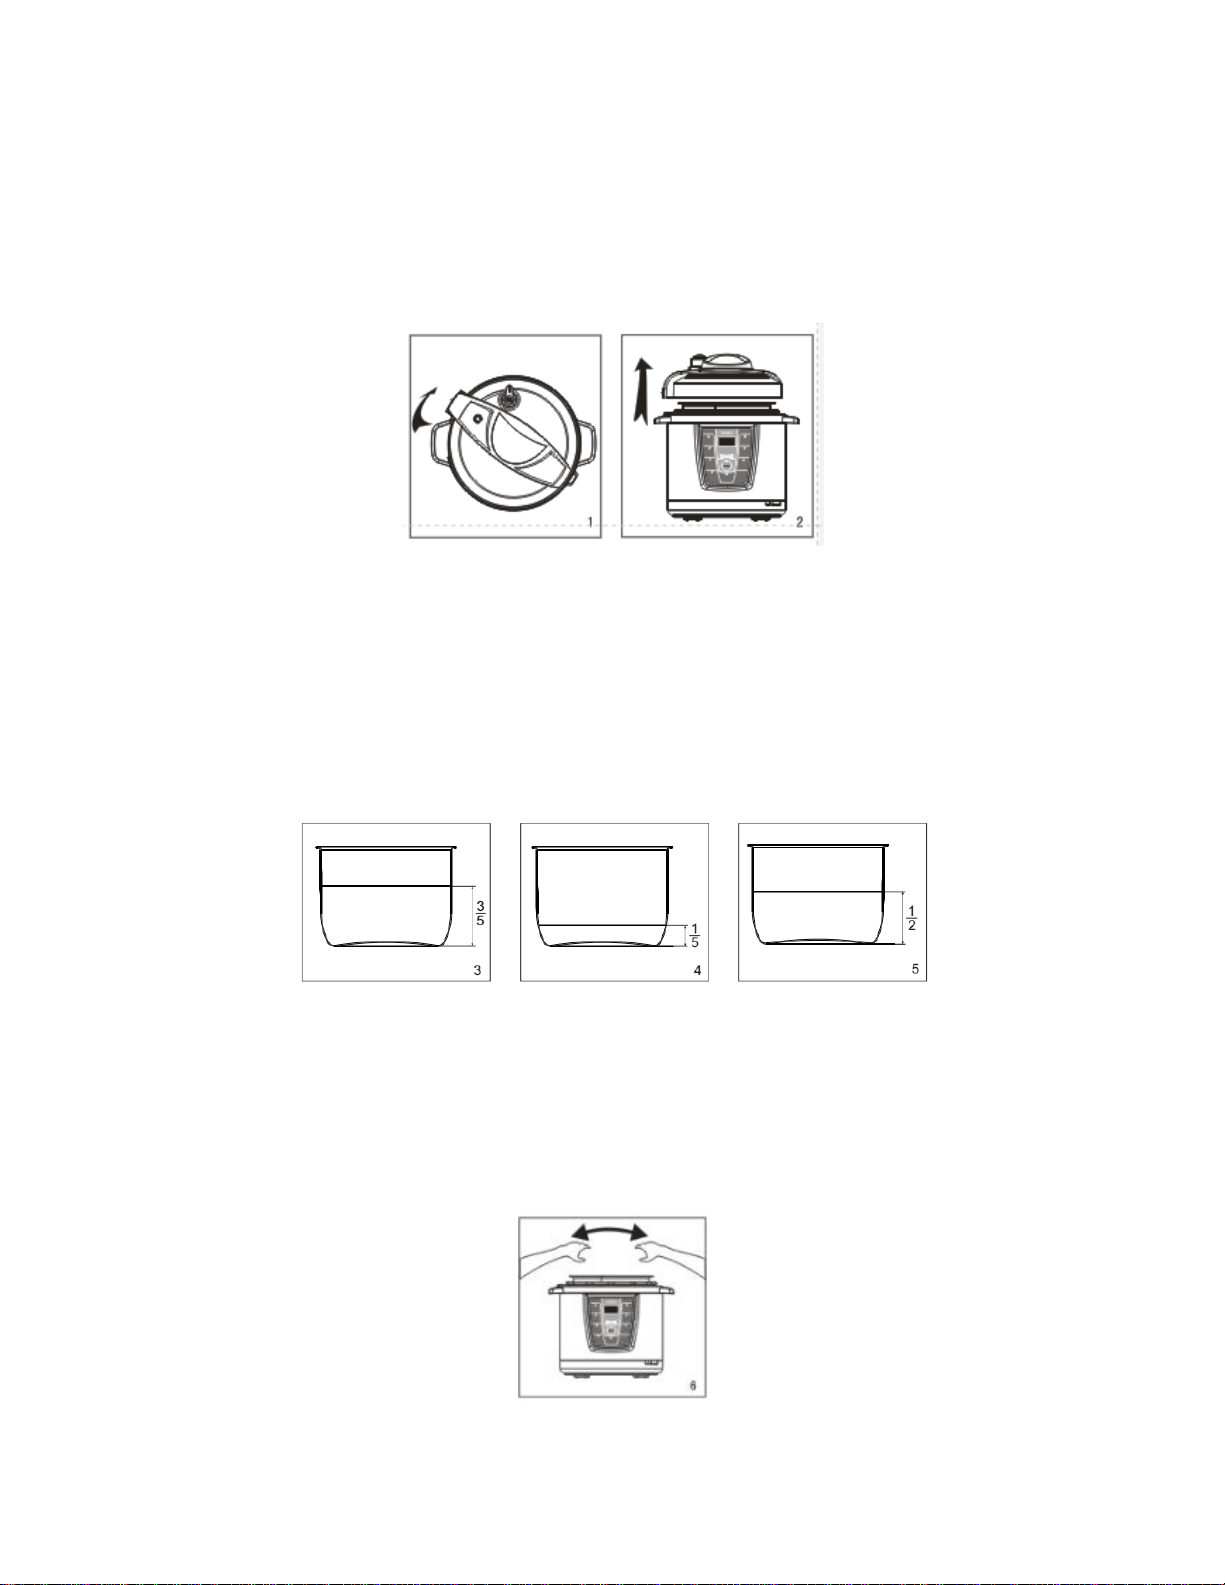
1. Open the lid by turning the lid handle clockwise to the OPEN position, and then
carefully lift the lid.(see pictures 1 & 2).
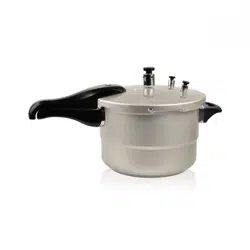
2. Take out the removable cooking pot, put food and water in it.
NEVER fill the cooking pot more than 3/5 or less than 1/5 full. This is indicated on the
upper line on the inside of the cooker identified with the word “MAX”. For rice and
vegetables that expand during cooking, DO NOT fill over 1/2. (see pictures 3, 4, 5)
3. Make sure to dry the removable cooking pot exterior and heating plate before putting
the cooking pot into the stationary pot. Do not put anything into the stationary pot
and heating plate. Please rotate the cooking pot slightly to make good contact with
the heating plate. (see picture 6)

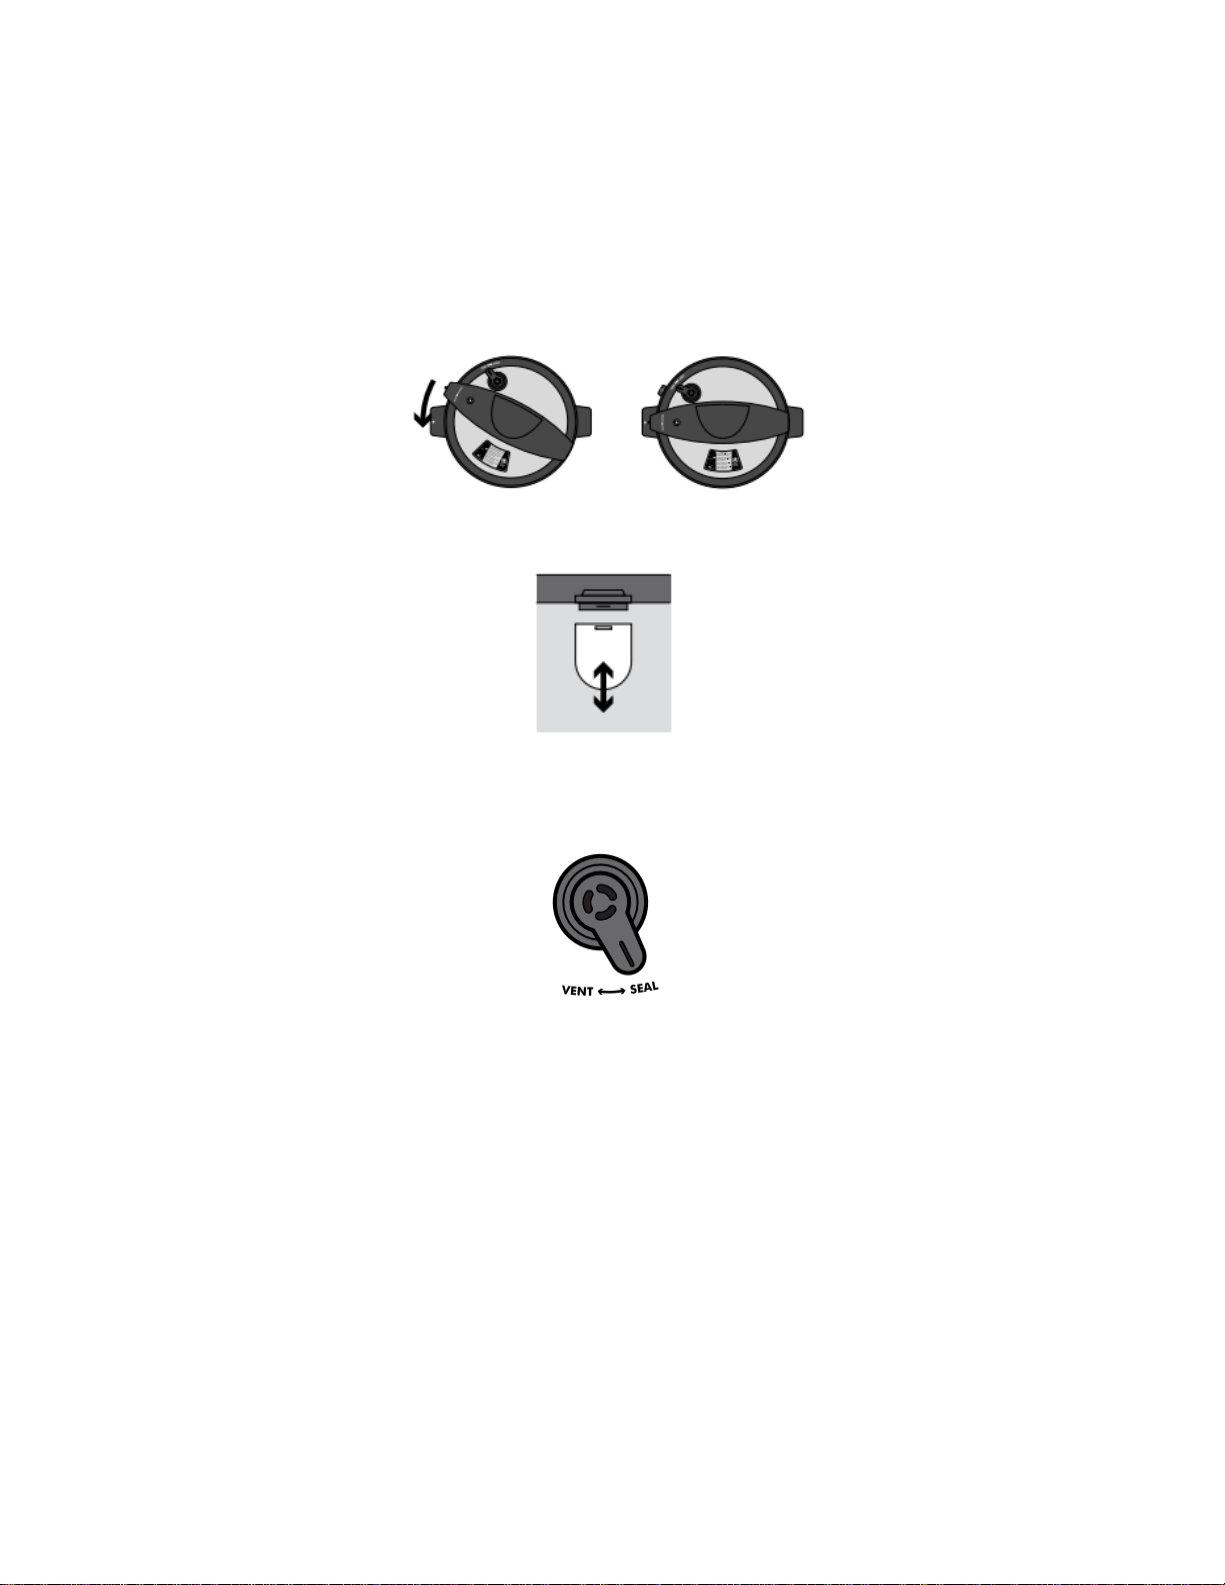
4. Close the lid: Make sure the silicone gasket is seated properly inside the lid. Hold
the lid handle and put the lid on the cooker; rotate the lid counterclockwise
approximately 30 degrees until the lid is aligned with the “CLOSE” mark on the
cooker. (see picture 7)
7
5. Install the condensation collector. (see picture 8)
8
6. Adjust the Exhaust Valve to SEAL position before cooking. The Float Valve must be
fully down to properly seal the pot before cooking.(see picture 9)
9
• If using the Brown function mode, the lid should remain off.
• If using the Slow Cook function mode, put the pressure valve to the VENT
position.
• If using the other cooking function modes, put the valve to the SEAL position.
NOTE: Please note that the Exhaust Valve will be loose when you are not using the
appliance for cooking. It will rock slightly and can turn 360°manually. Once the
Exhaust Valve is in operation and the pressure has built up to its capacity, the Exhaust
Valve will tighten securely, only allowing itself to be turned to the right to vent when
you are facing the front of the cooker. Once all the pressure has released, it will
become loose again.

7. Connect to the power. The LED display shows “00:00” and it enters into standby
state.
8. Choose the corresponding function according to your food recipe, and the related
indicator will be on.
COOKING FUNCTIONS
Rice Function
This is a 12 minutes program for cooking rice and grains
1. Position the removable cooking pot in the cooker.
2. Add at least 1/5 full of water or cooking liquid to the cooking pot.
3. Add the appropriate amount of grain to the liquid, following the grain to liquid ratio
indicated by the recipe. Do not fill the pot more than half-full.
4. Place the lid on the cooker; align the handle with the condensation collector, and
turn it counterclockwise until it locks into place. The locking pin will click into place.
Turn the pressure valve to SEAL.
5. Press the RICE button. The light on the RICE button will flash and the digital
display will show “00:12”.
6. Within 5 seconds, the indicator light will stop flashing to indicate the cooking
process has started. The program will cook for about 30 minutes.
7. When the cooking time ends, the unit will beep and automatically turn the “Keep
Warm” function on until you press “Keep-Warm/Cancel” button to cancel the
program.
WARNING:
Do not hold the pressure release valve. Hot steam/liquid may be ejected.
Keep hands and face away from steam vents, use pot holders when removing the
inner pot or touching any hot items, and never force the lid open. The lid will only
open once the pressure is released. Remove the lid by lifting it away from you to
avoid being burned by the steam.

Slow Cook Function
This function will allow you to cook slow cooker classics such as pot roasts in up to 10
hours. Load your ingredients in the morning and dinner will be waiting for you.
1. Place the removable cooking pot in the cooker.
2. Place the food to be slow cooked in the cooking pot.
3. Place the lid on the cooker, align the handle with the condensation collector, and
turn it in counterclockwise until it locks into place. The locking pin will click into
place. Turn the pressure valve to Vent.
4. Slow cooking is DOES NOT cook under high pressure, so you must turn
the Exhaust Valve to the VENT position.
5. Choose the SLOW COOK mode on the control panel. The light on the Slow
Cook button will flash and the digital display will show the corresponding cooking
time. Default time “02:00”.
6. Set the desired time by pressing the “+” or “-” button once for each additional half
hour. The longest cooking time is 10 hours at about 212
o
F.
7. Within 5 seconds, the indicator light will stop flashing to indicate the cooking
process has started.
8. The unit will begin to count down in one minute increments after the temperature
reaches about 212
o
F
9. When the cooking time is up, the unit will beep and go automatically into the
“Keep Warm” function until you press the “Keep-Warm/Cancel” button to cancel
the program.
WARNING:
Do not hold the pressure release valve. Hot steam/liquid may be ejected.
Keep hands and face away from steam vents, use pot holders when removing the
inner pot or touching any hot items, and never force the lid open. The lid will only
open once the pressure is released. Remove the lid by lifting it away from you to
avoid being burned by the steam.

Stew Function
This is a 20-minute program (00:20) for stewing food.
1. Follow the steps listed in this manual under the heading “General Operation
Instructions.” Press the STEW button.
2. If your meal needs a longer or shorter cooking time, the default time can be
changed during the first 5-seconds interval by pressing the plus(+) or minus(-)
button.
3. Make sure the pressure cooker is at least 1/5 full. Do not fill the cooking pot
more than 3/5 full.
4. When the cooking time ends, the unit will beep automatically and go into Keep
Warm mode, until you press the Keep Warm/ Cancel button.
WARNING:
Do not hold the pressure release valve. Hot steam/liquid may be ejected.
Keep hands and face away from steam vents, use pot holders when removing the
inner pot or touching any hot items, and never force the lid open. The lid will only
open once the pressure is released. Remove the lid by lifting it away from you to
avoid being burned by the steam.
Brown Function
This function allows you to brown your food before cooking. Brown your meat or
poultry for the best flavor and texture, unless otherwise indicated in the recipe.
Pat dry your food with a paper towel before browning. For best results, make sure the
oil is hot before adding your meat or poultry. Brown the food in batches to keep the
correct oil temperature for even browning.
1. Place the removable cooking pot in its place.
2. Add the appropriate amount of oil as indicated in the recipe.
3. Press the BROWN button. The light on the BROWN button will flash and the
display will read “00:20”. The lid should remain off.

4. Within 5 seconds, the indicator light will stop flashing to indicate the cooking
process has started.
5. After about one minute of preheating, add food and begin browning.
6. Once you are done browning, press the “Keep Warm/Cancel” button to cancel
the brown function. Now you can use any of the cooking programs to continue
preparing the recipe. Follow the instructions for each program.
WARNING:
Do not hold the pressure release valve. Hot steam/liquid may be ejected.
Keep hands and face away from steam vents, use pot holders when removing the
inner pot or touching any hot items, and never force the lid open. The lid will only
open once the pressure is released. Remove the lid by lifting it away from you to
avoid being burned by the steam.
Steam Function
This is a 15-minute program (00:15) for steaming.
1. Insert a steamer basket (NOT INCLUDED, preferably use a silicone steamer)
with your food into the pot, add water to 1/5 mark on the cooking pot.
2. Follow the steps listed in this manual under the heading “General Operation
Instructions.” Press the Steam button.
3. If your food needs a longer or shorter cooking time, the default time can be
changed during the first 5-second interval by pressing the plus(+) or minus(-)
button.
4. When the cooking time ends, the unit will beep automatically go into Keep Warm
mode, until you press the Keep Warm/ Cancel button.
WARNING:
Do not hold the pressure release valve. Hot steam/liquid may be ejected.
Keep hands and face away from steam vents, use pot holders when removing the
inner pot or touching any hot items, and never force the lid open. The lid will only

open once the pressure is released. Remove the lid by lifting it away from you to
avoid being burned by the steam.
Soup Function
This is a 30-minute program (00:30) for cooking soups.
1. Follow the steps listed in this manual under the heading “General Operation
Instructions.” Press the Soup button.
2. If your soup needs a longer or shorter cooking time, the default time can be
changed during the first 5-second interval by pressing the plus(+) or minus(-)
button.
3. Make sure the pressure cooker is at least 1/5 full. Do not fill the cooking pot more
than 3/5 full.
4. When the cooking time ends, the unit will beep automatically go into Keep Warm
mode, until you press the Keep Warm/ Cancel button.
WARNING:
Do not hold the pressure release valve. Hot steam/liquid may be ejected.
Keep hands and face away from steam vents, use pot holders when removing the
inner pot or touching any hot items, and never force the lid open. The lid will only
open once the pressure is released. Remove the lid by lifting it away from you to
avoid being burned by the steam.
Keep Warm Function
After cooking, the selected cooking function indicator light (red) will come off. The
cooker also will give an audible beep. The yellow “Keep-Warm” indicator light will be on
to indicate that the cooker has started the “Keep-Warm” function. In standby mode, the
Keep Warm function can be started by pressing the “Keep Warm/Cancel” key. The
“Keep-Warm” state temperature is 140-176ºF.

Keeping the food warm for a long time is not recommended, as it may negatively affect
the texture or the taste of the food.
WARNING:
Do not hold the pressure release valve. Hot steam/liquid may be ejected.
Keep hands and face away from steam vents, use pot holders when removing the
inner pot or touching any hot items, and never force the lid open. The lid will only
open once the pressure is released. Remove the lid by lifting it away from you to
avoid being burned by the steam.
Time Delay Function
The Premium Pressure Cooker has a delay time function of up to 24 hours.
1. Follow the steps listed in this manual under the heading “General Operation
Instructions”.
2. Press the button of the specific menu that you want to have delayed.
3. Press the Delay Time button during the first 5-seconds interval of the chosen
function.
4. The green indicator light of the Delay Time button will start flashing,
5. The default delay time is 30 minutes (00:30). During the first 5-seconds interval you
can adjust the default delay time by pressing the plus (+) or minus (-) button (30
minutes intervals).
6. After 5 seconds, the delay time is set and the green indicator light is on, together
with the indicator light of the chosen menu. The display will start to countdown.
7. To cancel the Delay Time function, press the Keep Warm/Cancel button.
8. When the delay time ends, the cooking process will start.
9. After the cooking has ended, the unit will beep and automatically go into Keep Warm
mode, until you press the Keep Warm/Cancel button.
Notes:
• It is not recommended to use the Delay Time function to cook foods that may
spoil.

• Leaving raw food inside the pressure cooker for long periods of time prior to
cooking may result in the food spoiling.
• Cook food that can be left out such as beans, grains or other foods that will not
spoil.
• Perishable foods such as meat, poultry, fish, cheese and other dairy products
cannot be left at room temperature for more than 2 hours and never longer than
1 hour if the room temperature is above 90ºF.

Cleaning and Maintenance
After use, unplug unit and allow the unit to cool completely before cleaning.
The Premium Electric Pressure Cooker must be cleaned thoroughly after each use in
order to avoid staining caused by a build-up of food or cooking residue.
DO NOT POUR COLD WATER INTO A HOT PRESSURE COOKER.
Note: To ensure safe operation of this Premium Electric Pressure Cooker, follow the
cleaning and maintenance instructions after each use.
1. Before any cleaning, wait for the unit to cool down.
2. Unplug the power cord from the electrical outlet before cleaning.
3. Always remove the Pressure Valve and clean the opening with a pin to remove any
blockage that might have occurred during the cooking process. This must be done
after each use.
4. Take out the removable cooking pot, use a sponge or a soft cloth or non-metal brush
and wipe. Be careful not to damage the inside non-stick coating.
5. The removable cooking pot and lid can be washed for cleaning. Rinse cooking pot
and Lid under hot running water. Use only a mild liquid detergent and a soft cloth,
sponge or nylon scrubber for cleaning. Do not use abrasive powders, bicarbonate of
soda or bleach. Do not use scouring pads. Rinse off with clean water and towel dry.
6. Clean the outer body with a soft cloth such as a paper towel or microfiber cloth.
WIPE THE BASE AFTER EACH USE WITH A SOFT, DAMP CLOTH OR SPONGE,
MAKING SURE ALL FOOD RESIDUE IS REMOVED. DO NOT IMMERSE BASE IN
WATER OR ANY OTHE LIQUID.
7. Rinse with water the underside of the lid including the sealing ring, exhaust valve,
anti-block shield, air escape and float valve. Dry completely. Clean the center ring
with a wet towel.
8. When cleaning the Lid, Remove the Sealing Ring from the Lid. Wash with warm,
soapy water and clean with a soft cloth or sponge. Rinse off with clean water and
towel dry.
9. The Sealing Ring must always be properly positioned on the underside of the Lid.
Check periodically to make sure that it is clean, flexible and not torn. If damaged, do
not use this unit.

Note: The Sealing Ring must be replaced every year or sooner if necessary. The
Sealing Ring may also need replacing if the Premium Electric Pressure Cooker is not
used for a long period of time, as it can harden from disuse, making it unable to form an
airtight seal. The Sealing Ring must be replaced only with another one of the correct
type and size for this Pressure Cooker.
10. Never use harsh chemical detergents, scouring pads or powders on any of the parts
or components.
11. Always check that the Pressure Valve and Float Valve are in good working order
and debris free.
12. Do not immerse the outer body in water or any other liquid or pour water into it.
13. Remove and clean the condensation collector, then reinstall it.
14. Regular care or maintenance is essential in ensuring that this product is safe for use.
In addition to the Sealing Ring gasket, the other safety devices on the Premium Electric
Pressure Cooker must also be cleaned after each use.
EXHAUST VALVE: To remove the Exhaust Valve, simply pull up and valve will release
from its spring lock mechanism. Apply mild detergent and wash it under warm running
water. After cleaning, check to see that the interior spring-loaded part moves freely by
pressing down on it. Put the Exhaust Valve back in place by pushing it down onto the
spring-loaded mechanism. This appliance requires little maintenance. It contains no
user serviceable parts. Do not try to repair it yourself. Contact customer service for
qualified repair information.
Troubleshooting
Indicator code
Reasons
E1
Pressure switch malfunction
E3
Short circuit of sensor
E4
Sensor circuit open
E5
Overheating

S/
N
Symptom
Possible Reasons
Solutions
1
Lid does not
lock
The sealing ring is not
properly installed
Reinstall the sealing ring
The float is seized by the
push rod
Push the rod with your hands
2
Cannot open
the lid after air
exhaust
The float is still up
Press the float down
3
Air escapes
from the rim of
the lid
Sealing ring was not
installed
Install the sealing ring
Food residue on sealing ring
Clean the sealing ring
Sealing ring worn out
Replace the sealing ring
Lid not locked properly
Rotate the lid fully
4
Air escapes
from the float
valve
Food stuck on the sealing
ring of the float valve
Clean the sealing ring
The sealing ring on the float
valve worn out
Replace the sealing ring
5
The float will
not rise
Not enough food and water
Check recipe for proper quantity
Air escaping from the rim of
the lid and the pressure limit
valve
Call the Consumer Service
Center

When the following circumstances take
place
Solutions
• Power cord and plug suffer from expansion,
deformation, discoloration, damages, etc.
• A portion of the power cord or the plug gets
hotter than usual.
• Electric pressure cooker heats abnormally,
emitting a burnt smell.
• When power-on, there are unusual sounds or
vibrations.
•Stop using the product
immediately; send it to your
nearest customer service
center.
• There is dust or dirt on the plug or socket.
• Remove dust or dirt with a
dry brush.
Warning - any other servicing should be performed by an authorized service
representative.

MEDIDAS IMPORTANTES DE SEGURIDAD
Cuando se utilizan aparatos eléctricos, siga siempre las precauciones básicas de
seguridad, incluyendo las siguientes:
1. Lea todas las instrucciones
2. No toque las superficies calientes. Use las asas o las perillas.
3. Para protegerse de descargas eléctricas, no sumerja el cable, el enchufe o el
aparato en agua ni en ningún otro líquido. Si la unidad accidentalmente se cae o es
sumergida en el agua, desenchúfela de la toma de corriente inmediatamente. No
introduzca las manos en el agua.
4. Se requiere supervisión cuando cualquier aparato es utilizado cerca de niños.
5.Esta olla a presión no está diseñada para ser usada por niños.
6. Desenchufe del tomacorriente cuando no esté en uso y antes de limpiarla. Deje que
se enfríe antes de poner o quitar piezas. Si la olla a presión comienza funcionar mal
durante el uso, desenchufe inmediatamente el cable. No la utilice ni intente repararla.
7. No opere ningún aparato con un cable o enchufe dañado o después de un mal
funcionamiento o si se ha dañado de alguna manera. Devuelva el aparato al centro de
servicio autorizado más cercano para su revisión, reparación o ajuste.
8. El uso de accesorios no recomendados por el fabricante del aparato puede causar
lesiones.
9. Siempre utilice el aparato sobre una superficie estable.
10. No utilice al aire libre. Sólo para uso doméstico.
11. No permita que el cable cuelgue del borde de la mesa o mostrador, ni que toque
superficies calientes.
12. No coloque el aparato sobre o cerca de una hornilla de gas o eléctrica, o en un
horno caliente.
13. Tenga mucho cuidado al mover un aparato que contenga aceite caliente o cualquier
otro líquido caliente.
14.Nunca sumerja la carcasa o base en el agua.
15. Siempre conecte el cable al aparato primero, luego el enchufe en el tomacorriente.
Para desconectar, ajuste todo control a apagado (OFF), luego retire el enchufe del
tomacorriente.

16. No utilice el aparato para otra cosa que no sea su uso previsto.
17. Riesgo de descarga eléctrica. Cocine únicamente en el recipiente removible.
18. Este aparato cocina bajo presión. El uso incorrecto puede provocar lesiones y
quemaduras. Asegúrese de que la unidad esté bien cerrada antes de operar. Véase
"Instrucciones de uso".
19. NUNCA llene la unidad sobre la línea marcada MAX en el recipiente interior. Al
cocinar alimentos que se expanden durante la cocción como el arroz, los frijoles o
legumbres secas, no llene la unidad de más de 1/2 (la mitad). Vea "Instrucciones
Generales de Operación". Si sobrecarga la olla a presión puede causar una obstrucción,
la cual hace que se acumule un exceso de presión en el interior y puede ser peligroso.
20.No se recomienda para cocinar alimentos como puré de manzana, arándanos,
cebada perlada, harina de avena u otros cereales, guisantes partidos, fideos,
macarrones, ruibarbo o espaguetis. Estos alimentos tienden a formar espuma y pueden
bloquear el dispositivo de liberación de presión (salida de vapor). Las recetas que
utilicen cualquiera de estos ingredientes deben seguirse cuidadosamente para evitar
problemas.
21. Pruebe siempre los dispositivos de liberación de presión para eliminar cualquier
obstrucción antes de su uso. Siempre asegúrese de que la válvula de escape está
instalada correctamente antes de su uso. Un montaje incorrecto puede impedir que la
olla a presión logre aumentar la presión o puede permitir que el vapor salga por los
lados de la tapa. Consulte "Características del producto" e "Instrucciones Generales de
Operación"
22. NO use esta olla a presión para freír con aceite a presión.
23. NO abra la olla a presión hasta que se haya enfriado y toda la presión interna haya
sido liberada. Si la olla a presión es difícil de abrir, esto indica que la olla a presión aún
está presurizada.
24.Nunca fuerce la olla a presión para abrirla. Cualquier presión acumulada en la olla
puede ser peligrosa. Si necesita abrir la tapa, consulte las instrucciones en la sección
"Apertura de la tapa" y prosiga con cuidado. Siempre y lo más importante si sigue el
método de liberación de presión rápida, proteja su piel de cualquier contacto con el
vapor que se escapa. Cuando toda la presión se haya liberado, levante la tapa con

cuidado lejos de usted con el fin de evitar el contacto de la piel con el calor o el vapor
saliente.
25. Esta olla de presión eléctrica genera calor y vapor que se escapa durante el uso.
PRECAUCIÓN SUPERFICIES CALIENTES. Tome todas las precauciones necesarias
para evitar incendios, quemaduras y otras lesiones personales durante su
funcionamiento. Nunca utilice lugar la unidad cerca de materiales inflamables como
paños de cocina, platos de papel, servilletas, cortinas, toallas de papel, etc. Deje
suficiente espacio alrededor de todos los lados de la unidad, incluyendo la parte
superior e inferior para asegurar el flujo de aire adecuado.
26. Este aparato no está diseñado para ser usado por personas con discapacidad física
reducida, sensoriales o mentales, o sin experiencia y conocimiento, a menos que estén
bajo la supervisión de una persona responsable o se les haya dado la instrucción
apropiada para utilizar el aparato. Este aparato no está diseñado para ser usado por
niños. Cualquier persona que no haya leído y entendido completamente todas las
instrucciones de funcionamiento y de seguridad contenidas en este manual de
instrucciones no está calificado para operar o limpiar esta olla de presión eléctrica.
GUARDE ESTAS INSTRUCCIONES
SOLO PARA USO DOMESTICO

Instrucciones de Cable Corto
a) Se proporciona un cable de alimentación corto para reducir el riesgo de enredarse o
de tropezar con un cable más largo.
b) Los cables de alimentación largos desmontables están disponibles y pueden
utilizarse si se tiene cuidado en su uso.
c) Si se utiliza un cable de alimentación desmontable:
1) La clasificación eléctrica marcada del cable debe ser por lo menos tan alta como
la clasificación eléctrica del aparato.
2) El cable debe colocarse de manera que no cuelgue del mostrador o mesa donde
pueda ser jalado por niños o tropezarse accidentalmente.
3) Si el aparato es del tipo con conexión a tierra, el cable de extensión debe ser un
cable de 3 hilos con conexión a tierra.
Precauciones
• Antes de cada uso, asegúrese de comprobar que el escudo anti-bloqueo, la válvula
de flotación y la válvula de liberación de presión estén libres de obstrucciones;
limpie la superficie de la olla y la placa interior de calentamiento para confirmar que
están libres de cualquier objeto extraño y asegúrese de que la válvula de liberación
de presión está en la posición de cerrado.
• Después de la cocción, espere hasta que la olla se enfríe durante un tiempo y libere
la presión con la válvula de liberación de presión. Tenga mucho cuidado al abrir la
tapa. Quemaduras graves pueden resultar del vapor dentro de la unidad.
• Si una pieza tal como el cable o el enchufe está dañada o la olla a presión
inteligente funciona mal, detenga el funcionamiento inmediatamente y consulte las
secciones de resolución de problemas de servicio y garantía.
• Inserte el enchufe en la toma con firmeza. Una inserción incompleta puede causar
una descarga eléctrica o un cortocircuito.
• Cualquier suciedad o agua en el enchufe debe ser eliminada, ya que puede
provocar un incendio. Cuando no está en uso, desconecte el cable de la toma de
corriente.

• Se debe tener cuidado con los sellos para evitar que se deformen. Dejar de hacerlo
puede evitar que el producto funcione correctamente.
Especificaciones del Producto
Modelo Tipo Suministro
eléctrico
Poder Volumen Tamaño del
recipiente
interno
Presión de
funcionamiento
Presión
limite
Temperatura
tibia
PPC1058D (10) 120v~60Hz 900W 5L 22cm 0-70kPa 90kPa 60-80
o
C
Antes del Primer Uso
Antes del primer uso, por favor, saque todos los accesorios del paquete y lea este
manual cuidadosamente. Preste especial atención a las instrucciones de
funcionamiento y precauciones para evitar cualquier lesión o daños materiales.
Antes de cada uso, inspeccione para asegurarse de que el sello y el escudo anti-
bloqueo están montados en la tapa. Después de su uso, retire cualquier objeto extraño
del sello y escudo anti-bloqueo. Mantenga limpio para evitar olores.
Nunca hale el sello por la fuerza, ya que puede deformarlo, afectar el sellado y afectar
la presión. Nunca se debe utilizar un sello dañado; la unidad se debe enviar al centro
de servicio para el reemplazo.
Características del Producto
01: Asa de la Tapa 02: Tapa
03: Cubierta superior 04: Válvula de escape
05: Válvula Interna de Acero 06: Válvula de flotación
07: Válvula Flotante 08: Olla removible
09: Panel de control 10: Olla fija
11: Base 12: Asa de la Olla
13: Caparazón 14: Cable de alimentación
15: Placa de Calentamiento 16: Escudo Anti Bloqueo
17: Anillo de cierre de la válvula Interna 18: Anillo de sellado de la tapa
Estructura de la
Válvula de Flotación

Apertura Segura de la Tapa
1. Desconecte la alimentación o el enchufe de alimentación.
2. Libere la presión:
A. Apertura rápida (para alimentos no líquidos):
• Deslice la válvula de escape a la posición de liberación.
• Coloque una toalla mojada en la tapa para enfriar más rápido hasta que la válvula de
flotación baje completamente.
B. Apertura Normal: Espere a que la válvula flotante baje a su nivel más bajo y luego
abra la tapa.
3. Abra la tapa: Sostenga el mango de la tapa, gire la tapa hacia la derecha hasta la
posición de desbloqueo y levante la tapa cuidadosamente para abrir.
• No abra la tapa hasta que se libere completamente la presión dentro de la olla.
• Nunca tire de la válvula de liberación de presión cuando se está liberando presión.
• Para los alimentos fluidos (líquidos delgados, gruesos y pegajosos), no deslice la
válvula de liberación de presión para liberar la presión cuando la olla acaba de
terminar. Si lo hace, el líquido de la comida caliente puede derramarse por la presión
de la válvula de salida y causar quemaduras corporales. Asegúrese de desconectar
la fuente de alimentación.
• Cuando se cocina una gran cantidad de alimentos, no trate de liberar la presión
inmediatamente después de cocinar.
• Se recomienda dejar que la comida se enfríe durante un tiempo antes de liberar la
presión.
ADVERTENCIA:
No sostenga la válvula de liberación de presión. La olla puede expulsar vapor o liquido
caliente.
Mantenga las manos y la cara lejos de los respiraderos de vapor, use agarraderas al
retirar el recipiente interior o al tocar cualquier parte caliente, y nunca fuerce la tapa
para abrir. La tapa sólo abrirá una vez que se libere la presión. Retire la tapa
levantándola lejos de usted para evitar quemaduras por el vapor.

Como Usar
La Olla de Presión Premium utiliza un panel de control grande y fácil de usar. Las
cómodas funciones de programa incorporadas le permiten cocinar su comida favorita
con el toque de una tecla de función programada. La olla inteligente incluye 6
programas: Brown (Dorar), Rice (Arroz), Steam (Vapor), Soup (Sopa), Stew (Estofado),
y Slow cook (Cocción lenta).
El procedimiento general de los programas de cocción es el siguiente:
1. Siga los pasos detallados en “Instrucciones Generales de Operación”.
2. Conecte el cable de alimentación.
Para garantizar la seguridad, se recomienda conectar el cable de alimentación a la olla
antes de conectar el enchufe a la toma de corriente.
3. Seleccione una tecla de función programa de cocción.
Una vez que se pulsa una tecla de función, el indicador de la función correspondiente
mostrará el tiempo de presión predeterminado.
El tiempo de cocción puede variar ligeramente con la cantidad de comida y líquido y las
texturas de los alimentos.
La tabla de tiempo de cocción a continuación es sólo para referencia. (por ejemplo,
cantidad de alimentos + agua que alcanza 1/5 a 3/5 dentro de la olla interior):
Tiempo de cocción = tiempo de calentamiento + tiempo de presión por defecto.
Función de
Cocción
Slow Cook
(Cocción
Lenta)
Brown
(Dorar)
Rice
(Arroz)
Soup
(Sopa)
Stew
(Estofado)
Steam
(Vapor)
Tiempo por defecto
de cocción a
presión
No se
cocina a
presión
No se
cocina a
presión
12mins
30mins
20mins
15mins
Tiempo total
estimado de
cocción*
135mins
20mins
30mins
55mins
50mins
35mins
* Puede variar dependiendo de la cantidad de alimentos a cocinar. Mas comida
necesita más tiempo para cocinarse.

Las funciones Brown (Dorar) y de Cocción Lenta (Slow Cook) no tienen tiempo de
cocción prefijado.
Al seleccionar una función y entrar en el programa, la pantalla mostrará el tiempo de
cocción a presión por defecto (para el arroz es de 12 minutos), y la olla a presión
empieza a calentarse. El tiempo de cocción a presión por defecto que muestra la
pantalla no iniciará la cuenta atrás hasta que el alimento o el líquido no se ha calentado
y la olla a presión ha comenzado la cocción a presión. El tiempo de calentamiento
normalmente tarda más de 10 minutos, dependiendo de la cantidad de alimentos.
4. La luz indicadora del menú parpadeará durante 5 segundos antes de iniciar el menú.
Después de 5 segundos, la luz indicadora dejará de parpadear para indicar que el
proceso de cocción ha comenzado.
Durante este intervalo de 5 segundos se puede cambiar el tiempo de cocción por
defecto pulsando las teclas más (+) o menos (-) en el panel.
En cualquier momento durante el proceso, el programa puede cancelarse pulsando el
botón Cancelar/Mantener caliente (Cancel/Keep Warm). La olla a presión entra en
modo de espera (Standby).
5. A medida que aumenta la presión dentro de la olla, la válvula flotante subirá. En este
punto comienza la cocción a presión. La tapa estará ahora bloqueada y no se puede
abrir.
¡PRECAUCIÓN! NUNCA INTENTE ABRIR LA
TAPA MIENTRAS COCINA A PRESION!
Nota: El indicador de presión activa se iluminará, indicando que la unidad está bajo
alta presión.
Luego de que el tiempo de cocción ha terminado, la olla a presión se pondrá
automáticamente en el modo de mantener caliente (keep warm). La olla emite un
silbido audible. La luz indicadora de mantener caliente estará encendida para mostrar
que la olla está en el modo de mantener caliente. La pantalla contará los minutos
transcurridos y le hará saber el tiempo que la olla ha estado en el modo de mantener

caliente. El indicador de presión activa se apagará automáticamente la olla entra en el
modo de mantener caliente.
Tenga en cuenta que la olla está todavía bajo alta presión en ese momento. No
intente abrir la tapa. Libere la presión antes de abrir.
Para abrir la tapa
Cuando la cocción a presión ha llegado a su fin, la olla se pondrá en modo de mantener
caliente. En este punto se puede optar por abrir la tapa. Por lo tanto, la presión necesita
ser liberado. Esto se puede hacer de dos formas:
1. Liberación rápida de presión: Mueva la Válvula de Escape a la posición de
ventilación (Vent). El vapor comenzará inmediatamente a liberarse a través de la
válvula. Cuando la presión esté completamente liberada, la válvula flotante se hundirá.
La tapa estará ahora desbloqueada para abrir.
TENGA MUCHO CUIDADO AL ABRIR LA TAPA.
QUEMADURAS GRAVES PUEDEN PRODUCIRSE POR CAUSA DEL
VAPOR DENTRO DE LA UNIDAD.
PRECAUCIÓN: MANTENGA LAS MANOS Y LA CARA LEJOS DE LA
VALVULA DE VENTILACIÓN.
El vapor caliente que escapa de la válvula puede causar lesiones graves si no se
siguen las precauciones. Use agarraderas, pinzas u otras herramientas para ajustar la
válvula.
2. Liberación natural de presión: Se recomienda al cocinar alimentos que no tienen la
tendencia a cocinarse demasiado, como papas, frijoles, sopas y guisos. Cuando la olla
entra en modo de Mantener Caliente (Keep Warm) luego de un ciclo de cocción a

presión, la presión comenzará a descender. Esto tomará de 12 a 30 minutos. Durante
este tiempo, la cocción continúa ligeramente. Cuando la presión está totalmente
liberada, la válvula del flotador se hundirá. La tapa estará desbloqueada para abrir.
PRECAUCIÓN: MANTENGA LAS MANOS Y LA CARA LEJOS DE LA
VALVULA DE VENTILACIÓN.
El vapor caliente que escapa de la válvula puede causar lesiones
graves si no se siguen las precauciones. Use agarraderas, pinzas u
otras herramientas para ajustar la válvula.
USE AGARRADERAS CUANDO RETIRE EL RECIPIENTE EXTRAÍBLE. NUNCA
FUERCE LA TAPA PARA ABRIRLA.
EL TAPA SE ABRE SÓLO CUANDO SE LIBERA COMPLETAMENTE LA PRESIÓN.
RETIRE LA TAPA LEVANTÁNDOLA HACIA AFUERA PARA EVITAR LESIONES
CAUSADAS POR EL VAPOR CALIENTE.
Instrucciones Generales de Operación
1. Abra la tapa: Sostenga el mango de la tapa, gire la tapa hacia la derecha hasta la
posición de desbloqueo y levante la tapa cuidadosamente para abrir (ver figuras 1 y 2).
2. Saque la olla extraíble y coloque la comida y agua en ella.
NUNCA llene olla a más de 4/5 o menos de 1/5. Esto se indica en la línea superior en
el interior de la olla identificada con la palabra "FULL" (LLENO). Para arroz y verduras
que se expanden durante la cocción, NO llene más de 3/5. (ver figuras 3, 4, 5)
3. Asegúrese de secar la olla extraíble y placa de calentamiento antes de poner la olla
de cocción en la olla estacionaria. No coloque nada en la olla estacionaria y placa de
calentamiento. Por favor, gire la olla un poco hasta que haga un buen contacto con la
placa de calentamiento. (ver figura 6)
4. Cierre la tapa: Asegúrese de que la junta de silicona está bien asentada dentro de la
tapa. Sostenga el mango de la tapa y coloque la tapa de la olla; gire la tapa en sentido
anti horario aproximadamente 30 grados hasta que la tapa esté alineada con la marca
“CLOSED IN THIS POSITION” (CERRADO EN ESTA POSICIÓN) en el mango de la
olla. (ver figura 7)
7
5. Instale el colector de condensación. (Ver figura 8)
8
6. Coloque la válvula de presión en posición "SEAL" (SELLADA) y asegúrese de que el
flotador está en la posición hacia abajo antes de cocinar (ver figura 9)
9
• Si se utiliza la función Dorar (Brown), la olla debe permanecer sin la tapa.
• Si se usa la función de cocción lenta (Slow Cooker), coloque la válvula de
presión en la posición de ventilación (VENT).
• Si se usa en otras funciones, coloque la válvula en la posición de sellado
(SEAL).
NOTA: Tenga en cuenta que la válvula de escape estará suelta cuando no se está
utilizando el aparato para cocinar. Se moverá ligeramente y se puede girar 360°
manualmente. Una vez que la válvula de escape está en funcionamiento y la presión ha
aumentado hasta su capacidad, la válvula de escape se ajusta bien, y solamente se
dejará girar hacia la derecha para ventilar cuando se mira a la parte delantera de la olla.

Una vez que toda la presión se ha liberado, la válvula se sentirá suelta de nuevo.
7. Conecte a la electricidad. La pantalla LED muestra "00:00" y entra en estado de
espera.
8. Elija el botón de función correspondiente de acuerdo a su receta de comida, y el
indicador relativo se encenderá.
FUNCIONES DE COCCION
Función de Cocinar Arroz (Rice)
Este es un programa de 12 minutos para cocinar arroz.
1. Coloque el recipiente interno extraíble en la olla.
2. Agregue al menos 1/5 de agua o líquido de cocción en la olla.
3. Añada la cantidad apropiada de grano para el líquido, siguiendo la proporción de
la receta. No llene la olla más arriba de la mitad.
4. Coloque la tapa de la olla; alinee el asa con el colector de condensación, y gire
hacia la izquierda hasta que encaje en su lugar. El pasador de bloqueo hará clic
en su lugar. Gire la válvula de presión a SEAL para sellar.
5. Pulse el botón RICE (arroz). La luz en el botón RICE parpadeará y la pantalla
digital mostrará "00:12".
6. Dentro de los próximos 5 segundos, el indicador luminoso dejará de parpadear
para indicar que el proceso de cocción se ha iniciado. El programa cocinará por
unos 30 minutos.
7. Cuando termina el tiempo de cocción, la unidad emitirá un pitido y entrara en
modo Keep Warm” (mantener caliente) automáticamente hasta que usted vuelva
a presionar el botón “Keep Warm/Cancel” para cancelar el programa.
ADVERTENCIA:
No sostenga la válvula de liberación de presión. La olla puede expulsar vapor o
liquido caliente.
Mantenga las manos y la cara lejos de los respiraderos de vapor, use agarraderas
al retirar el recipiente interior o al tocar cualquier parte caliente, y nunca fuerce la

tapa para abrir. La tapa sólo abrirá una vez que se libere la presión. Retire la tapa
levantándola lejos de usted para evitar quemaduras por el vapor.
Función de Cocción Lenta (Slow Cook)
Esta función le permitirá cocinar clásicos de la cocina lenta, como estofados, en un
máximo de 10 horas. Coloque sus ingredientes en la mañana y la cena estará lista al
regresar.
1. Coloque el recipiente interno removible cocción en la olla.
2. Coloque los alimentos a ser cocinados en el recipiente interno de la olla a presión.
3. Coloque la tapa sobre la olla, alinee el mango con el colector de condensación, y
gírelo en sentido anti horario hasta que encaje en su sitio. El pasador de bloqueo
encajará en su lugar. Gire la válvula de presión a la posición de ventilación (Vent).
4. La cocción lenta no cocina a alta presión, por lo que debe girar la válvula de
escape a la posición de ventilación (Vent).
5. Seleccione el modo de cocción lenta (Slow Cook) en el panel de control. La luz del
botón de cocción lenta (Slow Cook) parpadeará y la pantalla digital mostrará el
tiempo de cocción correspondiente. El tiempo predeterminado "02:00".
6. Ajuste el tiempo deseado pulsando la tecla "+" o “-“ una vez por cada media hora
adicional. El mayor tiempo de cocción es de 10 horas a 212
o
F aproximadamente.
7. Dentro de los próximos 5 segundos, la luz indicadora dejará de parpadear para
indicar que el proceso de cocción ha comenzado.
8. La unidad comenzará la cuenta atrás en incrementos de un minuto después de que
la temperatura alcance aproximadamente 212 ºF
9. Cuando el tiempo de cocción termina, la unidad emitirá un pitido y se colocará
automáticamente a la función "Mantener caliente" (Keep Warm) hasta que se pulsa
el botón de "Keep Warm /Cancel" para cancelar el programa.
ADVERTENCIA:
No sostenga la válvula de liberación de presión. La olla puede expulsar vapor o
liquido caliente.
Mantenga las manos y la cara lejos de los respiraderos de vapor, use agarraderas

al retirar el recipiente interior o al tocar cualquier parte caliente, y nunca fuerce la
tapa para abrir. La tapa sólo abrirá una vez que se libere la presión. Retire la tapa
levantándola lejos de usted para evitar quemaduras por el vapor.
Función de Estofado (Stew)
Este es un programa de 20 minutos (00:20) para hacer alimentos guisados o estofados.
1. Siga los pasos que se indican en este manual bajo el título "Instrucciones Generales
de uso general". Pulse el botón de Estofado (Stew).
2. Si la comida necesita un tiempo de cocción más largo o más corto, el tiempo
predeterminado se puede cambiar durante el primer intervalo de 5 segundos
pulsando el botón más (+) o menos (-).
3. Asegúrese de que la olla a presión se llena al menos 1/5 de su capacidad. No llene
la olla más de 3/5.
4. Cuando termina el tiempo de cocción, la unidad emitirá un sonido de forma
automática y pasará a modo de mantener caliente (Keep Warm), hasta que se pulsa
el botón Keep Warm / Cancelar.
ADVERTENCIA:
No sostenga la válvula de liberación de presión. La olla puede expulsar vapor o
liquido caliente.
Mantenga las manos y la cara lejos de los respiraderos de vapor, use agarraderas
al retirar el recipiente interior o al tocar cualquier parte caliente, y nunca fuerce la
tapa para abrir. La tapa sólo abrirá una vez que se libere la presión. Retire la tapa
levantándola lejos de usted para evitar quemaduras por el vapor.
Función de Dorar (Brown)
Esta función le permite a dorar los alimentos antes de cocinarlos. Dore su carne o aves
de corral para un mejor sabor y textura, a menos que se indique lo contrario en la
receta.
Seque su comida con una toalla de papel antes de dorarla. Para obtener los mejores
resultados, asegúrese de que el aceite esté caliente antes de añadir a su carne o aves

de corral. Dore la comida en lotes para mantener la temperatura correcta del aceite.
1. Coloque la olla extraíble en su lugar.
2. Añada la cantidad de aceite que se indica en la receta.
3. Pulse el botón de dorar (BROWN). La luz en el botón BROWN parpadeará y en la
pantalla aparecerá "00:20". No coloque la tapa.
4. Dentro de los próximos 5 segundos, el indicador luminoso dejará de parpadear para
indicar que el proceso de cocción se ha iniciado.
5. Después de aproximadamente un minuto de precalentamiento, agregue los
alimentos y comience a dorar.
6. Una vez que termine de dorar, presione el botón "Keep Warm / Cancel" para
cancelar la función de dorar. Ahora usted puede utilizar cualquiera de los programas
de cocción para continuar la preparación de la receta. Siga las instrucciones para
cada programa.
ADVERTENCIA:
No sostenga la válvula de liberación de presión. La olla puede expulsar vapor o
liquido caliente.
Mantenga las manos y la cara lejos de los respiraderos de vapor, use agarraderas
al retirar el recipiente interior o al tocar cualquier parte caliente, y nunca fuerce la
tapa para abrir. La tapa sólo abrirá una vez que se libere la presión. Retire la tapa
levantándola lejos de usted para evitar quemaduras por el vapor.
Función de Cocción al Vapor (Steam)
Este es un programa de 15 minutos (00:15) para cocer al vapor.
1. Inserte una cesta para cocinar al vapor (no incluida, de preferencia use una de
silicona) con la comida en el recipiente extraíble, añada agua hasta la marca 1/5 en
la olla de cocción.
2. Siga los pasos que se indican en este manual bajo el título "Instrucciones Generales
de uso." Pulse el botón de vapor.
3. Si la comida necesita un tiempo de cocción más largo o más corto, el tiempo
predeterminado se puede cambiar durante el primer intervalo de 5 segundos

presionando los botones más (+) o menos (-).
4. Cuando termina el tiempo de cocción, la unidad emitirá un sonido y entrará
automáticamente en el modo de mantener caliente, hasta que se pulsa el botón
Keep Warm / Cancelar.
ADVERTENCIA:
No sostenga la válvula de liberación de presión. La olla puede expulsar vapor o
liquido caliente.
Mantenga las manos y la cara lejos de los respiraderos de vapor, use agarraderas
al retirar el recipiente interior o al tocar cualquier parte caliente, y nunca fuerce la
tapa para abrir. La tapa sólo abrirá una vez que se libere la presión. Retire la tapa
levantándola lejos de usted para evitar quemaduras por el vapor.
Función Sopa (Soup)
Este es un programa de 30 minutos (doce y media) para la cocción de sopas.
1. Siga los pasos que se indican en este manual bajo el título "Instrucciones Generales
de uso." Pulse el botón de Sopa (Soup).
2. Si la sopa necesita un tiempo de cocción más largo o más corto, el tiempo
predeterminado se puede cambiar durante el primer intervalo de 5 segundos
pulsando las teclas más (+) o menos (-).
3. Asegúrese de que la olla a presión está llena por lo menos hasta la marca 1/5. No
llene la olla más de 3/5.
4. Cuando termina el tiempo de cocción, la unidad emitirá un sonido y entrará
automáticamente en el modo de mantener caliente, hasta que se pulsa el botón
Keep Warm / Cancelar.
ADVERTENCIA:
No sostenga la válvula de liberación de presión. La olla puede expulsar vapor o
liquido caliente.
Mantenga las manos y la cara lejos de los respiraderos de vapor, use agarraderas
al retirar el recipiente interior o al tocar cualquier parte caliente, y nunca fuerce la
tapa para abrir. La tapa sólo abrirá una vez que se libere la presión. Retire la tapa

levantándola lejos de usted para evitar quemaduras por el vapor.
Función Mantener Caliente (Keep Warm)
Después de la cocción, la luz indicadora de la función de cocción seleccionada (roja) se
apaga. La olla también dará un pitido audible. La luz indicadora de modo “Keep Warm”
(mantener caliente) de color amarillo se encenderá para indicar que la olla entra en
modo "mantener caliente". En el modo de espera, la función de mantener caliente se
puede iniciar pulsando la tecla "Keep Warm / Cancel". La temperatura del modo
"mantener caliente" es 60-80
o
C (140-176ºF).
No se recomienda mantener la comida caliente durante mucho tiempo, ya que puede
afectar negativamente la textura o el sabor de la comida.
ADVERTENCIA:
No sostenga la válvula de liberación de presión. La olla puede expulsar vapor o
liquido caliente.
Mantenga las manos y la cara lejos de los respiraderos de vapor, use agarraderas
al retirar el recipiente interior o al tocar cualquier parte caliente, y nunca fuerce la
tapa para abrir. La tapa sólo abrirá una vez que se libere la presión. Retire la tapa
levantándola lejos de usted para evitar quemaduras por el vapor.
Función de Demora en el Tiempo (Time Delay)
La Olla de Presión Premium cuenta con una función de demora de tiempo de hasta 24
horas.
1. Siga los pasos que se indican en este manual bajo el título "Instrucciones Generales
de uso".
2. Pulse el botón del menú específico que desea retrasar.
3. Pulse el botón Tiempo de retraso (Delay Time) durante los primeros 5 segundos de
de la función elegida.
4. La luz verde del indicador del botón Tiempo de retardo empieza a parpadear,
5. El tiempo de retardo predeterminado es de 30 minutos (00:30). Durante el primer
intervalo de 5 segundos se puede ajustar el tiempo de retardo predeterminado,

presionando las teclas más (+) o menos (-) botón (para intervalos de 30 minutos).
6. Después de 5 segundos, el tiempo de demora se establece y la luz indicadora verde
está encendida, junto con la luz indicadora de la función seleccionada. La pantalla
comenzará la cuenta regresiva.
7. Para cancelar la función Demora en el Tiempo, pulse el botón Keep Warm /Cancelar.
8. Cuando termina el tiempo de demora, el proceso de cocción se iniciará.
9. Después de que la cocción ha terminado, la unidad emitirá un pitido y entrará
automáticamente en el modo de mantener caliente, hasta que se pulsa el botón
Keep Warm /Cancelar.
Notas:
• No se recomienda utilizar la función de Demora en el Tiempo para cocinar
alimentos que pueden dañarse.
• Dejar alimentos crudos dentro de la olla a presión durante largos períodos de
tiempo antes de la cocción puede dar lugar a que se estropeen los alimentos.
• Utilice esta función solo para cocinar alimentos que se pueden dejar fuera como
frijoles, granos u otros alimentos que no se echen a perder.
• Los alimentos perecederos tales como carne, pollo, pescado, queso y otros
productos lácteos no pueden dejarse a temperatura ambiente por más de 2
horas y no más de 1 hora si la temperatura ambiente es superior a 90 ° F.

Limpieza y Mantenimiento
Después de su uso, desenchufe la unidad y deje que la unidad se enfríe
completamente antes de limpiarla.
La Olla de Presión Eléctrica Premium debe ser limpiada a fondo después de cada uso
con el fin de evitar las manchas causadas por la acumulación de residuos de alimentos.
NO VIERTA AGUA FRÍA EN UNA OLLA A PRESIÓN CALIENTE.
Nota: Para garantizar un funcionamiento seguro de esta olla de presión eléctrica, siga
las instrucciones de mantenimiento y limpieza después de cada uso.
1. Antes de cualquier operación de limpieza, espere a que la unidad se enfríe.
2. Desconecte el cable de alimentación de la toma eléctrica antes de limpiarlo.
3. Siempre retire la válvula de presión y limpiar la apertura con un alfiler para eliminar
cualquier obstrucción que pudiera haber ocurrido durante el proceso de cocción.
Esto debe hacerse después de cada uso.
4. Sacar la olla de cocción removible, use una esponja o un trapo o no metal cepillo
suave y limpie. Tenga cuidado de no dañar la capa antiadherente interior.
5. La olla de cocción removible y la tapa se pueden lavar para la limpieza. Enjuague la
olla y la tapa con agua corriente caliente. Use solamente un detergente líquido
suave y un paño suave, una esponja o una esponja de nylon para su limpieza. No
use polvos abrasivos, bicarbonato de sodio o lejía. No utilice estropajos. Enjuague
con agua limpia y seque con una toalla.
6. Limpiar el cuerpo exterior con un paño suave, como una toalla de papel o un paño
de microfibra. WIPE la base después de cada uso con un paño suave y húmedo o
una esponja, verificando que todos los residuos de comida se quita. No sumerja la
base en agua o cualquier OTHE LÍQUIDO.
7. Enjuague con agua la cara inferior de la tapa, incluyendo el anillo de estanqueidad,
la válvula de escape, escudo anti-bloque, escape de aire y el flotador de la válvula.
Seque por completo. Limpiar la pista central con una toalla húmeda.
8. Cuando limpie la tapa, quitar el anillo de sellado de la tapa. Lavar con agua tibia y
jabón y limpiar con un paño suave o una esponja. Enjuague con agua limpia y
seque con una toalla.
9. El anillo de sellado debe ser siempre correctamente colocado en la parte inferior de

la tapa. Comprobar periódicamente para asegurarse de que está limpio, flexible y no
desgarrado. Si está dañado, no utilice esta unidad.
Nota: El anillo de sellado debe ser reemplazado cada año o antes si es necesario. El
anillo de sellado también puede necesitar ser reemplazada si la olla de presión eléctrica
de primera calidad no se utiliza durante un largo periodo de tiempo, ya que puede
endurecerse por falta de uso, por lo que es incapaz de formar un sello hermético. El
anillo de sellado debe ser reemplazado únicamente por otra del tipo y el tamaño
correcto para esta olla a presión.
10. Nunca use detergentes químicos agresivos, estropajos o polvos en cualquiera de
las partes o componentes.
11. Compruebe siempre que la válvula de presión y válvula de flotador se encuentran
en buen estado de funcionamiento y libres de restos.
12. No sumerja el cuerpo exterior en agua o cualquier otro líquido o verter agua en él.
13. Retire y limpie el colector de condensación, a continuación, vuelva a instalarlo.
14. El cuidado regular o el mantenimiento es esencial para asegurar que este producto
es seguro para su uso.
Además de la junta de estanqueidad del anillo, los demás dispositivos de seguridad
en la olla de presión eléctrica de primera calidad también deben limpiarse después de
cada uso.
VALVULA DE ESCAPE: Para quitar la válvula de escape, simplemente tire hacia
arriba y la válvula se despega de su mecanismo de cierre de resorte. Aplicar un
detergente suave y lavar con agua tibia. Después de la limpieza, compruebe que la
parte interior de resorte se mueve libremente presionando hacia abajo en él. Ponga la
válvula de escape en su lugar empujándola hacia abajo sobre el mecanismo de
resorte. Este aparato requiere poco mantenimiento. No contiene piezas reparables por
el usuario. No trate de repararlo usted mismo. Contactar con el servicio al cliente para
obtener información de reparación calificado.
Resolución de Problemas
Código Indicador
Razones
E1
Falla del interruptor de presión
E3
Cortocircuito del sensor
E4
Circuito sensor abierto
E5
Sobre calentamiento
S/N
Síntoma
Razones Posibles
Soluciones
1
La tapa no
cierra bien
El anillo de sellado no está
instalado correctamente
Vuelva a colocar el anillo de
sellado
El flotador está retenido por la
barra de empuje
Empuje la barra con las
manos
2
No se puede
destapar
después de
liberar el aire
El flotador está todavía arriba
Presione el flotador hacia
abajo
3
Se escapa el
aire por el borde
de la tapa
No se ha instalado el anillo de
sellado
Instale el anillo de sellado
Hay residuos de comida en el
anillo de sellado
Limpie el anillo de sellado
Anillo de sellado desgastado
Reemplace el anillo de
sellado
La tapa no está cerrada
correctamente
Gire la tapa totalmente
4
El aire escapa
de la válvula de
flotación
Hay alimentos atascados en el
anillo de sellado de la válvula
de flotación
Limpie el anillo de sellado
El anillo de sellado de la
válvula de flotación esta
desgastado
Reemplace el anillo de
sellado

5
El flotador no se
levanta
No hay suficiente comida y
agua
Compruebe la receta y
coloque la cantidad adecuada
El aire escapa desde el borde
de la tapa y la válvula de límite
de presión
Llame al Centro de Servicio al
Consumidor
Cuando las circunstancias siguientes
tienen lugar
Soluciones
• El Cable de alimentación y el enchufe sufren
de expansión, deformación, decoloración,
daños, etc.
• Una parte del cable de alimentación o el
enchufe se calienta más de lo normal.
• La olla de presión eléctrica se calienta
anormalmente, emitiendo un olor a quemado.
• Hay sonidos o vibraciones inusuales al
encender.
• Deje de usar el producto
inmediatamente; envíelo al
centro de servicio al cliente
más cercano.
• Hay polvo o suciedad en el enchufe o toma
de corriente.
• Elimine el polvo y la
suciedad con un cepillo
seco.
Advertencia - cualquier otro servicio debe ser realizado por un representante de
servicio autorizado.