Loading ...
Loading ...
Loading ...
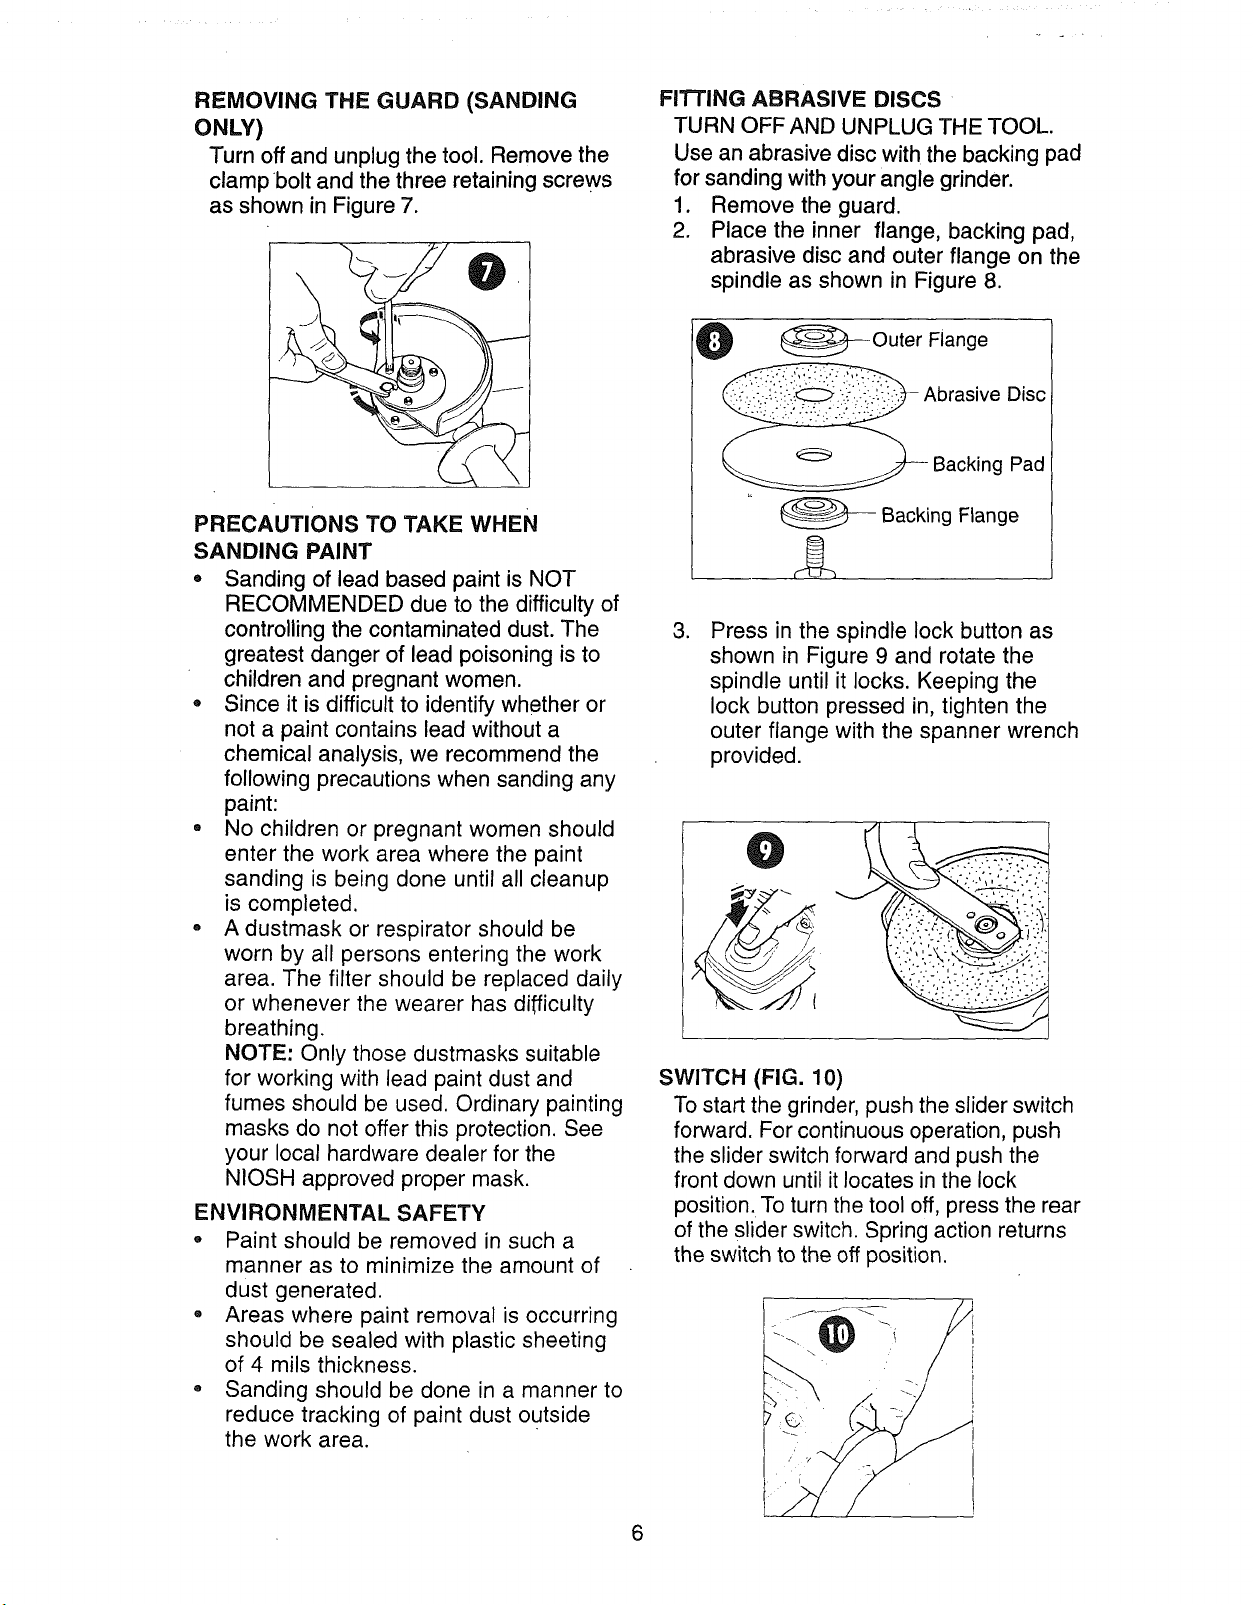
REMOVING THE GUARD (SANDING
ONLY)
Turn off and unplugthe tool. Remove the
clamp bolt and the three retaining screws
as shown in Figure 7.
PRECAUTIONS TO TAKE WHEN
SANDING PAINT
• Sanding of lead based paint is NOT
RECOMMENDED due to the difficulty of
controlling the contaminated dust. The
greatest danger of lead poisoning is to
children and pregnant women.
• Since it is difficult to identify whether or
not a paint contains lead without a
chemical analysis, we recommend the
following precautions when sanding any
paint:
, No children or pregnant women should
enter the work area where the paint
sanding is being done until all cleanup
is completed.
. A dustmask or respirator should be
worn by all persons entering the work
area. The filter should be replaced daily
or whenever the wearer has difficulty
breathing.
NOTE: Only those dustmasks suitable
for working with lead paint dust and
fumes should be used. Ordinary painting
masks do not offer this protection. See
your local hardware dealer for the
NIOSH approved proper mask.
ENVIRONMENTAL SAFETY
° Paint should be removed in such a
manner as to minimize the amount of
dust generated.
,, Areas where paint removal is occurring
should be sealed with plastic sheeting
of 4 mils thickness.
° Sanding should be done in a manner to
reduce tracking of paint dust outside
the work area.
FITTING ABRASIVE DISCS
TURN OFF AND UNPLUG THE TOOL.
Use an abrasive disc with the backing pad
for sanding with your angle grinder.
1. Remove the guard.
2. Place the inner flange, backing pad,
abrasive disc and outer flange on the
spindle as shown in Figure 8.
_Outer Flange
Disc
Backing Pad
_--- Backing Flange
,
Press in the spindle lock button as
shown in Figure 9 and rotate the
spindle until it locks. Keeping the
lock button pressed in, tighten the
outer flange with the spanner wrench
provided.
SWITCH (FIG. 10)
To start the grinder, push the slider switch
forward. For continuous operation, push
the slider switch forward and push the
front down until it locates in the lock
position. To turn the tool off, press the rear
of the slider switch. Spring action returns
the switch to the off position.
6
Loading ...
Loading ...
Loading ...