KL-8100
User’s Guide
E-1
Important Safety Precautions
Note of the following safety precautions before using the
label printer for the first time. Keep these safety precautions
and operating instructions on hand for future reference.
About safety precaution symbols
The following symbols are used in this manual and on the
product itself to alert you and others to the risk of personal
and material injury.
Warning
This symbol indicates an item that can result in
death or serious personal injury if ignored.
Caution
This symbol indicates an item that can result in
serious personal injury or material damage if ig-
nored.
Examples
A triangle indicates something you should be care-
ful about. This symbol warns against electrical
shock.
A circle indicates something you should not do.
This symbol indicates you should not try to take
something apart.
A black circle indicates something you must do.
This symbol indicates you should unplug some-
thing.
Warning
Power supply and voltage
• Use only a power source whose output matches
the rating marked on the plate on the bottom of
the label printer. Also, avoid plugging too many
appliances into the same extension cord. The
wrong voltage or overloading of an AC outlet
creates the danger of fire and electrical shock.
Serious malfunction
• Continued use of the unit when smoke or a
strange odor is coming from it creates the dan-
ger of electrical shock. Immediately turn power
off and unplug the power cord from the wall
outlet. Request servicing from your original
dealer.
AC adaptor
• Do not allow the power cord to become dam-
aged or broken, and never modify, over bend,
twist, or pull it. Never place heavy objects on
the power cord, and never expose it to direct
heat. A damaged power cord creates the dan-
ger of fire and electrical shock.
• Use only the AC adaptor specified for this unit.
Use of another AC adaptor creates the danger
of fire and electrical shock.
• Should the power cord become seriously dam-
aged (internal wiring is exposed or cut), request
servicing from your original dealer. Use of a
seriously damaged power cord creates the dan-
ger of fire and electrical shock.
• Never touch the AC adaptor when your hands
are wet. Doing so creates the danger of electri-
cal shock.
Never try to take the unit apart
• Never try to take the unit apart or modify it in any
way. Doing so creates the danger of electrical
shock, burn injury, or other personal injury.
Packaging
• Keep the plastic bag that the unit comes in out
of the reach of small children. Plastic bags cre-
ate the danger of suffocation for small children.
Avoid dropping
• Should the unit ever become damaged by fall-
ing down, immediately turn off power and un-
plug the power cord from the wall socket. Re-
quest servicing from your original dealer. Use
of a damaged unit creates the danger of fire
and electrical shock.
Batteries
• Never charge batteries, try to take batteries
apart, or allow batteries to become shorted.
Never expose batteries to direct heat or dispose
of them by incineration.
Caution
AC Adaptor
• Do not leave the power cord near stoves or other
sources of intense heat. Doing so can melt
power cord insulation and create the danger of
fire and electrical shock.
• When unplugging the power cord from the wall
socket, grasp the plug. Never pull on the cord
itself. Doing so can damage the power cord and
create the danger of fire and electrical shock.
• Whenever leaving the unit unattended for long
periods, be sure to unplug it from the wall socket.
• Whenever moving the unit, be sure to unplug it
from the wall socket. Leaving the unit plugged in
when it is being moved can result in damage to
the power cord and create the danger of fire and
electrical shock.
• Whenever cleaning the unit, be sure to unplug
it from the wall socket.
• When you are through using the unit, use its
power switch to turn it off and then unplug it
from the wall socket.
Avoid unstable areas
• Never place the unit on a wobbly table or a high
shelf. Doing so can cause it to fall, resulting in
personal injury.
Water and other foreign matter
• Never allow coffee, juice, or other drinks, or flower
vases to spill on the unit. Liquid spilled on the
unit creates the danger of fire and electrical
shock. Should liquid ever spill onto the unit, im-
mediately turn off power and unplug the power
cord from the wall socket. Request servicing from
your original dealer.
Location
• Avoid leaving the unit in areas subjected to high
humidity and large amounts of dust. Such con-
ditions create the danger of fire and electrical
shock.
English
E-2
• Avoid leaving the unit on a kitchen table, next to
a humidifier, or in any other area where it might
come into contact with oil vapors or steam. Such
conditions create the danger of fire and electri-
cal shock.
• Never place heavy objects on the unit. Doing
so creates the danger of the unit falling, result-
ing in personal injury.
Batteries
• Misuse of batteries can cause them to leak acid
that can cause damage to nearby items and
creates the possibility of personal injury.
• Be sure that the plus (+) and minus (–) sides of
each battery are facing correctly.
• Never mix batteries of different types.
• Never leave dead batteries in KL-8100.
• Remove the batteries if you do not plan to use
KL-8100 for a long time.
• Use only the battery type specified for this label
printer in this manual.
Memory
• Always keep separate written copies of any in-
formation you store in the memory of this label
printer. Data stored in memory can be unexpect-
edly lost due to malfunction, repair, dead bat-
tery, etc.
Introduction
Congratulations on your selection of this product. This label
printer makes it possible for you to print adhesive labels for
a wide variety of applications, such as: name tags, cassette
tape labels, floppy disks, binders, and other applications.
You can produce attractive, original labels thanks to such
features as:
• Variable tape sizes (6mm, 9mm, 12mm, 18mm, 24mm)
• 10 fonts
• 5 character styles (normal, bold, outline, shadow, raised)
• Various font effects
• Bar code printing
• Auto numbering
• Text memory
• Preset formats and preset layouts
You can even store data in memory for instant recall when
you need it.
Important!
• Contact a nearby dealer whenever you require serv-
icing.
• Note that the manufacturer shall not be held liable
for any loss or claims by third parties which may arise
out of the use of this product.
• Note that the manufacturer shall not be held liable
for any damages incurred as a result of data loss
caused by malfunctions, repairs, or interruption of
power supply.
• It is up to the user to keep backup records of impor-
tant data.
• Keep this manual on hand for future reference.
Quick Reference
Though your label printer is packed with powerful fea-
tures and functions, it is also designed to be easy to setup
and use. The following procedures tell you how to set up
the label printer and start printing labels right away using
preset (auto) layouts. As you become more experienced,
you can use the more sophisticated settings and opera-
tions described in detail in the other sections of this
manual to add even more creativity and originality to your
labels.
Getting Ready
1. Connect the AC adaptor to the label printer (page
E-6).
2. Load a tape cartridge (page E-7).
3. Turn on power (page E-6).
4. Reset the memory if necessary (page E-6).
5. Use the SET UP menu (page E-7) to make basic
settings and to produce a demo print if you want.
Creating a Label Using an Preset (Auto)
Layout (page E-19)
Example: To create a VHS video cassette label for the
title “Label Printer” to appear as follows.
1. Turn on the label printer, and clear all text from its
screen.
2. Press PRESETS to display the PRESETS menu.
3. Use u and i to move the highlighting to “LAYOUT”
and then press SET.
4. Use u and i to move the highlighting to “NEW”
and then press SET.
5. Use u and i to move the highlighting to “VIDEO”
and then press SET.
6. Use u and i to move the highlighting to “VHS”
and then press SET.
7. Use t and y to move the highlighting to <number>
and then press SET.
8. Input the text you want to include in each block, and
then press SET to advance to the next block.
9. Specify the print direction (page E-17), and either
mirror or normal printing (page E-17).
10.After making the settings you want, press SET.
11.Use u and i to move the highlighting to “PRINT”
and then press SET to execute it.
12.After printing, you can store your newly created label
in memory.

E-3
Contents
Important Safety Precautions ...................... E-1
Quick Reference ............................................ E-2
Part 1 Getting Acquainted ............................ E-4
Important Precautions .............................................. E-4
General Guide .......................................................... E-5
Label Printer Menus .................................................. E-5
Part 2 Getting Ready .................................... E-5
Power Supply ............................................................ E-5
AC Adaptor ............................................................... E-5
To connect the AC adaptor ................................... E-6
Loading/Replacing Batteries ..................................... E-6
Loading/Replacing the main batteries ................. E-6
Turning Power On and Off ........................................ E-6
Power On Recall Function ........................................ E-6
Resetting the Memory .............................................. E-6
To reset the memory ............................................ E-6
Auto Power Off Function........................................... E-6
Tape Cartridges ........................................................ E-6
To load a tape cartridge ....................................... E-7
Removing the Tape Cartridge .............................. E-7
About the SET UP menu .......................................... E-7
Message Language .................................................. E-8
To change the message language ....................... E-8
Display Contrast ....................................................... E-8
To change the display contrast ............................ E-8
Sound ....................................................................... E-8
To turn sound on and off ...................................... E-8
Unit of Measurement ................................................ E-8
To set the unit of measurement ............................ E-8
Demo Print ................................................................ E-8
To produce a demo print ...................................... E-8
Part 3 Inputting Characters and
Symbols ............................................. E-8
Display Symbols and Indicators ............................... E-8
Basic Alpha-Numeric Input ....................................... E-9
To input alpha-numeric characters ....................... E-9
About the CODE key................................................. E-9
Inputting Symbols, Dingbats, Special Numbers,
Greek Characters, and Russian Characters ....... E-10
To use the SYMBOL menu ................................ E-10
Inputting Illustrations ............................................... E-10
To input illustrations ........................................... E-10
User Characters ...................................................... E-10
User character drawing techniques ................... E-10
To create a user character using an
existing character ............................................ E-10
To create a user character from the user
character you created ..................................... E-10
To recall a user character ................................... E-10
To delete a user character ................................. E-11
Part 4 Deleting and Inserting
Characters ........................................ E-11
Moving the Cursor .................................................. E-11
To move the cursor ............................................ E-11
Deleting Individual Characters ................................ E-11
To delete characters using the BS key .............. E-11
To delete characters using the DEL key ............ E-11
Clearing the Display ................................................ E-11
To clear all text ................................................... E-11
To clear a portion of text ..................................... E-11
Text Editing ............................................................. E-11
To switch between overwrite and insert ............. E-11
Part 5 Character Attributes and
Text Effects ...................................... E-12
Fonts ....................................................................... E-12
To change the default font setting ...................... E-12
To change the font for displayed text ................. E-12
To change the font for all the text ....................... E-12
To change the font for blocks of text .................. E-12
To change the font for lines of text ..................... E-12
To change the font for specific characters ......... E-12
To find out current font settings .......................... E-12
Character Styles ..................................................... E-12
To change the character styles .......................... E-13
To find out current character style settings ........ E-13
Text Effects ............................................................. E-13
About text effect ranges ..................................... E-13
To assign text effects ......................................... E-13
To change the text effects for blocks of text ....... E-13
To change the text effect for lines of text ........... E-13
To change the text effect for specific
characters ....................................................... E-13
To change the text effect for a range of text....... E-14
Part 6 Character Sizes ................................ E-14
Direct Specification of Character Sizes .................. E-14
Standard Typeface ............................................. E-14
Small Typeface .................................................. E-14
To change character size using direct
specification .................................................... E-14
Specifying Character Sizes for Lines of Text Using
Preset Formats .................................................... E-15
About the format menu ...................................... E-15
To specify character sizes for lines of text using
preset formats ................................................. E-15
To find out preset format character sizes ........... E-15
About Auto Sizing ............................................... E-15
Part 7 FORM Menu Functions ................... E-16
Fundamentals of Label Layout ............................... E-16
Using the Layout Display ........................................ E-16
To show the layout display ................................. E-16
Creating and Deleting Blocks ................................. E-16
To create a block ................................................ E-16
To delete a block mark ....................................... E-16
Block Operations .................................................... E-16
To display the BLOCK FORM menu .................. E-16
To display the ALL FORM menu ........................ E-17
Part 8 Printing ............................................. E-18
Printing Precautions ................................................ E-18
Printing a Tape ........................................................ E-18
To print a tape .................................................... E-18
To adjust the print density .................................. E-18
Using the Image Display ......................................... E-19
To show the image display ................................. E-19
Part 9 Frames .............................................. E-19
To specify a frame around the printing area ........... E-19
To specify frames around each character ............... E-19
Part 10 PRESETS Menu Functions ........... E-19
To display the PRESETS menu .............................. E-19
LAYOUT .................................................................. E-19
To use a preset layout to create a label and
print it .............................................................. E-20
To store a label created using a preset layout ... E-20
To recall a preset layout label from memory ...... E-20
To delete a preset layout label from memory ..... E-20
ENLARGE ............................................................... E-20
To print a large-size label ................................... E-20
BAR CODE ............................................................. E-21
Bar Code Tape ................................................... E-21
EAN-13, EAN-8, UPC-A, UPC-E ...................... E-21
To print a bar code ............................................. E-21
ITF, CODE39, CODABAR ................................. E-21
To print a bar code ............................................. E-21
General Bar code Operations ........................... E-21
To store a bar code ............................................ E-21
To recall a bar code from memory ..................... E-21
To delete a bar code from memory .................... E-21
NUMBERING .......................................................... E-22
To print sequentially numbered labels ............... E-22
To store a numbering format .............................. E-22
To recall a numbering format from memory ....... E-22
To delete a numbering format from memory ...... E-22
PHRASES ............................................................... E-22

E-4
To print a preset phrase ..................................... E-22
Part 11 Stamp Printing ............................... E-22
To create a new stamp label ................................... E-23
To store a stamp label ............................................ E-23
To recall a stamp label from memory ...................... E-23
To delete a stamp label from memory .................... E-23
Part 12 Memory ........................................... E-23
To store data ........................................................... E-23
Recalling Text From Memory .................................. E-23
To recall memory text using sequential search .. E-23
To recall memory text using character search ... E-24
To delete memory text ........................................ E-24
Part 13 Data Communication ..................... E-24
Part 14 Reference ....................................... E-24
Cleaning the Printer Head and Roller ..................... E-24
To clean the printer head and roller ................... E-24
Initial Settings ......................................................... E-24
Initializing the Label Printer .................................... E-25
To initialize the label printer ................................ E-25
Format Indicator ...................................................... E-25
Tape Length Indicator ............................................. E-25
Illustrations .............................................................. E-25
Symbols, Dingbats, and Special Characters .......... E-25
Frames .................................................................... E-25
Fonts ....................................................................... E-25
ENLARGED Label Measurements ......................... E-26
Phrases ................................................................... E-26
Bar Code Specifications ......................................... E-26
Troubleshooting ...................................................... E-27
Error Messages ...................................................... E-28
Specifications .......................................................... E-29
Part 1 Getting Acquainted
This part of the manual provides you with important infor-
mation you need to know in order to use the label printer to
its full potential. Be sure to read it carefully before using the
label printer for the first time.
Important Precautions
• Keep your label printer out of areas subject to tempera-
ture extremes, moisture and direct sunlight. The recom-
mended temperature range is 10° to 35°C (50° to 95°F).
• Don’t let coffee, juice or other liquids splash onto the label
printer.
• Never let paper clips, pins or other foreign objects get into
the tape outlet slot or printer of the label printer.
• Do not pile heavy objects on top of the label printer.
• Never try to take the label printer apart or attempt your
own maintenance.
• Do not drop your label printer and avoid strong impact.
• Do not pull on the tape or try to force it back into the label
printer.
• Never operate the tape cutter lever when a tape cartridge
is not loaded in the label printer. Doing so can damage
the cutter blade.
• Never touch the printer head with your fingers.
• Take care to avoid applying too much pressure to the tape
cutter lever. Doing so can damage it.
• Do not use benzine, thinner, or other volatile chemicals to
clean the exterior of the label printer. Use a soft, dry cloth
or a cloth dampened in a weak solution of a mild, neutral
detergent and water. Wring the cloth out until all excess
moisture is removed.
• A dirty printer head can cause printing to become
smudged. When this happens, clean off the printer head
by wiping it with a cotton swab moistened with alcohol
(page E-24).
• Use of the label printer next to a television or radio may
interfere with reception.
E-5
Label Printer Menus
Label printer operation is designed to be as simple as pos-
sible, thanks to on-screen menus that you can use to select
the settings you need. Each menu is described in detail in
the sections that follow in this manual, but note the follow-
ing general points when using them.
• The item that is highlighted in a menu is the one that is
currently selected.
––––
P
U
TES
––––
T
N
O
FTL
U
AFE
D
T
U
P
N
I
TSA
R
T
N
O
C
• Use u and i to move the highlighting up and down and
change the selected item.
• Press SET to execute the highlighted item, or ESC to exit
the displayed menu (and return to the previous menu or
screen) without selecting anything.
• When you press SET to execute a menu item, the label
printer either moves on to the next menu, or it executes
the selected function and returns to the text input screen
that you started from.
Part 2 Getting Ready
This part of the manual tells you how to load and replace
batteries, load the tape cartridge, and perform other basic
setups for the label printer.
Important! Be sure to read this section before attempting
to use the label printer.
Power Supply
The Label Printer can be powered by a specified AC adap-
tor (AD-A12070) or eight AA-size alkaline batteries.
AC Adaptor
Note the following important precautions when using an AC
adaptor to power your label printer.
• Use only specified CASIO AD-A12070 AC adaptor, and
make sure the adaptor has the same voltage rating as
the household current in your area. Using a wrong adap-
tor can damage your label printer.
• Be sure to turn the label printer off before you connect the
adaptor. Do not turn power on until the adaptor is con-
nected to the label printer and plugged into an AC outlet.
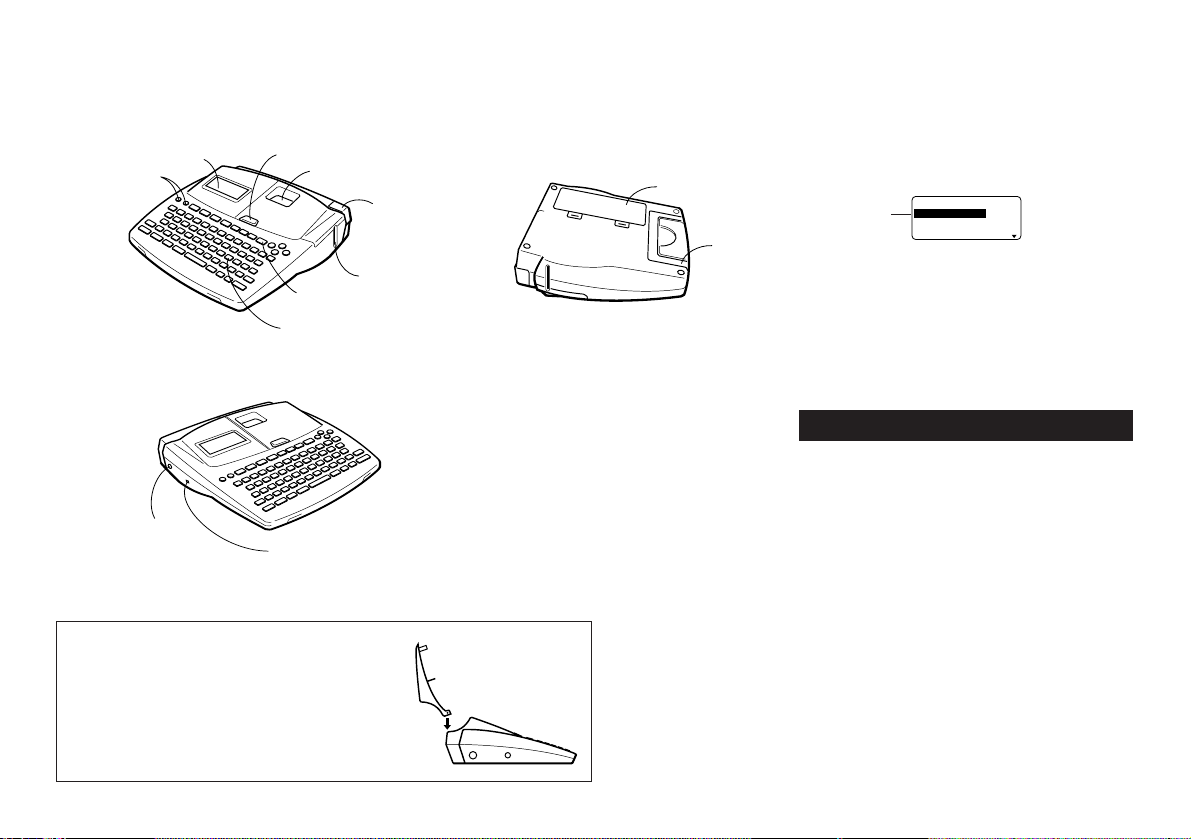
Bottom
General Guide
Front
Replacing the Cover if it Comes Off
If the cover comes off, replace it as shown in the illustra-
tion nearby. Take care to avoid damaging the tabs and
hinges when installing the cover.
AC adaptor
connector
3-pin jack
Cover release
Tape cartridge compartment
Tape cutter lever
Tape outlet
Print key
Letter keys
Handle
Main battery
compartment
Power Keys
Turn power on
and off.
Liquid crystal
display (LCD)
Currently
selected item
E-6
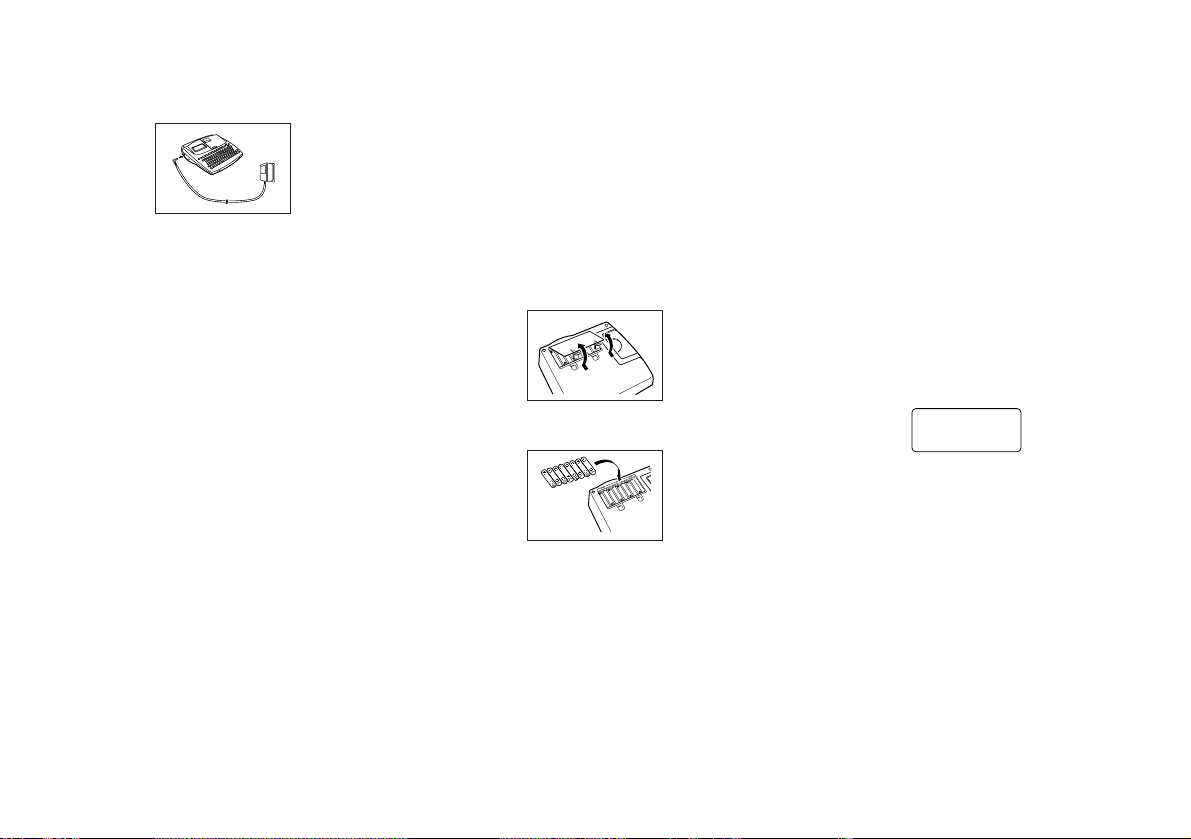
To connect the AC adaptor
Remove the AC adaptor connector cover, and connect the
adaptor to the label printer as illustrated below. Plug the
other end into a standard household AC outlet.
After you finish using the label printer, turn it off and discon-
nect the AC adaptor.
• Be sure to grasp the plug of the AC adaptor cord when
disconnecting it. Never pull on the cord.
Loading/Replacing Batteries
A handy low battery power indicator lets you know when
battery power is getting too low for proper operation. The
message LOW BATTERY or REPLACE BATTERIES ap-
pears on the display if battery power is low when you per-
form any of the following operations.
• Switching power on
• Executing a print operation
• Executing a tape feed operation
You should still be able to perform some Label Printer op-
erations, but some power intensive operations (like printing
or tape feed) may become impossible if battery power is
too low. In any case, you should replace batteries as soon
as possible or switch to the AC adaptor as soon as possible
after the LOW BATTERY message appears.
Important!
Batteries can burst or leak and damage your unit if you use
them the wrong way. Note the following important points.
• Be sure that the plus (+) and minus (–) sides of each bat-
tery are facing correctly.
• Never mix batteries of different types
• Never leave dead batteries in the battery compartment.
• Remove the batteries if you do not plan to use the unit for
a long time.
• Replace the main battery in accordance with the battery
life marked on the side of the battery.
• Have the back-up battery replaced by the date noted on
the sticker on the back of the label printer.
Power On Recall Function
Whenever you turn power off, any input that is on the dis-
play is automatically stored in memory. Then the next time
you turn on power, the message “[SET] TO RECALL” ap-
pears on the display. Pressing SET when this message is
on the display recalls the text that was on the screen when
you last turned off power.
• Pressing any key besides SET, FUNC, SHIFT or CODE
clears the text from memory.
Resetting the Memory
You should reset the memory of the label printer before us-
ing it for the first time, after you have not used it for a long
time, or if nothing happens when you turn power on.
Important! Resetting label printer memory clears its
memory of all input data.
To reset the memory
1. Make sure that label printer power is off.
2. While holding down the PRINT and ESC keys, press ON
to turn power on.
?LAITI
N
I
C
SE
/
TES
3. Press SET to initialize the label printer or ESC to abort
the reset operation without initializing anything.
• See “Initial Settings” on page E-24 for information on the
initial default settings of the label printer following the re-
set operation.
• You have to reset the Label Printer if you want to change
the on-screen message language. Press RESET and then
perform the procedure performed under Message Lan-
guage.
Auto Power Off Function
If you do not perform any key operation for about six min-
utes, the label printer automatically turns power off. To re-
store power, press ON.
Tape Cartridges
Use the procedures described below to load a tape car-
tridge into the label printer. The label printer automatically
detects what size tape is loaded.
Warning!
• Never recharge the batteries you use with this unit.
• Do not expose batteries to direct heat, do not short circuit
them, and do not try to take them apart.
•
Keep batteries out of the reach of small children. If
swallowed, consult with a physician immediately.
• Low battery power is indicated by poor print quality or
power switching off while printing is in progress.
Loading/Replacing the main batteries
1. Switch power off.
• If you are using the AC adaptor to power the unit, you
should also unplug the adaptor from the Label Printer.
2. Open the battery compartment cover on the back of the
Label Printer by sliding it in the direction indicated by the
arrow.
3. If you are replacing batteries, remove all eight of the old
batteries.
4. Load a set of eight new batteries into the battery com-
partment, making sure that their positive (+) and nega-
tive (–) ends are facing in the correct directions.
5. Replace the battery compartment cover.
Turning Power On and Off
Press ON to turn power on, and OFF to turn power off.
Important! If you are using the label printer for the first time,
you should reset it first.
E-7
• Never try to force tape back into the cartridge once it is
pulled out.
• Do not pull on the tape too hard. Doing so can break the
ink ribbon and result in malfunction.
7. Use a pencil or some other thin object to take up slack in
the ink ribbon as shown in the illustration. Note that the
tape does not move at this time.
• If the ink ribbon is slack when you load it into the label
printer, it can break or cause some other problem.
• Be sure to turn the ink ribbon take up spool only in the
direction indicated by the arrow (a).
• Turn the spool until the other spool (b) starts turning in
the direction noted by the arrow. This indicates there is no
slack in the ribbon.
8. Load the tape cartridge into the label printer, making sure
that the tape and ink ribbon pass between the head and
roller.
Important! Never try to push the tape back into the cas-
sette. Once tape is out of the cassette, there is no way to
wind it back in. Trying to do so can cause operational prob-
lems with the label printer.
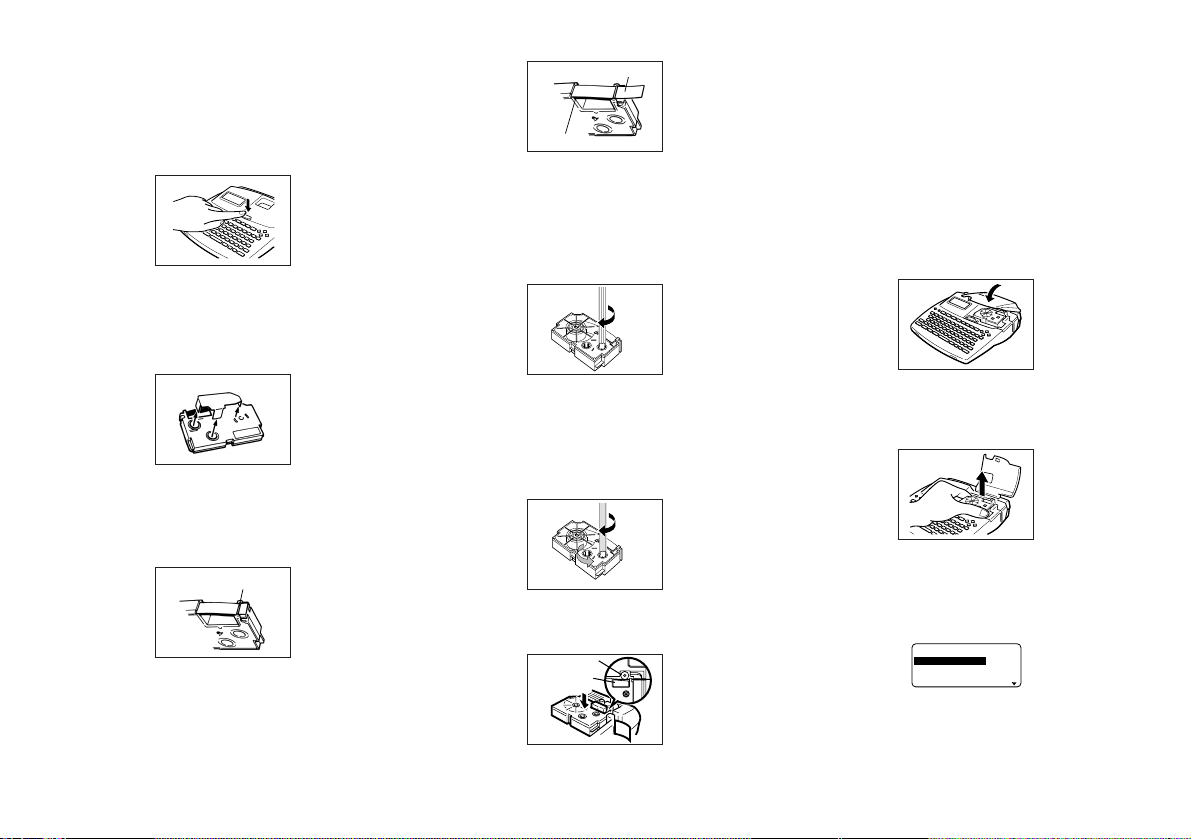
To load a tape cartridge
1. Make sure the label printer is turned off.
2. Press the cover release and open the cover.
• If there is a cartridge already in the label printer, remove it
by grasping the cartridge on both sides with your thumb
and forefinger, and lift straight up.
3. Remove the stopper from a new tape cartridge and check
to see that the tape is ready to use.
4. Check to make sure that the end of the tape is not bent.
• If the end of the tape is bent, use scissors to cut off the
bent portion.
5. Make sure that the tape is under the tape guide and that
it is not bent or twisted.
• Make sure the end of the tape is passing through the tape
guide. If it isn’t, pass the end of the tape through the tape
guide as shown in the illustration.
6. Pull out about 3cm (1
1
/
8
") of tape.
• Be sure to lower the tape cartridge straight down into the
label printer, and press down on it until it clicks securely
into place.
9. Close the cover and operate the tape cut lever to cut off
the tape.
10.Turn on label printer power and press FUNC and then
PRINT (FEED) two or three times to make sure that the
tape comes out without any problem.
• If the tape does not come out normally, turn off power and
start again from step 1 above.
Removing the Tape Cartridge
• Grasp the tape cartridge with your fingers as shown in
the illustration, and lift it straight up out of the label printer.
• To make it easier to remove a narrow (6mm, 9mm) tape
cartridge, insert a pencil or some other thin, pointed ob-
ject under the right side of the tape and lift up, as shown
in the illustration.
About the SET UP menu
The SET UP menu lets you change various basic settings
quickly and easily. To display the SET UP menu, press FUNC
and then FORM.
––––
P
U
TES
––––
T
N
O
FTL
U
AFE
D
T
U
P
N
I
TSA
R
T
N
O
C
Use u and i to move the highlighting to the item you
want to select and then press SET. Press ESC to clear the
SET UP menu without selecting anything. The following
sections explain how to use most of the SET UP menu items.
See page E-12 for details on using DEFAULT FONT, page
E-11 for how to use INPUT, and page E-18 for DENSITY.
Tape guide
(b)
(a)
Ink ribbon
Tape
Roller
Printer head
E-8
Message Language
You can use the following procedure to select any one of
five different languages (English, German, French, Italian,
Spanish) for display of message text.
• All of the display examples in this manual use English as
the display language.
To change the message language
1. On the SET UP menu, use u and i to highlight “LAN-
GUAGE” and then press SET.
–––
E
G
A
U
G
N
AL
–––
H
SIL
G
N
E
HC
ST
U
E
D
SIA
ÇN
A
R
F
2. Use u and i to highlight the language you want to use
and then press SET.
Display Contrast
Use the following procedure to make the characters on the
display darker or lighter.
To change the display contrast
1. On the SET UP menu, highlight “CONTRAST” and then
press SET.
2. Use t and y to make the display contrast lighter and
darker.
3. After setting the contrast, press SET.
Sound
The label printer is equipped with sound capabilities that
signal when power is turned on and when an illegal opera-
tion is attempted. Normally, sound are turned on whenever
you turn power on, but you can use the following procedure
to turn the sound on and off.
To turn sound on and off
1. On the SET UP menu, highlight “SOUND” and then press
SET.
2. Use u and i to highlight the setting you want (ON or
OFF) and then press SET.
Unit of Measurement
This label printer can use either centimeters (cm) or inches
(inch) as the unit of measurement.
To set the unit of measurement
1. On the SET UP menu, highlight “cm/inch” and then press
SET.
2. Use u and i to highlight the setting you want (cm or
inch) and then press SET.
Demo Print
After setting up the label printer, you may want to produce a
demo print to make sure that everything is working properly.
To produce a demo print
1. Press ON to turn power on.
2. Press PRINT and then SET.
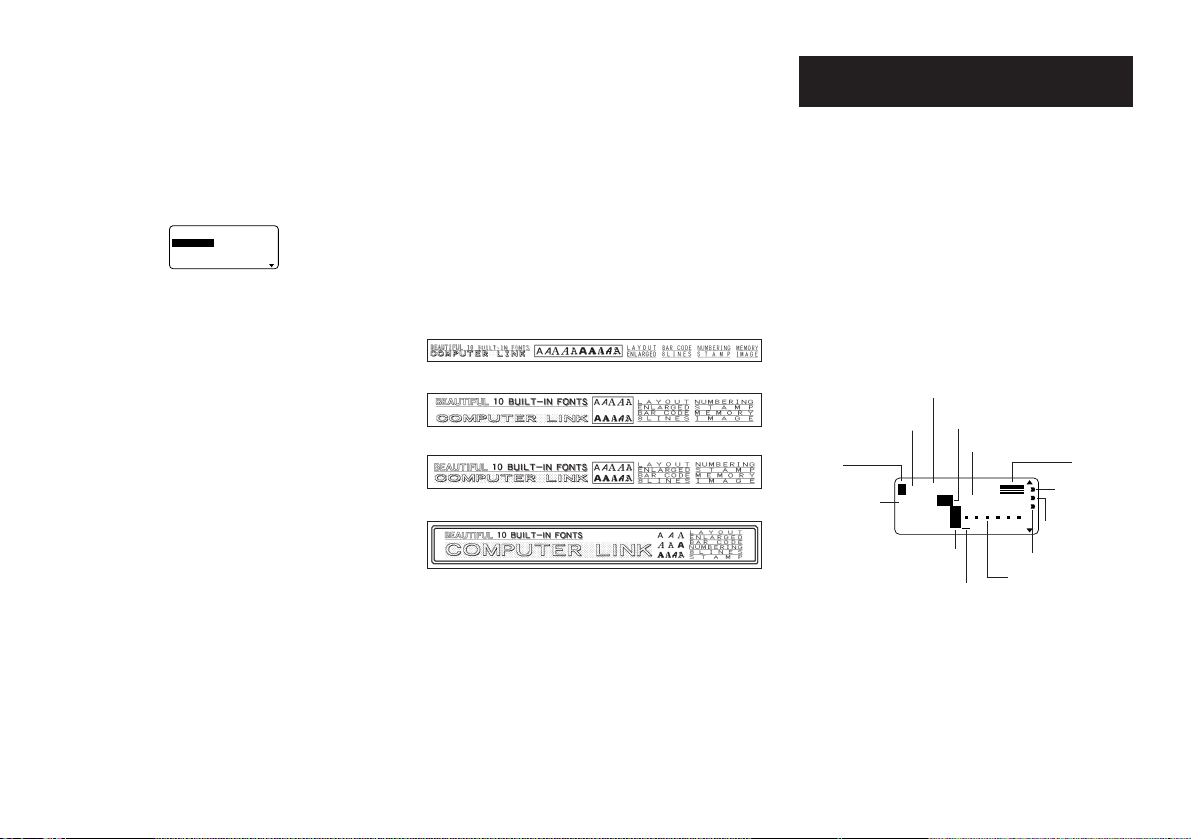
The following are examples of the demo print that the above
procedure produces. Note that the contents of the demo print
depends on the width of the tape loaded in the label printer.
6mm Tape
9mm Tape
12mm Tape
18mm and 24mm Tape
Important!
• You can produce a demo print when the text input display
is clear, immediately after turning power on only. Even if
you input text and then delete it, pressing PRINT will not
produce a demo print.
• If you experience problems with printing, check your tape
cartridge and power supply, and try again.
Part 3 Inputting Characters and
Symbols
This part of the manual tells you how to input characters. To
make things easier to understand, we call everything you
input a character, regardless of whether it is actually a let-
ter, number, or symbol. Explanations here all use the de-
fault settings that are in effect from the initial power-on
screen.
For information on using other fonts, styles, effects and char-
acters sizes, see pages E-12 to E-16.
Important! You can input up to 255 characters per label.
Further input becomes impossible after you input the 255th
character.
Display Symbols and Indicators
Before getting into actual input, you should first become
acquainted with the symbols and indicators used on the la-
bel printer display.
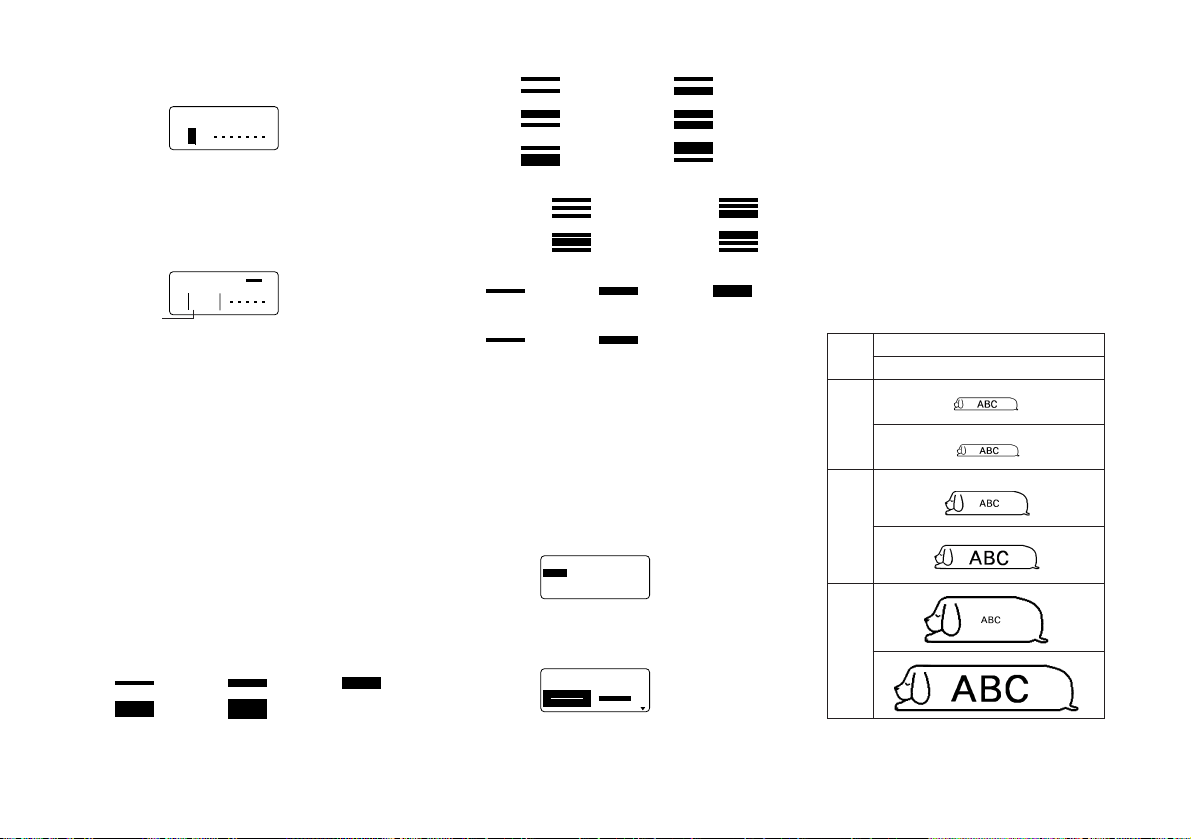
2AS
N
ASF
]
m
c9.99
[
F1×1
3
a
B
L
SI
O
AC
CAPS on/off indicator
“A” indicates upper-case input, while “a” indicates lower-
case.
Font indicator
This indicator shows the font setting (page E-12) for the
character where the cursor is located.
Function indicator
This indicator appears when you press the FUNC key. Press-
ing a key while this indicator is on the display causes the
function marked above that key to be executed.
Vertical printing
indicator
Mirror printing
indicator
Manual feed indicator
Character position mark
Block mark
Cursor
Character size
display indicator
Function/Shift/Code
indicator
CAPS on/off indicator
Format
Tape length
Block number
Font indicator
E-9
Shift indicator
This indicator appears when you press the SHIFT key. While
this indicator is on the display, the keyboard is shifted, so the
letter keys input the opposite of their current upper-case/lower-
case setting. The number keys input the punctuation symbols
marked in the upper right corners of the keys. The keyboard
automatically unshifts (and the shift indicator disappears) as
soon as you input a character.
Code indicator
This indicator appears when you press the CODE key. While
this indicator is on the display, number keys input the
accents marked above them and the U, O, P, A, S, J, K, L,
Z, C and N keys input the special characters marked in their
lower right corners. The keyboard automatically returns to
normal (and the code indicator disappears) as soon as you
input an accent.
Character size display indicator
This indicator shows the size of the character where the
cursor is currently located. The letter “F” to the right of the
character size indicates a preset format is being used.
The letter “S” indicates that the label printer’s small typeface
is selected.
Block number
This value appears when there are multiple blocks in the
text. It shows the sequential number of the block where
the cursor is currently located (page E-16).
Format
This indicator shows how many lines of text have been in-
put. See page E-25 for important information about how
various format conditions are indicated.
Tape length
This value shows the length that the tape will be printed. See
page E-25 for important information about how various tape
length conditions are indicated.
Character position marks
These marks show where characters will appear as you
input them.
Cursor
The cursor shows the next input position. Any character you
input appears at the point where the cursor is located.
Block mark
This mark separates two blocks on the screen.
Return symbol ( )
The return symbol indicates a newline operation.
Character style indicators
These indicators point to the character effect that is assigned
to the character where the cursor is currently located. You
can select between normal, bold, outline, shadow, and
raised.
Mirror image printing indicator
This indicator appears when the label printer is set up for
mirror image printing. Normal (non-mirror image) printing is
performed when this indicator is not shown.
Manual feed indicator
This indicator appears when you are using manual feed in-
stead of auto feed. Auto feed is in effect when this indicator
is not on the display.
Important! After you finish printing when using manual
feed, be sure to always press FUNC and then PRINT
(FEED) to feed the tape before cutting it. If you don’t you
will cut off part of the printed text.
Basic Alpha-Numeric Input
The following operation shows you the basic procedures
for inputting letters and numbers. We will explain the proce-
dure by inputting the following characters using the default
initial power-on screen.
ABXYZ Computer Company
1234567890
Note If you hold down any key, it will repeat its operation or
input at high speed until you release it.
To input alpha-numeric characters
1. Turn power on.
2. Input the first line of characters.
• To input the upper-case letters, you can use either SHIFT
or CAPS. With SHIFT you must shift the keyboard for
each character. With CAPS the keyboard keeps its up-
per-case/lower-case setting until you press CAPS again.
• Press SPACE to input spaces.
• If you input a wrong character, press BS to delete it and
input again. See page E-11 for other details on editing
text.
3. When you reach the end of a line of text, press B to
input a newline mark.
• A newline operation is indicated on the display by the
symbol. This shows where you changed lines.
4. Input the characters in the second line.
5. To print the text that you input, press PRINT. For details
on printing, see page E-18.
About the CODE key...
The CODE key makes it possible to input punctuation
needed for a number of different languages. The following
shows the key operations you should use for each of the
characters formed using the CODE key.
■ CAPS on
■ CAPS off
Example: To input á CODE 1
(´) A
CODE U Ü
CODE O Œ
CODE P Å
CODE A Æ
CODE J Ö
CODE K Ä
CODE L J
CODE Z W
CODE C Ç
CODE N Ñ
Key Operation Input Key Operation Input
CODE 1 ´
CODE 2 `
CODE 3 ¨
CODE 4 ˜
CODE 5 ˆ
CODE 6 ˇ
CODE 7 °
CODE 8 /
CODE 9 ˝
CODE 0
˛
CODE U ü
CODE O œ
CODE P å
CODE A æ
CODE S ß
CODE J ö
CODE K ä
CODE L j
CODE Z w
CODE C ç
CODE N ñ
Key Operation Input Key Operation Input
CODE 1 ´
CODE 2 `
CODE 3 ¨
CODE 4 ˜
CODE 5 ˆ
CODE 6 ˇ
CODE 7 °
CODE 8 /
CODE 9 ˝
CODE 0
˛
E-10
Inputting Symbols, Dingbats, Special
Numbers, Greek Characters, and
Russian Characters
The SYMBOL menu provides you with a choice of symbols,
dingbats, and special number formats, in addition to Greek
and Russian letters.
To use the SYMBOL menu
1. With the cursor at the location where you want to input a
symbol, dingbat, number, or character, press the
SYMBOL key to display the SYMBOL menu.
––––
L
O
B
M
YS
––––
L
O
B
M
YS
TAB
G
N
I
D
RE
B
M
UN
2. Use u and i to move the highlighting to the item you
want to select and then press SET.
• Pressing SET causes a menu of symbols, dingbats,
number formats, or characters to appear.
• To clear the SYMBOL menu without selecting anything,
press ESC.
3. Use u, i, t and y to move the highlighting to the
character you want to select, and then press SET.
• Pressing SET returns to the input screen, with the sym-
bol, dingbat, or character you selected input at the loca-
tion where the cursor was located when you displayed
the SYMBOL menu.
See page E-25 for a complete list of symbols, dingbats, and
characters that are available from each menu.
Inputting Illustrations
Your label printer gives you a choice of 50 illustrations that
you can use in your labels.
To input illustrations
1. With the cursor at the location where you want to input
an illustration, press the ILLUST key to display the
ILLUST menu.
1
––
T
S
U
LLI
––––
2. Use u, i, t and y to move the highlighting to the
illustration you want to select, and then press SET.
• Pressing SET returns to the input screen with the illustra-
tion you selected input at the location where the cursor
was located when you displayed the ILLUST menu.
See page E-25 for a complete list of illustrations that are
available.
User Characters
You can create up to four user characters and store them in
memory. You can create a character from scratch, or you
can use an existing character or symbol as a basis for cre-
ating a new character.
User character drawing techniques
The following describes the basic techniques for drawing
on the user character screen.
••
••
• To move the cursor
Use u, i, t and y to move the cursor around the screen.
FUNC t and FUNC y makes the cursor jump to the far left
or far right of the screen (when “CON” is not highlighted).
FUNC u and FUNC i makes the cursor jump to the top
or bottom of the screen (when “CON” is not highlighted).
••
••
• To draw a dot
Press 1 to draw a black dot at the cursor position or 2 to
draw a white dot.
••
••
• To draw a series of black dots
Press 1 to highlight “BLK”, and then press 3 to highlight
“CON”. In this condition, a continuous series of black dots
will be drawn when you move the cursor.
••
••
• To draw a series of white dots
Press 2 to highlight “WHT”, and then press 3 to highlight
“CON”. In this condition, a continuous series of white dots
will be drawn when you move the cursor.
To create a user character using an existing
character
1. Input the character or symbol you want to use as a basis
for your new character and locate the cursor under the
character.
2. Press FUNC and then ILLUST (USER CHR).
–
R
E
TC
A
R
A
HCR
ES
U
–
LLA
C
E
R
E
K
A
M
TI
D
E
3. Use u and i to move the highlighting to “MAKE” and
then press SET.
–
R
E
TC
A
R
A
HCR
ES
U
–
–
E
K
A
M
–
W
E
N
R
A
HCTU
P
N
IES
U
4. Use u and i to move the highlighting to “USE INPUT
CHAR” and then press SET.
KLB:1
TH
W
:2
N
O
C
:3
• The screen contains an image of the character you input
in step 1.
• If you selected “NEW”, a screen appears for creating a
character from scratch.
5. Use the user character drawing techniques to change
the image on the screen.
6. After you are finished changing the character, press SET.
1E
R
O
TS?E
R
E
H
W
7. Use t and y to select the user character area where
you want to store the character and then press SET.
• If the user character area you select already has a char-
acter in it, the old character will be replaced with the new
one.
8. Press SET to store the character.
• If there was no input character at the cursor location when
you pressed FUNC and then ILLUST (USER CHR) in step
2, the screen for creating a new character from scratch
appears when you press SET in step 3.
To create a user character from the user
character you created
1. Press FUNC and then ILLUST (USER CHR).
2. Use u and i to move the highlighting to “EDIT” and
then press SET.
3. Use t and y to select the user character you want to
edit, and then press SET.
4. Use the user character drawing techniques described to
edit the character you want, and then press SET.
5. Continue from step 7 under “To create a user character
using an existing character”.
To recall a user character
1. With the cursor located in the input screen where you
want to input the user character, press FUNC and then
ILLUST (USER CHR).
User character
area number
E-11
2. Use u and i to move the highlighting to “RECALL”
and then press SET.
3. Use t and y to select the user character you want and
then press SET.
To delete a user character
1. Press FUNC and then ILLUST (USER CHR).
2. Use u and i to move the highlighting to “DELETE”
and then press SET.
3. Use t and y to select the user character you want and
then press SET.
4. Press SET to delete the selected character or ESC to
abort without deleting anything.
Part 4 Deleting and Inserting
Characters
This section describes everything you need to know about
deleting and editing characters you have already input.
Moving the Cursor
Use the cursor keys to move the cursor around the display
and position it for deleting and editing characters.
To move the cursor
• Press t to move the cursor to the left, and y to move the
cursor to the right.
• Press SHIFT and then t to make the cursor jump to the
next block mark (
) to the left. (See page E-16 for details
about blocks).
• Press SHIFT and then y to make the cursor jump to the
next block mark ( ) to the right.
• Press FUNC and then t to make the cursor jump to the
beginning (far left) of the current line.
• Press FUNC and then y to make the cursor jump to the
end (far right) of the current line.
• Press FUNC and then u to make the cursor jump to the
first character of the text.
• Press FUNC and then i to make the cursor jump to the
end of the text.
• Holding down the t or y cursor key moves the cursor at
high speed.
Deleting Individual Characters
You can delete individual characters with either the BS key
or the DEL key. The only difference between the operation
of these two keys is the location of the cursor.
To delete characters using the BS key
Example: To change the word “commmputer” to “computer”.
1. Use t and y to move the cursor under “p”.
retup
mmm
oc
AS
N
ASa
1
m
c8.14×4
2. Press BS twice to delete the two m’s to the left of the
cursor, shifting “puter” to the left as you do.
To delete characters using the DEL key
Example: To change the word “commmputer” to “computer”.
1. Use t and y to move the cursor under the first (far left)
“m”.
2. Press DEL twice to delete the two m’s at the cursor’s
position, shifting “mputer” to the left as you do.
Clearing the Display
The label printer gives you a choice of clearing the entire
display or only a specific block of text.
To clear all text
1. Press FUNC and then BS (CLS).
––––––
S
LC
–––––
LL
A
T
R
AP
2. Use u and i to highlight “ALL” (if it isn’t already high-
lighted).
3. Press SET.
retup
m
oc
––––––
SL
C
–––––
C
SE
/
TES?
R
AEL
C
4. Press SET to clear all of the text on the display or ESC
to abort without clearing anything.
To clear a portion of text
1. Press FUNC and then BS (CLS).
2. Use u and i to highlight “PART” (if it isn’t already high-
lighted).
3. Press SET.
retup
m
oc
––––––
SL
C
–––––
?
M
O
R
F
4. Use t and y to move the cursor to start point of the text
you want to delete and press SET.
5. Use t and y to move the cursor to end point of the text
you want to delete.
• The text between the cursor and the start point is high-
lighted as you move the cursor.
6. Press SET to clear the highlighted text or ESC to abort
without clearing anything.
Text Editing
You can set up the label printer so it either overwrites exist-
ing characters with new input, or inserts new input between
existing characters. Note the following example.
Example
Existing text: ABCDEFGHI
Cursor location: E
New input: XXX
Overwrite
Result: ABCDXXXHI
Insert
Result: ABCDXXXEFGHI
To switch between overwrite and insert
1. Press FUNC and then FORM (SET UP) to display the
SET UP menu.
2. Use u and i to highlight “INPUT” and then press SET.
3. Use u and i to highlight the setting you want (“IN-
SERT” or “OVERWRITE”) and then press SET.
• The CAPS indicator on the display is highlighted when
overwrite is turned on. The CAPS indicator appears nor-
mally (unhighlighted) when insert is turned on.
E-12
Part 5 Character Attributes and
Text Effects
The operations in this part of the manual explain how to
change fonts and character styles. These characteristics are
called “character attributes”. It also tells you how to assign
such text effects as underlining, shading, and box printing to
text.
Important!
• Character attributes you specify affect printed text only.
The characters on the display do not change.
• Remember that character attributes are assigned to spe-
cific characters. Whenever you replace a character with
another one, the new character also picks up the attributes
of the original character.
• Text effects are applied to both displayed text and printed
text.
Fonts
This label printer gives you a choice of 10 different fonts.
See page E-25 for examples of each type of font.
The following sections describe how to change the default
font setting (the font that is automatically used whenever
you input text), how to change the font for displayed text,
and how you can find out what the font setting is for text on
the display.
Important!
• Note that you cannot make font changes for illustrations.
• Note that non-English characters (Ç, ß, Á, etc.) can be
used with the sans-serif, sans-serif italic, roman, roman
italic and bold script fonts only.
To change the default font setting
1. Press FUNC and then FORM (SET UP) to display the
SET UP menu.
2. Highlight “DEFAULT FONT” and then press SET.
–
TN
O
F
T
L
U
AFE
D
–
FI
R
ES
-
S
N
A
S
LATIFI
R
ES-
SN
AS
N
A
M
O
R
3. Use u and i to highlight the font you want to set as
the default and then press SET.
• Be sure to perform the following procedures after chang-
ing the default font setting. Note that changes in the de-
fault font will not be recognized until the following proce-
dure is performed.
4. Press FUNC and then BS.
5. Select ALL to clear all text from the display.
6. Turn off power, and then restart the Label Printer.
• Note that the default setting remains in effect until you
change it, even when power is turned off.
To change the font for displayed text
1. While there is text on the display, press FONT.
–––––
T
N
O
F
–––––
FI
R
ES
-
S
N
A
S
LATIFI
R
ES-
SN
AS
N
A
M
O
R
2. Use u and i to highlight the font you want to change
to and then press SET.
LLA
KC
O
LB
E
N
IL
–––––
T
N
O
F
–––––
• What you should do next depends on the range you want
to use.
To change the font for all the text
1. After performing the two steps under “To change the font
for displayed text”, use u and i to highlight “ALL” and
then press SET.
2. Press SET to change the font for all the text on the dis-
play.
• At this point, the label printer returns to the text input
screen.
• Pressing ESC returns to the RANGE menu without chang-
ing anything.
To change the font for blocks of text
1. After performing the two steps under “To change the font
for displayed text”, use u and i to highlight “BLOCK”
and then press SET.
ynap
m
oCCBA
–––––
T
N
O
F
–––––
K
C
O
LB?
M
O
R
F
B
L
• See page E-16 for details about how to use blocks.
2. Move the cursor to the start block from which you want
to change the font and then press SET to register your
selection.
ynap
m
oCCBA
–––––
T
N
O
F
–––––
K
C
O
LB?
O
T
B
L
3. Move the cursor to the end block up to which you want to
change the font and then press SET to register your se-
lection and change the font.
• At this point, the label printer returns to the text input
screen.
To change the font for lines of text
1. After performing the two steps under “To change the font
for displayed text”, use u and i to highlight “LINE” and
then press SET.
2. Move the cursor to the start line from which you want to
change the font and then press SET to register your se-
lection.
3. Move the cursor to the end line up to which you want to
change the font and then press SET to register your se-
lection and change the font.
• At this point, the label printer returns to the text input
screen.
To change the font for specific characters
1. After performing the two steps under “To change the font
for displayed text”, use u and i to highlight “CHAR-
ACTER” and then press SET.
2. Move the cursor to the start character from which you
want to change the font and then press SET to register
your selection.
3. Move the cursor to the end character up to which you
want to change the font and then press SET to register
your selection and change the font.
• At this point, the label printer returns to the text input
screen.
To find out current font settings
Use the t and y cursor keys to move the cursor around
the display. The font indicator shows the current font setting
for the character where the cursor is located.
Character Styles
There are five character styles: normal, bold, outline,
shadow, and raised.
The following sections describe how to change the charac-
ter style for displayed text, and how you can find out what
the character style setting is for text on the display.
E-13
To change the character styles
1. While there is text on the display, press STYLE.
–––––
E
LYTS
––––
LA
M
R
O
N
D
L
O
B
E
NI
L
T
U
O
2. Use u and i to highlight the style you want to change
to and then press SET.
–––––
ELYTS
––––
LLA
KC
O
LB
E
N
IL
• What you should do next depends on the range you want
to use.
• The range setting procedures are the same as those for
font range settings.
ALL: See “To change the font for all the text”.
BLOCK: See “To change the font for blocks of text”.
LINE: See “To change the font for lines of text”.
CHARACTER: See “To change the font for specific char-
acters”.
To find out current character style settings
Use the t and y cursor keys to move the cursor around
the display. The character style indicator shows the current
character style setting for the character where the cursor is
located.
Text Effects
You get a choice of three text effects: shading, underline,
and box. Effects can be used in combination with each other
.
Important! The text effects are applied to text on the dis-
play, in addition to the printed text.
About text effect ranges
As with fonts and character styles, you can specify a range
for your text effect specifications. The following shows an
example for each of the ranges available for text effects.
BLOCK
This range specifies application of a text effect for all the
text in a specific block.
ABCD
12345
abc
• See page E-16 for details about how to use blocks.
LINE
This range specifies application of a text effect for all the
text in a specific line.
ABCD
12345
abc
CHARACTER
This range specifies application of a text effect for a spe-
cific character.
ABCD
12345
abc
TEXT
This range is used to specify text across various lines, etc.
• A TEXT range specification must begin and end with in
the same block.
ABCD
12345
abc
To assign text effects
1. While there is text on the display, press EFFECT.
––––
T
C
EFFE
––––
G
N
I
D
A
H
S
E
NI
L
R
E
DNU
X
O
B
2. Use u and i to highlight the effect you want and then
press SET.
––––
T
C
EFFE
––––
K
C
O
LB
E
NI
L
R
ET
C
A
R
A
HC
• What you should do next depends on the range you want
to use.
To change the text effects for blocks of text
1. After performing the two steps under “To assign text ef-
fects”, use u and i to highlight “BLOCK” and then press
SET.
K
C
O
LB?
M
O
R
F
––––
T
C
EFFE
––––
B
L
B
L
54321
D
cba
• See page E-16 for details about how to use blocks.
2. Move the cursor to the start block from which you want
to change the text effect and then press SET to register
your selection.
K
C
O
LB
?
O
T
––––
T
C
EFFE
––––
B
L
B
L
54321
D
cba
3. Move the cursor to the end block up to which you want to
change the text effect and then press SET to register
your selection and change the effect.
• At this point, the label printer returns to the text input
screen.
To change the text effect for lines of text
1. After performing the two steps under “To assign text ef-
fects”, use u and i to highlight “LINE” and then press
SET.
2. Move the cursor to the start line from which you want to
change the text effect and then press SET to register
your selection.
3. Move the cursor to the end line up to which you want to
change the text effect and then press SET to register
your selection and change the text effect.
• At this point, the label printer returns to the text input
screen.
To change the text effect for specific characters
1. After performing the two steps under “To assign text ef-
fects”, use u and i to highlight “CHARACTER” and
then press SET.
2. Move the cursor to the start character from which you
want to change the text effect and then press SET to
register your selection.
3. Move the cursor to the end character up to which you
want to change the text effect and then press SET to
register your selection and change the text effect.
Indicator Meaning Indicator Meaning
Normal Shadow
Bold Raised
Outline
AA
A
A
A
A
A
E-14
• At this point, the label printer returns to the text input
screen.
To change the text effect for a range of text
1. After performing the two steps under “To assign text ef-
fects”, use u and i to highlight “TEXT” and then press
SET.
2. Move the cursor to the start character from which you
want to change the text effect and then press SET to
register your selection.
3. Move the cursor to the end character up to which you
want to change the text effect and then press SET to
register your selection and change the text effect.
• At this point, the label printer returns to the text input
screen.
Part 6 Character Sizes
Your label printer comes with two basic typefaces: standard
and small. You can adjust the size of characters either by
direct specifying for each character or specifying character
size for entire lines of text using preset formats.
The operations in this part of the manual explain how to
change character sizes using each of these techniques.
Direct Specification of Character Sizes
You can specify the size of characters using the numeric
factors shown in the tables below. A character size change
is indicated on the display by a character size indicator.
Standard Typeface
• The normal size for the standard typeface is 1 × 1 (24 ×
24 dots; 3mm × 3mm).
• Character size can be changed by specifying a vertical
factor (1, 2, 3, 4, 5) and a horizontal factor (1, 2, 3, 4, 5, 6,
7).
• The table below shows the character size indicator val-
ues that appear for each character size.
■ Standard Typeface
Important! The vertical character sizes you can use are
automatically limited by the width of the tape loaded in the
label printer.
• The range (From - To settings) for a character size speci-
fication cannot extend from one block to another.
Small Typeface
• The normal size for the small typeface is 1 × 1 (16 × 16
dots; 2mm × 2mm). 8 × 16 dots matrix is used to form
alpha-numeric characters and symbols.
• Character size can be changed by specifying a vertical
factor (1, 2, 3, 4) and a horizontal factor (1, 2, 3, 4, 5, 6, 7,
8).
• The table below shows the character size indicator val-
ues that appear for each character size.
• The character size indicator 1 × 1 is shown on the display
when the small typeface is being used.
■ Small Typeface
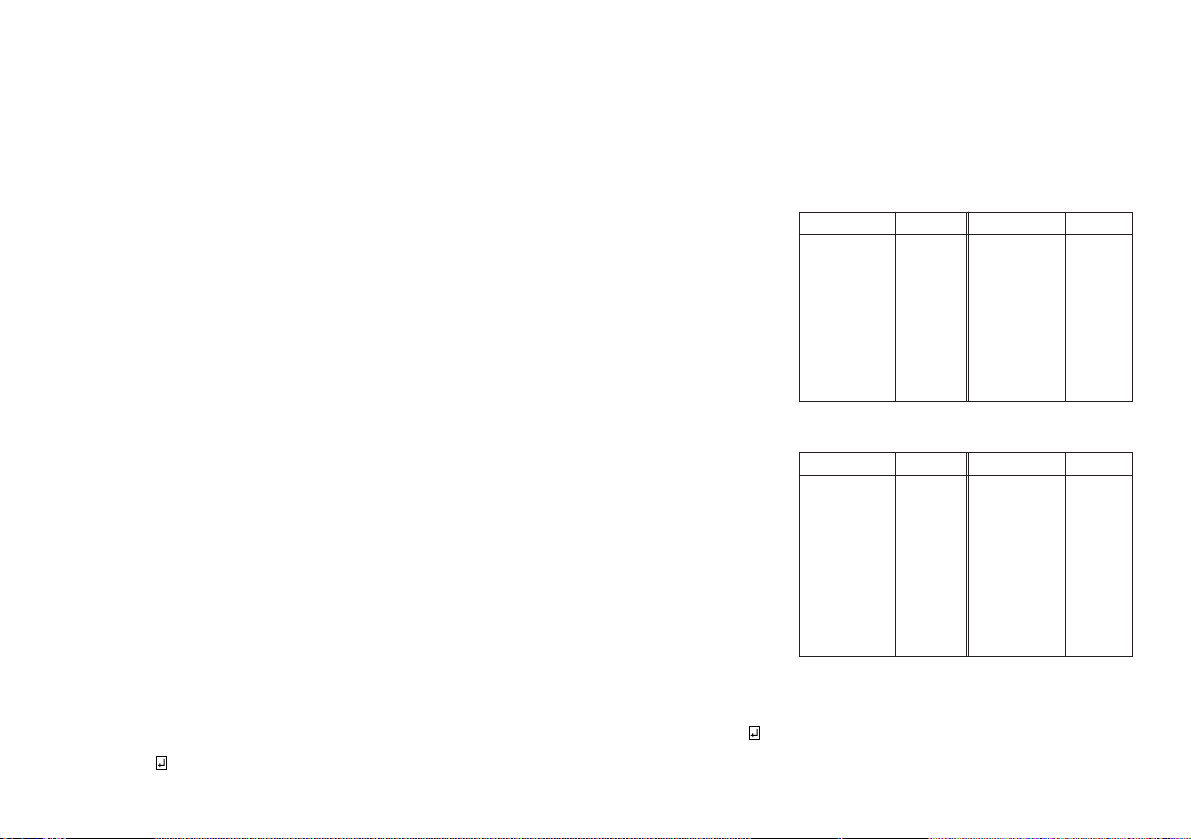
Tape Width VerticaI Character Sizes
6mm 1
9mm 1, 2
12mm 1, 2, 3
18mm 1, 2, 3, 4, 5
24mm 1, 2, 3, 4, 5
Horizontal
Vertical
Factor
12345678
11 × 11 × 21 × 31 × 41 × 51 × 61 × 71 × 8
22 × 12 × 22 × 32 × 42 × 52 × 62 × 72 × 8
33 × 13 × 23 × 33 × 43 × 53 × 63 × 73 × 8
44 × 14 × 24 × 34 × 44 × 54 × 64 × 74 × 8
Tape Width VerticaI Character Sizes
6mm 1
9mm 1, 2
12mm 1, 2, 3
18mm 1, 2, 3, 4
24mm 1, 2, 3, 4
Horizontal
Vertical
Factor
12345678
11 × 11 × 21 × 31 × 41 × 51 × 61 × 71 × 8
22 × 12 × 22 × 32 × 42 × 52 × 62 × 72 × 8
33 × 13 × 23 × 33 × 43 × 53 × 63 × 73 × 8
44 × 14 × 24 × 34 × 44 × 54 × 64 × 74 × 8
55 × 15 × 25 × 35 × 45 × 55 × 65 × 75 × 8
• The range (From - To settings) for a character size speci-
fication cannot extend from one block to another.
Notes
• Proportional spacing cannot be used with the small
typeface.
• Available font is only one.
• Style and text effect settings may not print correctly when
used with the small typeface.
• Dingbats and user characters may not print correctly when
used with small typeface.
To change character size using direct
specification
1. While there is text on the display, press SIZE.
–––––
EZIS
–––––
EZIS
TA
M
R
O
F
2. Use u and i to highlight “SIZE” and then press SET.
–––––
EZIS
–––––
H
T
D
I
W
T
H
G
IE
H
4 × 4
3. Specify the character size you want.
• Use t and y to move the highlighting between the two
dimensions.
• To change a dimension, press i to increase it or u to
decrease it. Or you can input a value directly on the label
printer’s keyboard.
• Remember that the dimensions you can specify depend
on the width of the tape loaded in the label printer (see
table, left).
4. After you finish setting the character size you want, press
SET to register it.
5
4
321
–––––
EZIS
–––––
?
M
O
R
F
E-15
5. Move the cursor to the start character from which you
want to change the character size and then press SET
to register your selection.
5
4
21
–––––
EZIS
–––––
?
O
T
3
6. Move the cursor to the end character up to which you
want to change the character size and then press SET
to register your selection and change the character size.
• At this point, the label printer returns to the text input
screen.
The following shows a character size mark.
54321
AS
N
AS
m
c5.63×3
3× 3
FIT
a
Specifying Character Sizes for Lines of
Text Using Preset Formats
With this method, you input the text you want and then use
preset formats to specify the character size for each line of
text. Note that character size marks do not appear inside of
text when you specify character sizes using this method. In-
stead, the character size display mark shows the size of the
characters where the cursor is currently located.
About the format menu
The format that appears in the following procedure uses
symbols to indicate character sizes in each line of text. The
formats that appear depend on the width of the tape loaded
in the label printer and the number of lines in the block of
text where the cursor is located when you press the SIZE
key. The following shows all of the formats available for each
tape width and the number of lines of text.
• Note that with the preset formats, all character sizes have
the same vertical and horizontal measurements.
24mm and 18mm tape, 1 line of text
1 × 1
2 × 2 3 × 3
4 × 4 5 × 5
3. Use u, i, t and y to move the highlighting to the
format that you want to use and then press SET to select
it.
• At this point, the label printer returns to the text input
screen.
To find out preset format character sizes
Use the t and y cursor keys to move the cursor around
the display. The character size indicator shows the current
size setting for the character where the cursor is located.
About Auto Sizing
If you do not specify a character size, the label printer auto-
matically selects the optimum size in accordance with the
width of the tape you are using. If you are using frames
(page E-19), characters are automatically balanced with the
type of frame being used.
The following are examples of how auto sizing works.
Important! Remember that changing the tape cartridge may
make it impossible to print text if there are too many lines.
Note the following relationships between tape width and the
number of text lines.
24mm and 18mm tape, 2 lines of text
1 × 1/1 × 1
1 × 1/2 × 2
2 × 2/1 × 1 2 × 2/2 × 2
1 × 1/3 × 3 3 × 3/1 × 1
24mm and 18mm tape, 3 lines of text
1 × 1/1 × 1/1 × 1
1 × 1/1 × 1/2 × 2
1 × 1/2 × 2/1 × 1 2 × 2/1 × 1/1 × 1
12mm tape, 1 line of text
1 × 1 2 × 2 3 × 3
9mm tape, 1 line of text
1 × 1
2 × 2
Important! You can use preset formats to specify charac-
ter sizes for lines of text only when there is no character
size specification already made inside of the text. If you press
the SIZE key while the cursor is located inside of a block
that already contains a character size indicator, the FOR-
MAT item will be dimmed on the SIZE menu, which means
it cannot be selected.
To specify character sizes for lines of text
using preset formats
1. While the cursor is located inside of the block of text where
you want to use the preset formats, press SIZE.
–––––
EZIS
–––––
EZIS
TA
M
R
O
F
• See page E-16 for details about blocks.
2. Use u and i to highlight “FORMAT” and then press
SET.
–––––
EZIS
–––––
–
TA
M
R
O
F
–
• The FORMAT menu appears with all of the preset for-
mats that are available in accordance with the number
of text lines there are in the block where you located the
cursor, and with the width of the tape loaded in the label
printer.
Auto Fit
1 × 1 (Manual Setting)
Tape
width
6mm
9mm
12mm
18mm
24mm
Character size mark
E-16
B
L
e
t
up
m
oCCBA
AS
N
AS
2
2
m
c4.04×4
a
• If you wanted to break the text up into three blocks, you
would input another block mark.
To delete a block mark
To delete a block mark, use the procedures for BS and DEL
as described under “Deleting Individual Characters” (page
E-11).
Block Operations
The procedures in this section can be used to control the
following parameters for each block.
• Direction (vertical, horizontal)
• Alignment (left, center, right, uniform spacing)
• Justification (justify, ragged)
• Character pitch (none, narrow, medium, wide)
• Block length (auto, fixed)
Use the BLOCK FORM menu to perform block operations.
To display the BLOCK FORM menu
1. While there is text on the display, press FORM.
–––––
M
R
O
F
–––––
M
R
O
F
KC
O
L
B
M
R
O
FLLA
2. Use u and i to move the highlighting to “BLOCK
FORM” and then press SET.
––
M
R
O
FK
C
O
LB
––
–
E
G
N
A
R
–
K
C
O
LBE
N
O
SK
C
O
LBLLA
3. Specify whether you want your specifications to apply to
one block or all blocks and then press SET.
• If you specify one block, the specifications you make will
be applied to the block where the cursor was located when
you pressed FORM.
––
M
R
O
FK
C
O
LB
––
Z
R
O
HN
O
IT
C
E
R
I
D
TFEL
N
G
ILA
YFITS
U
JYFITS
U
J
• Use u and i to move the highlighting between menu
items.
(See page E-19)
Part 7 FORM Menu Functions
This part of the manual describes how to use the FORM menu
to layout your text exactly the way you want it on the label.
With the FORM menu, you can control character pitch, text
blocks, text alignment, and a wide range of other features.
Fundamentals of Label Layout
Before we actually begin our discussion about how to lay-
out a tape, we should first define a few terms. Note the fol-
lowing.
Blocks
A block is text that is enclosed between two block marks ( ).
Note that the first (far left) block does not require a block
mark at the beginning, and the last (far right) block does not
require a block mark at the end. If there are no block marks,
all of the text is treated as a single block. You can individually
specify the length of each block, as well as the pitch and the
number of lines of inside each block.
Print Area
The print area is the actual area of a label that contains
printed text. It starts with the left side of the first character
printed, and ends with right side of the last character printed.
Side Spaces
The side spaces are blank areas that the Label Printer au-
tomatically adds on either end of the print area. Note that
side spaces are only added when you are using auto feed,
and they are not added when using manual feed.
Auto Feed (with side spaces)
24mm
18mm
12mm
9mm
6mm
1 line
1 line
1 line
1 line
–
6 lines max.
6 lines max.
3 lines max.
3 lines max.
1 line max.
8 lines max.
8 lines max.
5 lines max.
4 lines max.
2 lines max.
Tape Width Plain Text Print Area Frame Character Frame
Manual Feed (no side spaces)
Label Length
The label length is the print area, plus the side spaces.
Settings you make for side spaces, block spacing, and mir-
ror printing affect the entire label length.
Using the Layout Display
You can check the layout of your label at any time using the
layout display. The layout display shows all of the graphics
and text elements that make up your label to give you a
general idea of how the label is laid out.
To show the layout display
1. After laying out the label you plan to print, press
LAYOUT.
m
c6.9
→
L1
2. If the label layout is too big to fit on a single display, use t
and y to scroll it.
• Pressing t returns to the top of the layout.
3. Press ESC to quit the layout display.
• You can view the actual appearance of the label using the
image display, which is described on page E-19.
Creating and Deleting Blocks
The following procedures describe how to create and de-
lete blocks. Later you will learn how can change certain
settings on a block-by-block basis.
To create a block
Example: To input the text “ABC Computer Company” and
create two blocks: “ABC” and “Computer Com-
pany”.
1. Input the text.
2. Move the cursor to the space between “ABC” and “Com-
puter Company”.
3. Press BLOCK.
Screen number
(when the entire
layout does not fit on
a single screen)
Feed setting (E-18)
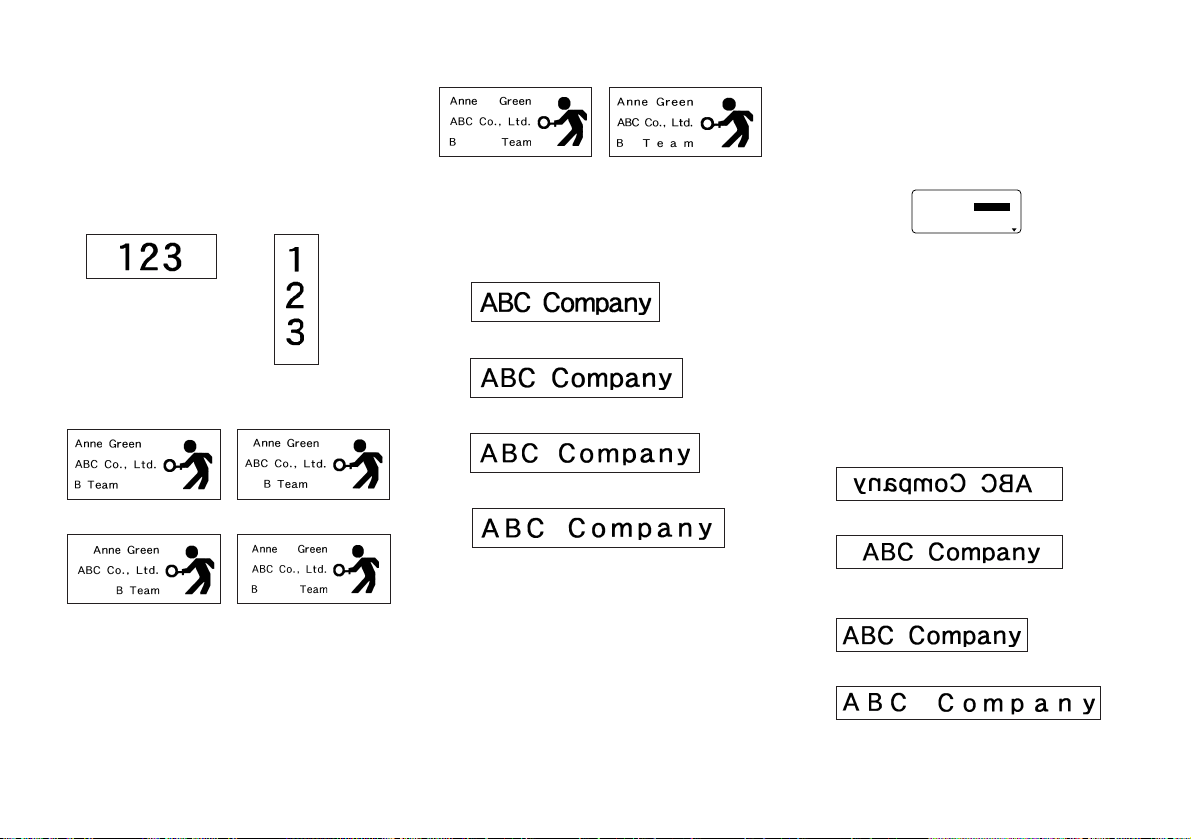
E-17
Examples
• Justified • Ragged
CHARACTER PITCH
This is the relative spacing between characters. You can
specify character pitch as NONE, NARROW, MEDIUM or
WIDE. The following shows examples of each character
pitch setting.
NONE
NARROW
MEDIUM
WIDE
BLOCK LENGTH
Select “FIX” if you want so specify a fixed block length in
the range of 0.0 cm to 99.9 cm. Specify “AUTO” for this
option if you want the label printer to automatically adjust
the length of the block.
All Text Operations
The procedures in this section control the following param-
eters for all of the text on the display.
• Mirror printing (mirror, normal)
• Proportional character spacing (on, off)
• Smoothing (on, off)
• Block space (none, narrow, wide)
• Feed (long, short, manual)
• Tape length (auto, fixed)
• Block alignment (left, center, right, uniform spacing)
Use the BLOCK FORM menu to perform block operations.
To display the ALL FORM menu
1. While there is text on the display, press FORM.
2. Use u and i to move the highlighting to “ALL FORM”
and then press SET.
––––––
LLA
–––––
LA
M
R
O
NR
O
RR
I
M
N
O
LA
N
O
IT
R
O
P
O
R
P
N
OG
N
I
H
T
OO
M
S
• Use u and i to move the highlighting between menu
items.
• The ALL FORM menu has three pages. Press SET while
the first page is displayed to change to the second page.
Press SET while the second page is displayed to change
to the third page. Pressing SET while the third page is
displayed registers any settings with the menu and re-
turns to the text input screen.
• Use t and y to change between settings of the currently
selected (highlighted) item.
• The following explanations describe each of the ALL
FORM menu items in detail.
MIRROR/NORMAL
MIRROR
NORMAL
PROPORTIONAL
ON
OFF
• The BLOCK FORM menu has two pages. Press SET while
the first page is displayed to change to the second page.
Pressing SET while the second page is displayed regis-
ters any settings with the menu and returns to the text
input screen.
• Use t and y to change between settings of the currently
selected (highlighted) item.
• The following explanations describe each of the BLOCK
FORM menu items in detail.
DIRECTION
HORIZONTAL VERTICAL
ALIGNMENT
LEFT CENTER
RIGHT EQUAL (Uniform Spacing)
JUSTIFICATION
This item lets you specify justified (even) or ragged (un-
even). The following shows some examples of how justifi-
cation affects text.
• Justification is applied only when EQUAL is selected for
ALIGNMENT.
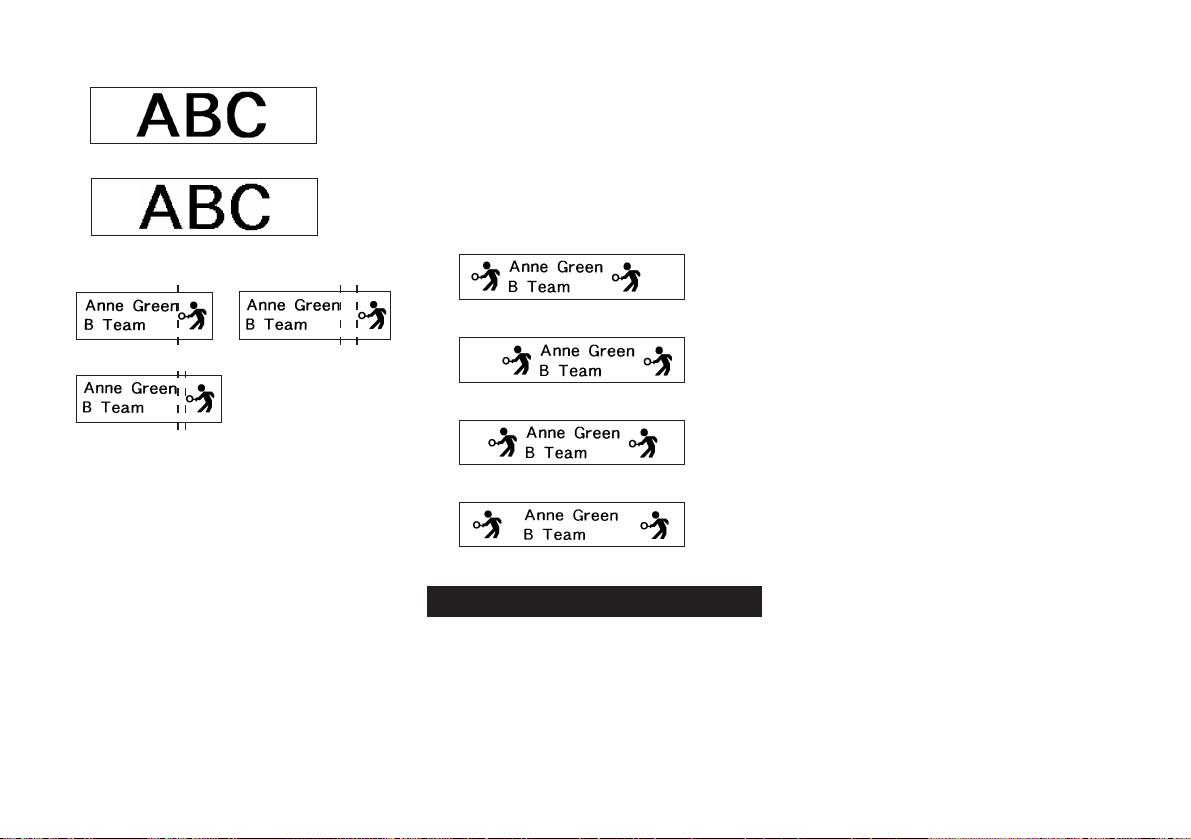
E-18
SMOOTHING
ON
OFF
BLOCK SPACE
NONE WIDE
NARROW
FEED
You can also one of two different feed settings that provides
either long or short side spaces (“Fundamentals of Label
Layout” page E-16). You can also specify manual feed.
LONG
This setting causes the tape to feed 16mm at the be-
ginning and end of each printing.
SHORT
This setting causes the tape to feed 3mm at the begin-
ning and end of each printing.
MANUAL
This setting provides side spaces of only 1mm of the
printed text. If you perform two consecutive print op-
erations (without manually feeding between prints), the
last character of the first print operation is followed by
the first character of the second print operation, with
no space provided between them. It is a good way to
save tape when you print a series of tapes.
Important! After you finish printing when using manual feed,
be sure to always press FUNC and then FEED to feed the
tape before cutting it. If you don’t you will cut off part of the
printed text.
TAPE LENGTH
Select “FIX” if you want so specify a fixed tape length in the
range of 0.0 cm to 99.9 cm. Specify “AUTO” for this option if
you want the label printer to automatically adjust the length
of the tape.
BLOCK ALIGN
LEFT
RIGHT
CENTER
EQUAL
Part 8 Printing
This part of the manual includes all the information you need
to print tapes.
Note The following information covers basic printing pro-
cedures only. Other printing related information can be found
in the sections of this manual describing presets (page
E-19), stamp printing (page E-22), frames (page E-19), and
memory operations (page E-23).
Printing Precautions
• Never turn power off while printing is being performed.
• Make sure that the tape outlet is not blocked before you
start printing.
• Never operate the tape cutter while printer is being per-
formed (indicated by the message “NOW PRINTING” on
the display).
• During printing at very high density, printing of very long
text, or repeat printing of the same text a number of times,
the label printer may stop printing for about five seconds.
This is not a malfunction, and normal printing should
resume shortly.
Printing a Tape
Printing a tape is as easy as pressing the PRINT key.
To print a tape
1. Press the PRINT key to print a tape of the text you have
input and laid out.
• To stop a print operation that is in progress, press ESC.
• You can add extra margin to the beginning of the tape by
pressing FUNC and then FEED before starting the print
operation.
2. After the print operation is complete, press the tape cut-
ter lever to cut the tape.
• Make sure you press the tape cutter lever as far as it will
go, but do not apply excessive force.
3. Use scissors to trim the tape to the size you want, if nec-
essary.
• After you print a tape, you can peel off its paper backing
and stick the tape onto the object you want. Note that the
tape will not stick on coarse, wet, oily, or soiled surfaces.
Also, you should not try to use the tape where it is ex-
posed to direct sunlight or rain. Do not stick the tape onto
human skin.
• An easy way to remove the backing from a tape and ex-
pose the adhesive surface is to bend the tape near one of
its ends. This should cause the tape and its backing to
separate, allowing you to pull them apart.
To adjust the print density
1. Turn power on.
2. Press FUNC and then FORM (SET UP) to display the
SET UP menu.
E-19
3. Use u and i to highlight “DENSITY”, and then press
SET.
––––
YTIS
N
E
D
–––
><
K
R
A
D
T
H
G
IL
54321
4. Use t and y to highlight the density you want to use
and then press SET to apply the setting and return to the
text input screen.
• The higher the number you select, the darker the charac-
ters that are printed.
Using the Image Display
The image display lets you view a realistic image of exactly
what your tape will look like before you print it.
To show the image display
1. After laying out the label you plan to print, press IMAGE.
ABC
• The image on the display scrolls from right to left.
2. To stop the image from scrolling and freeze the current
contents on the display, press SET.
3. Press SET again to resume scrolling.
4. Press ESC to quit the image display.
• Labels that contain very thin lines or a large number of
characters may not appear normally on the image display.
The appearance of the message “REPLACE BATTER-
IES!” or “LOW BATTERY!” indicates that battery power
is low. Whenever either of these messages appears,
replace all the batteries with a full set of new ones as
soon as possible. Continued use of the label printer
while battery power is low can result in sudden power
failure during operation or printing.
1. Input the text you want to frame.
2. Press FRAME.
3. Use u and i to move the highlighting to “EACH CHAR-
ACTER” and press SET.
1ET
C
A
R
A
HCHC
AE
–
4. Use u, i, t and y to move the highlighting to the
frame you want to use and press SET.
• See page E-25 for a complete list of the EACH CHARAC-
TER frames that are available.
5. Press SET to print your text with the selected frame or
ESC to abort the print operation without printing anything.
Important! Printing cannot be performed on 6mm tape
while EACH CHARACTER frames are being used.
Part 10 PRESETS Menu Functions
This part of the manual describes how to use the PRESETS
menu to access a variety of different built-in functions that
make label creation quicker and easier.
To display the PRESETS menu
1. Press PRESETS.
• Note that PRESETS menu functions are normally used
when there is no text on the input screen. If there is text
on the screen when you press PRESETS, the message
“CLEARS INPUT TEXT!” appears on the screen. You can
proceed with the operation (and clear the text) by press-
ing SET, or press ESC to abort without clearing anything.
2. Use u and i to move the highlighting to the preset you
want to select and then press SET.
LAYOUT
The preset layouts provide a total of 74 label templates that
you can use to create attractive labels quickly and easily.
Each template is made up of “elements” whose contents
you can use as they are or change to something else. You
can even store completed labels in memory for instant re-
call when you need them.
• Note that 6mm wide tape cannot be used for printing a
preset layout.
Part 9 Frames
The frame feature makes it easy to add attractive ornamen-
tal frames to your text. You get a choice of two types of
frames.
Frame around the printing area
Frames around each character
To specify a frame around the printing
area
1. Input the text you want to frame.
2. Press FRAME.
–––––
E
M
A
R
F
––––
TXETLLA
R
ET
C
A
R
A
HCHC
AE
3. Use u and i to move the highlighting to “ALL TEXT”
and press SET.
–
TXETLLA
– 1
4. Use u, i, t and y to move the highlighting to the
frame you want to use and press SET.
–––––
E
M
A
R
F
––––
C
SE
/
TES?T
N
I
R
P
m
c7.7
H
T
G
N
EL
• See page E-25 for a complete list of the ALL TEXT frames
that are available.
5. Press SET to print your text with the selected frame or
ESC to abort the print operation without printing anything.
To specify frames around each character
Note
Five kinds of flames are available when 6mm tape is loaded
in the label printer.

E-20
To use a preset layout to create a label and
print it
1. While the PRESETS menu is on the display, use u and
i to move the highlighting to “LAYOUT” and then press
SET.
––––
T
U
O
YAL
––––
W
E
N
LLA
C
E
R
ETELE
D
2. Use u and i to move the highlighting to “NEW” and
then press SET.
––––
T
U
O
YAL
––––
O
E
D
IV
O
I
DU
A
ELIF
3. Use u and i to move the highlighting to “VIDEO” and
then press SET.
–––––––––
O
E
D
IV
S
H
V
C
–
S
H
V
mm
8
• Note that you can also recall an existing label.
4. Use u and i to move the highlighting to “VHS” and
then press SET.
4321
5. Use t and y to move the highlighting to the number of
the layout you want to use (1, 2, 3, 4) and then press SET.
AS
N
ASa
ELTIT
• Note that some blocks already contain characters. You
can use the characters as they are or replace them with
new ones.
6. Input the text you want to include in each element, and
then press SET to advance to the next element.
• To use a character already in an element without chang-
ing it, press SET to advance to the next element. To leave
an element blank, press SET without inputting anything.
• When you press SET after inputting text for the last ele-
ment, the menu shown here appears.
––––
T
U
O
YAL
––––
N
O
X
O
B
Z
R
O
HN
O
IT
C
E
R
I
D
LA
M
R
O
NR
O
RR
I
M
7. Specify box on/off, the print direction (page E-17), and
either mirror or normal printing (page E-17).
• Use u and i to move the highlighting between items,
and t and y to change each setting.
• Turning on “BOX” causes the layout to be enclosed in a
box when it is printed.
8. After making the settings you want, press SET.
––––
T
U
O
YAL
––––
T
N
I
R
P
E
R
O
T
S
TIXE
9. Use u and i to move the highlighting to “PRINT” and
then press SET to execute it.
• The message “CUT THEN [SET]!” appears on the screen.
Operate the tape cut lever to cut off any excess tape.
10. Press SET.
• After printing is complete, operate the tape cut lever to
cut the tape.
11. Use u and i to move the highlighting to “EXIT” and
then press SET.
––––
T
U
O
YAL
––––
C
SE/TES?TIXE
12.Press SET to end the operation.
To store a label created using a preset layout
1. Perform steps 1 through 8 under “To use a preset layout
to create a label and print it” to create the label.
2. Use u and i to move the highlighting to “STORE” and
then press SET.
a
?E
M
A
N
3. Input up to five characters for the name of the label, and
then press SET.
C
SE
/
TES?E
R
O
TS
%
0Y
R
O
M
E
M
D
ES
U
––––
T
U
O
YAL
––––
4. Press SET to store the label or ESC to abort the opera-
tion without storing anything.
5. Use u and i to move the highlighting to “EXIT” and
then press SET.
6. Press SET to end the operation.
To recall a preset layout label from memory
1. While the LAYOUT menu is on the display, use u and i
to move the highlighting to “RECALL” and then press SET.
2. Use u and i to display the name of the label you want,
and then press SET to recall it.
3. Now you can make any changes in the label contents
and then print it, or simply print the label without making
any changes.
• To make changes in the label contents, use the proce-
dures starting from step 8 under “To use a preset layout
to create a label and print it”.
• To print the label without making any changes, perform
the procedure starting from step 6 under “To use a preset
layout to create a label and print it”.
To delete a preset layout label from memory
1. While the LAYOUT menu is on the display, use u and i
to move the highlighting to “DELETE” and then press SET.
1S
H
V
1
ytraP
L
DEL
2. Use u and i to display the name of the label you want,
and then press SET to delete it.
3. Press SET to delete the label.
ENLARGE
This item lets you print up to 16 characters on multiple tapes.
You can then assemble the tapes into an enlarged label.
Note that this item is available only when 12, 18, or 24mm
tape is loaded in the label printer. See page E-26 for impor-
tant information about character sizes and tape width when
using the various setting of this item.
• 12mm tape cannot be used for printing a tape enlarged
using the “4 PIECES LARGE” setting.
To print a large-size label
1. While the PRESETS menu is on the display, use u and
i to move the highlighting to “ENLARGED” and then
press SET.
–––
D
E
G
R
AL
N
E
–––
SE
C
EIP2
SE
C
EIP3
SE
C
EIP4

E-21
2. Use u and i to move the highlighting to the enlarge-
ment size you want to use and then press SET.
AS
N
ASa
D
E
G
R
AL
N
E
3. Input up to 16 characters of text, and then press SET.
4. Specify the print direction (page E-17) and either mirror
or normal printing (page E-17).
• Use u and i to move the highlighting between items,
and t and y to change each setting.
5. After making the settings you want, press SET.
–––
D
E
G
R
AL
N
E
–––
T
N
I
R
P
TIXE
m
c3.82
H
T
G
N
EL
6. Use u and i to move the highlighting to “PRINT” and
then press SET to execute it.
7. Use u and i to move the highlighting to “EXIT” and
then press SET.
8. Press SET to end the operation.
BAR CODE
With this item, you can print any one of seven different types
of bar codes: EAN-13, EAN-8, UPC-A, UPC-E, ITF,
CODE39, CODABAR.
Important! The procedure you use to print a bar code de-
pends on the type of bar code you select.
Bar Code Tape
Only the following types of tape should be used for printing
bar codes.
• Black on white tape (WE)
• Blue on white tape (WEB)
• Black on yellow tape (YW)
Important!
• You cannot use 6mm tape to print bar codes.
• You can input up to 60 characters as comment text when
using 18mm/24mm tape. You cannot input comment text
with 9mm and 12mm tape (the comment input screen will
not appear). If you do not want to input comment text,
press SET without inputting anything.
• Always test bar codes produced using this label printer
before actually using them. If bar codes cannot be read
properly, try adjusting the print density (page E-18) or us-
ing a larger character size.
EAN-13, EAN-8, UPC-A, UPC-E
The following applies to EAN-13, EAN-8, UPC-A, and UPC-
E bar codes.
To print a bar code
1. While the PRESETS menu is on the display, use u and
i to move the highlighting to “BAR CODE” and then
press SET.
2. Use u and i to move the highlighting to “NEW” and
then press SET.
–––
E
D
O
CR
AB
–––
31
–
N
AE
8
–
N
AE
A
–
C
P
U
3. Use u and i to move the highlighting to the type of bar
code you want to print and then press SET.
AS
N
ASa
T
N
E
MM
O
C
• This display appears only if you are using 18mm/24mm
tape. If you are using different tape, skip to step 5.
4. Input up to 60 characters of comment text if you want,
and then press SET.
5. Input the bar code’s data and then press SET.
6. Use u and i to move the highlighting to the size you
want to use and then press SET.
–––
E
D
O
CR
AB
–––
T
N
I
R
P
E
R
O
TS
TIXE
7. Use u and i to move the highlighting to “PRINT” and
then press SET to execute it.
8. Use u and i to move the highlighting to “EXIT” and
then press SET.
9. Press SET to end the operation.
ITF, CODE39, CODABAR
The following applies to ITF, CODE39 and CODABAR bar
codes.
To print a bar code
1. While the PRESETS menu is on the display, use u and
i to move the highlighting to “BAR CODE” and then
press SET.
2. Use u and i to move the highlighting to “NEW” and
then press SET.
3. Use u and i to move the highlighting to the type of bar
code you want to print and then press SET.
–––
E
D
O
CR
AB
–––
–
TI
G
I
D
K
C
E
HC
–
S
EY
O
N
4. Use u and i to select “YES” (use check digit) or “NO”
(do not use check digit) and then press SET.
• This display appears only if you are using 18mm/24mm
tape. If you are using different tape, skip to step 6.
5. Input up to 60 characters of comment text if you want,
and then press SET.
6. Input the bar code’s data and then press SET.
7. Perform steps 6 through 9 under “To print a bar code” of
“EAN-13, EAN-8, UPC-A, UPC-E”.
General Bar code Operations
The following procedures apply to all bar code types.
To store a bar code
1. Perform the required steps to create the bar code so the
following is on the screen.
2. Use u and i to move the highlighting to “STORE” and
then press SET.
3. Input up to five characters for the name of the bar code,
and then press SET.
4. Press SET to store the bar code or ESC to abort the
operation without storing anything.
5. Use u and i to move the highlighting to “EXIT” and
then press SET.
6. Press SET to end the operation.
To recall a bar code from memory
1. While the BAR CODE menu is on the display, use u
and i to move the highlighting to “RECALL” and then
press SET.
2. Use u and i to display the name of the bar code you
want, and then press SET to recall it.
3. Now you can make changes in the bar code and print it
or store it as a new bar code.
To delete a bar code from memory
1. While the BAR CODE menu is on the display, use u
and i to move the highlighting to “DELETE” and then
press SET.
E-22
2. Use u and i to display the name of the bar code you
want, and then press SET to delete it.
3. Press SET to delete the bar code.
NUMBERING
This label printer gives you a choice of four different number-
ing formats that you can use to print sequentially numbered
labels from 0 to 999.
Formats
1
: Number followed by up to 220
characters of text.
2
: Number preceded by up to 220
characters of text.
3
: Number with up to 110 charac-
ters of text on either side.
4
: Number only.
To print sequentially numbered labels
1. While the PRESETS menu is on the display, use u and
i to move the highlighting to “NUMBERING” and then
press SET.
–––
G
N
I
R
EB
M
UN
––
W
E
N
LLA
C
E
R
ETELE
D
2. Use u and i to move the highlighting to “NEW” and
press SET.
4321
3. Use t and y to move the highlighting to the number of
the format you want and then press SET.
A
NAS
a
S
R
EB
M
UN
1
4. Input the starting number of the numbering sequence
and then press SET.
S
N
AS
T
N
E
MM
O
C
a
A
3. Now you can make changes in the numbering format
and print it or store it as a new format.
To delete a numbering format from memory
1. While the NUMBERING menu is on the display, use u
and i to move the highlighting to “DELETE” and then
press SET.
2. Use u and i to display the name of the numbering
format you want, and then press SET to delete it.
3. Press SET to delete the numbering format.
PHRASES
A collection of preset English phrases can be recalled quickly
and easily when you need them. See page E-26 for a com-
plete list of the preset phrases that are available.
To print a preset phrase
1. While the PRESETS menu is on the display, use u and
i to move the highlighting to “PHRASES” and then press
SET.
––––
SESA
RH
P
–––
N
IA
G
R
A
B
DN
E
B
T
O
N
O
D
ETA
C
ILP
UD
2. Use u and i to scroll through the preset phrases until
the one you want is highlighted and then press SET.
3. Use u and i to highlight “PRINT”, then press SET to
print the phrase.
4. Use u and i to move the highlighting to “EXIT” and
then press SET to end the operation.
Part 11 Stamp Printing
The stamp printing feature lets you create your own stamps
using a selection of various formats. Then you can print on
special stamp tape and attach the finished tape to an op-
tionally available stamp holder.
When using the ST-15 stamp holder, select NL (10 × 55mm)
as the stamp holder type in step 3 of the procedure de-
scribed below.
Important! Note that an optional special stamp tape car-
tridge and stamp tape holder is required in order to create a
pre-inked stamp. Contact your dealer to purchase the nec-
essary tape and holder. Load the special stamp tape before
performing the following procedure.
5. Input any comment text you want and then press SET.
–––
G
N
I
R
EB
M
UN
––
Z
R
O
HN
O
IT
C
E
R
I
D
LA
M
R
O
NR
O
RR
I
M
• You can also specify the font, character style, and text
effects if you want.
6. Specify the print direction (page E-17) and either mirror
or normal printing (page E-17).
• Use u and i to move the highlighting between items,
and t and y to change each setting.
7. After making the settings you want, press SET.
8. Use u and i to move the highlighting to “PRINT” and
then press SET to execute it.
• The label printer prints a tape with the number and com-
ment text, and then displays the screen shown in step 3,
with the number incremented by one.
9. Repeat steps 4 through 7 to print as many sequentially
numbered labels as you want.
10.To quit the numbered label operation, press ESC and
then SET.
To store a numbering format
1. Perform steps 1 to 7 to create the numbering format so
the following is on the screen.
–––
G
N
I
R
EB
M
UN
––
T
N
I
R
P
E
R
O
TS
TIXE
2. Use u and i to move the highlighting to “STORE” and
then press SET.
3. Input up to five characters for the name of the number-
ing format, and then press SET.
4. Press SET to store the numbering format or ESC to abort
the operation without storing anything.
5. Use u and i to move the highlighting to “EXIT” and
then press SET.
6. Press SET to end the operation.
To recall a numbering format from memory
1. While the NUMBERING menu is on the display, use u
and i to move the highlighting to “RECALL” and then
press SET.
2. Use u and i to display the name of the numbering
format you want, and then press SET to recall it.
E-23
To create a new stamp label
1. Press STAMP.
–––––
P
M
ATS
––––
W
E
N
LLA
C
E
R
ETELE
D
2. Use u and i to move the highlighting to “NEW” and
then press SET.
–––––
P
M
ATS
––––
)
mm
02×01
(
S
N
)
mm
55×01
(
L
N
)
mm
23×61
(
S
W
3. Use u and i to move the highlighting to the stamp
holder model that you will be using with your stamp tape
and then press SET.
G
N
O
L
E
R
A
U
Q
S
DNU
O
R
––
)
mm
02×01
(
S
N
–
4. Select the type of frame you want to use and press SET.
21
• The number of layouts that appear on the right display
depends on the type of stamp holder you are using.
5. Use t and y to select the layout that you want to use
and then press SET.
S
N
AS
M
ETI
a
A
6. Input the text you want to include in each block, and then
press SET to advance to the next block.
• To leave a block blank, press SET without inputting any-
thing.
• When you press SET after inputting the text for the last
block, the following menu appears.
–––––
P
M
ATS
––––
–
X
O
B
–
FF
O
7. Use u, i, t and y to select a box type and then press
SET.
–––––
P
M
ATS
––––
Z
R
O
HN
O
IT
C
E
R
I
D
P
M
ATSES
U
• If you select “ROUND”, proceed immediately to step 8.
• If you select “LONG FRAME”, you will then have to select
a specific frame type before to proceed to step 8.
8. Use u and i to move the highlighting and use t and
y to specify the setting and then press SET.
–––––
P
M
ATS
––––
T
N
I
R
P
E
R
O
TS
T
IXE
9. Use u and i to move the highlighting to “PRINT” and
then press SET to execute it.
• After printing is complete, operate the tape cut lever to
cut the tape.
10.Use u and i to move the highlighting to “EXIT” and
then press SET.
11. Press SET to end the operation.
To store a stamp label
1. Perform steps 1 through 9 under “To create a new stamp
label” to create the label.
2. Use u and i to move the highlighting to “STORE” and
then press SET.
3. Input up to five characters for the name of the label, and
then press SET.
4. Press SET to store the label or ESC to abort the opera-
tion without storing anything.
5. Use u and i to move the highlighting to “EXIT” and
then press SET.
6. Press SET to end the operation.
To recall a stamp label from memory
1. While the STAMP menu is on the display, use u and i
to move the highlighting to “RECALL” and then press
SET.
2. Use u and i to display the name of the label you want,
and then press SET to recall it.
3. Press SET. Now you can make any changes in the label
contents and then print it, or simply print the label with-
out making any changes.
• To make changes in the label contents, use the proce-
dures starting from step 6 under “To create a new stamp
label”.
• To print the label without making any changes, perform
the procedures starting from step 6 without in putting any
characters.
To delete a stamp label from memory
1. While the STAMP menu is on the display, use u and i
to move the highlighting to “DELETE” and then press
SET.
2. Use u and i to display the name of the label you want,
and then press SET to delete it.
3. Press SET to delete the label.
•
There are two stamp tape sizes: 18mm and 24mm. There
are also four types of stamp holders: large and small for
24mm tape, and large and small for 18mm tape. Note
that certain stamp tape and stamp holders may not be
available in some areas.
Part 12 Memory
This part of the manual tells you how to store text data in
memory for instant recall when you need it. You can store
up to 2,500 characters in memory.
To store data
1. Input the text you want to store, and then press MEMORY.
––––
Y
R
O
M
E
M
––––
E
R
O
TS
LLA
C
E
R
ETELE
D
2. Use u and i to move the highlighting to “STORE” and
then press SET.
3. Press SET to store the text in memory or ESC to abort
the store procedure without storing anything.
Recalling Text From Memory
There are two methods you can use to recall text: sequen-
tial search and character search. With sequential search,
you scroll through memory contents until you find what you
want. With character search, you input up to eight charac-
ters and the label printer searches through its memory to
find them for you.
To recall memory text using sequential search
1. Press MEMORY.
18mm Tape
24mm Tape
WL (16 × 70 mm)
E-24
2. Use u and i to move the highlighting to “RECALL”
and then press SET.
a
?
HCR
AES
3. Press SET without inputting anything and the first item
stored in memory appears.
4. Use u and i to scroll through the items in memory
until the one you want is on the display.
5. Press SET.
––––
Y
R
O
M
E
M
––––
–
LLA
C
E
R
–
W
E
N
E
N
IB
M
O
C
• What you do next depends on whether or not you want to
delete existing text on the display or combine the recalled
text with existing text.
NEW
1. Use u and i to move the highlighting to “NEW”.
2. Press SET to delete any text that was previously on the
input screen and replace it with the recalled text.
COMBINE
1. Use u and i to move the highlighting to “COMBINE”
and then press SET.
2. Use t and y to move the cursor to the location where
you want the recalled text inserted and then press SET.
To recall memory text using character search
1. Press MEMORY.
2. Use u and i to move the highlighting to “RECALL”
and then press SET.
3. Input the characters you want and then press SET to
start the search operation.
• The first item that starts with the characters you input ap-
pears on the screen.
• The characters must come at the very beginning of the
item. The label printer does not find the characters if they
come at the beginning of a block or line inside the item.
4. Continue from step 4 under “To recall memory text using
sequential search.”
To delete memory text
1. Press MEMORY.
2. Use u and i to move the highlighting to “DELETE”
and then press SET.
3. Use either sequential search or character search to dis-
play the memory text you want to delete and then press
SET.
4. Press SET to delete the data.
Part 13 Data Communication
• The FA-920 makes it possible for you to use the label
printer to print data created on your personal computer.
Important!
• Data communication with a personal computer requires
Computer Link software and a data communication ca-
ble.
• See the documentation that comes with the Computer Link
software for details on how to operate it.
• Data communication with your label printer requires a
specific computer system configuration as described in
the documentation that comes with the Computer Link
software. You may not be able to exchange data with a
personal computer that does not conform with the required
system configuration.
• After finishing with a data communication operation (in-
cluding printing), press ESC to exit the Data Communica-
tion Mode. All other functions are disabled while data com-
munication is being performed.
Part 14 Reference
This section contains information about the label printer that
you can use as reference when you need it.
Cleaning the Printer Head and Roller
A dirty printer head and roller can result in poor printing
quality. If you have problems with print quality, use the fol-
lowing procedure to clean the printer head and roller.
To clean the printer head and roller
1. Make sure the label printer is turned off.
2. Press the tape cartridge compartment cover release and
open the compartment cover.
3. Remove the tape cartridge.
4. Use a cotton swab dipped in alcohol to clean the printer
head and roller as shown in the illustration.
5. Replace the tape cartridge and close the compartment
cover.
Initial Settings
The following are the initial settings of the label printer when-
ever you turn it power on or reset the unit.
Item Power On Reset
Display Cleared Cleared
Memory Retained Cleared
User Characters Retained Cleared
Horz/Vert Horizontal Horizontal
Text Alignment Left Left
Justification Justified Justified
Character Spacing Narrow Narrow
Block Length Auto Auto
Mirror Printing Normal Normal
Proportional Spacing On On
Smoothing On On
Block Spacing Narrow Narrow
Auto Feed Long Long
Tape Length Auto Auto
Block Alignment ****(Left) ****(Left)
Default Font Retained Sans-Serif
Insert/Overwrite Retained Insert
Contrast (32 levels) Retained Level 17
Printer head Roller
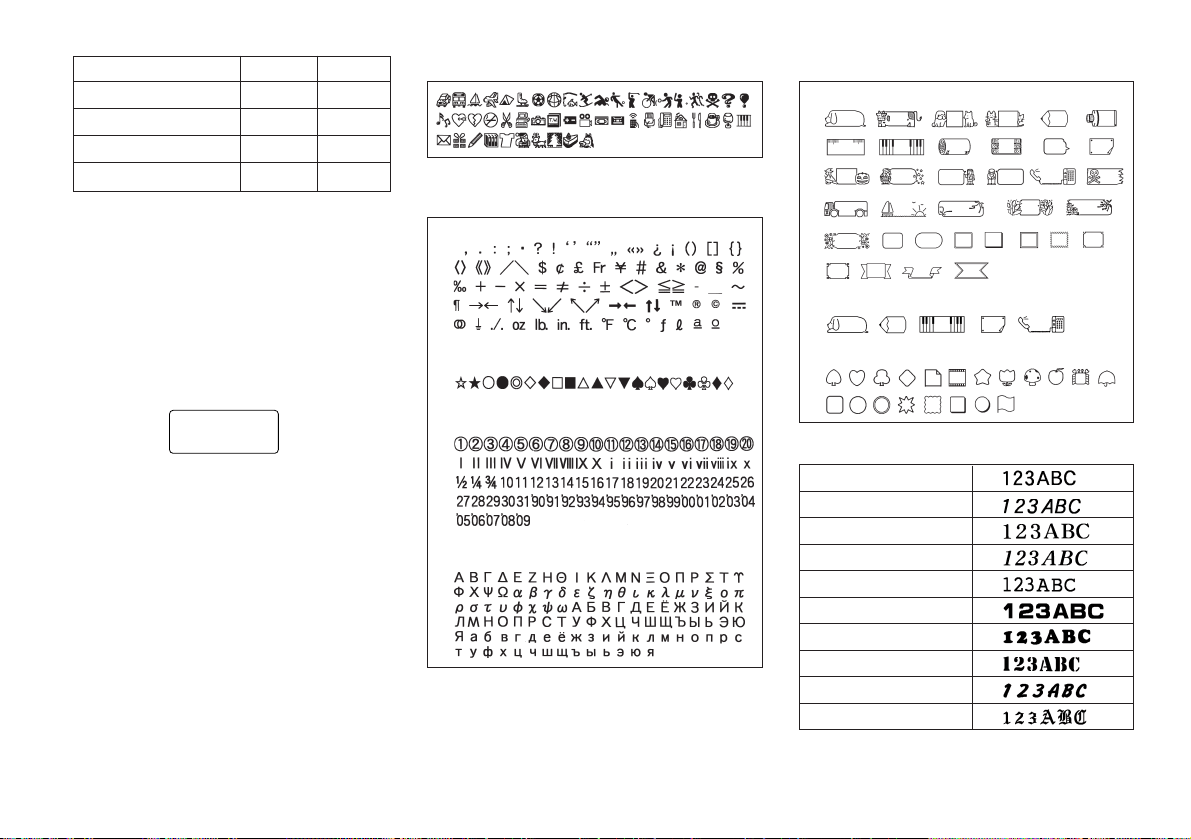
E-25
Item Power On Reset
Density (5 levels) Retained Level 3
Sound Retained On
Language Retained English
cm/inch Retained cm
Initializing the Label Printer
If you experience serious malfunction of the label printer or
if operation fails completely, try performing the following
operation to initialize the printer.
Important! Initializing the label printer deletes all memory
contents. Make sure you have a back-up copy of text stored
in memory if you need it.
To initialize the label printer
1. Turn power off.
2. Holding down the PRINT, ESC, and ON keys, turn power
back on.
?LAITI
N
I
C
SE
/
TES
• This prompt confirms whether or not you want to initialize
the label printer.
3. Press SET to initialize the label printer or ESC to abort
the reset operation.
Format Indicator
The following shows how the brackets on either side of the
format indicator change to indicate various conditions.
[■]: Fixed block length (specified by user)
(■]: Block text too long for fixed block length, but printing
will be performed by compressing text.
■]: Printed tape length will be longer than specified fixed
length because text will not fit within fixed tape length
even if its size is reduced 50%.
Tape Length Indicator
The following shows how the brackets on either side of the
tape length indicator change to indicate various conditions.
[5.1cm]: Fixed tape length specified by user.
5.1cm]: Printing operation cannot be performed.
Illustrations
Symbols, Dingbats, and Special Charac-
ters
● SYMBOL
● DINGBAT
● NUMBER
● GREEK, RUSSIAN
Frames
● ALL TEXT
*When 6mm tape is loaded
● EACH CHARACTER
Fonts
New Sans-serif
New Sans-serif Italic
New Roman
New Roman Italic
Courier
Logo Style
Rich Stroke
Stencil
Bold Script
Black Letter
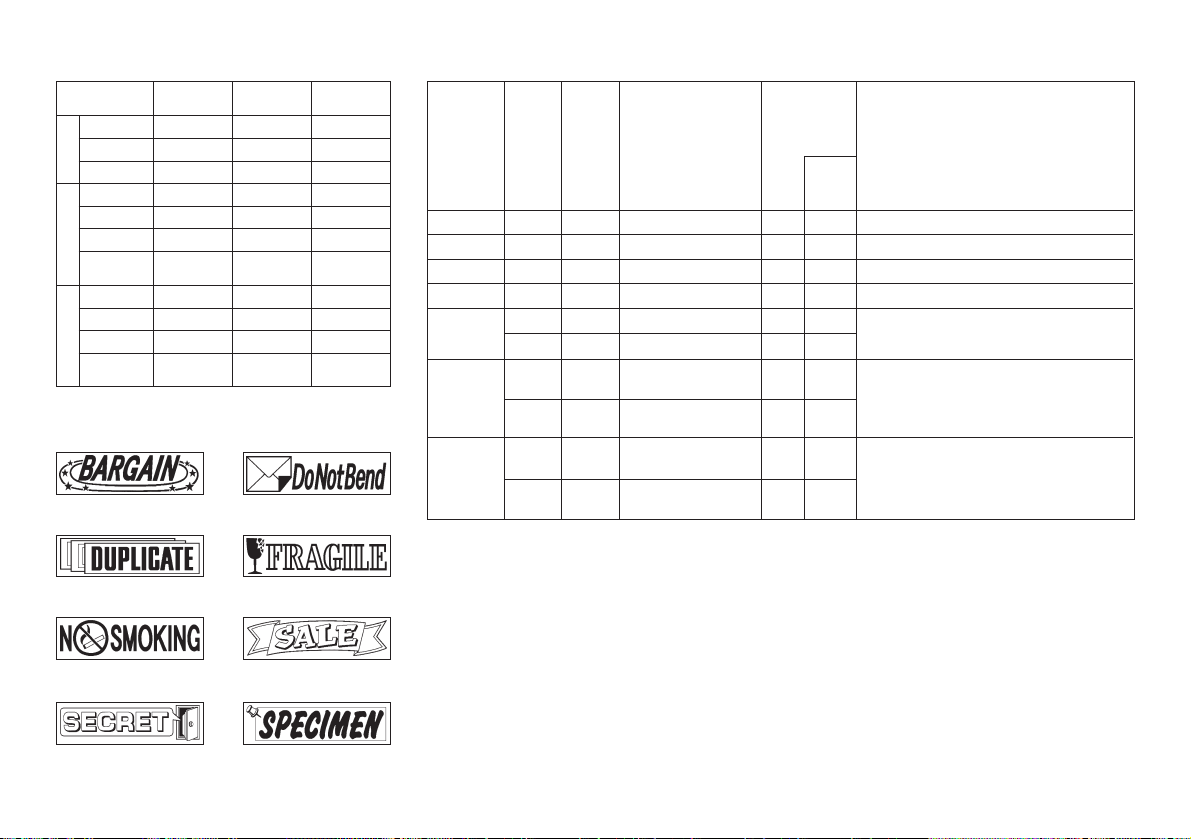
E-26
ENLARGED Label Measurements
Phrases
BARGAIN DO NOT BEND
DUPLICATE FRAGILE
NO SMOKING SALE
SECRET SPECIMEN
Bar Code Specifications
*1 The check digit is automatically calculated in accordance
with input data. For EAN-13, EAN-8, UPC-A, and ITF,
the check digit is appended at the end of the printed dig-
its. For CODE39 and CODABAR, the check digit is ap-
pended one digit before the final digit (when a check digit
is used).
*2 UPC-E includes a check digit, but it is not printed as a
numeral below the bar code.
*3 The number of digits printed below a bar code equals
the input characters plus automatically appended char-
acters.
*4 An error message is displayed whenever there are in-
sufficient digits. The unit will not allow input of too many
digits.
*5 An error message appears and printing is impossible if
an odd number of digits are input when an ITF check
digit is not being used. Append a zero to the beginning of
the digits and re-input.
*6 An error message appears and printing is impossible if
an even number of digits are input when an ITF check
digit is being used. Append a zero to the beginning of the
digits and re-input
*7 Both the start code and end stop code of CODE39 must
be asterisks.
*8 An error message appears and printing is impossible if
any characters other than those specified here are used.
*9 With CODABAR, A, B, C, or D can be used as the start
code and stop code. An error message appears and print-
ing is impossible if any other character is used.
24mm 18mm 12mm
2 pieces
3 pieces
4 pieces
2 pieces
3 pieces
4 pieces
4 pieces
Large
2 pieces
3 pieces
4 pieces
4 pieces
Large
8 × 8 times
12 × 12 times
16 × 16 times
8 × 8 times
12 × 12 times
16 × 16 times
20 × 20 times
8 × 8 times
12 × 12 times
16 × 16 times
20 × 20 times
24 × 24mm
36 × 36mm
48 × 48mm
24 × 24mm
36 × 36mm
48 × 48mm
60 × 60mm
24 × 24mm
36 × 36mm
48 × 48mm
60 × 60mm
24mm
36mm
48mm
30mm
42mm
54mm
63mm
36mm
48mm
60mm
69mm
Tape Width
Size Character Resulting
Increase Size Tape Width
Check
Digit *1
Yes
Yes
Yes
(Yes) *2
No
Yes
No
Yes
No
Yes
Print
Digits *3
13
8
12
6
4 to 22
4 to 22
4 to 22
4 to 22
4 to 22
4 to 22
Input Digits
*4
12
7
11
6
4 to 22 (even only) *5
3 to 21(odd only) *6
2 to 20
1 to 19
4 to 22
3 to 21
Input Characters
*8
Numerals
Numerals
Numerals
Numerals
Numerals
Alpha-numeric characters; hyphen; period;
space; dollar sign; slash; plus sign; percent
sign
Numerals; hyphen; period; dollar sign; colon;
slash; plus sign; letters A through D (first and
final digits only) *9
Automatically
Assigned
Number of
Digits
—
—
—
—
—
—
2 *7
2 *7
—
—
Check
Digit
*1
1
1
1
—
—
1
—
1
—
1
Bar Code
Type
EAN-13
EAN-8
UPC-A
UPC-E
ITF
CODE39
CODABAR
E-27
Troubleshooting
••
••
•
Power Supply
••
••
•
Text Input
Nothing appears on the display.
Possible Cause Action
Improper display con-
trast setting
Low batteries
Batteries loaded incor-
rectly
AC adaptor is not con-
nected correctly.
Adjust display contrast.
Replace batteries.
Remove batteries and reload
them correctly.
Make sure the AC adaptor is
connected correctly.
Only blank spaces
were input.
Input the text you want to print.
Tape comes out when PRINT is pressed, but nothing
is printed on it.
Possible Cause Action
Improper print density
setting
Improper loading of
the cartridge
Dirty print head or rub-
ber roller
Adjust the print density setting.
Remove the tape cartridge and
reload it correctly.
Clean the printer head and
roller.
Printing is blurred, blotched, broken, etc.
Possible Cause Action
Ink ribbon cassette
loaded while the ink
ribbon is slack.
Remove the ink ribbon cassette
and check to make sure the ink
ribbon is not broken. Next, take
up any slack in the ink ribbon
and then reload the tape car-
tridge.
Important!
• Before loading an ink ribbon
cassette into the label printer,
always make sure you take
up any slack in the ink ribbon
first.
• If the ink ribbon is broken, you
must change to another ink
ribbon cassette.
Ink ribbon is being fed from the tape outlet along
with the tape.
Possible Cause Action
••
••
•
Tape Cutting
••
••
•
Using Labels
Cannot input text.
Possible Cause Action
FUNC key has been
pressed.
Press ESC to clear FUNC key
operation.
Tape does not come out when PRINT is pressed.
Possible Cause Action
Tape cartridge com-
partment cover is not
closed completely.
No more tape left in
the cartridge.
Tape jam
Securely close the tape car-
tridge cover.
Replace the tape cartridge with
a new one.
Remove the tape cartridge and
pull out the jammed tape by
hand. Cut off excess tape with
scissors, and carefully replace
the cartridge into the label printer.
Important!
Never allow the tape outlet to
become blocked and never
touch tape as it is being fed
during printing.
Cannot cut tape.
Possible Cause Action
Take the label printer to the
dealer from whom you pur-
chased it to have the tape cut-
ter blade replaced.
Printed text is cut off by tape cut operation.
Possible Cause Action
The printer is set up for
manual tape feed.
Out of tape
Be sure to press the FEED key
before performing the tape cut
operation.
Important!
When the printer is set up for
manual tape feed, the tape is
not fed automatically after print-
ing is complete.
Replace the tape cartridge with
a new one.
Tape cutter blade is
dull.
Label will not adhere to a surface.
Possible Cause Action
The backing paper is
still on the back of the
tape.
Surface is unsuitable
for affixing a tape.
Peel the backing paper from the
back of the tape to expose the
adhesive.
Labels do not adhere well to
surfaces that are rough, wet,
oily, or dirty.
E-28
Cannot transfer data.
Possible Cause Action
Message Cause and Recommended Action
TEXT TOO
LONG!
DATA ERROR!
RESET!
DATA ERROR!
RESET!
DATA ERROR!
RESET!
NO DATA!
TOO MANY BL!
ILLEGAL
CHARACTERS!
CANNOT
PRINT
MEMORY
FULL!
NOT ENOUGH
MEMORY!
SAME NAME
ALREADY
USED!
DATA ITEM
NOT FOUND!
TOO MANY
LINES!
TOO MANY
LINES TO
FRAME!
ODD NUMBER
OF DIGITS!
CANNOT
PRINT
NOT ENOUGH
DIGITS!
CANNOT PRINT
RESET!
COMMUNICA-
TION ERROR!
POWER OFF
THEN LOAD A
TAPE
CARTRIDGE
TEXT TOO
LONG!
Name being assigned to a preset
format is already used. Use a differ-
ent name.
No match for characters specified for
a search operation. Change to other
characters or use sequential search.
Too many lines to be printed. Reduce
the number of lines or use a wider
tape.
Too many lines for printing with a
frame. Reduce the number of lines
or use a wider tape.
• Odd number of digits input for ITF
bar code when a check digit is not
being used. Add a 0 (zero) as the
first digit and re-input.
• Even number of digits input for ITF
bar code when a check digit is
being used. Add a 0 (zero) as the
first digit and re-input.
Bar code print printed does not have
enough digits. Re-input with the
proper number of digits.
Memory has not been initialized yet.
Perform the reset operation.
Label printer was unable to receive
data being sent from an external
source. Check cable connections
and parameter settings.
Printing operation performed while
the tape cartridge compartment is
empty. Load a tape cartridge and try
again.
Text being printed does not fit within
a fixed-length tape. Shorten the text
or change the tape length.
Message Cause and Recommended Action
Text being printed with a frame does
not fit within a fixed-length tape.
Shorten the text or change the tape
length.
Print operation attempted when
memory is not initialized. Perform the
reset operation and try again.
Memory data has been deleted or
corrupted bacause battery went
dead.
Text storage attempted when
memory is not initialized. Perform the
reset operation and try again.
Recall or delete operation attempted
while there is no more data in
memory. Press SET to clear the er-
ror message.
Attempt to input a 16th block mark
(only 15 are allowed). Delete block
marks you don’t need.
• Invalid characters used in a bar
code. Change to allowed charac-
ters.
• Letter other than A, B, C, or D in-
put for CODABAR bar code start
code or end code. Use only the
allowable characters.
Memory used for storage is full. De-
lete data in memory that you no
longer need.
Operation being attempted would
cause memory used for storage to
become full. To store more, delete
data in memory that you no longer
need.
If you don’t want to store more, press
SET to clear the message and then
continue with the operation.
••
••
•
Data Communication
Error Messages
Make sure the data communi-
cation cable jacks are con-
nected securely.
Be sure to start actual data
transfer within about 20 seconds
after pressing SET to start a data
communication operation.
Poor data communi-
cation cable connec-
tion
Passage of too much
time after setting up
for data communica-
tion
E-29
Message Cause and Recommended Action
CANNOT
COMBINE!
INPUT TEXT!
REPLACE
BATTERIES
Recalling text into existing text re-
sults in more than 255 characters.
Reduce the number of characters in
existing text.
Recall operation incorporating re-
called text into existing text would
result in more than 15 block marks.
Reduce the number of block marks
in the existing text and try again.
Attempt to register characters when
no characters are input. Input char-
acters and try again.
Replace batteries.
Specifications
Model: KL-8100
Input
Keyboard Layout: Typewriter (QWERTY)
Character Types
Alpha (English and other languages): 52 (A~Z, a~z), 99
(Á, ß, Ç, W etc.)
Numbers: 10
Symbols/Greek and Russian Characters: 306
Illustrations: 50
Display
Type: Liquid crystal display
Columns: 12
Lines: 2
Printing
Type: Thermal transfer
Speed: Approximately 12mm/second
Width: 4mm (6mm tape); 8mm (9mm tape); 10mm (12mm
tape); 16mm (18/24mm tape)
Character Matrix: 48 × 48 dots
Character fonts: New Sans-serif, New Sans-serif Italic,
New Roman, New Roman Italic, Courier,
Logo Style, Rich Stroke, Stencil, Bold
Script, Black Letter
Character spacing: NONE, NARROW, MEDIUM, WIDE
Tape Length: 0.0cm to 99.9cm (FIX); longer lengths pos-
sible with AUTO
Block Length: 0.0cm to 99.9cm (FIX); longer lengths pos-
sible with AUTO
Character Effects: Shading, underline, box
Character Styles: Normal, bold, outline, shadow, raised
Character Sizes: 72 from 1 × 1 to 5 × 8 and 1 × 1S to
4 × 8S
Number of Lines:
6mm tape: 2 lines
9mm tape: 4 lines
12mm tape: 5 lines
18mm or 24mm tape: 8 lines
Frames: 55 types
Preset Formats: 74 types
Preset Phrases: 8 types
Memory
Text: up to 2,500 characters
General
Main power supply: Specified for the AD-A12070 AC
adaptor or eight AA-size alkaline bat-
teries
Battery life: Approximately 3 tape cartridge (continuous
printing)
Memory Back-up Battery: Built-in
Battery life: Marked on the sticker on the back of the label
printer.
Be sure to have the battery replaced by the date
noted on the sticker on the back of the label
printer. Have the battery replaced by the retailer
where you purchased the label printer or by an
authorized CASIO service provider. Note that
you will be charged for battery replacement.
Power consumption: 12 W
Auto Power Off: Approximately six minutes after last key
operation
Ambient Temperature: 10° to 35°C (50° to 95°F)
Dimensions: 63.5 (H) × 196 (W) × 195 (D) mm
(2
1
/
2
" (H) × 7
11
/
16
" (W) × 7
11
/
16
" (D))
Weight: 580g (20.5oz) (except main batteries)

CASIO COMPUTER CO., LTD.
6-2, Hon-machi 1-chome
Shibuya-ku, Tokyo 151-8543, Japan