Loading ...
Loading ...
Loading ...
iiiii_ii!i!i_!!ililili!ii!_!i!i!i!!j_ili_i_ii!i_iiii_i_i_i_!_ii_!J_!i_ii!_i!ii!i!i_!i_i_!i_i_!i_i_!ii_!i:i_i!_iiii_i_!_i_i_ii_!i_!iiii!_i_!!_i_!!i_i_ii!i_i_!;!ii_!!i_i_iiii_i!i_iiiii!_!!_!;!_J;_!S;_!_!!!_ii_i!i_!i_i!ii!_!_
1_ Installation
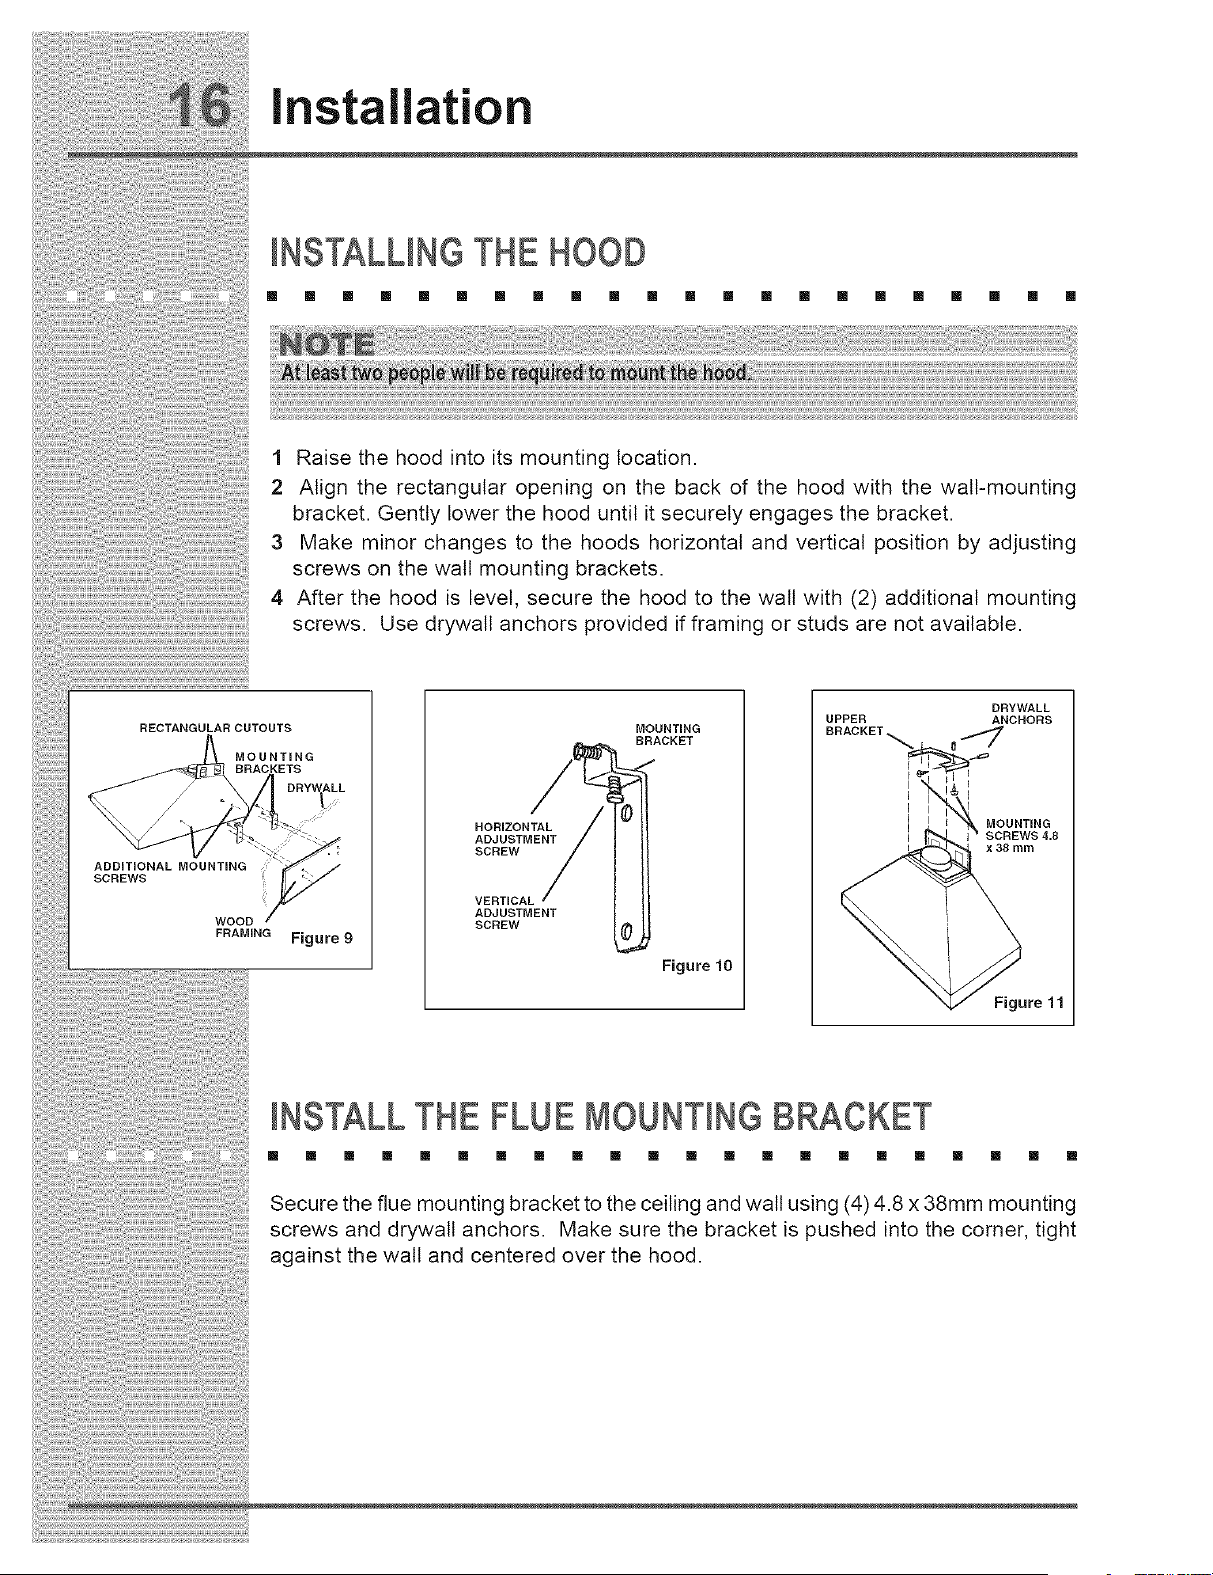
1 Raise the hood into its mounting location.
2 Align the rectangular opening on the back of the hood with the walt-mounting
bracket. Gently lower the hood until it securely engages the bracket.
3Make minor changes to the hoods horizontal and vertical position by adjusting
screws on the wall mounting brackets.
4 After the hood is level, secure the hood to the walt with (2) additional mounting
screws. Use drywall anchors provided if framing or studs are not available.
RECTANGULAR CUTOUTS
MOUNTING
BRACKETS
JDRYV_ALL
ADDiTiONAL MOUNTING
SCREWS
WOOD
FRAMING Figure 9
MOUNTING
BRACKET
HORIZONTAL
ADJUSTMENT
SCREW
VERTICAL
ADJUSTMENT
SCREW
Figure 10
UPPER
DRYWALL
ANCHORS
MOUNTING
x38 mm
Figure 11
IHSTALL THE FLUE MOUHTIHGBRACKET
[] [] [] [] [] [] [] [] [] [] [] [] [] [] [] [] [] [] [] [] [] []
Secure the flue mounting bracket to the ceiling and wall using (4) 4.8 x 38mm mounting
screws and drywall anchors. Make sure the bracket is pushed into the corner, tight
against the wall and centered over the hood.
Loading ...
Loading ...
Loading ...