Loading ...
Loading ...
Loading ...
15
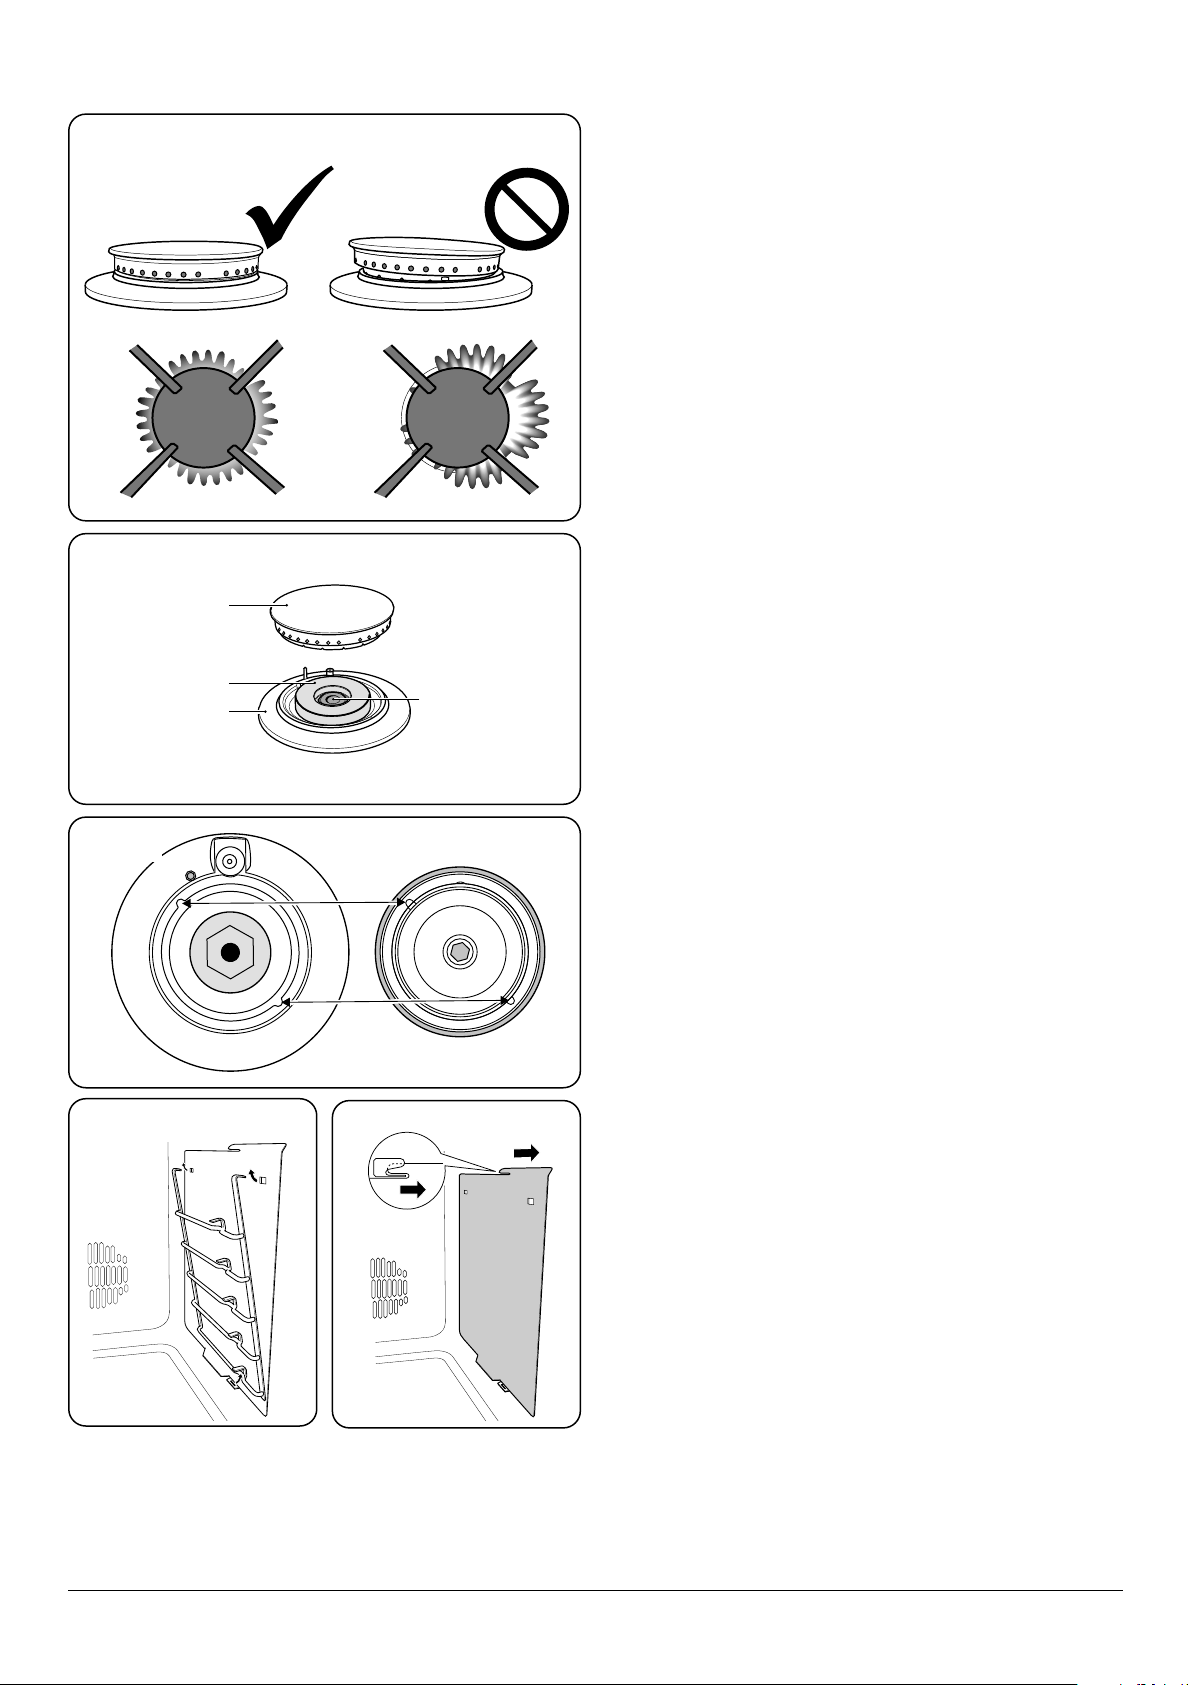
ArtNo.281-0020 Removing the liner
ArtNo.311-0028 - Burner head off
A
C
B
D
Never use caustic or abrasive cleaners as these will
damage the surface.
Control panel and oven doors
Avoid using any abrasive cleaners including cream cleaners,
on brushed stainless steel surfaces. For best results use liquid
detergents.
The control panel and control knobs should only be cleaned
with a soft cloth wrung out in clean hot soapy water – but
take care that no surplus water seeps into the appliance. Wipe
with a clean dampened cloth then polish with a dry cloth. The
oven doors should only be cleaned with a soft cloth wrung
out in clean hot soapy water.
Cleaning brass parts (some models only)
Uncoated natural brass is used as part of the authentic nish
on some models and this may tarnish with age. To regain
a polished nish, these areas should be cleaned using a
gentle brass cleaner. Take care the cleaner does not aect
surrounding areas.
Ovens
The side panels can be removed for cleaning and for cleaning
behind them.
Removing the oven linings
Remove the shelves rst. To remove the oven shelf supports
lift until clear of the two supporting holes and pull outwards
(Fig. 4.4).
Please note – there are specic liners for the left and right
hand side.
To remove the side panels, simply lift the panel and slide
forwards (Fig. 4.5).
Replacing the oven linings
To replace the liner the cut-out section must be at the top of
the liner. Slide the liner towards the back of the oven cavity.
When this is in place the shelf supports can be replaced. To
do this, rst insert the bottom of the support in the cut-out
followed by the two hooks at the top.
ArtNo.311-0029 - Burner base & head alignment
ArtNo.311-0030 - Burner head fitting
ArtNo.281-0019 - Removing the shelf support
A – Burner head, B - Burner ring, C – Base
Fig. 4.1
Fig. 4.2
Fig. 4.3
Fig. 4.4 Fig. 4.5
Loading ...
Loading ...
Loading ...