Loading ...
Loading ...
Loading ...

15
5. The front bearing (E, Figure 18) is eccentric,
and should be adjusted so that it just contacts
the blade without pinching the blade or
interfering with its movement. Proceed as
follows:
6. Loosen the hex nut (F, Figure 18) with a 14mm
wrench.
7. Use a 12mm wrench to rotate the small hex
nut just above the bearing (G, Figure 18) until
the bearing is just contacting the blade.
8. Hold the bearing at that position with the
wrench on the hex nut, to prevent the bearing
from moving. At the same time, tighten the
upper hex nut (F, Figure 18) with the other
wrench.
9. Repeat these steps for the other blade guide
assembly.
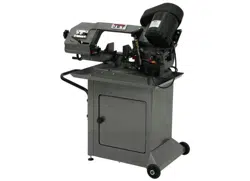
10.12 Blade Replacement
Use caution and proceed
slowly when working with or around a band
saw blade. Use gloves when handling it.
1. Disconnect band saw from power source.
2. Remove the knob and the back blade cover
from the band saw. See Figure 19.
3. Loosen the handle on the blade guide (A,
Figure 18) and lower the blade guide as far as
it will go. See Figure 19.
Figure 19
4. Release tension on the blade.
5. Remove old blade and install new one by
placing it between the guides and around the
band wheels. Make sure the blade is oriented
properly so that the teeth will point downward
and into the workpiece (Figure 20). An arrow
on the the body of the bow indicates blade
direction (shown in Figure 15).
6. The blade should be tensioned and tracked
properly before operating. See “Blade
Tension” and “Blade Tracking” above.
Figure 20
10.13 Automatic Shut-Off
At the end of a cut, the screw (A, Figure 21)
contacts the paddle switch (C, Figure 21), shutting
off the machine. The screw has been set at the
factory. If future adjustment is needed, loosen the
hex nut (B, Figure 21) with a 12mm wrench and
rotate the screw as needed, then re-tighten the hex
nut.
NOTE: The bow must be raised in order to re-start
the band saw.
Figure 21
10.14 Switch Lock-Out
The switch has a removable piece (C, Figure 21).
When this is removed, the band saw cannot be
activated. To start the band saw, first snap this
piece back into place.
Loading ...
Loading ...
Loading ...