
RECESS BOX FOR ONSEN WATER HEATERS
Models: ONHW26NG50, ONHW26NG60,
ONHW26LPG50, ONHW26LPG60
V1
1
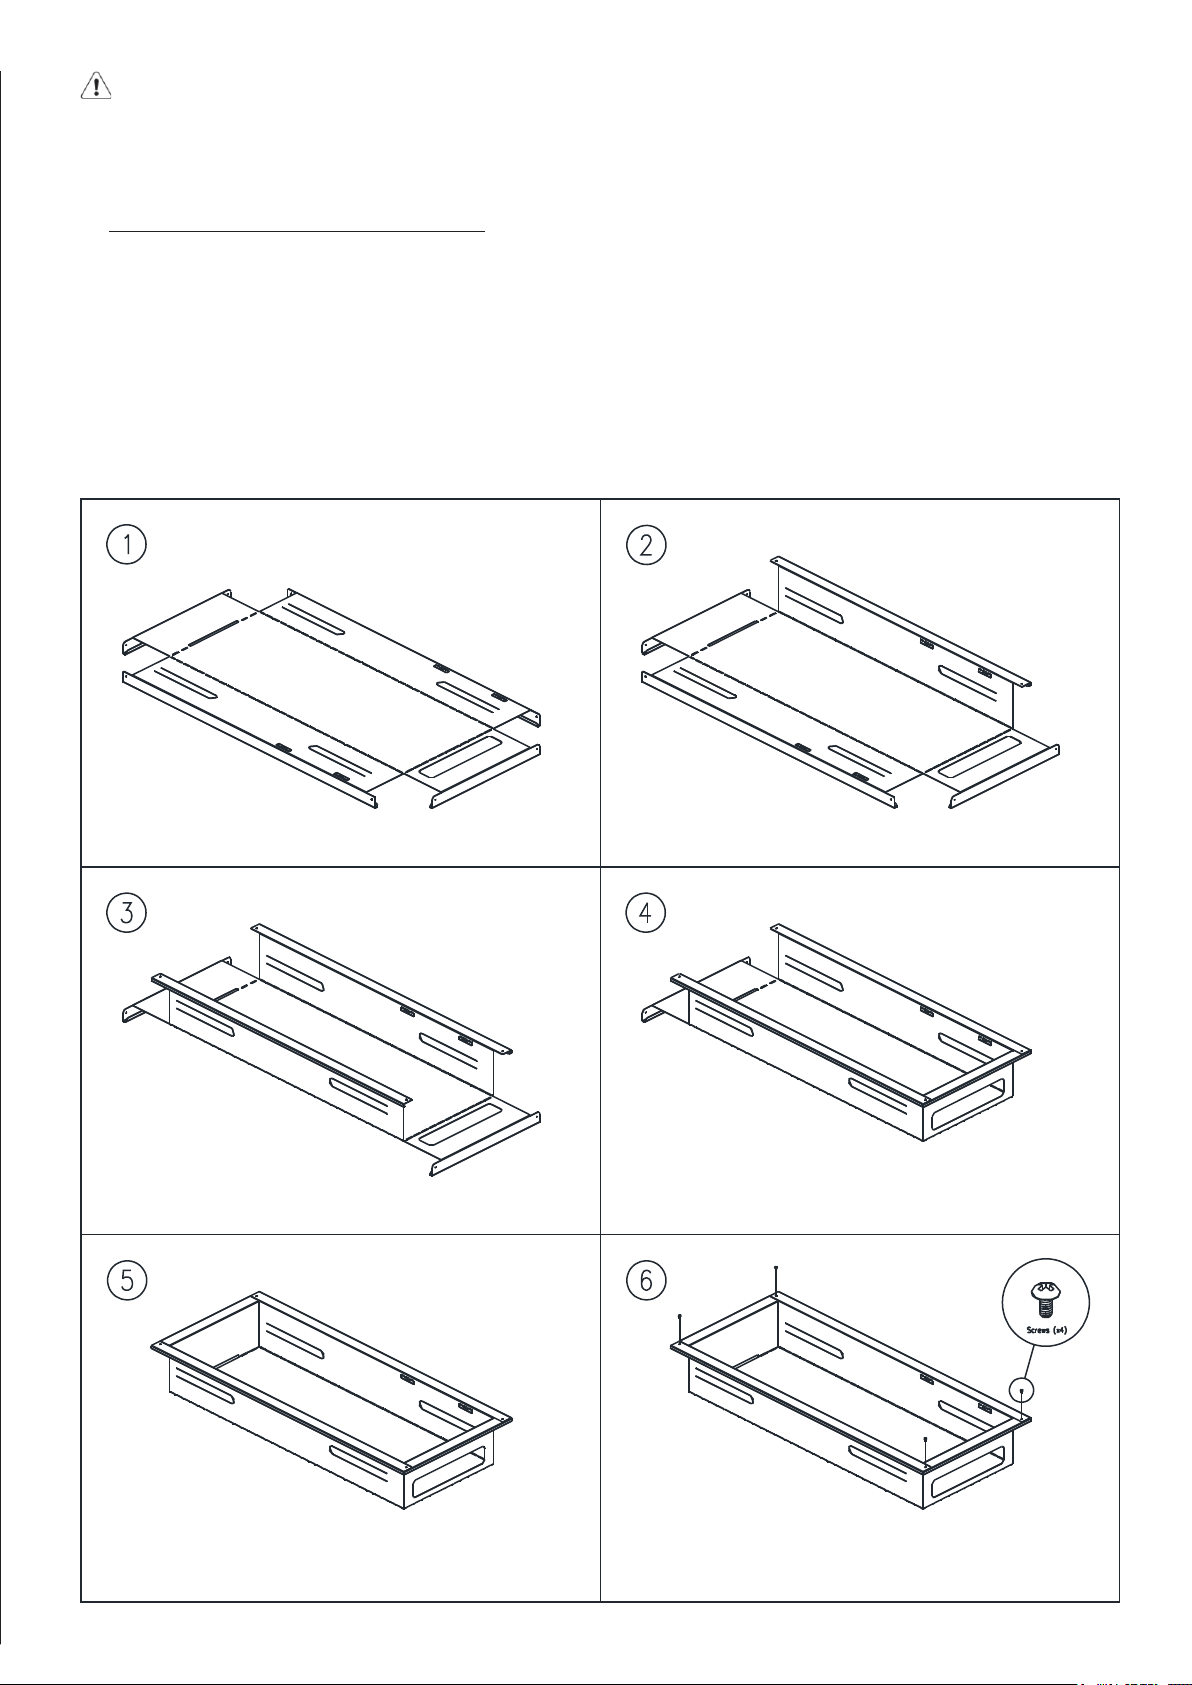
- Carefully place the flat packed metal box on the floor as shown in Diagram 1.
(To protect the recess box during assembly, use the packaging to line the floor.)
- Next fold the sides according to Diagrams 2-5.
- Then secure the four sides by fitting the screws included in the packaging as shown
in Diagram 6.
1. Assembling the Recess Box
IMPORTANT! Before installing your water heater, copy the model number and serial
number from the product label located on the side of the water heater to your Onsen water
heater user manual for future reference.
2
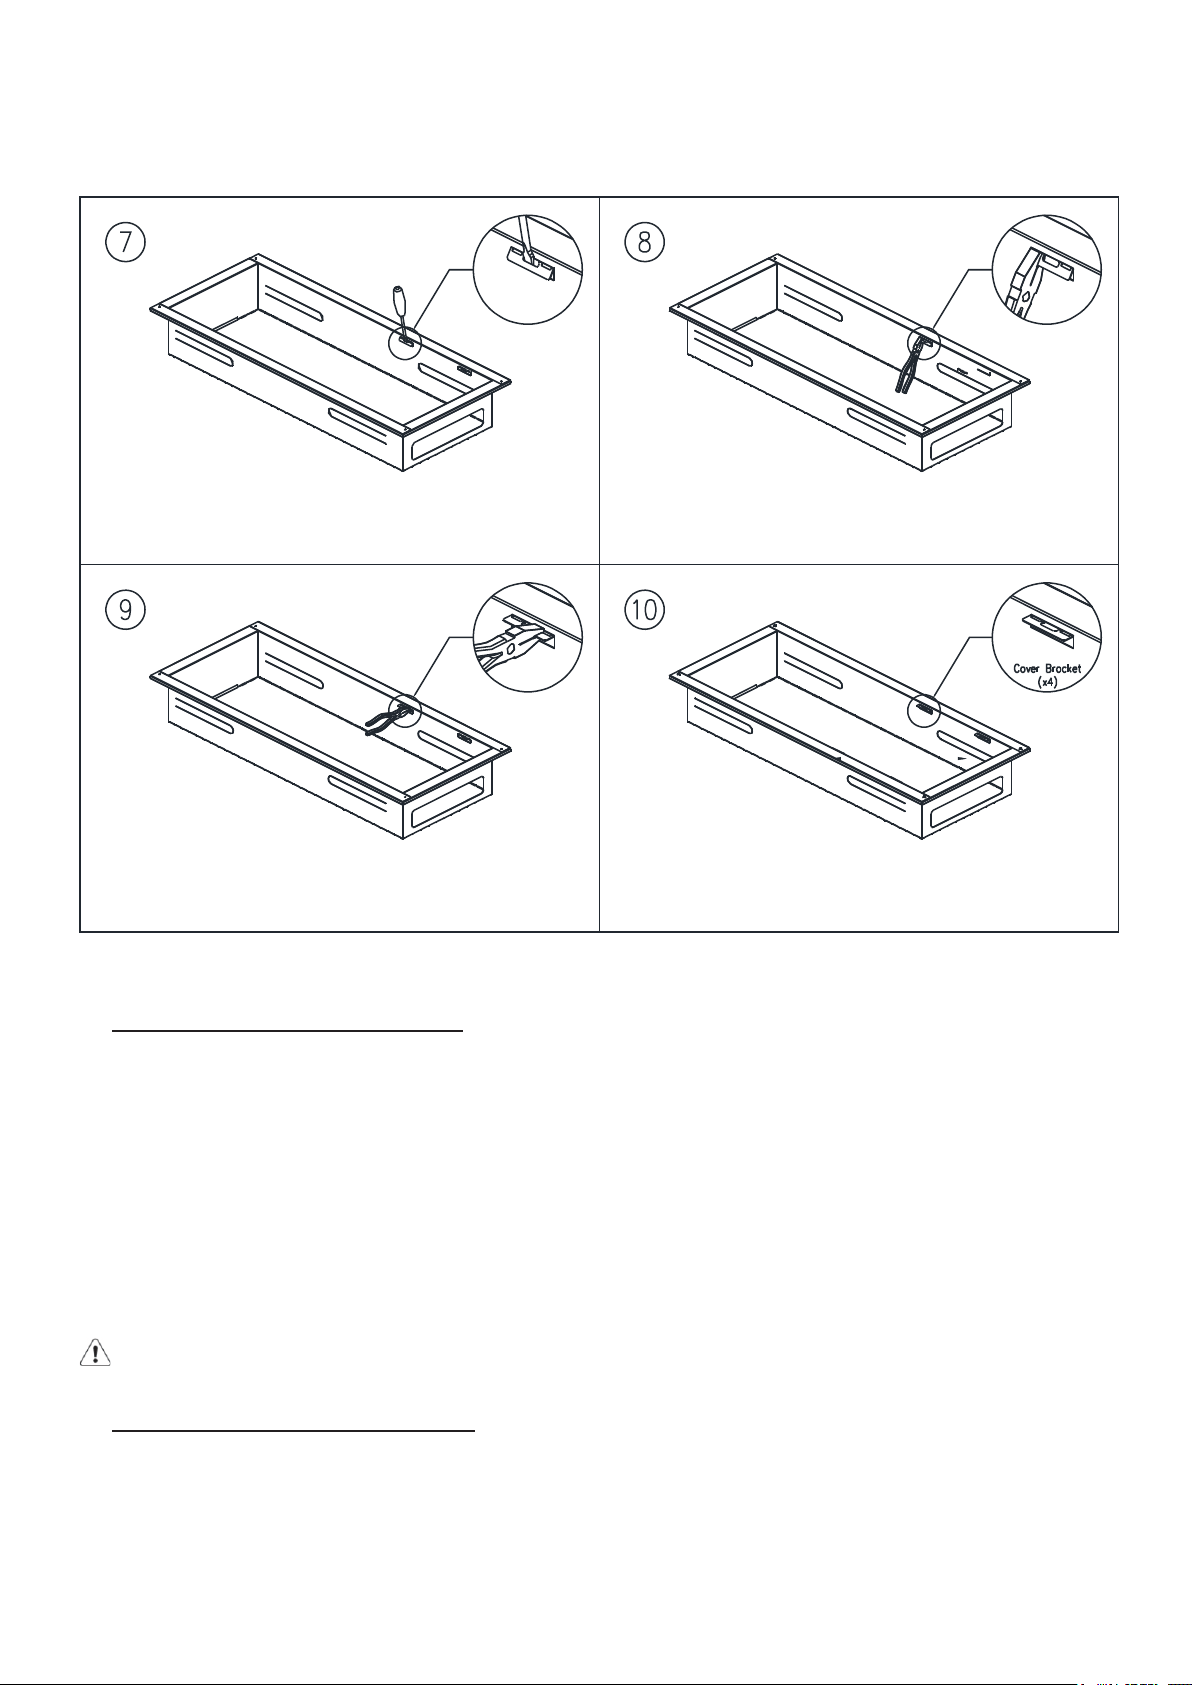
- Next using a flat screwdriver, gently pry out four cover bracket stubs from the side walls as shown
in Diagram 7.
- Then use pliers to straighten out the brackets neatly to a 90°angle. Refer to Diagrams 8 & 9.
- The recess box is now ready for installation.
2. Installing The Recess Box
- Fitting the Recess Box into a new construction masonry wall.
Bend out the 4 brick ties. Fit the recess box into the brickwork opening and anchor it to the masonry
by bending the brick ties to slot into the masonry joints and using mortar to secure. Check that
the box is level and allow ample time for the mortar to cure before fitting the water heater unit.
- Fitting the Recess Box into an existing wall.
Prepare an opening in the wall with a cavity size of : H-1015mm x W-390mm x D-158mm.
Place box into cavity and drill out holes at required fixture points and use appropriate fasteners
to secure firmly into position.
3. Mounting the Water Heater
- Once the recess box has been fitted onto the wall, mount the water heater in to the recess box by
following the instructions below.
-Carefully insert the water heater into the recess box and push upwards so that the water heater
upper mounting bracket goes into the 210mm x 8mm slot located at the top of the recess box.
Refer to Diagrams 11 - 13.
3
IMPORTANT! Ensure that the pipe inlet cutout is facing down when placing in position.
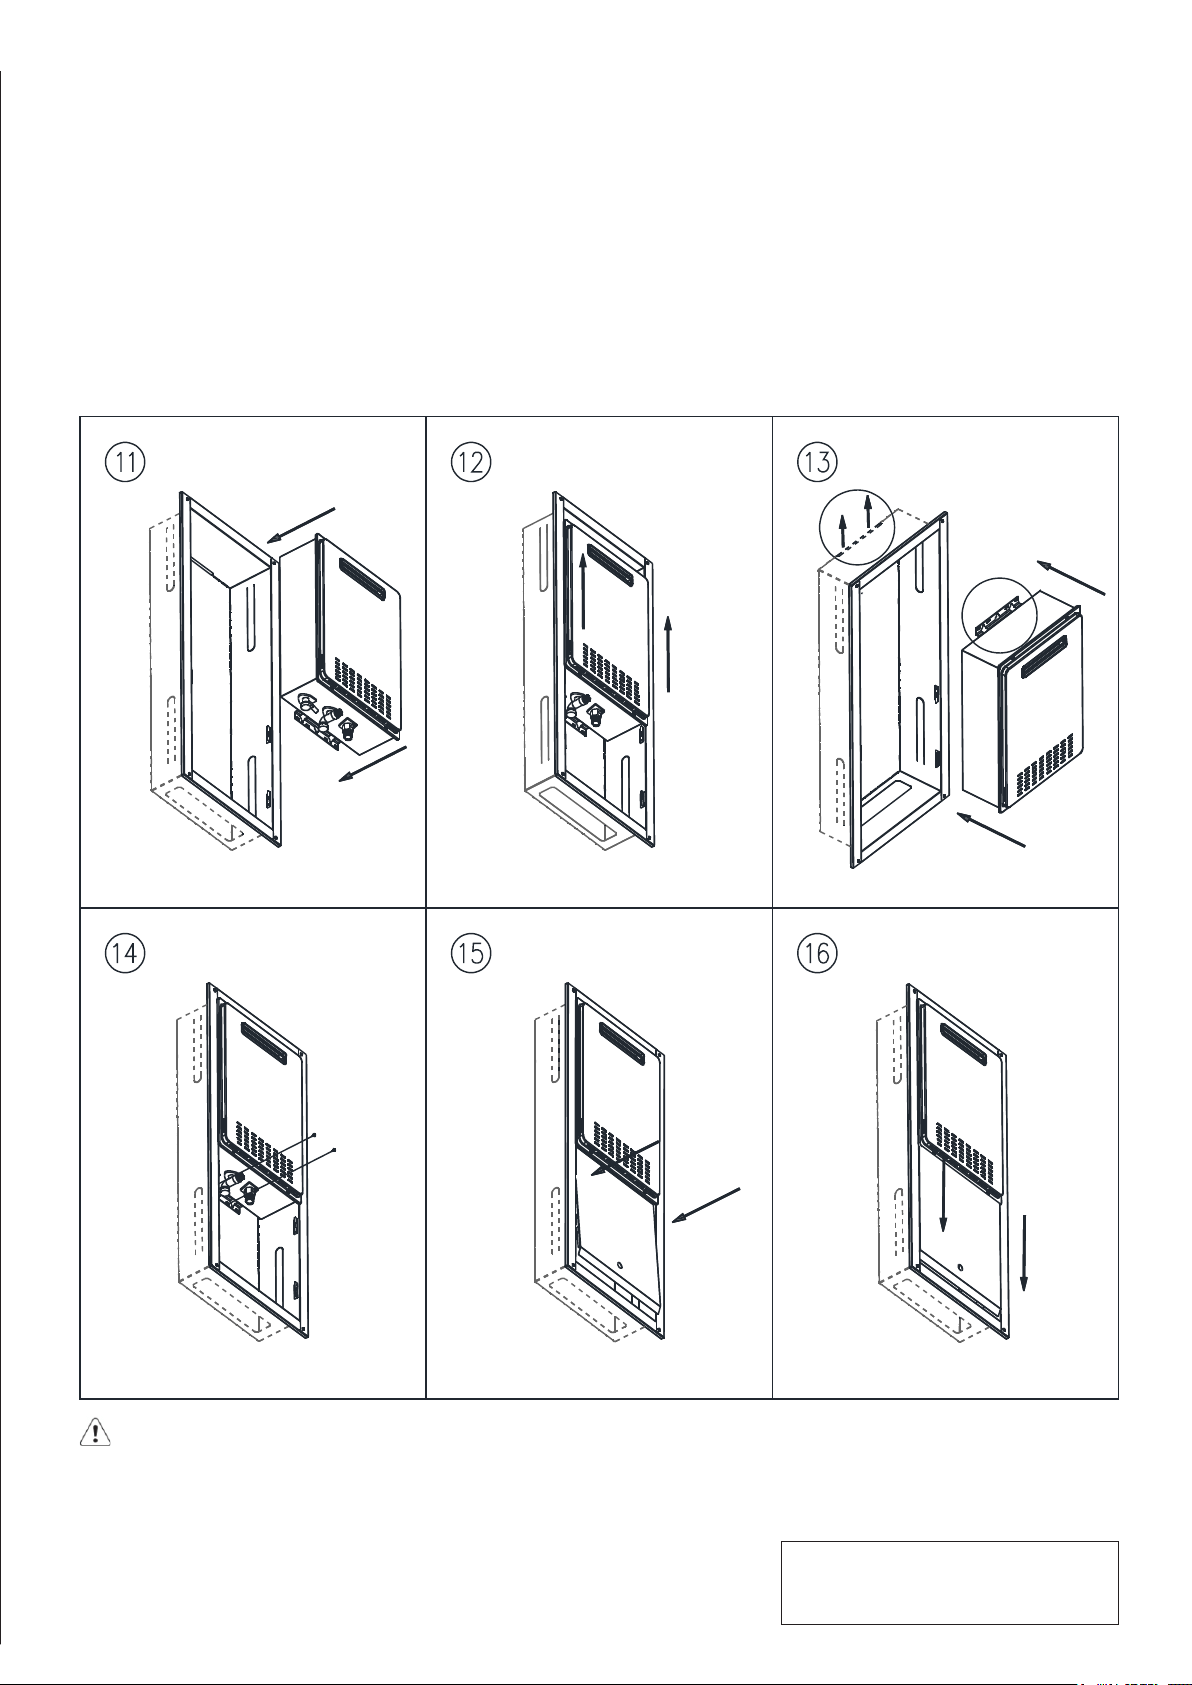
- Then use the mounting screws provided with your water heater to secure to the wall. (The water
heater unit is heavy when filled with water and it is advisable to install wooden batons along the
screw locations if necessary.) Refer to Diagram 14.
- Install all gas and water piping according to the instructions in your water heater user manual.
Check for gas and water leaks. Then test and check the operation of the water heater.
- Once all the above works have been completed, fit the cover to conceal the pipework. To do this
first tilt the cover slightly and insert under the water heater front panel flange and then carefully
adjust and position the cover to insert its hooks (x4) into their respective slots on the brackets on
the recess box side walls. Refer to Diagrams 15 & 16.
IMPORTANT! Use a weatherproof electrical socket if necessary and weatherproof the
recess box if required by using suitable sealant along the external joints and around the
pipework.
V1
4
Distributed by:
SHINDA INTERNATIONAL PTY LTD
: 1300 358 770 : (02) 9773 7399