Loading ...
Loading ...
Loading ...
6 JCT-2610 Series Rivet Buster
Setup and Assembly
Any missing parts or damage should be reported
immediately to your JET
®
distributor. Do not use a
damaged tool. Read this instruction manual
thoroughly for operation, maintenance and safety
instructions.
Box contents:
1 Rivet buster
1 Screw clamp
1 Operation and parts manual
1 Warranty card
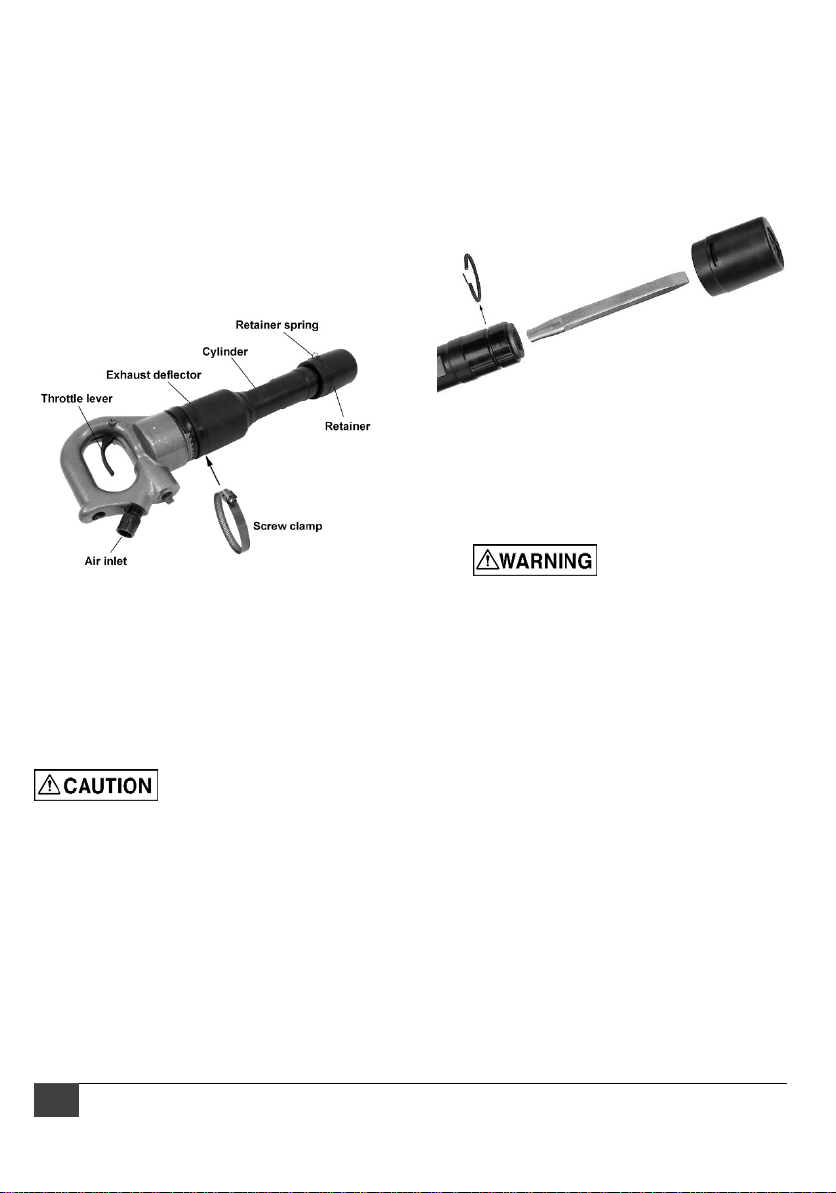
Figure 1
1. Rotate exhaust deflector (Figure 1) until
exhaust holes point away from operator and
bystanders.
2. Install screw clamp on exhaust deflector to
secure its position.
Operation
The rivet buster must be
properly lubricated before operation. See
“Lubrication” section.
1. Install working steel (not provided) as
follows. See Figure 2.
2. Place screwdriver or other tool in triangular
end of retainer spring, and pull spring out of
groove.
3. Slide retainer off cylinder. If needed, insert
screwdriver into slot and use as wedge to
help loosen retainer.
4. Lubricate shank of working steel with grease.
Insert steel through rear of retainer. (Make
sure upper sleeve is fitted into cylinder, and
lower sleeve and bumper are fitted into
retainer.)
5. Slide steel and retainer onto cylinder. Shank
of steel should be fully inserted into cylinder,
and retainer slot should align with groove on
cylinder.
Figure 2 (chisel not provided)
6. Install spring by feeding it into groove until
completely installed. If needed, spray
lubricant into groove to facilitate spring
insertion. Tug sharply on the working steel to
ensure it is secure.
An unsecured steel can
be ejected from the cylinder with force,
causing injury. Retainer and retainer
spring must be properly installed before
using rivet buster.
7. Remove protective cap from air inlet (Figure
1). If an in-line oiler is not being used, add 4
or 5 drops of air tool oil (not included) into the
air inlet.
8. Blow out air line to remove any dirt or
moisture, then connect air supply hose to
tool. Set air pressure to 90 psi.
IMPORTANT: Connecting a quick-change
coupling directly to the tool is not
recommended, as vibration may cause the
connection to fail. Instead, add a leader hose
and install any quick-change couplings
farther down the line.
9. Hold rivet buster firmly with both hands.
Place end of tool in contact with work
surface, and press throttle lever. Do not push
too hard; allow tool to do the work.
10. Release throttle lever to stop tool.
Loading ...
Loading ...
Loading ...