Loading ...
Loading ...
Loading ...
Care and Cleaning
Removing and Replacing Warmer Drawer
Electrical shock hazard can occur and result in
serious injury or death. Disconnect appliance from electric
power before cleaning and servicing the warmer drawer.
To remove the warmer drawer:
1. Turn power OFF to the appliance before removing the warmer
drawer.
2. Open the warmer drawer completely.
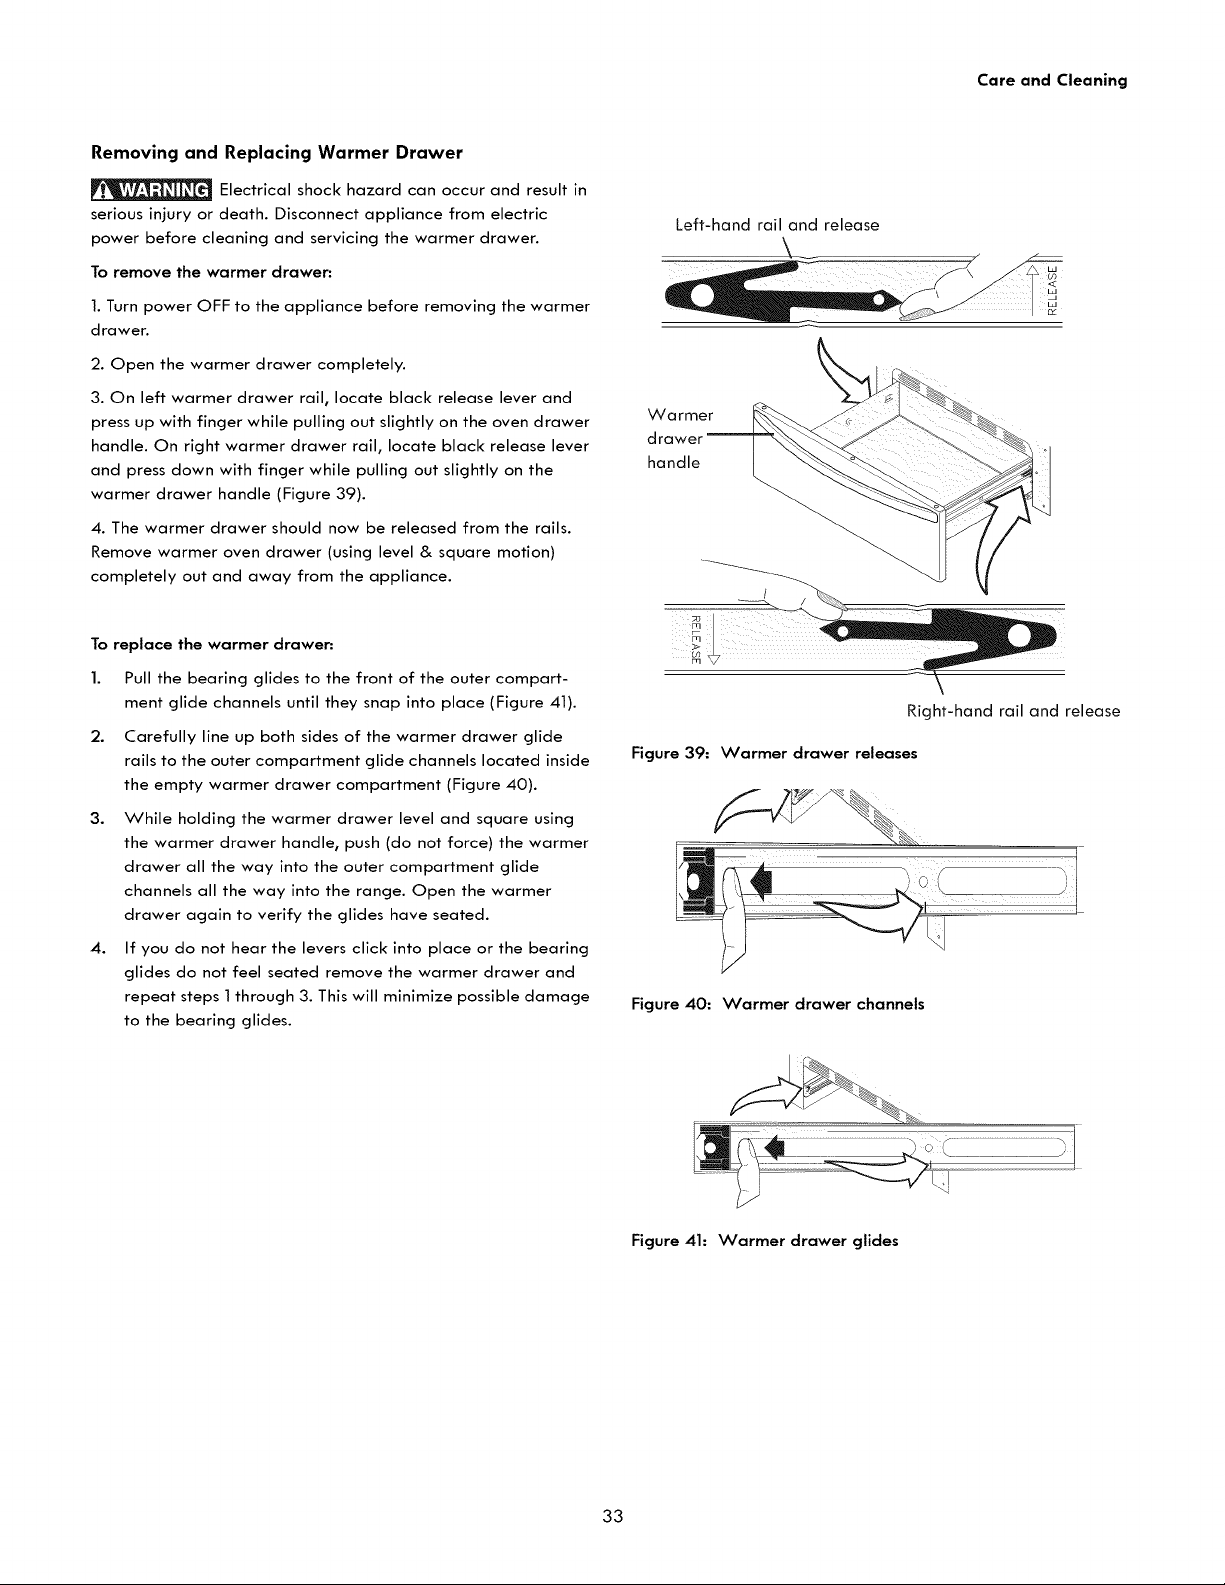
3. On left warmer drawer rail, locate black release lever and
press up with finger while pulling out slightly on the oven drawer
handle. On right warmer drawer rail, locate black release lever
and press down with finger while pulling out slightly on the
warmer drawer handle (Figure 39).
4. The warmer drawer should now be released from the rails.
Remove warmer oven drawer (using level & square motion)
completely out and away from the appliance.
To replace the warmer drawer:
1. Pull the bearing glides to the front of the outer compart-
ment glide channels until they snap into place (Figure 41).
2. Carefully line up both sides of the warmer drawer glide
rails to the outer compartment glide channels located inside
the empty warmer drawer compartment (Figure 40).
3. While holding the warmer drawer level and square using
the warmer drawer handle, push (do not force) the warmer
drawer all the way into the outer compartment glide
channels all the way into the range. Open the warmer
drawer again to verify the glides have seated.
4. If you do not hear the levers click into place or the bearing
glides do not feel seated remove the warmer drawer and
repeat steps 1 through 3. This will minimize possible damage
to the bearing glides.
Left-hand rail and release
Warmer
drawer
handle
Right-hand rail and release
Figure 39: Warmer drawer releases
Figure 40: Warmer drawer channels
Figure 41: Warmer drawer glides
33
Loading ...
Loading ...
Loading ...