EN
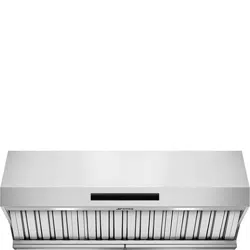
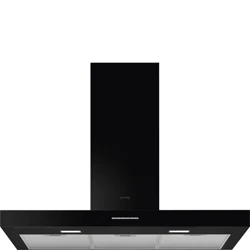
Exhaust hood
Instruction on mounting and use

1
2
3
4

5
6
7
8

9
EN Caution
10
TRANSLATION OF THE
ORIGINAL INSTRUCTIONS
Safety Instructions
Read all instructions
Closely follow the instructions set out
in this manual. The manufacturer
declines all responsibility for any
faults, damage or fires caused by the
failure to observe the instructions
provided in this manual. The hood is
designed for extracting cooking
fumes and vapours. It is intended for
domestic use only.
The hood can appear different to the
one illustrated in the drawings in this
booklet. However, the instructions
for use, maintenance and installation
are the same.
! This manual should be kept for
future reference. If the appliance
is sold, given away or you move to
a new house, make sure that it
stays with the product.
! Read the instructions carefully:
they contain important
information regarding installation,
use and safety.
! Do not make any electrical or
mechanical modifications to the
product or the extraction ducts.
! Before installing the appliance,
make sure that none of the
components are damaged.
Otherwise, contact your dealer
and do not proceed with the
installation.
Please note: The items marked with
“(*)” are optional accessories
supplied only with some models or
items that are not supplied and that
have to be purchased separately.
Caution
Warning! Do not connect the
appliance to the mains power supply
until installation is complete.
Before carrying out cleaning or
maintenance, disconnect the hood
from the mains power supply by
removing the plug or switching off
the main circuit breaker.
Always wear work gloves when
carrying out installation and
maintenance.
The appliance is not intended to be
used by children or by people of
reduced physical, sensory or mental
capacity or if lacking experience or
knowledge in the use of the
appliance, unless they are supervised
or have been trained to use the
appliance by a person responsible for
their safety.

EN Caution
11
Children should be supervised to
make sure that they do not play with
the appliance.
Do not use the hood if the grid is not
mounted correctly!
The hood should NEVER be used as a
support surface unless specifically
indicated.
The room in which the hood is
installed must be adequately
ventilated when the hood is used
together with other appliances
powered by gas or other fuels.
The air that is extracted must not be
conveyed into a duct that is used for
extracting fumes from appliances
powered by gas or other fuels.
Do not flambé foods under the hood.
The use of open flames can damage
the filters and can cause fires and
must therefore be avoided.
Frying must be carried out with care
so that the oil does not overheat and
catch fire.
When the hob is in use, the
accessible parts of the hood may
become hot.
Accessible parts may become hot
when used with a cooking appliance
Comply with local authority
regulations regarding the technical
and safety measures to adopt for
discharging the fumes.
The hood should be cleaned
regularly, both internally and
externally (AT LEAST ONCE A MONTH
and in any case, comply with the
maintenance instructions provided in
this manual).
Failure to follow the instructions for
cleaning the hood and replacing the
filters can lead to the risk of fire.
Do not use or leave the hood without
the lamps correctly installed as there
is a possible risk of electric shock.
The manufacturer declines all
responsibility for any faults, damage
or fires caused by the failure to
observe the above the instructions
provided in this manual.
This appliance is marked according to
the European directive 2002/96/EC
on Waste Electrical and Electronic
Equipment (WEEE). By ensuring this
product is disposed of correctly, you
will help prevent a potential negative
impact on the environment and on
human health.
EN Caution
12
The symbol on the product, or in
the accompanying documentation,
indicates that this product should not
be disposed of as household waste
but that it should be taken to an
appropriate collection point for the
recycling of electrical and electronic
equipment. Dispose of the product in
accordance with
local waste disposal regulations. For
further information on treatment,
collection and recycling this product,
please contact your appropriate local
authority department, the household
waste collection service or the shop
where you purchased this product.
This appliance has been designed,
tested and built in compliance with
the standards on:
• Safety: IEC/EN 60335-1;
IEC/EN 60335-2-31, IEC/EN
62233.
• Performance: IEC/EN 61591;
ISO 5167-1; ISO 5167-3; ISO
5168; IEC/EN 60704-1;
IEC/EN 60704-2-13; ISO 3741;
EN 50564; IEC 62301.
• EMC: EN 55014-1; CISPR 14-
1; EN 55014-2; CISPR 14-2;
IEC/EN 61000-3-2; IEC/EN
61000-3-3.
Recommendations for proper use of
the appliance aimed at reducing
environmental impact: When you
start cooking, switch the hood on at
minimum speed and leave it on for a
few minutes after you have finished
cooking. Increase the speed only if
there is a large amount of steam and
fumes. Use the booster function only
when necessary.
Replace the carbon filter(s) whenever
necessary in order to maintain a good
level of odour reduction efficiency.
Clean the grease filter whenever
necessary in order to keep it working
efficiently. In order to optimise
efficiency and reduce noise, use a
duct of the maximum diameter
indicated in this manual.
WARNING! Failure to install screws
or fixing devices according to these
instructions can cause electrical
hazards.
EN Caution
13
Use
The hood is designed to be used
either as a ducting version or as a
filter version.
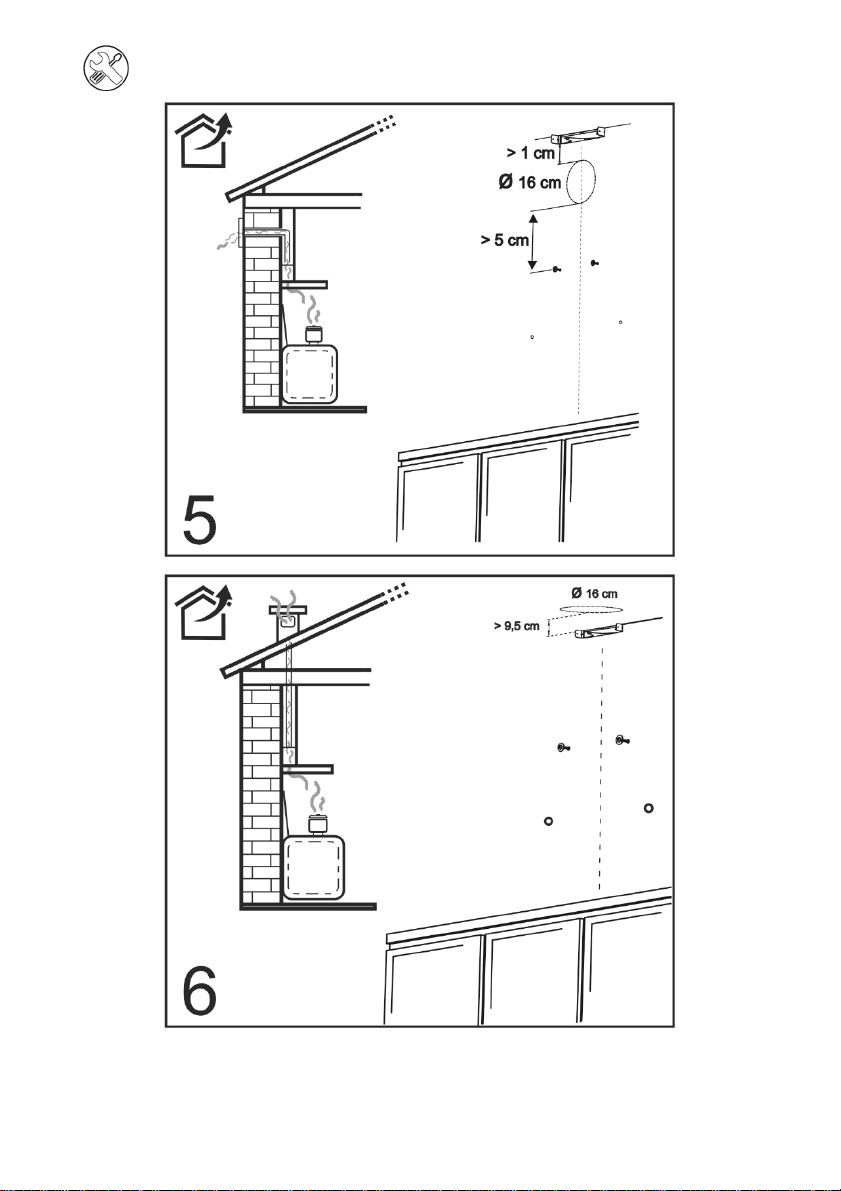
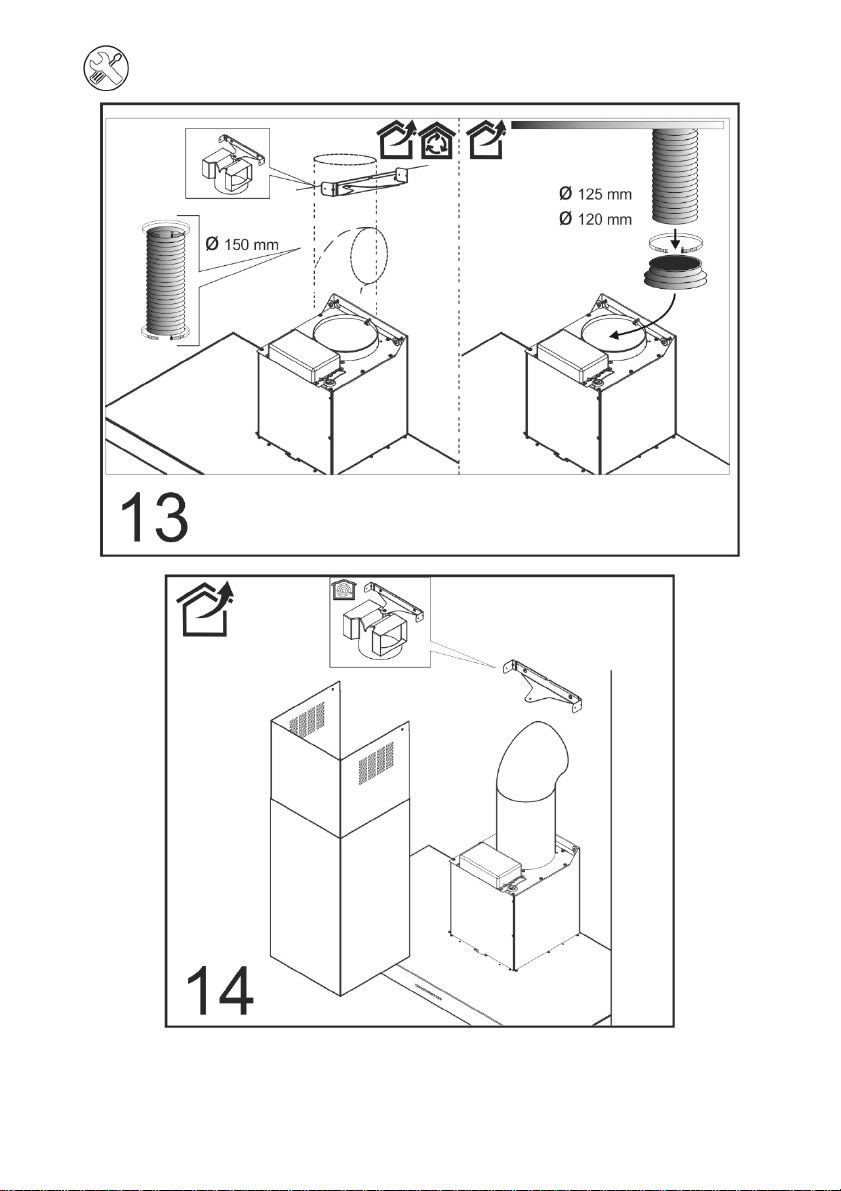
Ducting version
This version conveys the fumes to the
outside of the building via an
extraction duct that is fixed to the
connecting flange.
The diameter of the extraction duct
must be the same as that of the
connecting ring.
Warning! The duct is not supplied
and must be purchased separately.
In the horizontal section, the
extraction duct must have a slight
upwards inclination (about 10°) so
that it can convey the air to the
outside more easily.
If the hood is fitted with activated
carbon filters, they should be
removed.
Connect the hood to the extraction
ducts and wall outlets that have a
diameter that is the same as the air
outlet (connecting flange).
Using ducts and wall outlets that
have a smaller diameter will reduce
suction and lead to a large increase in
noise.
We decline any responsibility if these
instructions are not complied with.
! Use a duct of the minimum
length necessary.
! Use a duct with as few bends as
possible (maximum angle: 90°).
! Avoid drastic changes in the duct
cross-section.
! Use a duct that is as smooth as
possible inside.
! The duct must be made of
certified material.
Filter version
The air will be degreased and
deodorised before being returned to
the room. To use the hood in this
version you have to install an
additional activated carbon filtration
system.
Models without a suction motor only
operate in ducting mode and must be
connected to an external suction
device (not supplied).
Connection instructions are supplied
with the external suction unit.

EN Installation
14
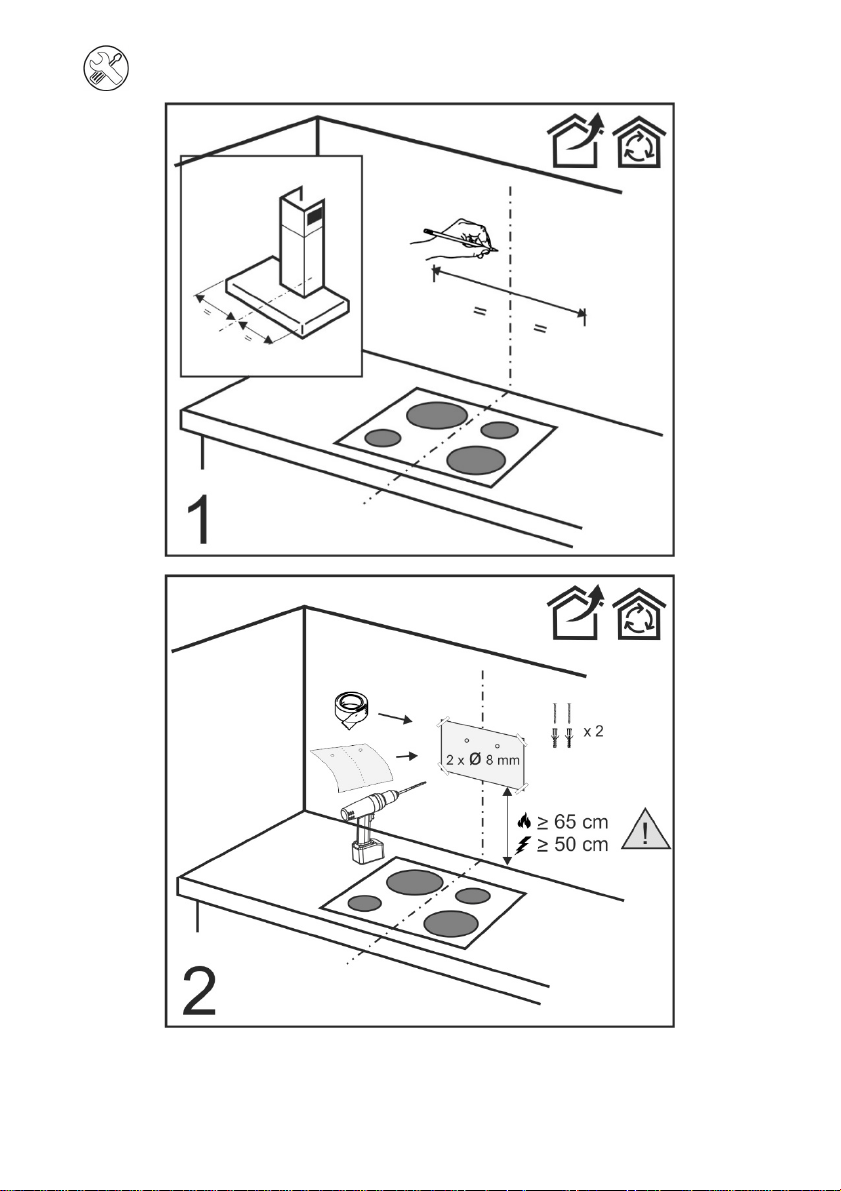
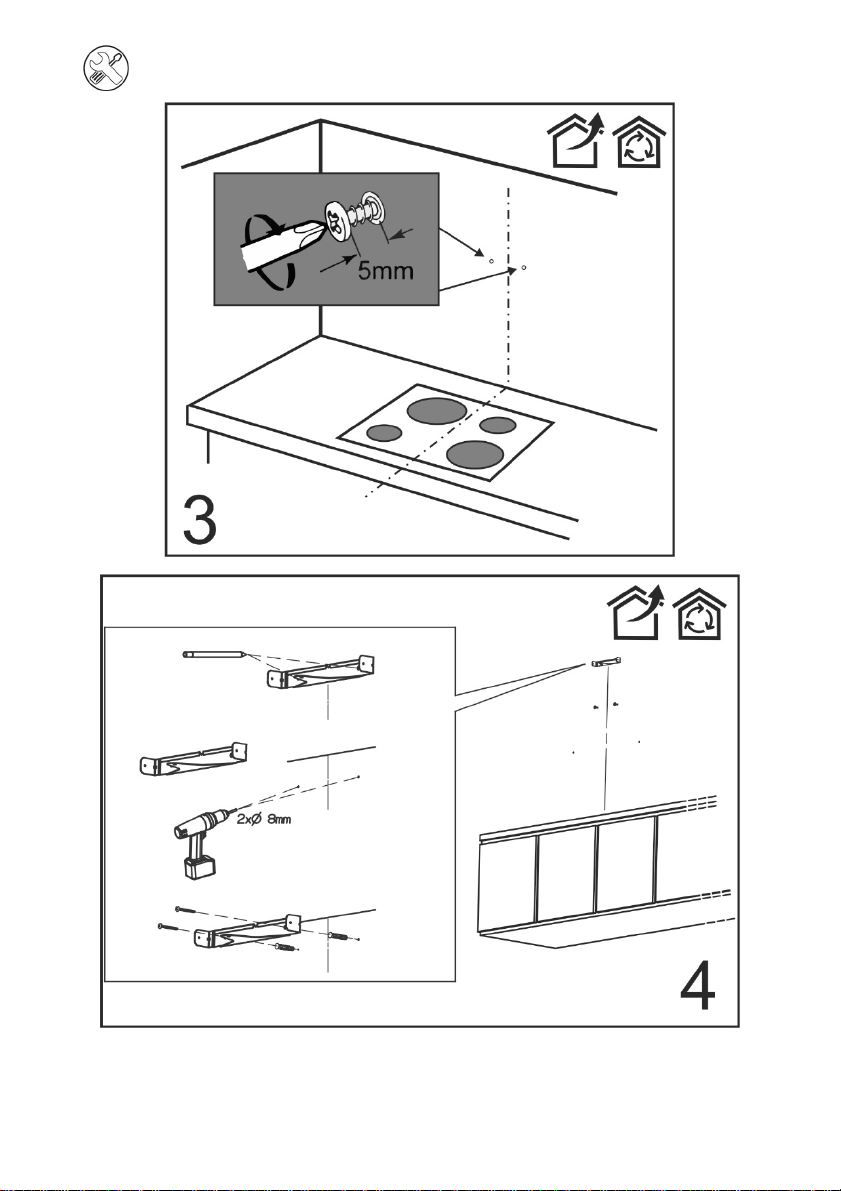
Installation
The minimum distance between the
pan supports on the hob and the
lowest part of the hood must not be
less than 50cm for electric hobs and
65cm from gas or mixed fuel hobs.
If the installation instructions for the
gas hob specify a greater distance,
this must be complied with.
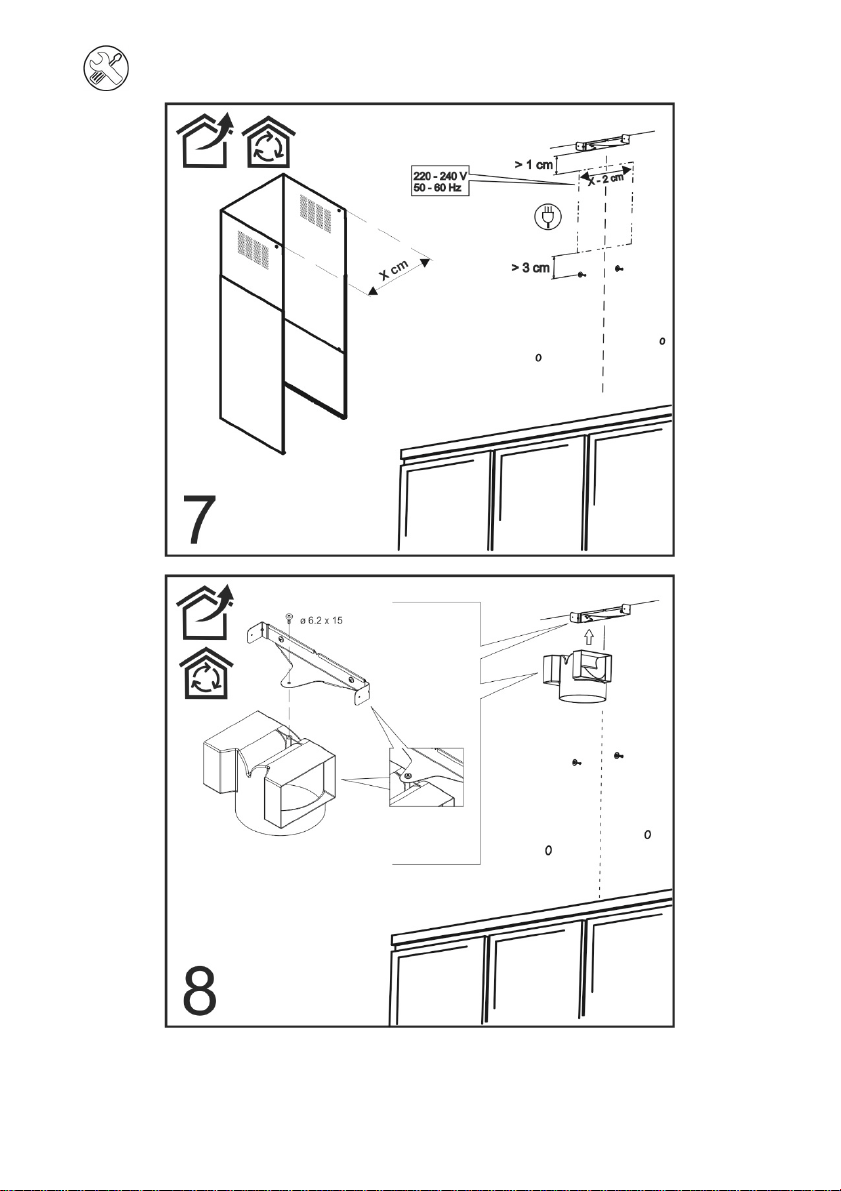
Electrical connection
The mains power supply voltage must
be the same as that indicated on the
plate inside the hood. If provided
with a plug, connect the hood to a
socket that is compliant with current
regulations and located in an area
that is accessible, even after
installation. If it is not fitted with a
plug (direct mains connection) or if
the plug is not located in an
accessible area after installation, use
a compliant two-pole switch that
assures the complete disconnection
of the mains under over-current
category III conditions, in accordance
with installation regulations.
WARNING! Always make sure that
the mains power cable has been
installed correctly before re-
connecting
the hood to the mains power supply
and making sure that it works
correctly.
The hood is provided with a special
power cable; if the cable is damaged,
request a replacement from the
technical support department.
Save this instructions

EN Installation
15
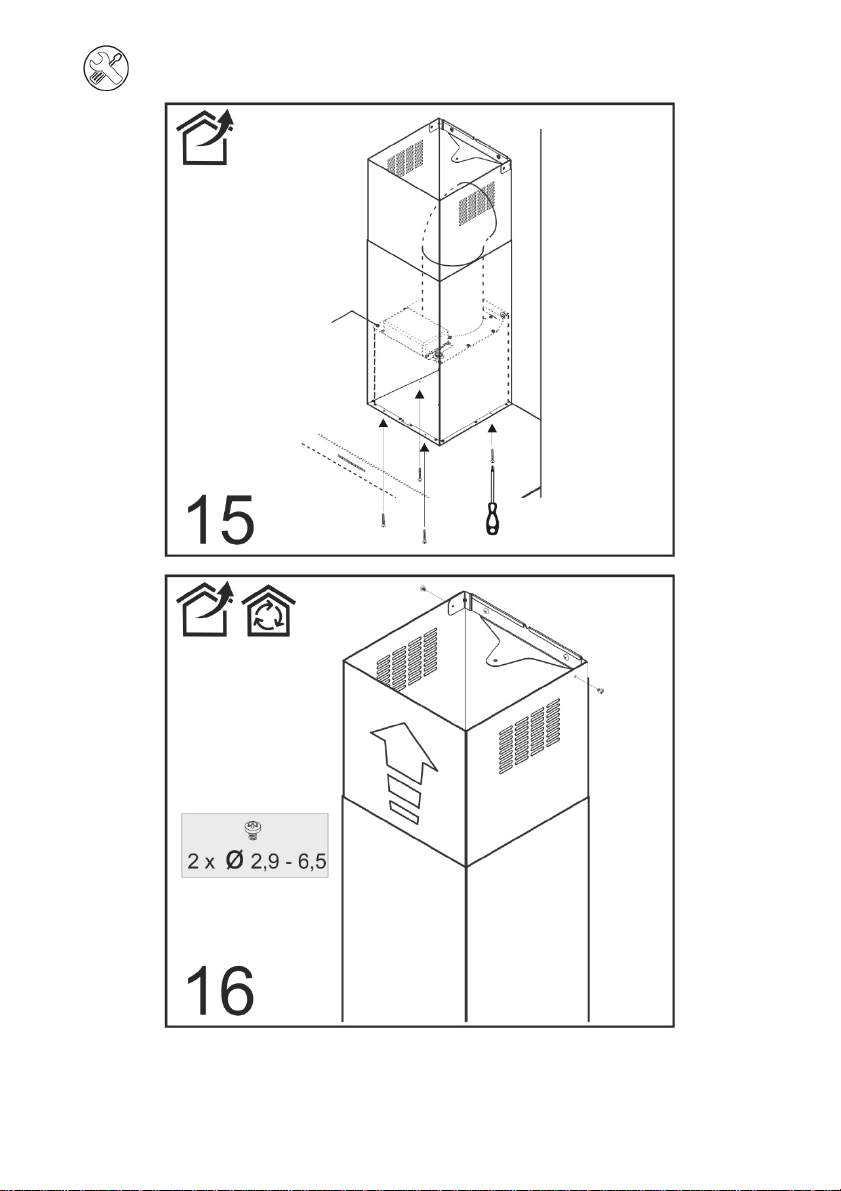
Mounting
Before installation:
• Make sure that the product is
of a suitable size for the area
in which it is to be installed.
• Remove the activated carbon
filter(s) if supplied (see also
relative section). This/these
should be reinstalled only if
you wish to use the hood in
the filter version.
• Make sure that (for transport
purposes) there are no other
items inside the hood (e.g.
packets of screws,
guarantees etc.), which
should be removed and kept.
• If possible, disconnect and
move any units below and
around the area of
installation of the hood (wall
or ceiling) in order to have
better access. Otherwise,
protect the furniture units
and all the parts involved in
the installation as much as
possible. Select a flat surface
on which to place the hood
and the supplied parts and
cover it with a protective
cover.
• Also make sure that there is
an electric socket available in
the area in which the hood is
to be installed (which can be
accessed even after the hood
has been installed) and that it
is possible to connect to a
device that discharges the
fumes to the outside (ducting
version only).
• Carry out all the masonry
work required (e.g.
installation of an electrical
socket and/or a hole for the
passage of duct).
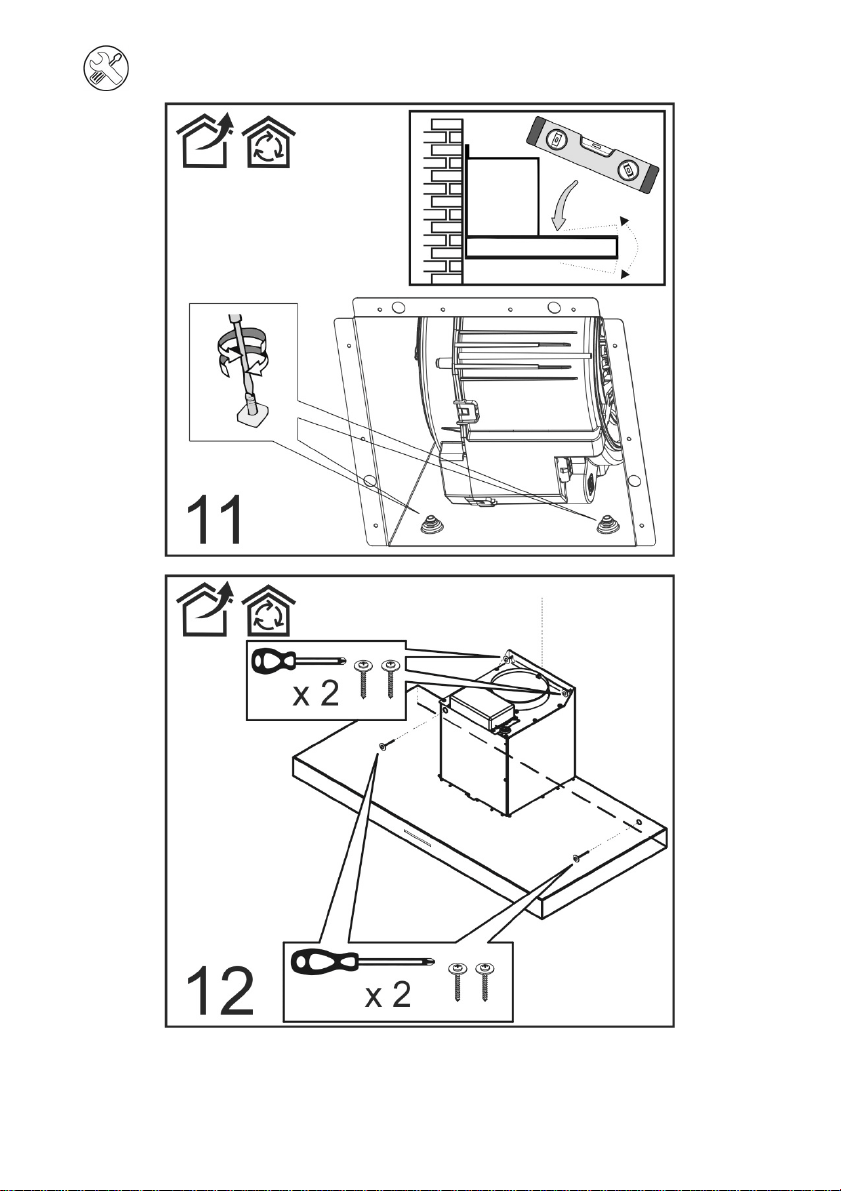
The hood is supplied with expansion
plugs for fastening the hood to most
types of walls/ceilings. However, a
qualified technician should verify the
suitability of the materials for the
type of wall/ceiling. The wall/ceiling
must be strong enough to support
the weight of the hood.

EN Instructions for use
16
Operation
Use the highest speed if there is a large amount of steam in the kitchen. It is
recommended to switch on the suction 5 minutes before starting to cook and
to leave it on for about another 15 minutes after cooking.
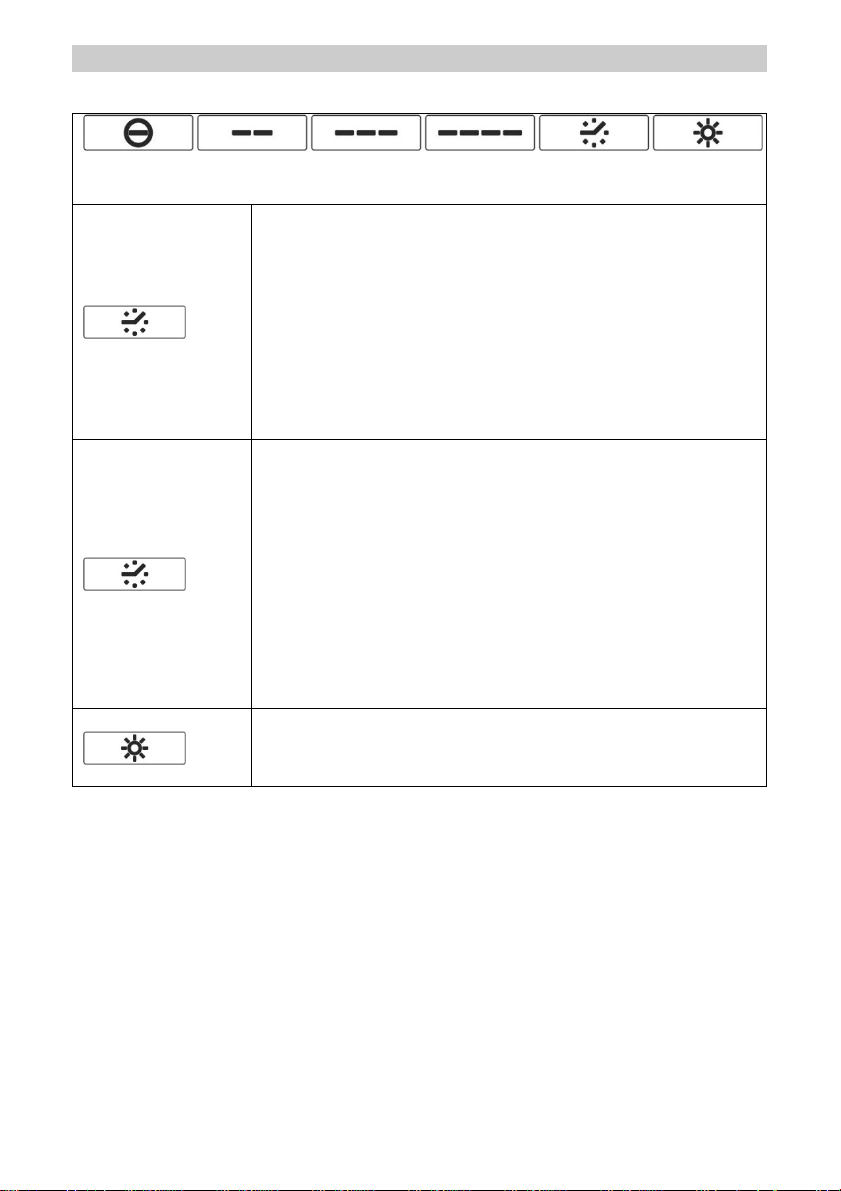
1 2 3 4 5 6
ON/OFF hood and speed 1: press button 1 to switch
the hood on. The LED below the icon will light up. To
switch off the hood, go back to the minimum speed by
pressing button 1 and then press button 1 again to
switch it off.
Speed 2: can be selected only after the hood has been
switched on
Speed 3: can be selected only after the hood has been
switched on
Intensive speed (boost): this speed is timed. The
operating time is 5 minutes, after which the suction
speed returns to speed 3. To switch off the function
before the time elapses, press button 1, 2 or 3, the
hood will go to the selected speed.
EN Instructions for use
17
1 2 3 4 5 6
Timer operation: Programs automatic hood switch off.
With the hood operating at any speed, press button 5,
the relative LED will start to flash, indicating that this
function is timed for 15 minutes. The speed can be
changed during this time.
To turn off the timer, press button 5 again or switch off
the hood by pressing button 1, the LED switches off
and the function is disabled. The hood will switch
automatically to OFF, with all the LEDs turned off when
the function ends.
Recirculation function
When this function is enabled, the motor is switched
on for 10 minutes and then it turns off for 50 minutes,
every hour for 24 hours.
To activate the air cleaning function, press and hold
button 5 for 3 seconds; the LED button 5 remains on
steadily.
To turn the function off, press and hold button 5 for 3
seconds. The hood switches off.
Lights ON/OFF.

EN Instructions for use
18
Grease filter signal
After 100 hours of operation, the
LED on button 5 switches on steadily.
When this signal appears, the grease
filter needs to be cleaned.
The signal can be seen when the
hood is in the Extractor OFF mode.
To cancel the grease filter signal,
press and hold button 1 for about 3
seconds until it turns off.
Maintenance
WARNING! Before carrying out
cleaning or maintenance, disconnect
the hood from the mains power
supply by removing the plug or
switching off the main circuit
breaker.
Cleaning
The hood should be cleaned, both
internally and externally, regularly (at
least as often as you service the
grease filters). Use a cleaning cloth
moistened with neutral liquid
detergents. Do not use abrasive
products. DO NOT USE ALCOHOL!
Warning: Failure to follow the
instructions for cleaning the
appliance and replacing the filter can
lead to the risk of fire. Follow the
instructions carefully.
The manufacturer will not be held
liable for any damage to the motor or
fires caused by incorrect
maintenance or failure to follow the
above instructions.

EN Instructions for use
19
Grease filter
Retains the particles of grease
produced during cooking. It should be
cleaned at least once a month (or
when the filter saturation indication
system - if installed on the model in
your possession - indicates that it is
necessary to do so) using a non-
aggressive detergent, either by hand
or with a short, low temperature,
dishwasher cycle.
If washed in a dishwasher, the metal
grease filter may change colour, but
this not does affect its performance
in any way.
Pull the spring release handle to
remove the grease filter.
*NON-washable activated carbon
filter (only for models provided with
it)
The carbon filter retains unpleasant
cooking odours. The filter becomes
saturated after a variable length of
time, depending on the type of
cooking and how often the grease
filter is cleaned. In any case, the
cartridge should be replaced at least
every four months. This filter
CANNOT be washed or regenerated.
*Washable activated carbon filter
(only for models provided with it)
The carbon filter retains unpleasant
cooking odours. The carbon filter can
be washed once every two months
using hot water and suitable
detergents, or in a dishwasher at
65°C (if a dishwasher is used, select
the full cycle function without loading
dishes).
Eliminate excess water without
damaging the filter, then remove the
mat from inside the plastic frame and
place it in the oven for 10 minutes at
100°C to dry completely.
Replace the mat every 3 years and
whenever the cloth is damaged.
Lamp Replacement
The hood is equipped with a LED
lighting system.
The LEDs guarantee optimum
lighting, last up to 10 times longer
than traditional lamps, and allow
energy savings of up to 90%.
For replacement, contact the
technical support service.

20