Loading ...
Loading ...
Loading ...
want to install it.
Step 7 – Attach your central vacuum piping to the central vacuum
cleaner. Below is a picture of a example of how the unit could
be installed.
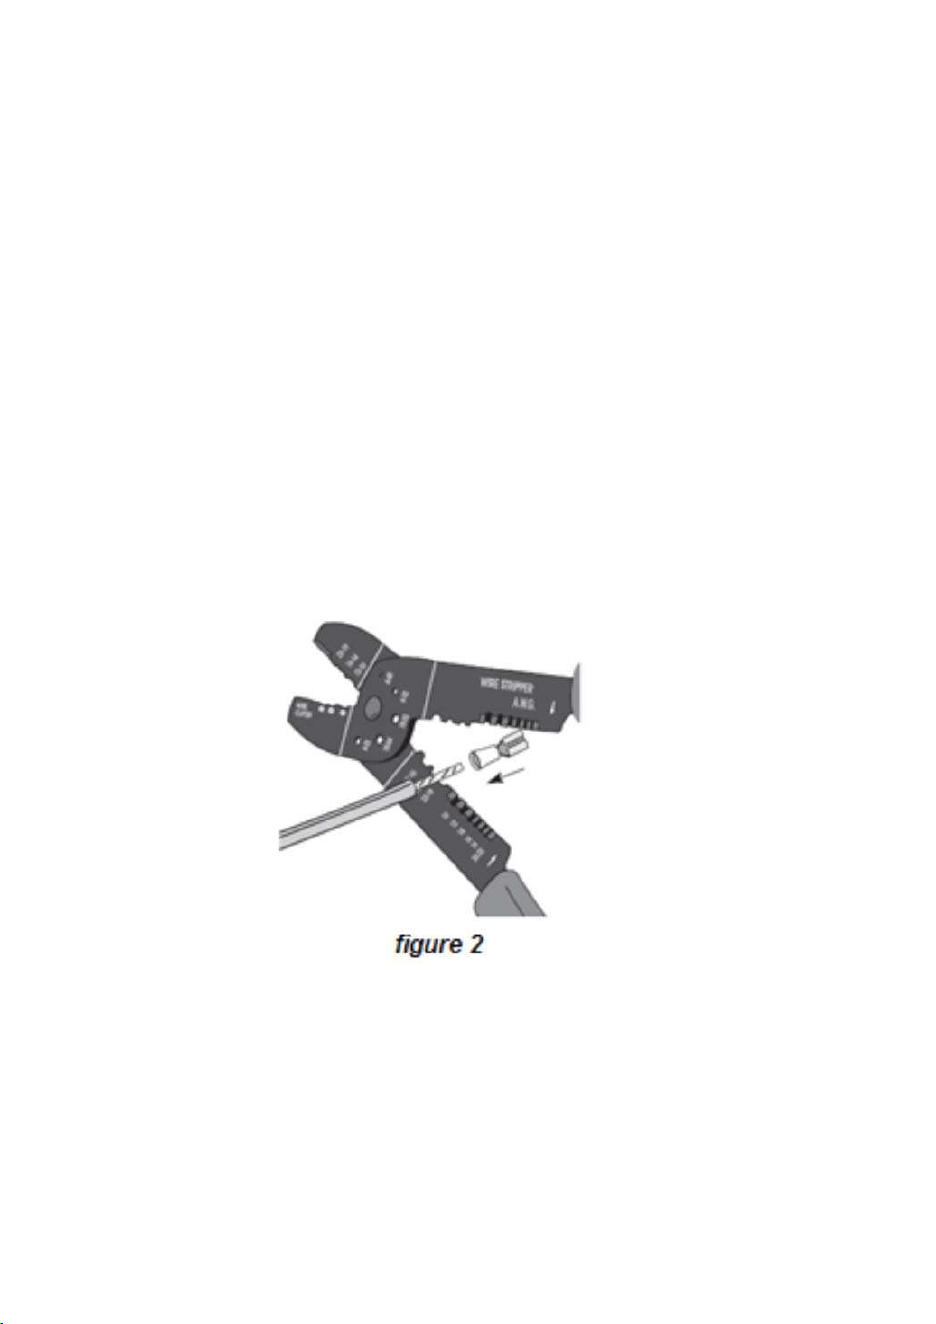
Step 8 – If you have low voltage lines along your piping install
them to the central vacuum in this step. To do so simply strip
the ends of the low voltage wires to the correct size, remove the
terminals on the low voltage inlet on the vacuum, twist the ends
of the low voltage wires so there are no loose wires and insert
them into the terminals (see Figure 2 below).
Then tighten the terminal in 2 places. In the front to hold the
wire and at the back to tighten the insulator around the wire
(Figure 2 above). If the insulator does not completely cover
the stripped wire, use electrical tape to insulate the wire
adequately, and prevent all contact between the 2 wires.
When done insert the terminal into the low voltage inlet (figure 3
below).
When disconnecting do not pull on the wire but instead simply
remove the terminal from the low voltage inlet on the vacuum.
Step 9 – With the vacuum mounted on the wall, the pipes all
connected, and the low voltage lines installed you are ready to
plug in the unit to electricity. Make sure you are plug it into a
grounded 120 volt 15 amp standard electrical wall outlet.
Step 10- You may turn the vacuum on by turning the power
switch to “ON” on the vacuum, or by attaching the correct central
vacuum hose to a central vacuum outlet inside your home. If your
central vacuum hose has a on/off switch on the hose handle you
may need to turn that to on. If you dont have a central
vacuum hose Prolux also makes standard central vacuum hose
kits.
6 7
Loading ...
Loading ...
Loading ...