Loading ...
1
CAUTION
Read Rules and Instructions for Safe Operation
WARNINGS
1. Toreducetheriskofreorelectricshock,donotusethisfanwithanysolid-statespeedcontroldevice.
2. Thisappliancehasapolarizedplug(onebladeiswiderthantheother).Toreducetheriskofelectricshock,thisplug
isintendedtotinapolarizedoutletonlyoneway.Iftheplugdoesnottfullyintheoutlet,reversetheplug.Ifitstill
doesnott,contactaqualiedelectrician.Donotattempttodefeatthissafetyfeature.
3. This appliance is not intended for use by children.
4. Do not leave the fan running unattended.
SAFETY WARNINGS
1. Fan should be used under rated voltage.
2. Connectpoweronlyafterthefanisfullyassembled.
3. Neverinsertngersoranyotherobjectthroughthegrillwhenfanisrunning.
4. Unplugfromoutletwhennotinuse,whenmovingfanfromonelocationtoanother,beforeputtingonortakingoff
parts before cleaning.
5. Do not leave the fan running unattended.
6. Keepchildrenawayfromtheappliance.
7. ThisproductisintendedforhouseholduseONLYandnotforcommercial,industrialoroutdooruse.
8. Toprotectagainstelectricalshock,donotplacefaninwindows,immerseunitorcordinwaterorspraywithliquids.
9. Donotoperatethefaninthepresenceofexplosiveorammablefumes.
10. Donotplacethefanoranypartsnearanopename,cookingorotherheatingappliance.
11. Todisconnect,griptheplugandpullitfromthewalloutlet.Neveryankthecord.
12. Donothangormountfanonwallorceiling.
13. Donotoperateifthefanhousingisremovedordamaged.
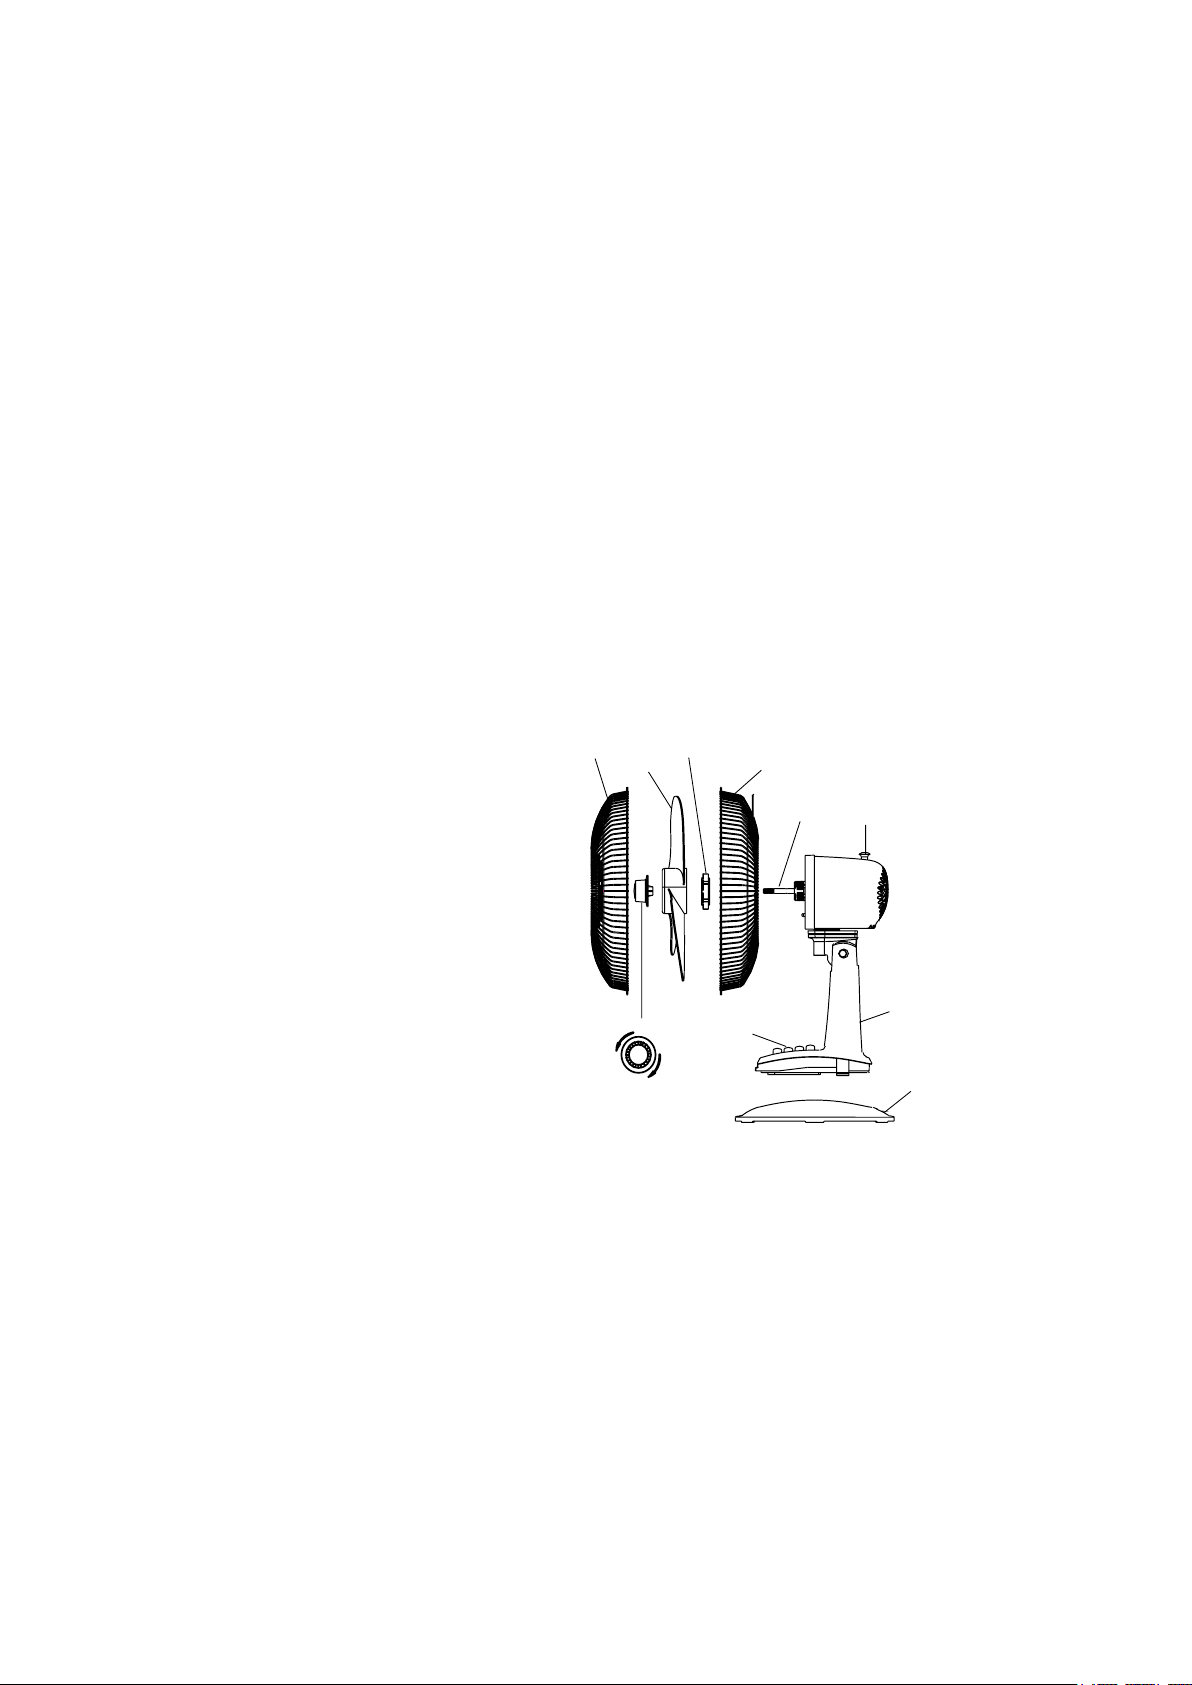
1. Front grille
2. Blade
3. Plastic nut
4. Rear grille
5. Motor shaft
6. OscillatingSwitch
7. Fan Body
8. Spinner
9. Base
10. Speed control keys
11. Tight
12. Loose
PARTS NAME
BASE ASSEMBLY
1. Detachscrewfrombaseofthefan.
2. Match locking tab to base and click into position.
3. Tightenthescrewinthebasetosecurethefantothebase.
ASSEMBLY OF BLADE AND GRILLS
1. TaketheSpinneroutfromthebagandremovetheplasticnutbyturningitcounterclockwise.
2. Setthereargrillintheproperpositionwiththehandleup.
3. Screwonplasticnuttightlytoattachgrill.
4. Installthebladeontotheshaftuntiltheretainingpintsintothenotchontheblade.
5. Screwspinnerontomotorshaftcounterclockwise.
6. Mountthefrontgrillandjoinbothgrillstogetherusingtheclips.
7. Removeanddiscardplasticsleeveonshaft.
9
1
2
3
4
5
6
7
10
8
12
11
Loading ...
Loading ...
Loading ...