PART# 40047 | 10.24.17
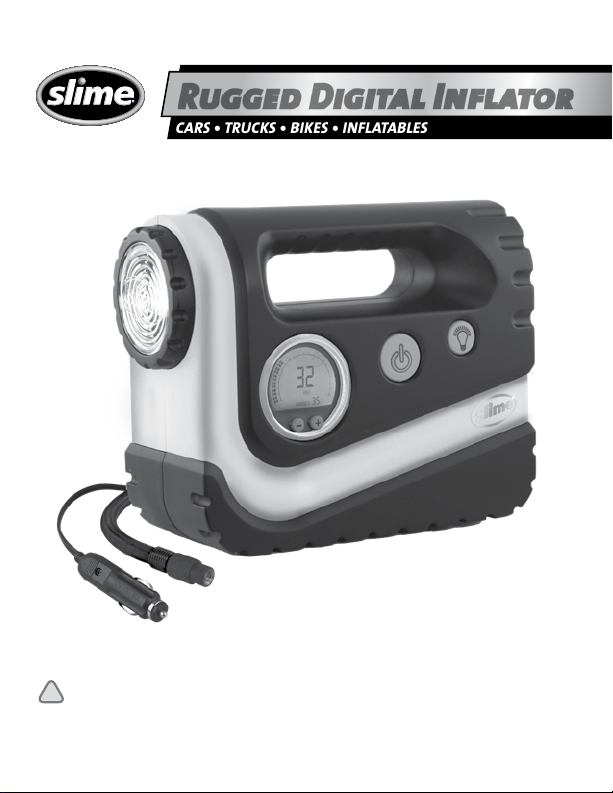
CARS • TRUCKS • BIKES • INFLATABLES
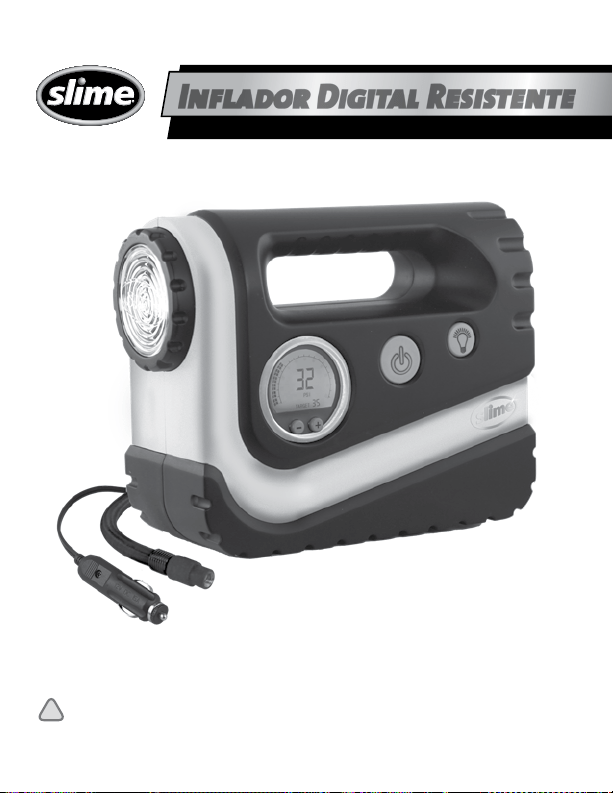
Rugged Digital InflatorRugged Digital Inflator
ATTENTION! READ ALL INSTRUCTIONS CAREFULLY
FAILURE TO FOLLOW WARNING INSTRUCTIONS CAN RESULT IN FIRE,
PERSONAL INJURY OR PROPERTY DAMAGE.
!
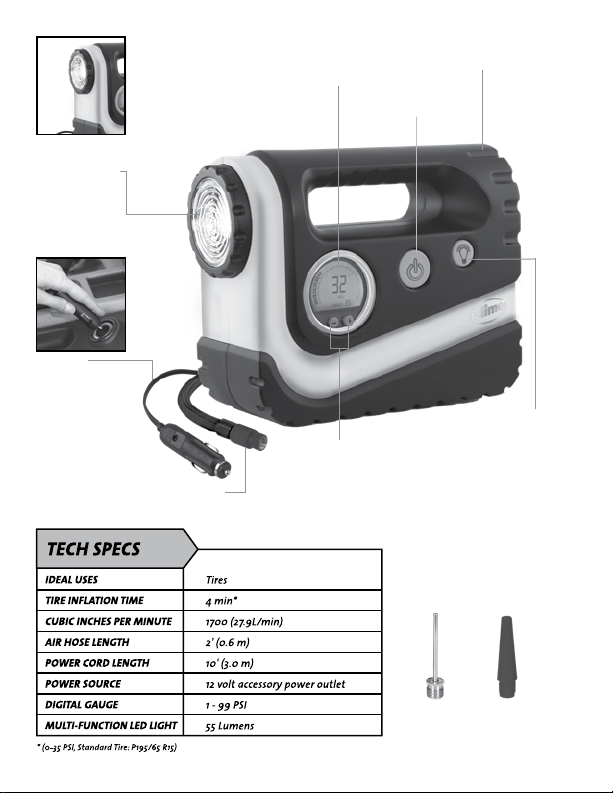
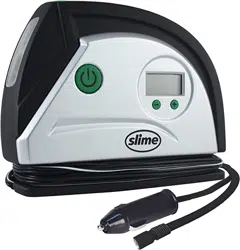
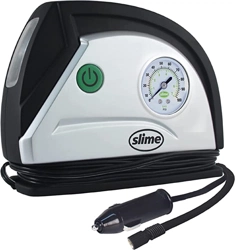
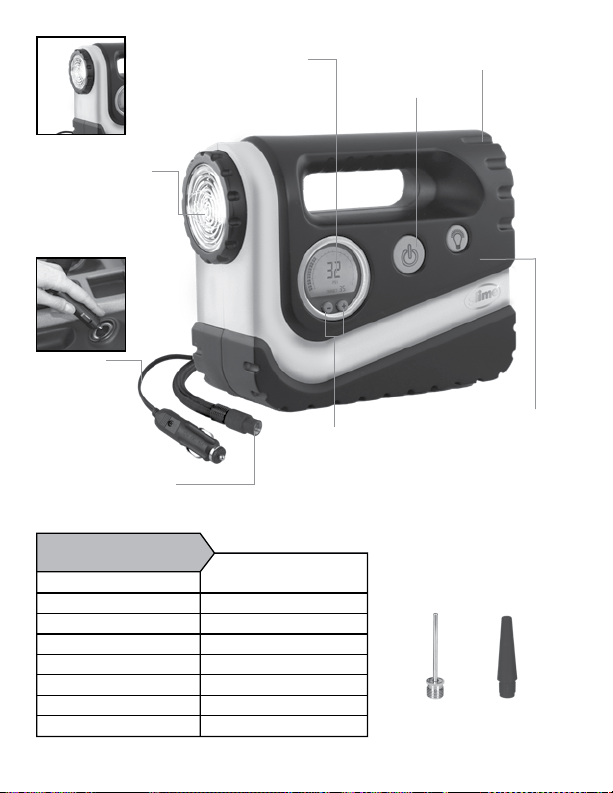
ON/OFF
SWITCH
POWER
SOURCE
• Plugs into 12 volt
power outlet
(10’ length (3m))
EASY READ
DIGITAL DISPLAY
• Displays PSI
BALLS INFLATABLES
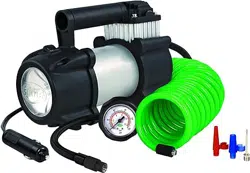
BRIGHT MULTI-FUNCTION
LED LIGHT
• Illuminates tire
and surrounding
area
• Blinks hazard red
for oncoming vehicles
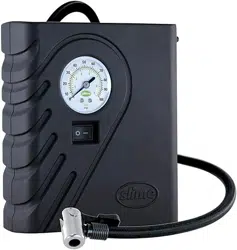
TWIST CONNECT AIR HOSE
• 2’ length (0.6m)
LIGHT SWITCH
• Toggles between
white light and
blinking hazard red
INFLATE RIGHT™
TECHNOLOGY
• Inflator automatically shuts off when
the set pressure level is achieved
• Guarantees perfect pressure with
every use
DURABLE RUGGED
HOUSING
CAUTION: HOT • DO NOT HOLD IN HAND WHILE OPERATING • PLACE INFLATOR ON A
HARD, CLEAN SURFACE.
1. DO NOT run vehicle while inflator is operating. You may need to be in
“accessory” or “on” position. Please make sure emergency brake is set and car is
in park.
2. DO NOT use inflator continuously for more than 10 minutes. Allow unit to cool
approximately 25 minutes between uses. Do not leave inflator unattended.
3. ALWAYS use a pressure gauge to check actual tire pressure.
DO NOT OVERINFLATE!
4. Read all instructions thoroughly before use. Failure to follow warning instructions
can result in fire, injury to persons or property damage.
5. For use with 12 volt DC power outlets rated 15 amps or higher. Do not use with
older 8 amp cigarette lighter receptacles.
6. Keep inflator out of reach of children.
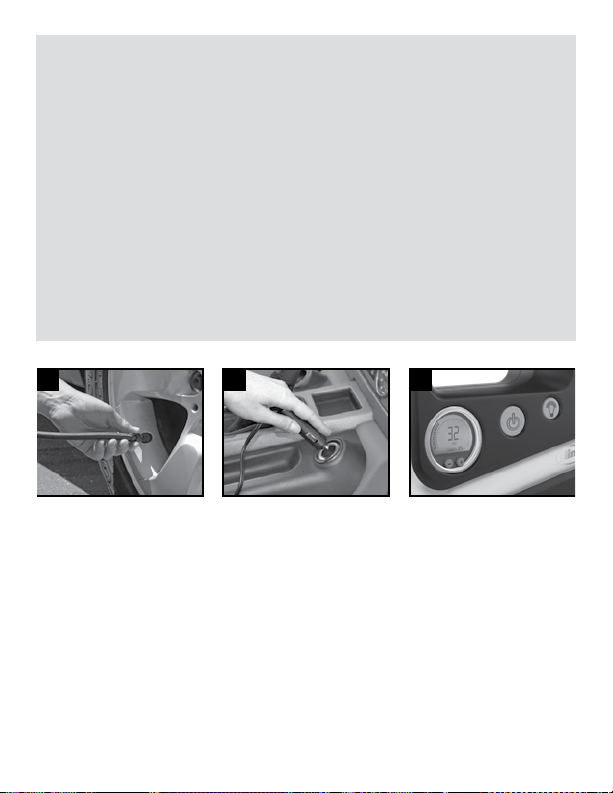
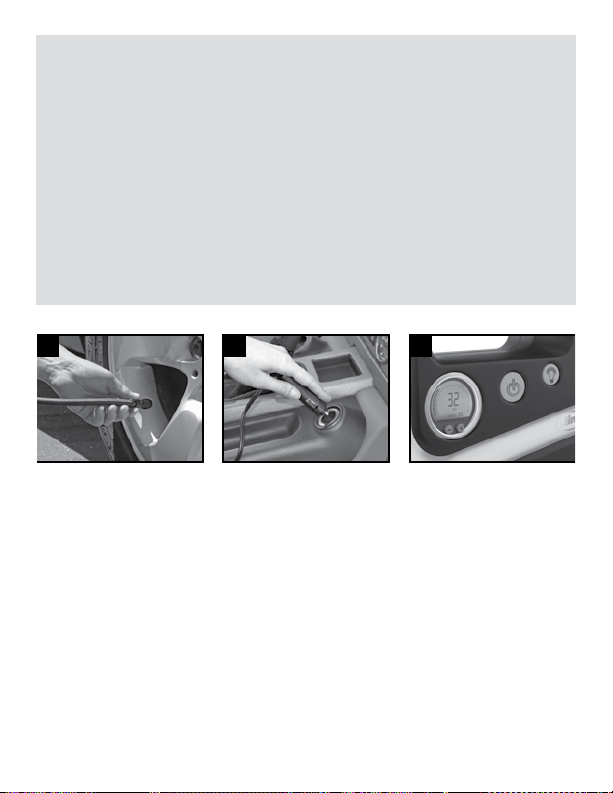
1 2 3
1. Screw air hose connector onto tire's valve stem.
2. Plug power cord into 12 volt accessory power outlet.
3. Press on switch to turn on inflator. Inflate tire to manufacturer's recommended air
pressure.* When proper pressure is reached, press off switch to turn off inflator. Unplug
power cord and remove air hose connector.
*NOTE: Correct tire pressure can be found in vehicle owner's manual or on driver's side
door jamb.
INFLATE TIRES
INFLATE RIGHT™ TECHNOLOGY INSTRUCTIONS:
1. Hold the + or – button for approximately 5 seconds until the display flashes.
Set the required pressure using the + or – buttons, then wait 2-3 seconds.
The display will show the pressure value to which the tire will be inflated.
2. Push the ON/OFF button for the inflator to start. When the pressure gauge reaches
the pre-set value, the inflator will automatically switch off.
3. The ON/OFF button can be used to override the pre-set pressure value if required.
TROUBLESHOOTING:
Inflator will not turn on (try one or all of the following):
1. Check to see if the tire pressure set point on the digital gauge is set to a lower
PSI than your tire currently is reading (i.e., the digital gauge is set to 15psi but
your tire is at 20psi; in this scenario, the inflator will not turn on) Refer to the
digital gauge operating instructions and set the PSI to the correct tire pressure.
2. Check the power plug and push it firmly into the receptacle, twist back and
forth.
3. Check receptacle and plug terminals for dirt, or debris. (Use a non-conductive
probe, not fingers or metal).
4. Check vehicle power outlet fuse, should be 15 amps minimum.
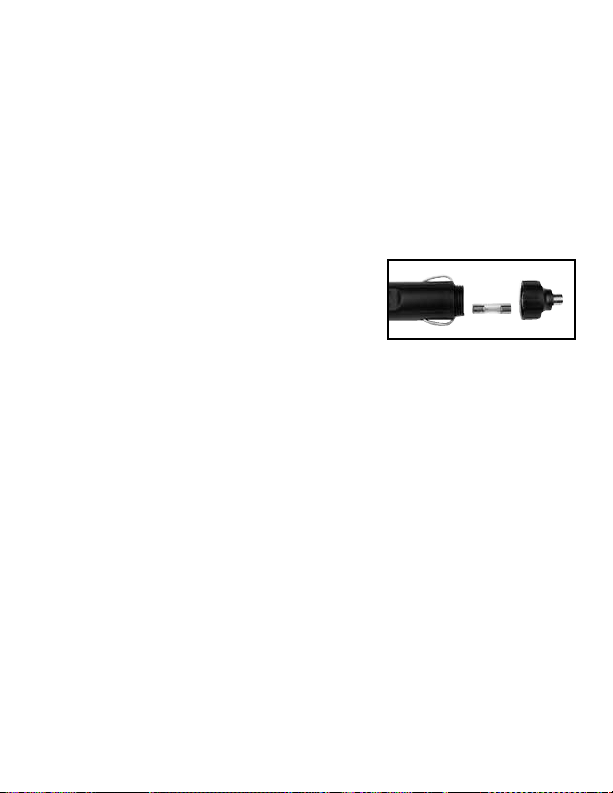
5. Check the fuse, located in the plug adaptor, it may
have blown. Unscrew the tip of the plug adaptor,
remove fuse, and inspect (if necessary, replace
fuse with one of the same amperage).
Inflator runs but does not inflate:
1. Be sure the connector is fully tightened on the valve stem.
2. Check tire for leaks, and check hose for breaks and leaks at fittings.
Inflator runs slowly:
1. Overheated from excessive use, shut it off and allow to cool for 25 minutes.
2. Voltage too low, check condition of vehicle battery.
NOTE: If tire is totally deflated, it is possible that the tire could separate from the
rim allowing air to leak out when trying to inflate.
In the event this situation
occurs, you will have to jack up the tire prior to inflation.
CAUTION: Keep inflator out of reach of children. Do not over-inflate tire.
Dispose of this product at an e-waste recycling collection point or facility. Do not
place in the trash or standard recycling receptacle.
WARRANTY: For the period of one year from date of purchase, manufacturer guarantees that this Product will
meet the specifications when used as directed. Manufacturer’s sole liability and Customer’s sole remedy under any
warranty claim is limited to Manufacturer’s coupon upon return of proof of purchase.
QUESTIONS OR COMMENTS:
Call (888)457-5463 or visit www.slime.com
ITW Global Tire Repair • 125 Venture Drive, Suite 210, San Luis Obispo, CA 93401 USA
Slime® is a trademark of Illinois Tool Works, Inc., registered in the U.S. and other countries.
AUTOMÓVILES • CAMIONES • BICICLETAS • INFLABLES
Inflador Digital ResistenteInflador Digital Resistente
¡ATENCIÓN! LEA TODAS LAS INSTRUCCIONES CON ATENCIÓN
SI NO SIGUE LAS INSTRUCCIONES DE ADVERTENCIA, PUEDE CAUSAR
INCENDIO, LESIONES A PERSONAS O DAÑOS MATERIALES.
!
INTERRUPTOR
DE ENCENDIDO/
APAGADO
FUENTE DE
ENERGÍA
• Se conecta a una
salida eléctrica de
12 voltios (10’ de
longitud (3 m))
PANTALLA DIGITAL
DE LECTURA FÁCIL
• Indica la presión por
pulgada cuadrada o PSI
PELOTAS INFLABLES
LUZ LED BRILLANTE
MULTIFUNCIONAL
• Ilumina la llanta y el área a
su alrededor
• Emite luz roja intermitente
para vehículos que se
aproximan
MANGUERA DE AIRE CON
CONEXIÓN DE ROSCA
• 2’ de longitud (0.6 m)
INTERRUPTOR
DE LA LUZ
• Cambia entre
luz blanca y roja
intermitente para
indicar peligro
TECNOLOGÍA INFLATE RIGHT™
• El inflador se apaga automáticamente
cuando se alcanza el nivel de presión
establecido
• Garantiza la presión perfecta con
cada uso
CARCASA RESISTENTE
DURABLE
USO IDEAL
TIEMPO PARA INFLAR LA LLANTA
PULGADAS CÚBICAS POR MINUTO
LONGITUD DE LA MANGUERA DE AIRE
LONGITUD DEL CABLE ELÉCTRICO
FUENTE DE ENERGÍA
MEDIDOR DIGITAL
LUZ LED
Llantas
4 min*
1700
2' (0.6m)
10' (3.0m)
Salida eléctrica de 12 voltios para
accesorios
1 - 99 PSI
55 lúmenes
ESPECIFICACIONES
TÉCNICAS
* (0-35 PSI, llanta estándar de coche: 195/65 R15)
(27.9L/min)
PRECAUCIÓN: CALIENTE • NO SOSTENER EN LA MANO MIENTRAS SE USA • COLOCAR EL
INFLADOR SOBRE UNA SUPERFICIE SÓLIDA Y LIMPIA.
1. NO operar el vehículo mientras el inflador está funcionando. Es posible que deba estar
en posición de “accesorio” o “encendido”. Cerciorarse de que el freno de emergencia
esté activado y de que el coche esté en posición de estacionamiento.
2. NO usar el inflador de forma continua durante más de 10 minutos. Dejar que la unidad
se enfríe unos 25 minutos entre usos. No dejar el inflador sin supervisión.
3. SIEMPRE usar un medidor de presión para comprobar la presión real de la llanta. ¡NO
INFLAR EN EXCESO!
4. Leer todas las instrucciones detenidamente antes del uso. No seguir las instrucciones
de advertencia puede resultar en un incendio, lesiones o daños a la propiedad.
5. Para uso con salidas eléctricas de 12 voltios CC de 15 amperios de tensión nominal
o más. No utilizar con receptáculos antiguos de 8 amperios de encendedores de
cigarrillos.
6. Mantener fuera del alcance de los niños.
1 2 3
1. Colocar el conector de la manguera de aire en el vástago de la válvula de la llanta.
2. Conectar el cable eléctrico en la salida eléctrica de 12 voltios para accesorios.
3. Pulsar el interruptor para encender el inflador. Inflar la llanta conforme a la presión de
aire recomendada por el fabricante*. Cuando se alcance la presión correcta, pulsar el
interruptor para apagar el inflador. Desconectar el cable eléctrico y retirar el conector de
la manguera de aire.
*NOTA: La presión correcta de las llantas se puede encontrar en el manual del propietario
del vehículo o al interior de la puerta del lado del conductor.
CÓMO INFLAR LAS LLANTAS
INSTRUCCIONES SOBRE LA TECNOLOGÍA INFLATE RIGHT™:
1. Sostener el botón + o - durante aproximadamente 5 segundos hasta que la pantalla se
torne intermitente. Configurar la presión deseada con los botones + o -, luego esperar
2-3 segundos.
2. Pulsar el botón de encendido/apagado para que el inflador arranque. Cuando
el indicador de presión alcance el valor preestablecido, el inflador se apagará
automáticamente.
3. El botón de encendido/apagado se puede utilizar para anular el valor de presión
preestablecido, si es necesario.

GARANTÍA: Por el periodo de un año desde la fecha de compra, el fabricante garantiza que este producto cumplirá
las especificaciones si se usa de acuerdo con las instrucciones. La única responsabilidad del fabricante y la única
solución para el cliente bajo cualquier reclamación de garantía se limita a un cupón del fabricante para el reemplazo
del producto cuando se haya devuelto el artículo con el comprobante de compra.
PREGUNTAS O COMENTARIOS: Llamar al (888)457-5463 o visitar www.slime.com
ITW Global Tire Repair • 125 Venture Drive, Suite 210, San Luis Obispo, CA 93401 USA
Slime® es una marca registrada de Illinois Tool Works, Inc., registrada en Estados Unidos y en otros países.
SOLUCIÓN DE PROBLEMAS:
El inflador no enciende (probar una o todas las siguientes):
1. Verificar si el punto de configuración de presión de la llanta en el indicador digital es
un valor PSI inferior a la lectura actual de la llanta (es decir, el medidor digital está
configurado a 15 psi, pero la llanta tiene 20 psi, en este escenario, el inflador no se
encenderá). Consultar el manual de instrucciones del medidor digital y configurar el
valor de PSI a la presión correcta de la llanta.
2. Verificar el enchufe eléctrico y empujarlo firmemente en el receptáculo, girar de lado a
lado.
3. Revisar si hay suciedad en el receptáculo y en los terminales del enchufe. (Usar una
sonda no conductora, no usar los dedos ni objetos metálicos).
4. Revisar el fusible de salida eléctrica del vehículo, debe ser de un mínimo de 15 amperios.
5. Revisar el fusible, que se encuentra en el adaptador del
enchufe, es posible que se haya fundido. Desenroscar
la punta del adaptador del enchufe, quitar el fusible, e
inspeccionar (si es necesario, reemplazar el fusible con
uno del mismo amperaje).
El inflador enciende pero no infla:
1. Verificar que el conector esté completamente apretado en el vástago de la válvula.
2. Revisar las llantas en busca de fugas, y revisar que la manguera no tenga roturas ni fugas
en las conexiones
El inflador funciona lentamente:
1. Se ha sobrecalentado por el uso excesivo, apagarlo y dejar enfriar durante
25 minutos.
2. El voltaje está demasiado bajo, verificar el estado de la batería del vehículo.
NOTA: Si la llanta está totalmente desinflada, es posible que se haya separado del rin,
lo que permite que el aire se escape hacia afuera al tratar de inflar.
EN EL CASO DE QUE
SE PRODUZCA ESTA SITUACIÓN, SE DEBERÁ LEVANTAR LA LLANTA CON EL GATO ANTES DE
INFLARLA.
PRECAUCIÓN: MANTENER FUERA DEL ALCANCE DE LOS NIÑOS. No inflar las llantas en exceso.
Desechar este producto en un punto o centro de recolección de reciclaje de desechos