
User guide
D8 | D9 | D10

1
ENGLISH
To ensure an optimum experience, observe the following
guidelines:
• Keep your Neato indoors. It was not designed for
outdoor use.
• Although Neato robots have a smart navigation system
to avoid obstacles, your Neato may occasionally bump
into furniture, objects, pets, and people.
• Remove small objects on the floor, such as stray
socks, jewelry, and cords, as well as items that may be
damaged by bumping.
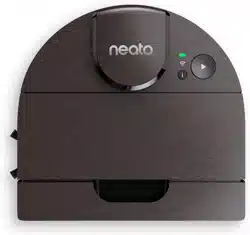
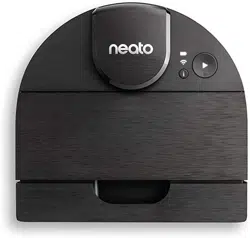
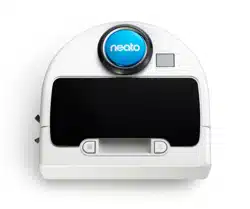
Meet your Neato Intelligent Robot Vacuum
• Neato rotating brush works like the brush in a regular
upright vacuum cleaner. Do not use the Neato on
floors or rugs (especially those with fringes) where
you would not use a regular upright vacuum.
• Shiny surfaces and black floors might cause
navigation problems.
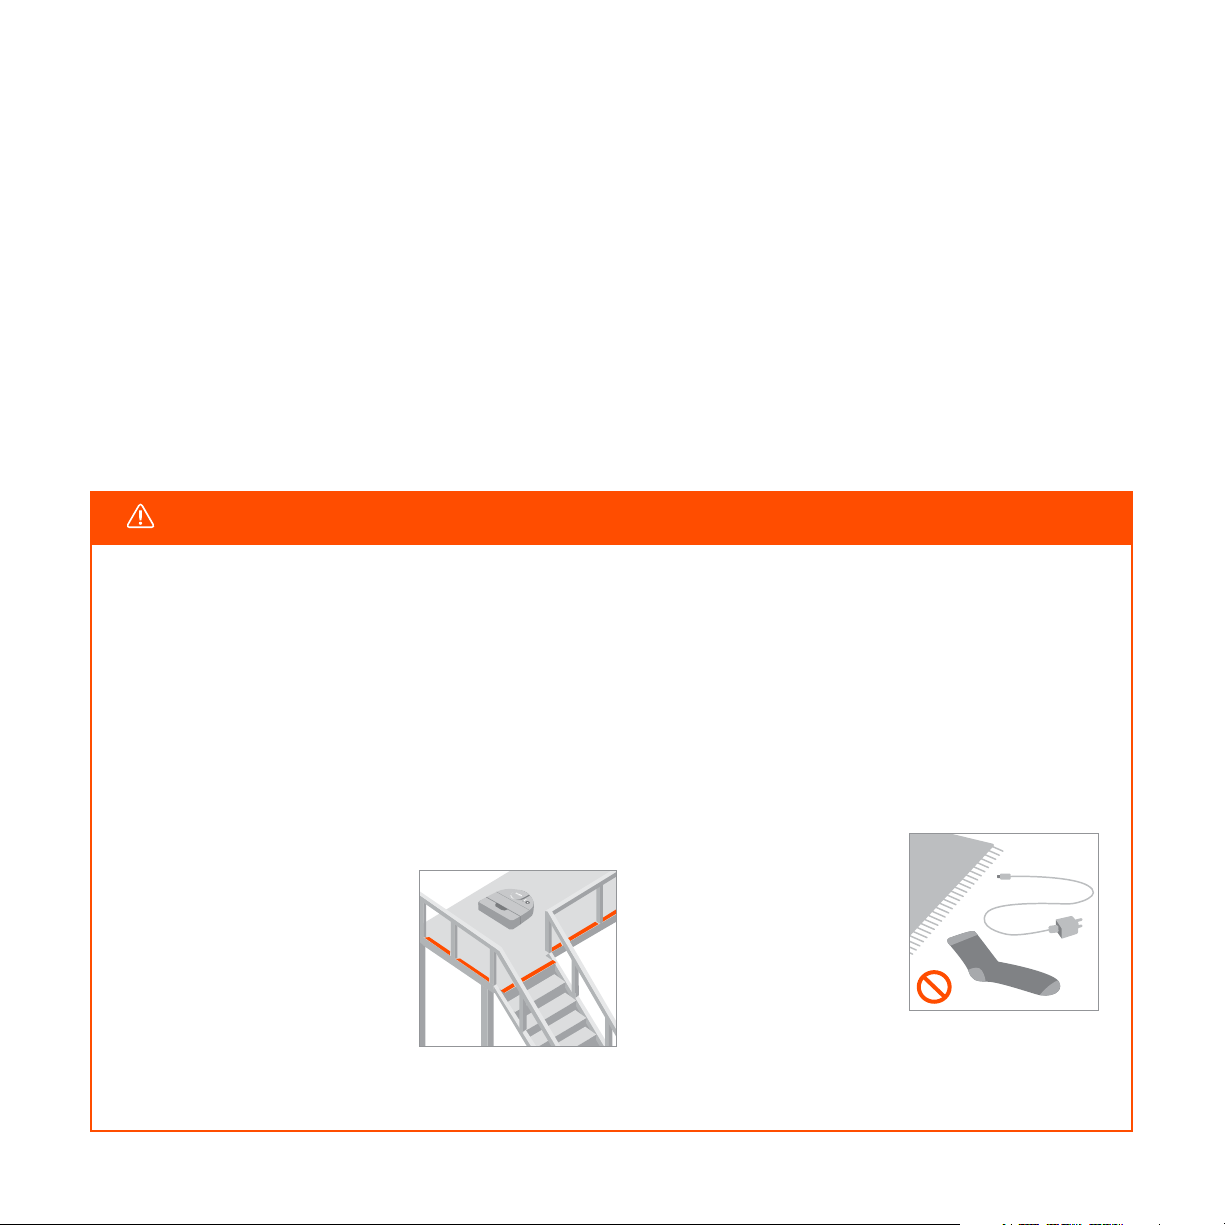
• Watch your Neato during the first few cleaning runs.
Adjust the cleaning environment to optimize the
robot’s navigation. For example:
• If the area to be cleaned has a
cli, drop, balcony, fireplace,
stairs, or other areas where
your Neato could fall or that
represent danger, place a
physical barrier or create a
No-Go Zone. Neato Robotics is
not responsible for any damage
to furniture, rugs, or flooring.
» Move or cover pet bowls
and plant trays to keep your
Neato away from liquids
and wet areas.
» Clear the area of small items
such as toys and clothing.
» Tie up wires, curtains, and
other low-hanging items.
Congratulations for choosing the Neato robot vacuum.
Your Neato is designed from the ground up to deliver unparalleled performance
and ease of use that will revolutionize your vacuuming experience.
We know you are excited to start using your Neato. Please take a few moments to read
this manual and become familiar with your Neato to ensure you get the most benefit from
using it.
IMPORTANT! Read before continuing with setup

2
ENGLISH
For helpful information, including how-to videos, frequently asked questions, and tips & tricks for optimal operation, go to
https://neatorobotics.com/support. On your MyNeato app, you can also tap to contact Neato Customer Care.
Table of contents
Related documents
In addition to this User Guide, the following documents are supplied with your Neato:
• Quick start guide — contains instructions to get your Neato up and running in the
shortest possible time.
• Important information & warranty — contains safety, warranty, and other important
information about your Neato.
If you need additional assistance, we are here to help. Contact us at: neatorobotics.com/customer-care.
Getting Help
Getting to know your Neato robot ......................................................................................3
Preparing to use your Neato robot .....................................................................................5
Connecting to the MyNeato app ..........................................................................................6
Selecting a cleaning mode on the MyNeato app ..........................................................7
Cleaning with the MyNeato app ...........................................................................................8
Creating a Floor Plan Map and No-Go Zones .................................................................9
Schedule cleaning Routines and locating your Neato robot ..................................10
Manually operating your Neato robot ............................................................................... 11
Maintaining your Neato robot ............................................................................................. 12
3
ENGLISH
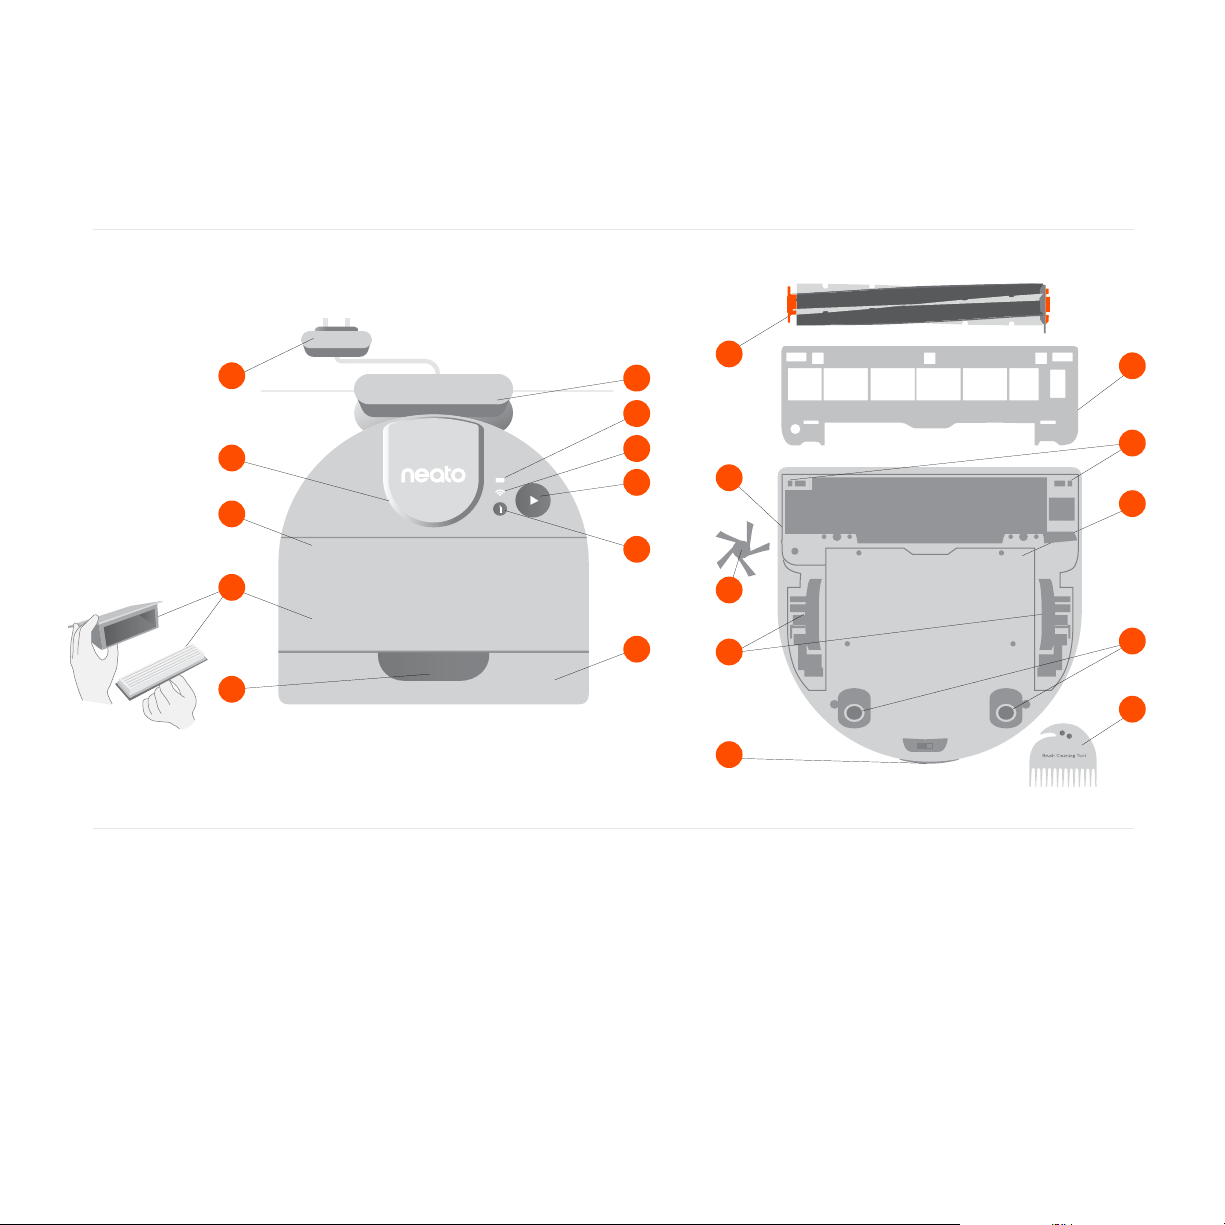
Getting to know your Neato robot
1 Power adapter
(detachable supply unit)
2 Laser cover
3 Top
4 Dirt bin and filter
5 Handle
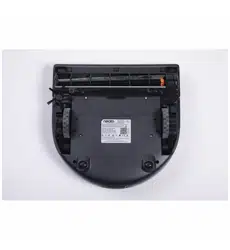
12 Brush
13 Wall following sensor window
14 Side brush
15 Wheels
16 Drop sensor window
17 Charging contacts
2
1
3
9
11
12
13
19
18
5
7
8
6 Charge base
7 Battery icon
8 Wi-Fi icon
9 Play button
10 Info button
11 Front bumper
18 Brush guard
19 Battery door
20 Bum rollers
21 Cleaning tool
21
a
10
14
15
16
4
6
17
20
4
ENGLISH
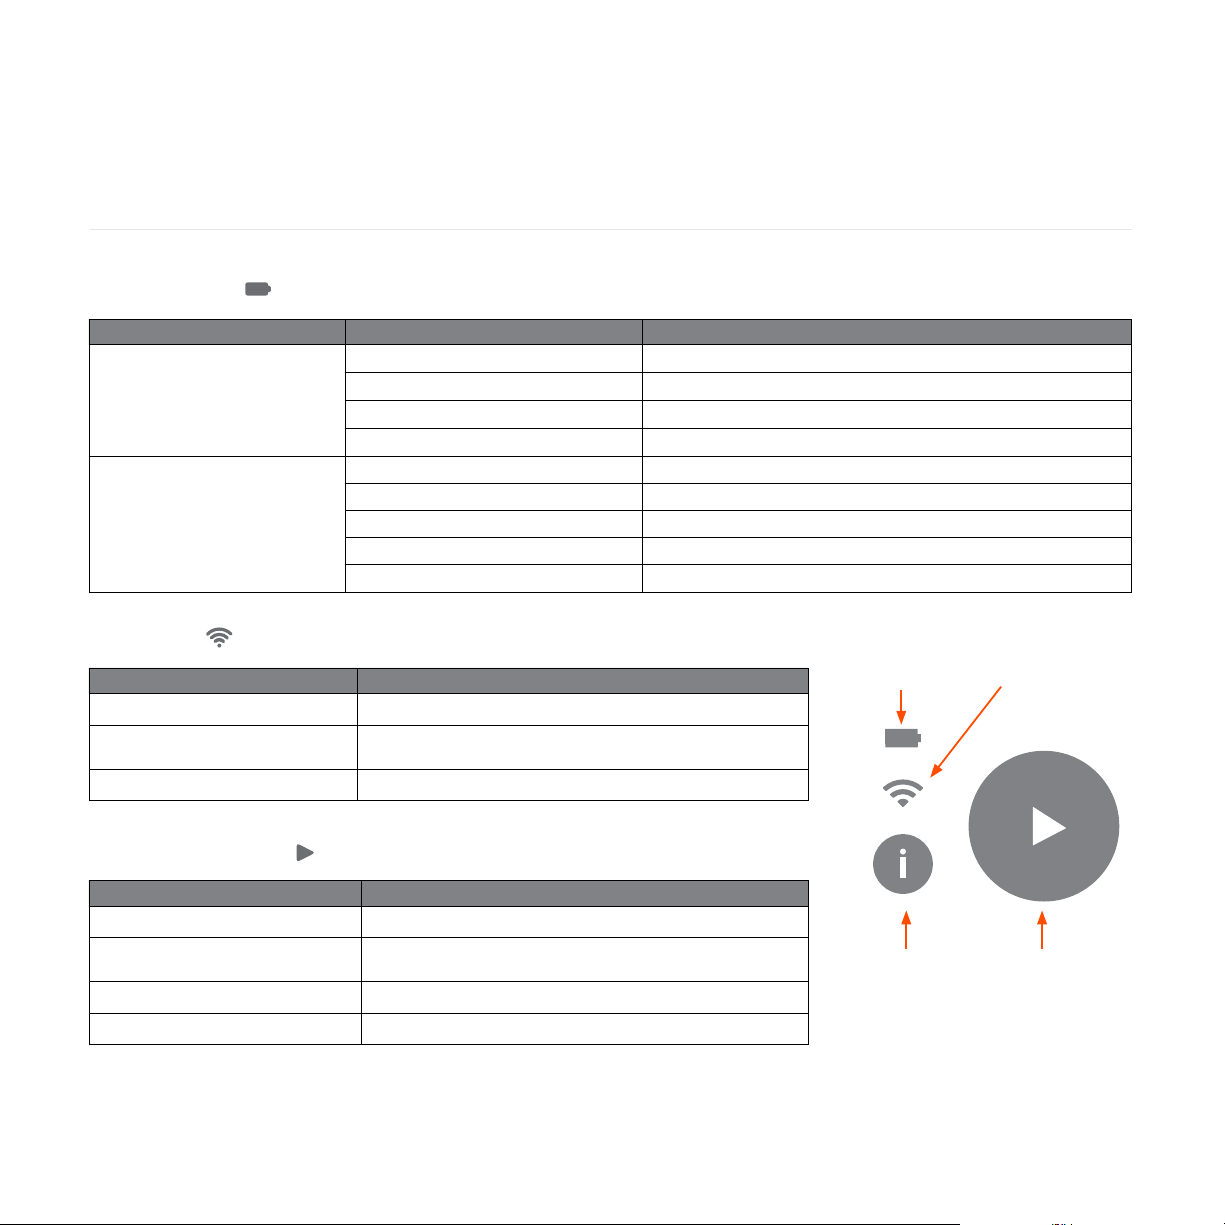
WI-FI LED COLOR AND BEHAVIOR MEANING
White
Neato is connected to Wi-Fi.
Pulsing white
Neato is trying to pair to the app via Bluetooth or connect
to Wi-Fi.
O
Neato is not connected to Wi-Fi.
WI-FI LED
BATTERY LED
WHEN THE NEATO ROBOT IS… BATTERY LED COLOR AND BEHAVIOR MEANING (BATTERY CAPACITY LEVEL)
O the charge base
Green Battery level is full. Ready to clean.
Yellow Battery level is low. Move to charge base.
Steady red Battery level is critically low. Move to charge base.
Fast blinking red Battery has a fault and must be serviced.
On the charge base
Steady green Battery power is at full charge. Ready to clean.
Slow pulsing green Battery power is at medium and battery is charging.
Slow pulsing yellow Battery power is low and battery is charging.
Slow pulsing red Battery power is critically low and battery is charging.
Fast blinking red Battery has a fault and must be serviced.
PLAY LED COLOR AND BEHAVIOR DESCRIPTION
White
Neato is awake and ready to clean or robot is cleaning.
Red sustained
An error has occurred. Press Info button to find out more
about the error.
Pulsing white
Neato is paused.
O
Neato is sleeping or powered o.
PLAY BUTTON LED
Battery LED
Wi-Fi LED
Play buttonInfo button
5
ENGLISH
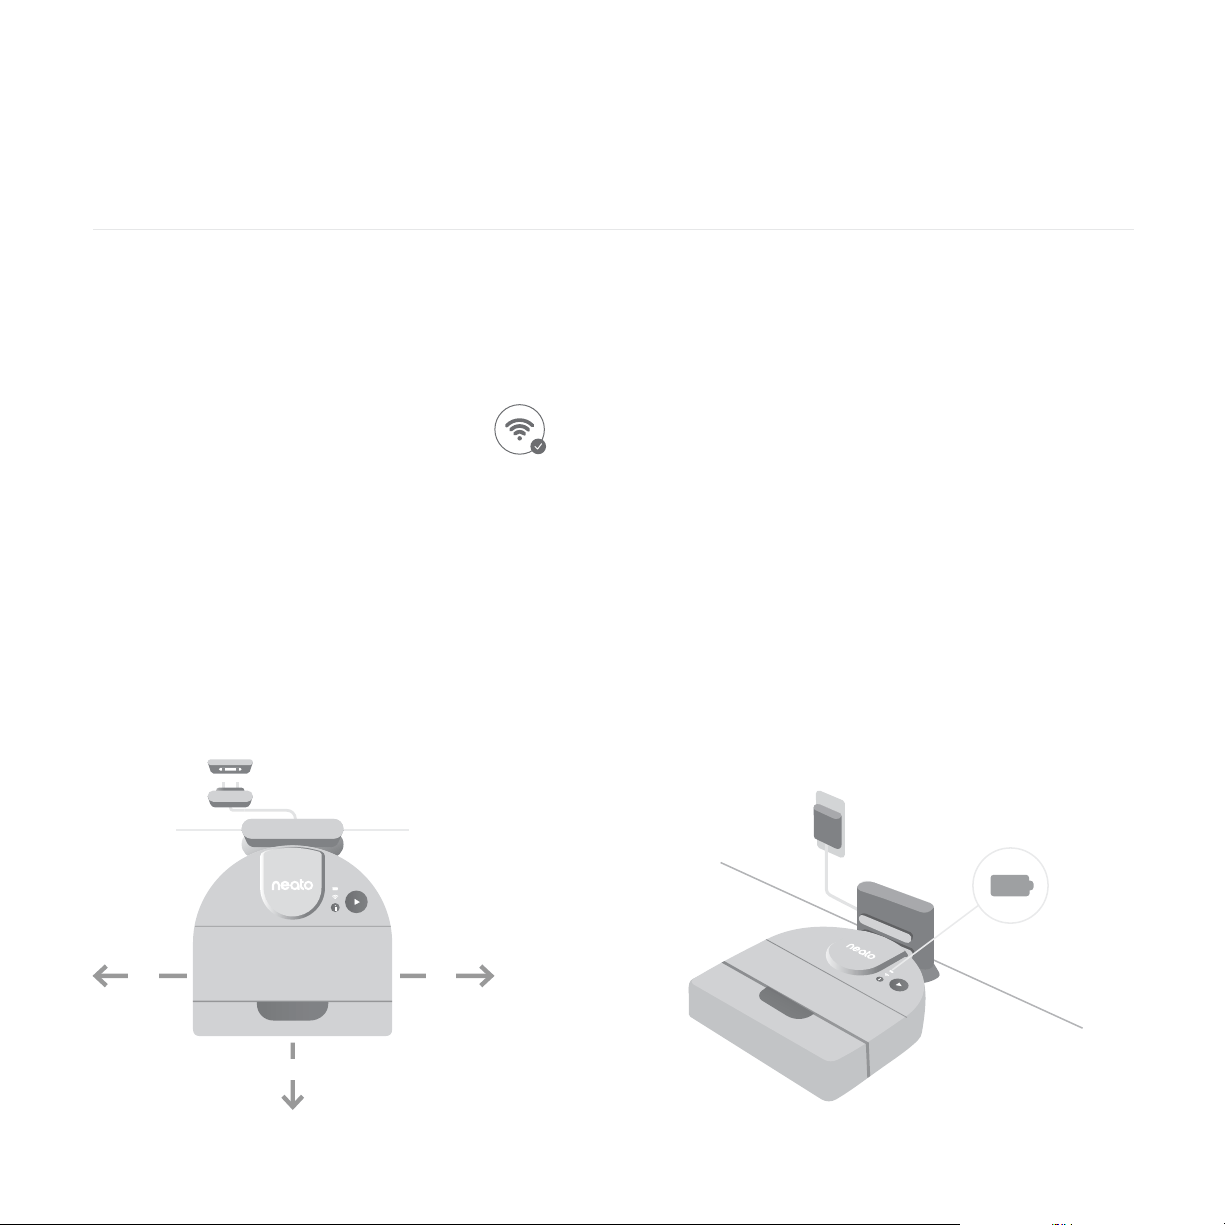
Preparing to use your Neato robot
Before you start using your Neato, perform
the setup instructions in this chapter.
Positioning the charge base
Before positioning the charge base, select
a clear area with good Wi-Fi coverage.
Begin by inserting the plug behind the charge
base into an AC outlet. Shorten the cord as needed
by wrapping it behind the charge base.
Make sure the charge base is against the wall and
plugged in securely.
Place Neato against the charge base. When
docked properly, the battery LED on the robot
vacuum lights up.
12”
12”
12”
Checking the battery
Your Neato battery comes partially charged. Before
you use your Neato for the first time, position it at the
charge base and allow the robot to charge until the
battery LED becomes green (up to 3 hours).
NOTE: Always charge your Neato using the supplied
Neato Original charge base and battery.
Auto recharge and resume
If the area to be cleaned is very large, your Neato may
need to recharge its battery before finishing the job.
Once recharged, it will return to finish where it left o.
6
ENGLISH
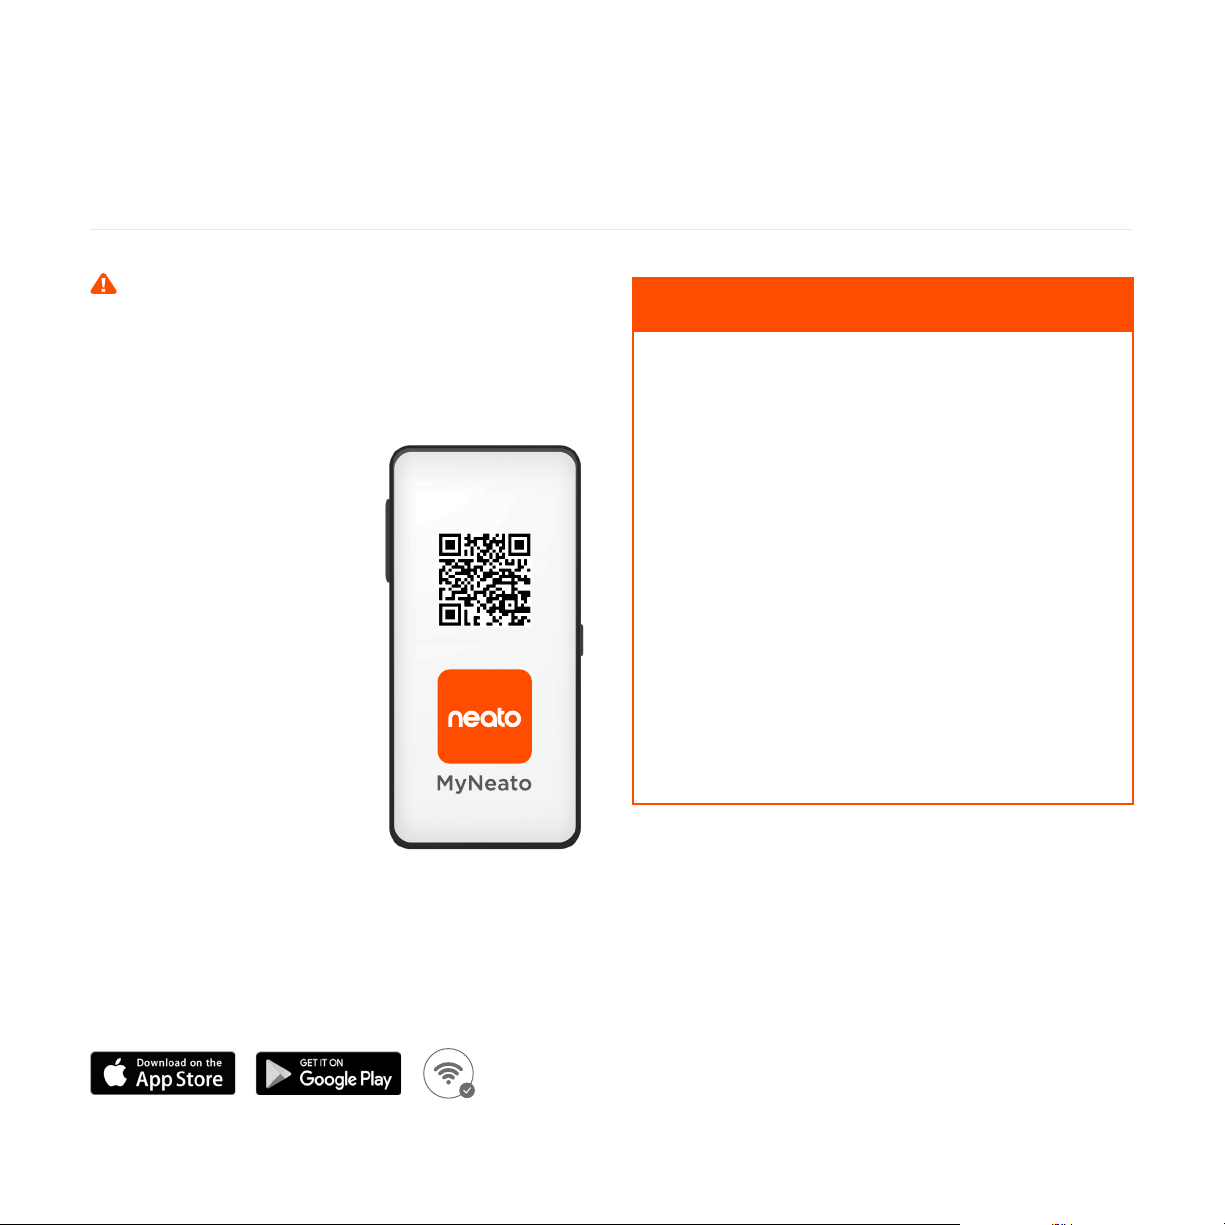
Connecting to the MyNeato app
IMPORTANT NOTE: You must connect your
Neato to the MyNeato app before using your
robot vacuum.
1. Confirm that the charge base is positioned
properly and within good Wi-Fi coverage.
2. Use this QR Code to
download the MyNeato app
from the Internet to your
phone.
3. On your phone settings,
turn on Bluetooth
communication.
4. Complete the connection
procedure by following the
steps on the MyNeato app.
5. During the procedure, you
will be asked whether you
want to receive notifications
from the MyNeato app.
Allowing notifications
permits your Neato to
notify you about its status
and alerts.
• Start and pause your Neato when you
are not home
• Select cleaning modes: Eco, Turbo
• Get cleaning coverage map
• Create a Routine to schedule cleanings
• Receive cleaning status notifications instantly
• View battery status
• Receive notifications about Neato
software updates
• Receive maintenance alerts and context-
sensitive help to keep your Neato operation
at its peak
• Get feature updates
• Chat with customer support for help
Operating your Neato robot from
multiple smartphones
You can use the MyNeato app on multiple smart
devices in a household to operate the same
Neato. Just download the MyNeato app to other
smartphones and then sign into the same MyNeato
account using the email and password originally
used to set up your Neato.
The MyNeato app allows you to:

7
ENGLISH
Selecting a cleaning mode
on the MyNeato app
CLEANING
MODES
DESCRIPTION
ECO
Sets your Neato’s brush and blower to medium
power. This mode allows your Neato to clean the
largest area on a single charge. Eco Mode is ideal
for hardwood floors and is the quietest mode. This
is the default mode.
TURBO
Sets your Neato’s brush and blower to high power.
This mode provides stronger suction and a faster
rotating brush. Turbo Mode is ideal for carpets, but
consumes more battery power than Eco Mode.
Cleaning modes
Before you start, cleaning either with the MyNeato
app or manually, you can select a cleaning mode to
determine how your robot vacuum cleans.
By default, Neato uses Eco Mode. However, you can
use the MyNeato app to change modes to suit your
cleaning requirements. The following table describes
the cleaning modes.
Extra Care navigation
In addition to the listed cleaning modes, your Neato
supports an Extra Care navigation feature that
is useful if you have especially delicate furniture.
This feature is enabled from the same page on the
MyNeato app where you select cleaning modes.
When this feature is enabled, your Neato navigates
more carefully and leaves a wider buer around
objects such as delicate pieces of furniture and
chair legs. Extra Care navigation is available on D9
and D10 only.
NOTE: The cleaning mode you select applies to
subsequent cleaning operations performed using the
MyNeato app as well as a clean started by pressing
the play button on your Neato.
8
ENGLISH
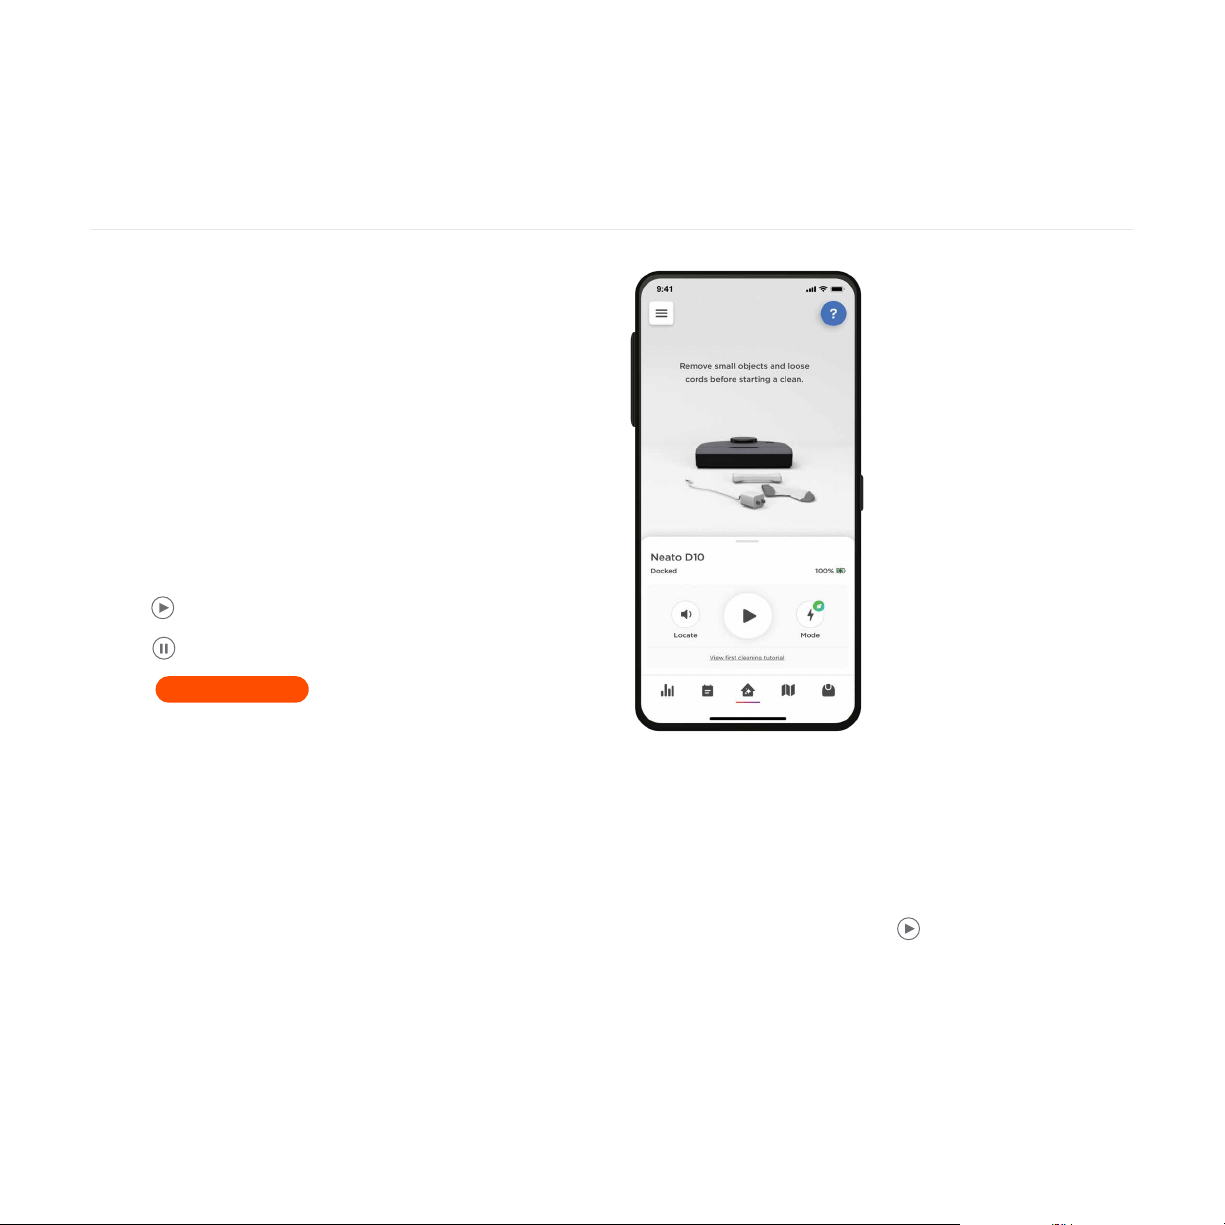
Cleaning with the MyNeato app
Using the MyNeato app to clean
Your Neato cleans the entire floor plan on one level,
moving automatically from room to room. From
the app you can start cleaning, pause, resume, and
cancel to return to charge base.
To clean a house:
1. Remove small objects and loose cords from the floor.
2. Make sure that your Neato is placed at the
charge base.
3. Tap
to start cleaning.
4. Tap
to pause cleaning.
5. Tap to continue cleaning.
6. Tap Cancel and return to base button to send your
Neato back to the charge base.
During cleaning, your Neato comes o its charge
base, explores its surroundings, and starts cleaning in
sections approximately 15 x 15 feet (4.6 x 4.6 meters)
in size, depending on layout and furniture. Your Neato
continues to clean the entire room on one level,
section by section, until the entire area is cleaned. It
then moves from room to room to continue cleaning.
If your Neato cleans a room partially, it will return to
complete that room before finishing the job.
Moving a Neato robot mid-cleaning
Do not pick up your Neato while it is moving.
Otherwise, it can become disoriented, deviate from its
normal smart behavior, and have diculty finding its
charge base.
To pause the cleaning, press once while your
Neato is cleaning. If you then lift your Neato, put it
back down within 1 foot of where you picked it up.
Resume
9
ENGLISH
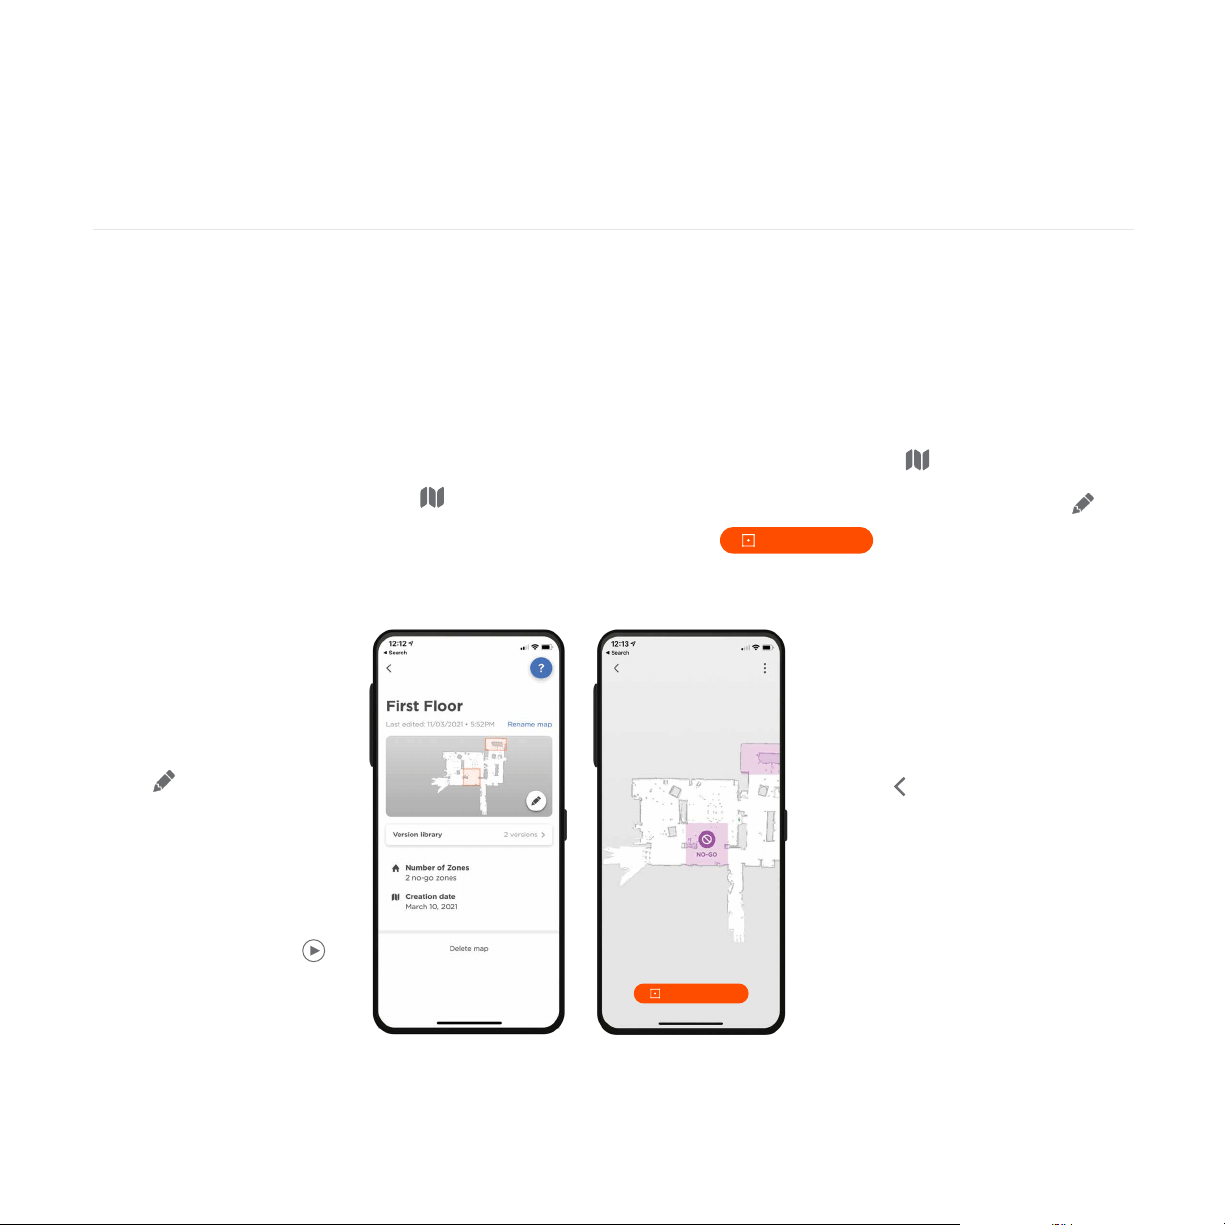
4. Drag a No-Go Zone rectangle
to the area of the map that you
want to select. You can adjust
No-Go Zone size by enlarging
or reducing the No-Go Zone
rectangle. Repeat step 3 to add
more No-Go Zones to the map.
5. Tap on the top left of your
screen and your No-Go Zones
will be saved automatically.
Creating a Floor Plan Map
Creating a floor plan map of your house allows
you to set up No-Go Zones, so you can tell your
Neato which areas of your house you want
to avoid cleaning.
After your Neato performs its first cleaning using
the MyNeato app, it creates a map of your house
automatically. To view the map, tap in the
MyNeato app. For best results, remove small
objects and loose cords from the floor and start
cleaning the whole house on your first run.
Creating No-Go Zones
No-Go Zones allow you to tell your Neato to avoid
areas that should not be cleaned, such as a child’s play
area or a dog bowl.
No-Go Zones are easy to set up using the MyNeato app:
1. Go to map view by tapping
2. Create No-Go Zones in your map, by tapping
3. Select
Creating a Floor Plan Map
and No-Go Zones
NOTE: You must start
cleaning from the charge
base to create a Floor
Plan Map.
From map view, you can
select to create
No-Go Zones, name, and
delete your maps.
NOTE: If your Neato has
not yet performed an initial
cleaning, you will not see
a map. In this case, tap
to start cleaning. A floor
plan will be created after
the first cleaning.
Add No-Go Zone
Add No-Go Zone
10
ENGLISH
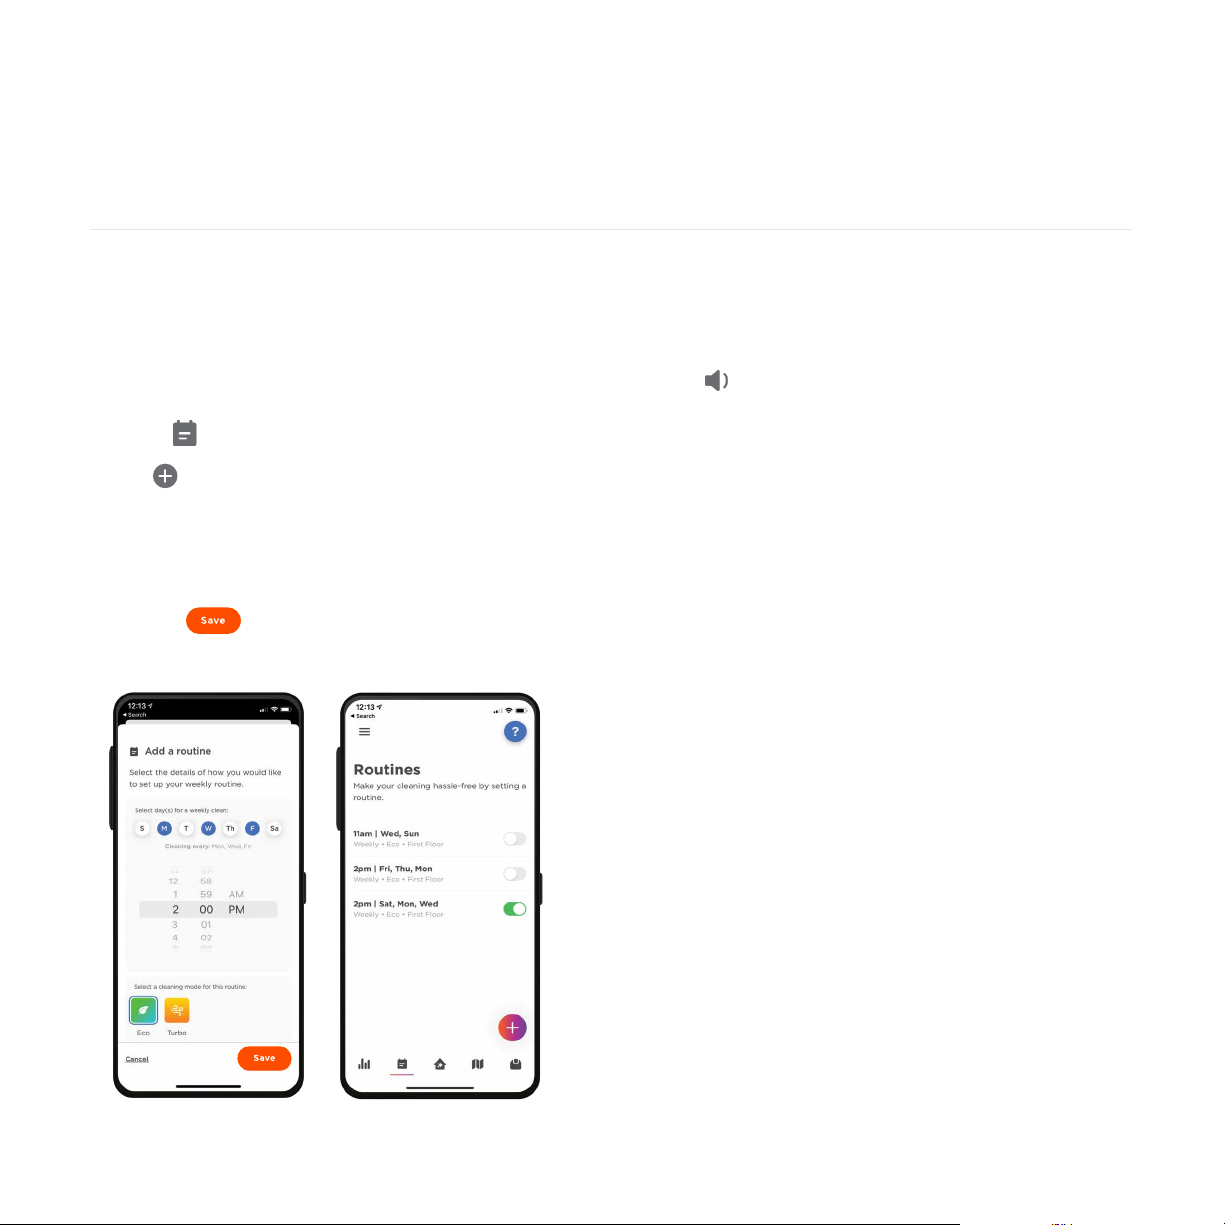
Creating Routines to schedule cleanings
You can schedule your Neato to clean an entire house
on certain days and times by creating a Routine.
To set up a Routine:
1. Select in the MyNeato app.
2. Tap to add a new Routine.
3. Select day(s) and time during the week to schedule
your cleaning.
4. Select Cleaning Modes
5. Tap the to save your Routine
Locating your Neato robot
There may be times when your Neato becomes stuck
or stops at an unknown location in your house. When
you tap your Neato will make a sound which will
guide you to find its physical location.
Updating your Neato robot
Technology improves over time, and so will your Neato.
For this reason, Neato will automatically update your
robot and sends notifications to your MyNeato app,
so you always have the latest features as soon as they
are available.
Troubleshooting your device
If an error occurs while operating your Neato, click the
error link in the MyNeato app to see what the error
means and what corrective action to take.
For more information, visit
https://neatorobotics.com/support.
Schedule cleaning Routines
and locating your Neato robot
11
ENGLISH
NOTE: Before you start manual cleaning for the first
time, you must connect your Neato to the MyNeato
app. See Connecting to the MyNeato App
.
Cleaning an entire house
To clean your house, confirm that the Play LED is
white. You can initiate cleaning by pressing once.
Your Neato robot will clean the entire floor on one
level automatically moving room to room.
Manually operating your Neato robot
Cleaning one room
If you just want to clean one room, you can manually
place your Neato in the room, press and close
the door. Your Neato will clean the room and return
to where you originally placed it. When your Neato
has finished cleaning, please put it back on its
charge base.
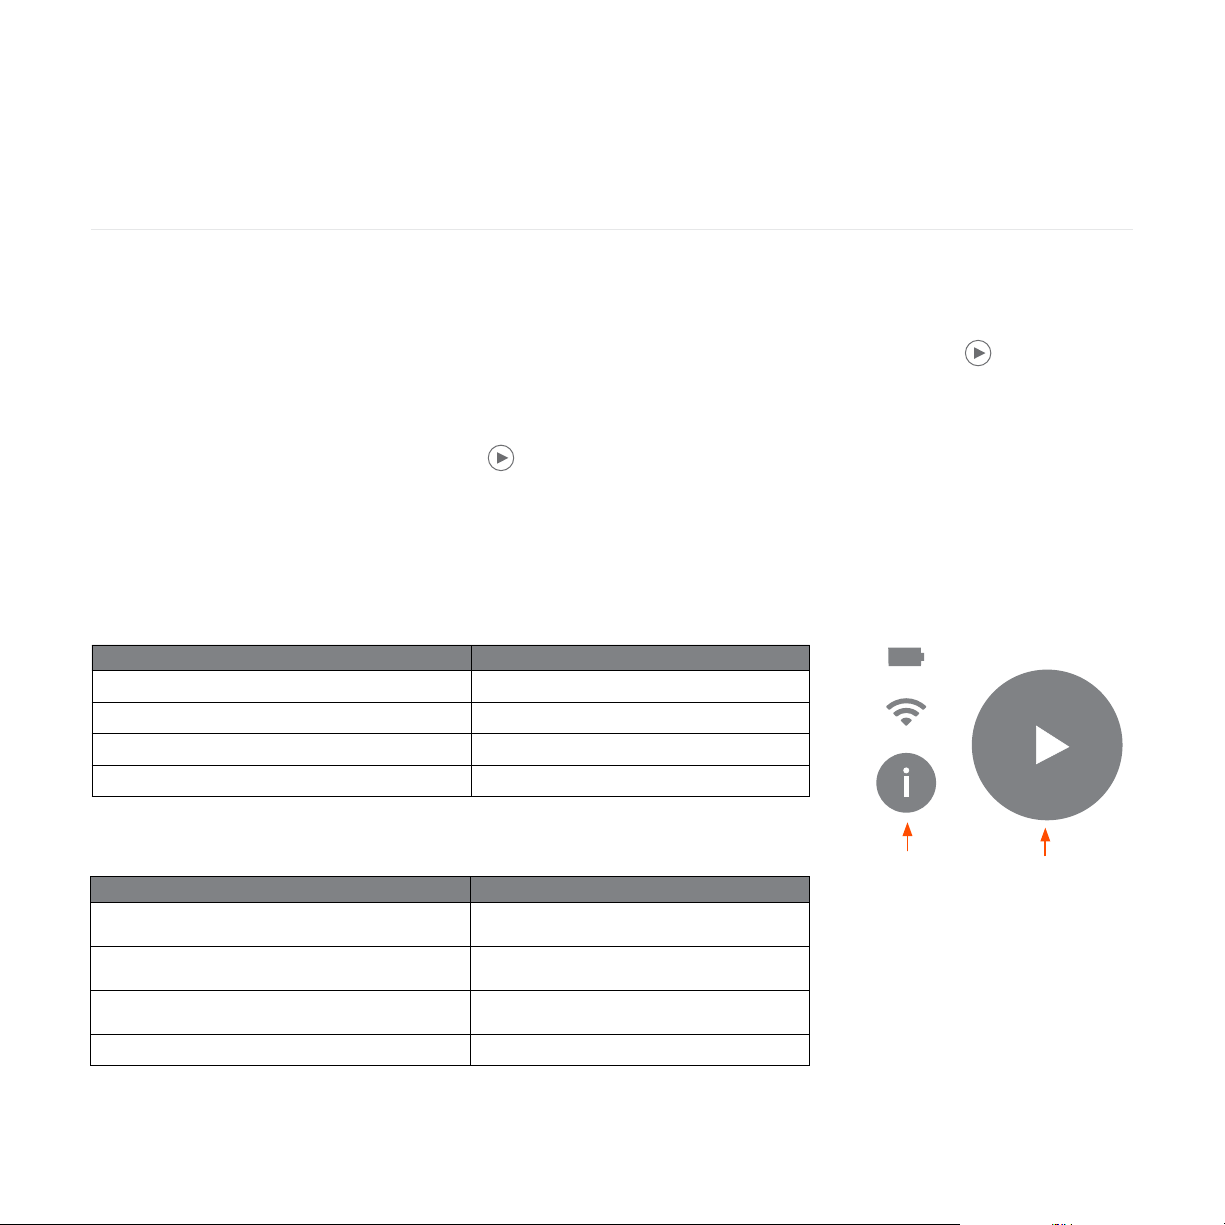
INFORMATION BUTTON
PLAY BUTTON
PRESSING THE PLAY BUTTON… PERFORMS THIS ACTION…
Press once when the Play LED is white.
Initiates a cleaning run.
Press once while the Neato is cleaning.
Pauses the cleaning run.
Press twice while the Neato is cleaning.
Cancels the cleaning run.
Long press for five seconds.
Shuts down the Neato robot.
PRESSING THE INFO BUTTON… PERFORMS THIS ACTION…
Short press when the Info button is white.
Hear information about the Neato robot’s
status.
Short press when the Info button is red.
Hear information about an error and how to
resolve it.
Long press.
Hear information that the user is connected to
the correct robot.
Long press while also pressing the Play button.
Performs a factory reset.
Information
button
Play button
12
ENGLISH
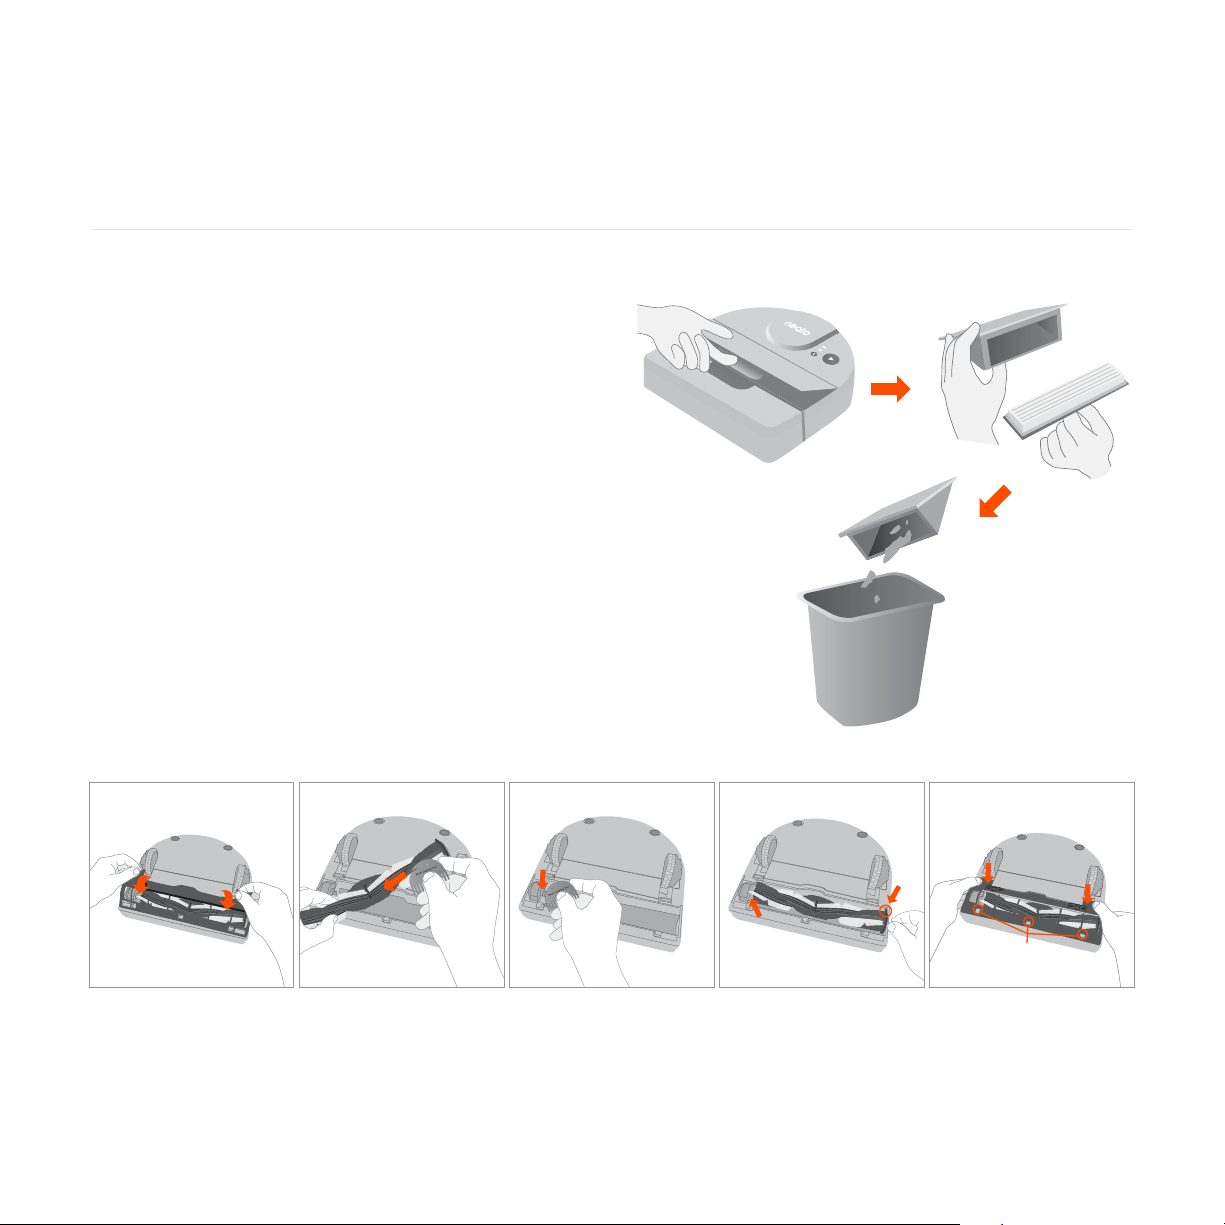
For reliable operation, check and clean your Neato
robot’s brushes and empty its dirt bin after every use
or as needed, depending on your environment. Failing
to do this maintenance may impact your Neato’s
performance and may void your warranty coverage.
Emptying dirt bin and cleaning filters
After each use, empty the dirt bin, clean the airways
and opening, and clean the filter. To remove the filter,
pinch the handle and pull out. Replace the filter every
1 to 2 months or more frequently as needed.
Cleaning the brush
We recommend that you clean the brush monthly.
Remove the side brush and set aside. Follow the
steps below:
Maintaining your Neato robot
!
!
!
13
ENGLISH
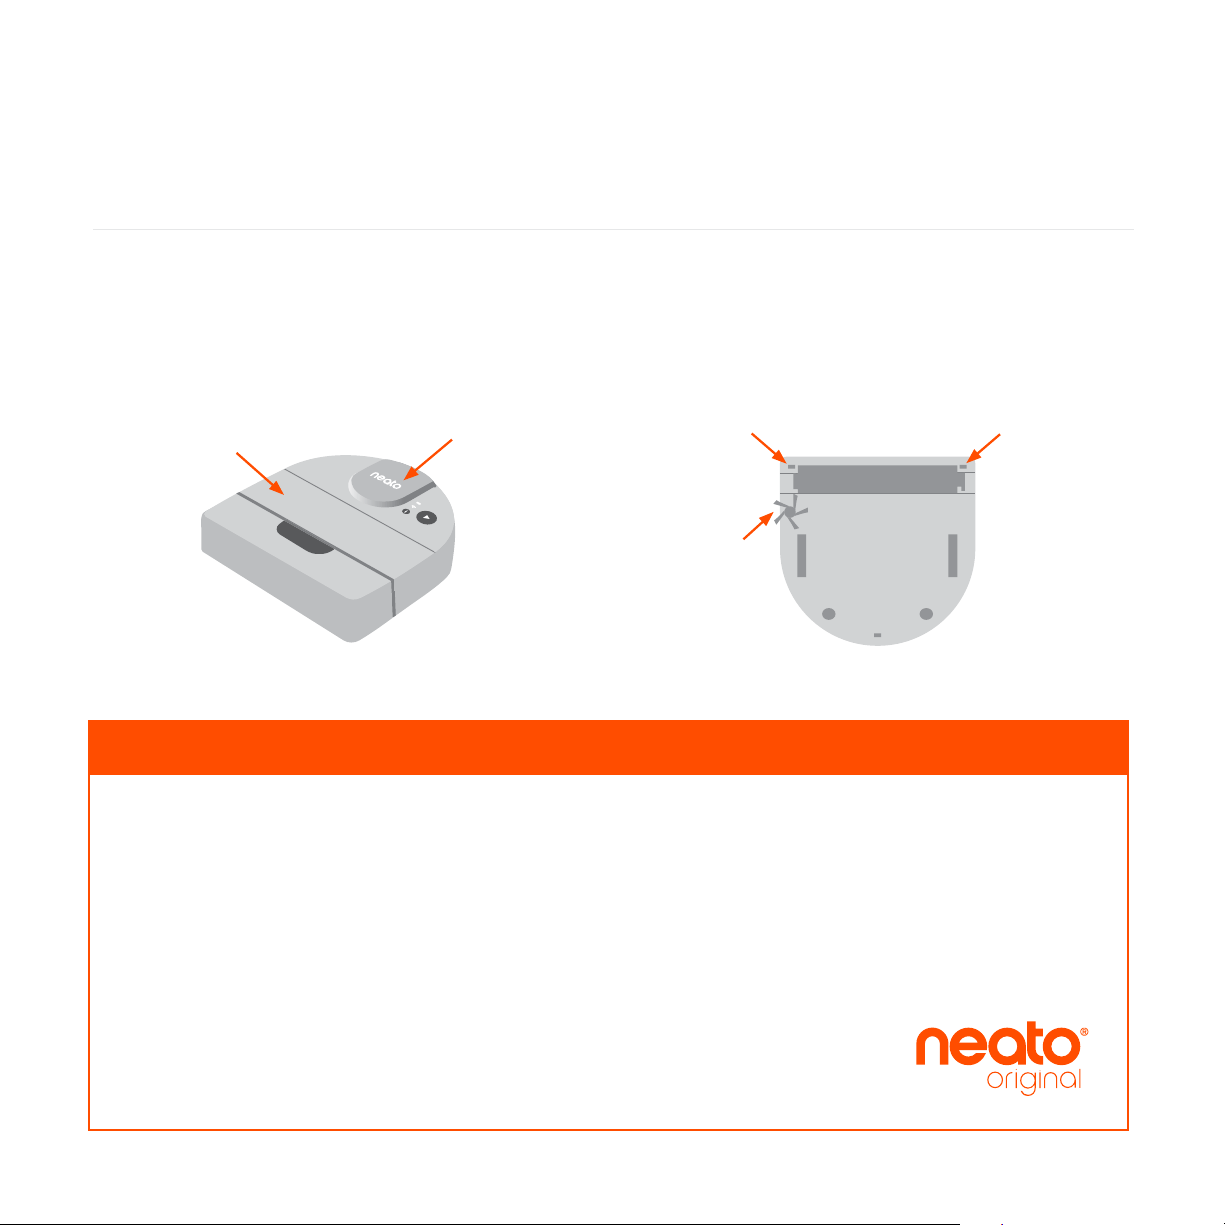
Cleaning the top of the Neato robot
Clean the top of your Neato and the area around the
laser top with a soft cotton cloth.
Cleaning the sensors
Use a dry cotton swab to clean the three drop sensor
windows on the bottom of your Neato.
Top
Laser top
Drop sensor
window
Wall following
sensor window
Drop sensor
window
Always purchase Neato Original accessories and parts:
• Batteries
• Filters
• Brushes
• Cleaning tool
• Charge base
For information about accessories and replacement parts
for your Neato, go to neatorobotics.com.
Using unauthorized or third-party (non-Neato Original)
accessories can damage your Neato and will void
your warranty.
Recommended replacement schedule depends on use.
Filters - every 1 to 2 months
Brushes - every 6 to 12 months
Batteries - every 12 to 18 months
Accessories
Neato Robotics®, Inc.
50 Rio Robles
San Jose, CA 95134, USA
NeatoRobotics.com
P/N 500-0102 Rev A