Loading ...
Loading ...
Loading ...
14 15
ninjakitchen.co.uk
ninjakitchen.co.uk
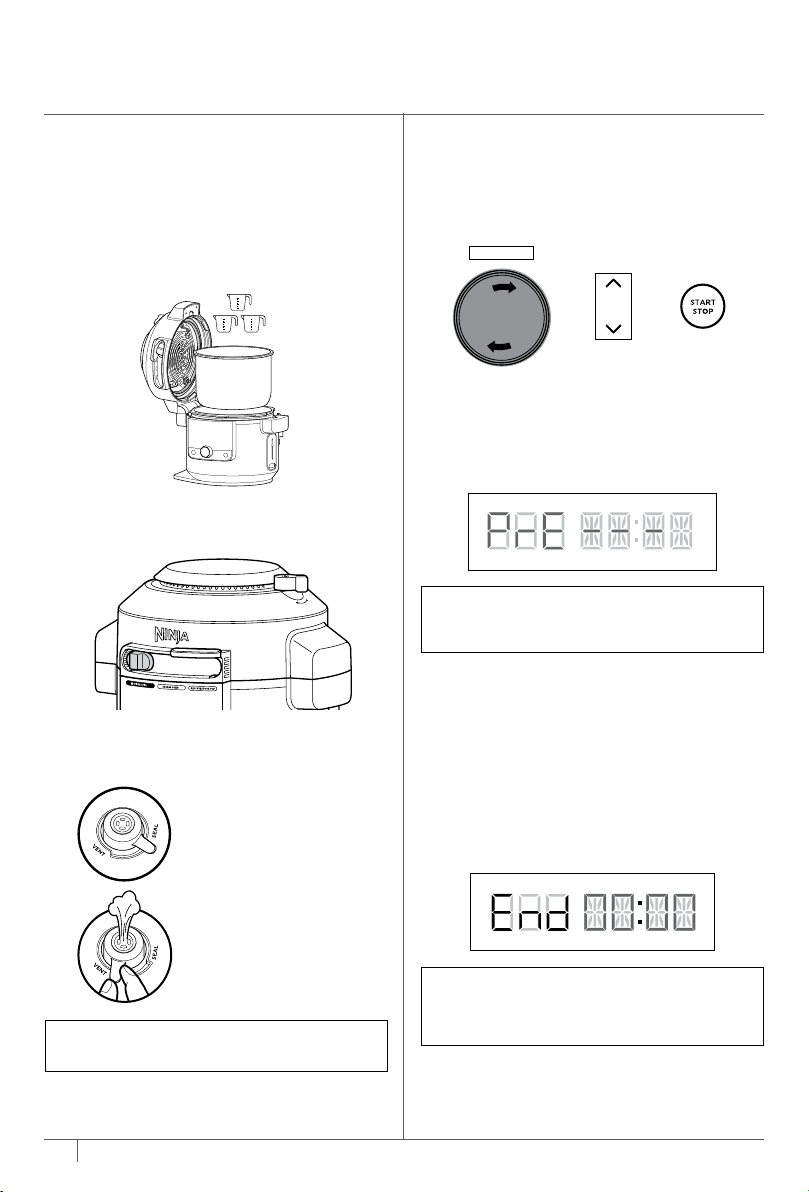
4 Use the dial to select QUICK RELEASE.
The unit will default to high (Hi) pressure.
Use the right down arrow to adjust the
time to 2 minutes. Press START/STOP to
begin.
5 This display will show "PrE" and a
progress bar indicating the unit is
building pressure. When the unit is
fully pressurised, the timer will start
counting down.
6 When cook time reaches zero, the unit
will beep and display "End" before
automatically quick releasing the
pressurised steam. A warning chime
will sound, indicating the pressure
release valve is about to open. When
the pressure release valve opens, steam
will escape from it. As soon as the unit
reads "OPN Lid", move the slider to the
right to unlock the lid. Then open the
lid.
NOTE: Time to pressure will vary based on
quantity and temperature of ingredients,
along with selected pressure level.
RELEASING PRESSURE
AUTOMATICALLY
NATURAL: Natural release is best for larger
cuts of meats that need extra time to cook.
The heat will turn o, but the food inside
will continue to cook. The unit will naturally
depressurise once the cook time has ended
and the unit cools down.
QUICK: Quick release is used for smaller
foods or ingredients that are sensitive to
overcooking. DO NOT quick release when
cooking starchy or foamy foods. To quick
release, use the dial to select this option
before you start pressure cooking.
DELAYED: Delayed release is useful for
recipes that require more time at pressure
once the cook time has ended (for example,
rice and grains). To delay release, use the
dial to select this option. Delay release will
default to 10 minutes. Press the Release
pressure icon to change the delay release
time. Pressing again allows you to change
the time and pressure. When cook time
has ended, the unit will then quick release
pressure once the delay duration is
complete.
NOTE: For larger food loads that require
more depressurisation, you can manually
release pressure by moving the valve to
the VENT position.
If choosing to manually release, move
pressure release valve from SEAL to VENT
or hold the RELEASE PRESSURE icon.
PRESSURISING
As pressure builds in the unit, the control
panel display will show "PrE" and progress
bars. Time to pressure varies based on the
amount and temperature of ingredients as
well as liquid in the pot. For safety, the lid
will lock as the unit pressurises and it will not
unlock until pressure is released. Once the
unit has reached full pressure, cooking will
begin and the timer will start counting down.
USING THE PRESSURE FUNCTION
To turn on the unit, plug the power cord
into a wall socket, then press the
button
.
Pressure
1 Place ingredients and at least 250ml
of liquid in the pot, as well as any
necessary accessory. DO NOT fill
the pot past the PRESSURE MAX line.
2 Close the lid, then turn the pressure
release valve to the SEAL position.
3 Move the slider to PRESSURE. The unit
will default to NATURAL RELEASE.
Use the dial to select NATURAL
RELEASE, QUICK RELEASE or DELAYED
RELEASE. The default pressure level and
time settings will display. Use the up and
down arrows to the left of the display
to select Hi or LO.
4 Use the up and down arrows to the
right of the display to adjust the cook
time in minute increments up to 1 hour
and then 5-minute increments from
1 hour to 4 hours.
NOTE: When cooking rice, beans or
other ingredients that expand, DO NOT
fill the pot more than halfway.
NOTE: Unit will
not pressurise
if there is not
enough liquid.
WATER TEST: GETTING STARTED
PRESSURE COOKING
It is recommended that first-time users
do the water test to familiarise themselves
with pressure cooking.
1 Place the pot in the cooker base and
add 750ml of room-temperature water
to the pot.
2 Close the lid and move slider
to the PRESSURE position.
3 Make sure the pressure release valve
is in the SEAL position.
NOTE: Valve will be loose when
fully installed.
VENT
for all other functions
and all other slider
positions
SEAL
for Pressure functions
NOTE: The unit will switch to KEEP
WARM mode and the heating element
will remain on.
NOTE: Delayed Release defaults to
10 minutes. If you are using Delayed
Release and want to adjust the time,
press the RELEASE PRESSURE button
to set the desired time.
+
USING THE
PRESSURE COOKING FUNCTIONS
+ +
QUICK RELEASE
NATURAL RELEASE
QUICK RELEASE
DELAYED RELEASE
Loading ...
Loading ...
Loading ...