Owner's
Manual
Advantium TM Oven
ZSC 1000
ZSCIO01
Write the model and serial numbers here:
Model #
Serial #
Find these numbe_ on a label inside
the o\en.
Monogram:
3828WSA#684 49-40487 01-08Jfl
IMPORTANT SAFETY INSTRUCTIONS
Advantium Oven
PRECAUTIONS TO AVOID POSSIBLE EXPOSURE
TO EXCESSIVE MICRO WAVE ENERG Y
(a) Do NotAttempt to operate this oven with the
door open since open-door operation C}lil
result in harmfld exposure to microwave
energy. It is important not to defeat or
tamper with the satetv interlocks.
(b) Do Not Place any object between the oven
ti'ont tace and the door or allow soil or
cleaner residue to accumulate on sealing
S/II'J[;I ces.
(c) Do Not Operate the oven if it is damaged.
It is particularly important that the oven
door close propedy and that there is no
damage to the:
(1) door (bent),
(2) hinges and latches (broken or loosened),
(3) door seals and sealing surfaces.
The Oven Should Not be ac!justed or repaired
by anyone except properly qualified service
l)ei'sonnel.
Contents Advantium
Advantium Quick Start ................. 15
Cooking controls ..................... 18
Oven fea rares ........................ 17
Safety ............................ 2-13
What is Adwmtium ? ................... 14
Speedcooking
Convection Baking, Broiling
and Toasting ......................... 26
Cooking tips ......................... 20
Favorite recipes .................... 23, 24
Power level .......................... 21
Proofing ............................ 27
Repeat last .......................... 20
Resume feature ...................... 20
Speedcook cookware .................. 22
Speedcook menu guide ................ 16
Speedcook-sate cookware ................ 5
Things that are normal ................ 25
Using a pre-set speedcook menu ......... 19
_4'arming ............................ 27
Microwaving
Cooking by time ...................... 29
Cooking tips ......................... 29
Deli'ost by ti)od type ................... 30
Deli'ost bv tim e ....................... 30
Defrosting tips ....................... 31
Express .......................... 15, 29
Favorite recipes ...................... 29
Microwave power level(s) ............... 29
Microwave-sale cookware ................ 6
Precautions to avoid possible
expostlre to excessive
microwave energy ...................... 2
Sensor cooking .................... 32, 33
Things that are normal ................ 33
Using pre-set microwave selections ....... 28
Other Features
Automatic fan ........................ 36
Beeper volume ....................... 34
Child lockout ........................ 36
Ch)ck ............................ 15, 34
Delay Start .......................... 34
Display ON/OFF ..................... 34
Hel I) ............................... 35
Reminder . .......................... 34
Review ............................. 34
Scroll speed ......................... 34
Timer . ............................. 36
Care and Cleaning
Cleaning the inside ................... 37
Cleaning the outside .................. 38
Cooking trays and baking sheet .......... 38
Remowd)le tm'ntable .................. 37
Troubleshooting
Problem Solver . ................... 39, 40
Customer Service
Product Registration ................ 41, 42
Service phone numbers ................ 43
_Mu'ra ntv ..................... Back Cover
IMPORTANT SAFETY INSTRUCTIONS
Advanlil¢m Oven
WARNING! To reduce the risk of burns, electric shock, fire, injury to persons, or
exposure to excessive microwave energy:
SAb 27"Y PRECA U7 70NS
[] Read all instructions before using []
this appliance. When using electrical
appliances, basic safety precautions should
be followed, including the following:
[]
[]
[]
Read and %llow tile specific precautions
in the Plff'2124UTION_' 7"0 AVOH)
[ ( &SIBLL EXI)OSUIff_ ] ) LXCLSSTl'L
MICI_OWAVE ENFJ_GY section on page 2.
Be sure your appliance is properly
installed and grounded bv a qualified
technician in accordance with the
provided installation instructions.
Install or locate this appliance only
in accordance with the provided
installation instructions.
[] Some products such as whole eggs and
sealed containers--fbr example, closed
jars--are able to explode and should not
be heated in this oven. Such use of the
oven could result in it_jury.
[] Do not mount this appliance o_er
a sink.
[] This oven is not approved or tested for
nlarine //so.
[] This o_en is UL listed fbr standard wall
installation.
[]
[]
This appliance must only be serviced
by qualified serxice personnel. Contact
nearest authorized serxice facility for
examination, repair or adjustment.
Do not coxer or block any openings on
the appliance.
Do not s/ore this appliance outdoors.
Do not use this product near water_
for example, in a wet basement, near a
swimming pool, near a sink or in similar
locations.
[] See door smface cleaning instructions in
the Car(, a_d Cleani_g o "the.... , ,¢ Ove_ section
of this manual.
[] To reduce the risk of fire in the o_en
cavity:
--Do not o_ercook food. Carefifllv attend
appliance when paper, plastic or other
combustible materials are placed inside
the o_en while microwaxe cooking.
--Remo_e wire twist-ties and metal handles
fiom paper or plastic containers befbre
placing them in the o_en.
--Do not use the o_en for storage purposes.
Do not leave paper products, cooking
utensils or fbod in the o_en when not in use.
[]
[]
[]
[]
[]
Do not operate this appliance if it has
been damaged or dropped.
As with any appliance, close superxision
is necessary when used by children.
Use this appliance onh_ for its intended
use as described in this manual.
Do not use corrosive chemicals or _apors
in this appliance.
This oven is specifically designed to heat,
dry or cook food, and is not intended for
laborato W or industrial use.
--If materials inside the o_en ignite, kee I)
the oxen door closed, turn the oven off
and shut off p(m>r at the filse or circuit
breaker panel. If the door is opened, the
fire may spread.
--Do not use the Sensor Features twice in
succession on the same fbod portion.
If food is undercooked after the first
countdown, use COOK BY TIME for
additional cooking time.
IMPORTANT SAFETY INSTRUCTIONS
Advanlium Oven
AWARNING!
SAt' 2 TY PRECA U770NS
• Do not operate the oxen without
the turntable ill place. Tile turntable
must be/mrestricted so it can turn.
• During and after use, do not touch,
or let clothing or other flammable
materials contact any interior area
of the oven; allow sufficient time
tbr cooling first.
• Kee I) the oxen flee flom grease
buildup.
• Cook meat and poulti T thoroughly--
meat to at least all INTERNAL
temperaune of 160°F, and poulu T to
at least all INTERNAL temperature of
180°F. Cooking to these temperatures
usually protects against tbodborne
illness.
• Potentially hot surfaces include the
oxen door, floor, walls, oxen rack and
turntable.
ARCTNG A'_ving (:an occur during both .q)eedcoohing and microwave cooking. [[you .seearcing, 1)_._ the
CLEA R/OFF pad and (:or_+(:tthe problem.
Arcing is the microwme term for sparks
in the oxen. Arcing is caused by:
• Metal or foil touching the side of
the oxen.
• Foil not molded to food (upturned
edges act like antemlas).
• Use foil only as recommended in
this manual.
• Metal cookware used during either
speedcook or microwave cooking
(except for the pans provided with
the oven).
• Metal, such as twist:ties, poultl\v pins,
or gold-rimmed dishes, ill the oxen.
• Recycled paper towels containing small
metal pieces being used ill the oxen.
FOODS 7 O
When microxs aving, place all tbods and
containers oil tile clear glass trav.
Do not pop popcorn ill your oxen/mless
ill a special microwme popcorn accesso U
or/mless you use popcorn labeled for use
ill microwaxe oxens.
Do not boil egg5 ill tiffs oxen. Pressure
will build up inside egg yolk and will
cause it to burst, possibly resulting
ill injury.
Do not operate the oxen without food
inside. This may cause damage to the
oxen. It increases the heat around the
magnetron and call shorten the litb of
the oxen.
Foods with unbroken outer "skill"
such as potatoes, hot dogs, sausages,
tomatoes, apples, chicken livers and other
giblets, and egg yolks should be pieived
to allow smam to escape during cooking.
•SUPERHk_7_D WATER
Liquids, .sud_ a_ wato (@'( or lea, a'_z abl( to
,'w,nJogwated b_3,ond lhe boiling poi,_t wilhout
a/qwari_lg lo lw boiling. Visible bubbling or
boiling when the (ontaino is n,ml)vdjivmz the
microwave oven is not aN_@s pms_'nt. THIS"
COUIJ) I?ESUI2_ L\: lq,2RY HOT LIOUII)S
SUDI JENI_Y B()IlJN( ; o lq:d¢ 1_Tql£_VTHE
C()NTkL\qrd¢ LS'DLS'T{:7_BI_DOR A5t¥)()N
OR OTHEI? UTFNS'IL 1S 1A(S'I'_I?TFJ)IN-ID
THF. LIOUII),
To reduce the risk of inju Uto persons:
--Do not oxerheat the liquid.
--Stir the liquid both betbre and halfway
through heating it.
--Do not use straight-sided containers with
nanow necks.
After heating, allow the container to stand
ill the microwaxe oxen for a short time
before removing the containei:
--Use extreme care when inserting a spoon
or other utensil into the container.

IMPORTANT SAFETY INSTRUCTIONS
Advanlium Oven
AWARNING!
Speedcooh
oven-s@
cookzoar#
77wturntable must
always be irz pla_e when
i_sing ltu, oven.
Pul /hod direcllr on ltze
noi*-stich metal tray
lo speedcook.
•The oven and door will get very hot
when speedcooking.
• Cookware will become hot because of
heat transferred from the heated food.
O_en mitts will be needed to handle
the cookware.
• Do not use coverings, containers or
cooking/roasting bags made of foil,
plastic, wax or paper when
speedcooking.
• Do not co_er the turntable, wire o_en
rack, trays or any part of the o_en with
metal foil. This will cause arcing in the
o'_en.
• Use the non-stick metal tray in the
same way you would use a shallow
1)aking pan or 1)aking trav.
• Place tBod directly on the trays when
cooking unless prompted by the oxen
to do otherwise.
• Any oven-safe dish can be used in
your oven. Recipes in the Advantium
Cookbook were rested in Pyrex c'_glass
cookware and Corningware _>ceramic
casseroles. Cook times and results
may vary when using other types of
oven-safe dishes. Place them directly
on the trays.
• Do not use the oxen to dry newspapers.
• Use of the cleat glass tray when
speedcooking will resuh in inferior
cooking performance.
Oven-s@
coohware
Bahing,
Broiling,
Warming,
Proofing
&
7basting
• The oven and door will get very hot
when baking, broiling, warming,
proofing or toasting.
•Cookware will become hot. Oxen mitts
will be needed to handle the cookware.
• Do not use coverings, containers or
cooking/roasting bag, s made of tbil,
plastic, wax or paper when
speedcooking.
• Do not coxer the turntable, wire oxen
rack, trays or any part of the oxen with
metal foil. This will cause arcing in the
oxen.
• Use the non-stick metal tray in the
same way you would use a shallow
1)aking pan or 1)aking trav.
77wturntable must
always be in place when
icsing"llw oven.
• Use the aluminum baking sheet on the
wire oven rack, and place them on the
non-stick metal tray when baking on
two levels, 1)roiling or toasting foods.
•Place food directly on the trays when
cooking unless prompted by the o_en
to do otherwise.
• Any oven-safe dish can be used in
your oven. Recipes in the Advantium
Cookbook were rested in Pyrex c'_glass
cookware and Corningware _'>ceramic
casseroles. Cook times and results
may vary when using other types of
ov&a-safe dishes. Place them directly
on the trays.
• Do not use the oxen to dry newspapers.
• Use of the cleat glass tray when
1)aking, 1)roiling, warming, proofing or
masting will result in inferior cooking
performance.
Pul /hod di*vclly on lhe
no'n-slieh metal tray
to bake on one level. Pul fi)od direclly on lhe
alumin:hm baking'_shee( on the
wire oven rack, and place lhem
on the non-sli_k melal lra_;
when baking" on lwo leveA,
bmilin#, or loaslin#_ foods,.
IMPORTANT SAFETY INSTRUCTIONS
Advanlium Oven
AWARNING!
MicTozo (I V e-
COOkZO(IT_
77w turntable mu,st
alwa)s be in place when
using lhe oven.
77re clear glass tray
should alway,_ be _n
p.la_ e w]wn
mwrowavin_:
Mahe ,stay to use ,suitable eoohwa'_ during microwave eoohir_g Most gla,s,sea,s:se_*Jle,seoohing disbars,
mea,suring cuD,s, (:usta_l cuD,s,porte U or china dinnerwa'_ which doe,snot have metallic trim or
glaz_ with a metallic sheen can be u.s_d. Some eoohwa'_ is la& l_d ".suitabh Jiw mierowaving. "
• Place food or microwa_ahle container
directly on the clear glass tray to cook
your food.
• Use of the non-stick metal tray during
microwme cooking will resuh in
inferior cooking performance.
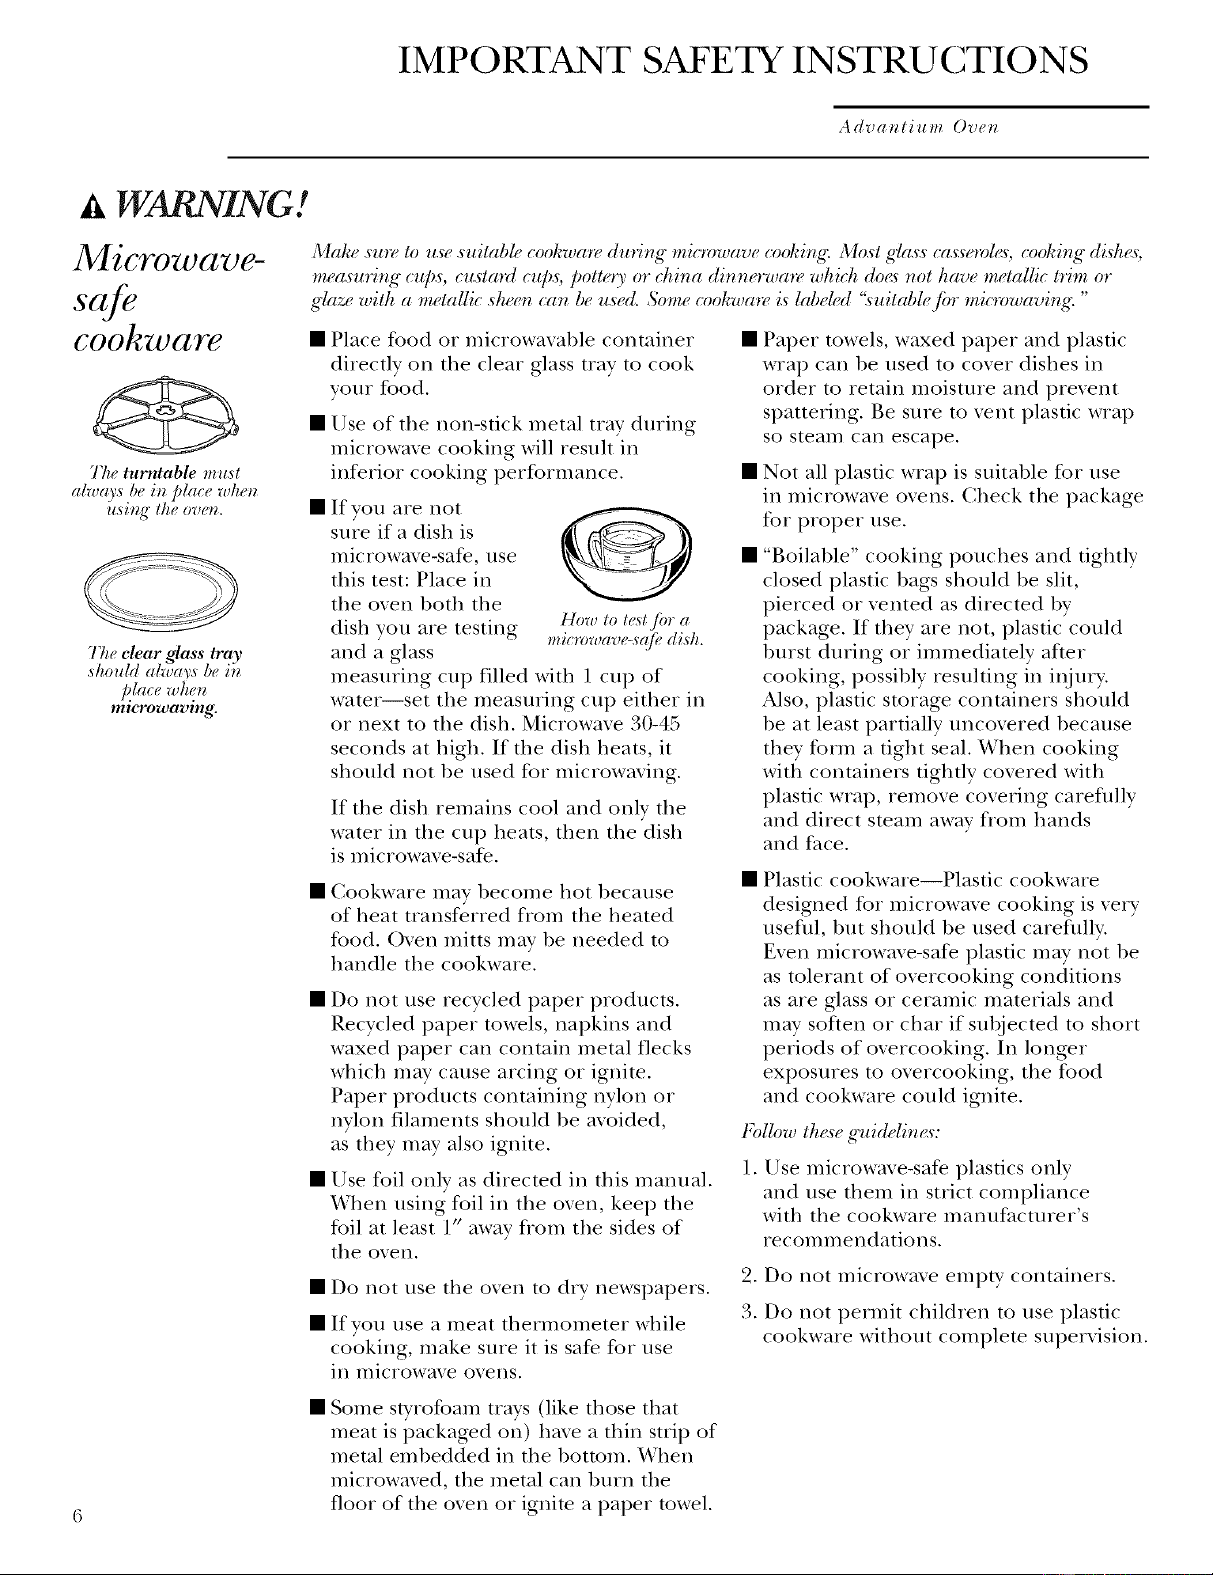
• If you are not
sure if a dish is
nlic rowave-sa re, rise
tiffs test: Place in
the oven both the How to te,stJbr a
dish you are testing mic_neave-s(¢)¢ dish.
and a glass
measuring cup filled with l cup of
water--set the measuring cup either in
or next to the dish. Microwave 30-45
seconds at high. If the dish heats, it
should not he used for microwaving.
If the dish remains cool and only the
water in the cup heats, then the dish
is microwax e-safe.
• Cookware may become hot because
of heat transferred from the heated
food. Oxen mitts may he needed to
handle the cookware.
• Do not use recycled paper products.
Recycled paper towels, napkins and
waxed paper can contain metal flecks
which may cause arcing or ignite.
Paper products containing nylon or
nylon filaments should he avoided,
as they may also ignite.
• Use foil only as directed in this manual.
When using foil in the oxen, keep the
foil at least 1" away from the sides of
the oxen,
• Do not use the oxen to dry newspapers.
• If yon use a meat thermometer while
cooking, make sure it is safe for use
in inicrowaxe oxens.
•Paper towels, waxed paper and plastic
wrap can he used to covet dishes in
order to retain moisture and prevent
spattering. Be sure to vent plastic wrap
so steam can escape.
• Not all plastic wrap is stfitable for use
in microwme oxens. Check the package
tbr proper use.
• "Boilable" cooking pouches and tightly
closed plastic bags should be slit,
pierced or vented as directed by
package. If they are not, plastic could
burst during or immediamly after
cooking, possihly resulting in inju U.
Also, plastic storage containers should
be at least partially uncovered because
they tbrm a fight seal. When cooking
witI_lcontainers tightly covered with
plastic wrap, remove covering careflflly
and direct steam away flom hands
and face.
• Plastic cookware--Plastic cookware
designed tbr microwave cooking is very
useflfl, but should be used careflflly.
Even microwave-safe plasuc may not be
as tolerant of overcooking conditions
as are glass or ceramic materials and
may soften or char if subjected to short
periods of overcooking. In longer
exposures to overcooking, the food
and cookware could ignite.
Follow lh(<s'eg_uidelir_w
I. Use microwme-safe plastics only
and use them in strict compliance
with the cookware mamffacmrer's
recommendations.
2. Do not microwme empty containers.
3. Do not permit children to use plastic
cookware without complete superxision.
• Some styrofoam trays (like those that
meat is packaged on) have a thin strip of
metal emhedded in the bottom. When
microwaved, the metal can burn the
floor of the oven or ignim a paper towel.
IMPORTANT SAFETY INSTRUCTIONS
A dvar_li I¢m Ove_
AWARNING!
SAFETY Pt_2 CA UT YONS
• Don't defrost frozen beverages in
narrow-necked bottles (especially
carbonamd beverages). Even if the
container is open, pressure can build
up. This can cause the container to
burst, possibly resulting in injm T.
• Foods cooked in liquids (such as
pasta) may tend to boil more rapidly
than foods containing less moisture.
Should this occur, refer to the Car(,
and Cl_,a,fi_,g o/the ove_l section for
instructions on how to clean the
inside of the oxen.
• Hot foods and smam can cause
burns. Be careflfl when opening any
containers of hot food, including
popcorn bags, cooking pouches and
boxes. To prevent possible it_jm T,
direct smam away flom hands and face.
• Do not oxercook potatoes. They could
dehydrate and catch fire, causing
dam age to your oxen.
• Avoid heating baby %od in glass jars,
even with the lid off. Make sure all
infant food is thoroughly cooked.
Stir food to distribute the heat evenly.
Be careflfl to prevent scalding when
warming fornmla. The container may
feel cooler than the formula really is.
Always rest the formula before feeding
the babv.
• Do not attempt to deep fiy in the oxen.
SAVE THESE INS TR UCTIONS
MESURES DE SECURITE IMPORTANTES
Four Advantium
PP_CA UTIONS POUR I_VITER UNE I_VENTUELLE
EXPOSITION EXCESSIVE A UX MICRO-ONDES
(nJ
(b)
N'essayez pas de fifire flmctionner le flmr 5
i/licro-ondes lorsque la porte est Otl\'erte,
puisque cela pourrait entrahler une
exposition nocive aux micro-ondes. 11 est
important de nejamais essayer de torcer ou
modifier le svst0me de verrouillage de
s_curit_.
Ne placez pas d'objets entre la porte et la
suriace awmt du flmr. Ne laissez pas de salet(_
ou de rt_sidus de produits nettowmts
s'accumuler sur les suriaces d'_tanch(qt_.
(C} Nefaites pasfonctionner le flmr s'il est
endommag_, ll est tr_s important que la porte
ferme bien et que les pi_ces suivantes ne
soient pas endommag(_es :
(1) i,a porte (tordue),
(2) I,es charni_)res et loquets (cass_s ou
desserrt_s),
(3) I,esjoints et surtaces d'_tanch_it_.
(d} Seul un technicien qualifi_ doit r_parer ou rt_gler
•_oti'e t()/lI" _'1 i//icro-ondes.
MESURES DE SECURITE IMPORTANTES
Fo u rA dv a _Iiu m
AMISE EN Pour r_duire le risque de br_lures, de choc _lectrique, d'incendie,
GARDE !de blessures it autrui ou d'exposition excessive aux micro-ondes :
MES UP 2S DE SE CURIY'E
[]
[]
[]
[]
[]
[]
Veuillez lire les mesures de s6curiti6 avant
d'utiliser le four. Lors de l'utilisation
d'appareils 61ectriques, il faut observer
des mesures de s6curit6 616mentaires, et
en particulier :
Veuillez lire et obserxer les <<Prdcautions
pour dviter une dventuelle exposition
excessixe aux micro-ondes ,, ii la page 8.
Assurez-_ous que l'appareil soit installd et
mis fi la terre correctement par un
technicien qualifid confbrmdment aux
directives d'installation fournies.
Installez et placez cet appareil seulement
selon les directives d'installation fburnies.
Certains aliments comme les oeufs dans
leur coquille et les rdcipients scellds-
par exemple, des pots en xerre fbrmds-
peuvent dclater s'ils sont chauff_s dans le
fbur ii micro-ondes et risquent de vous
blesser.
N'installez pas cet appareil au-dessus d'un
d_ier.
[] Ne couvrez pas ou ne bloquez pas les
omertures de l'appareil.
[] Ne rangez pas cet appareil _'tl'extdrieur.
N'ufilisez pasce %ur _iproximit_ de l'eau,
par exemple, dans un sous-sol mouilld,
pi_s d'une piscine d'un drier ou dans des
emplacements semblables.
[] Voir les directixes concernant le nettoyage
des surfaces dans la section <<Entretien et
nettoyage du four it micro-ondes >,du
prdsent manuel.
[] Pour r_duire les risques d'incendie fi
l'intdrieur du fbur :
--Ne faites pas trop cuire les aliments.
Surxeillez la cuisson de pr&s quand wins
u/ilisez du papier, du plastique ou d'autres
mafi&res inflammables dans w)tre four
pendant la cuisson.
--Enlexez les attaches mdtalliques et les
poigndes en mdtal des contenants de
papier ou de plastique axant de les mettre
dans le fbur.
[]
[]
[]
[]
[]
[]
[]
[]
Ce %ur fi micro-ondes n'a pas dtd
approux_ ou mis fi l'essai pour _tre utilis_
eI/ nler.
Ce ffmr est homologud UL pour une
installation murale standard.
N mlll_ez pas cet appareil s'il a dtd
endommagd ou s'il est tombd.
Comme axec tout appareil, il est important
de survei]ler dtroitement ]orsque le fbur
est uti]isd par des enfants.
1 " "S 1 O"
N mlll.ez cet appareil que pour I usame
auquel il est destind, tel que ddcrit dans le
prdsent manuel.
N tmll.ez pas de substances chimiques ou
corrosives dans cet appareil.
Ce %ur it micro-ondes a dtd conqu
spdcifiquement pour chauftbr, s_cher ou
cuire des aliments et non pour _tre utilisd
en laboratoire ou fi des fins industrielles.
Seul un technicien qualifid dolt rdparer
cet appareil. Communiquez avec le bureau
de service apr&swente le plus pr&s si votre
appareil dolt _tre vdrifid, rdpard ou rdgld.
--Ne rangez rien dans le %un Ne laissez pas
de produits en papier, ustensiles de
cuisson ou aliments dans le fbur lorsqu'i]
n'est pas ufilisd.
--Si un fbu dclate dans votre fbur, laissez la
porto fermde, dmignez le four et
ddbranchez le cordon d'a]imentation ou
coupez le courant en enlevant le fllsible
ou en ddclenchant le disjoncmur Si xous
ouvrez la porW, les tlammes risquent de se
propager.
--N'utilisez pas les functions de capteur
deux fbis de suite sur la m&me section de
nourriture. Si la nourriture n'est pas assez
cuite apr0s le premier passage, utilisez
COOK BY TIME (TEMPS DE CUISSON
pour _iouter du temps de cuisson.
[]
[]
Ne faites pas fonctionner le fbur sans
plateau tournant. Le plateau dolt pouvou
tourner sans restriction.
Durant et apr&s l'usage, ne touchez pas ou
ne laissez pas de v_tements ou autres
mat&iaux inflammables entrer en contact
avec l'intdrieur du fbur. Prdvoyez
suftisamment de temps pour le
refioidissemen t. 9
MESURES DE SECURITE IMPORTANTES
Fo u r A dv a n I iu m
MISE EN GARDE. t
1 1
ME\$ URt£\$ DE SE C URI TE
• Gardez le four libre de toute
accumulation de graisse.
• Faites bien cuire la xiande et la xolaille--
la viande doit axoir une temp&amre
INTERNE de 160 ° F (71 oC), et la xolaille
une temp&amre INTERNE d'au moins
180 ° F (83 ° C). Une preparation aces
ni\'eaux de temp&ature protege
normalement des maladies alimentaires.
• Les surfaces chaudes peuvent inclure la
porte du four, le plancher, les parois, le
plamau de cuisson et le plateau
tonrnant.
ARC
D7YNCELLES
Un a_r p_ul a[)paraio_ durant la cuisson rapid_ _t la cuis:sor, 0mic,>ond_<_. Si vous voyez ur_
mz app_O_ezsur la touH_e arzrztdation/arr_;t (CLLAI_/ )tt ) _t _orrig_.z l_ probl_;me.
La formation d'tm arc est ]a fhcon qu'ont • Les ustensiles de cuisson de m_tal
les micro-ondes de produire des _tincelles
dans le flour. Ceci est imputable aux
causes sni_antes :
• Un article de m_tal on du papier
d'aluminimn est en contact avec les
patois du fbnr.
• Le papier d'aluminium n'_ponse pas
bien la forme de l'aliment (les bords
relex(_s agissent comme des antennes).
• Utilisez de papier d'aluntininm sauf
comme il est d_crit dans le present
nlannel.
utilisOs durant la cuisson rapide on la
cuisson a micro-ondes (sanf les
casseroles fonrnies avec le four).
• Des articles en m_tal, comme des
attaches, les broches utilis_es pour la
volai]]e on les garnitures dories des
assiettes se trouvent dans ]e fonr.
• Des essnie-tout en papier recyclO
conmnant de petites particu]es de
m_tal sont employ_s dans le font.
AIdMENTS •
10
Pour la cuisson fimicro-ondes, placez tons
les aliments et contenants sur le plateau
de xene transparent.
Ne pr6parez pas de mais _clat_ dans
votre tbur fi micro-ondes, fi moins
d'utiliser un grille-mais sp_cialement
congu fi cette fin on du mais _clat(_
pour la cuisson aux micro-ondes.
I1 n'est pas recommand_ de faire
bouillir des oeufs dans le four. La
pression qui se cr6e dans lejaune fera
_clater l'oeuf et pourrait causer des
blessures.
Le fait de laisser foncfionner le four fi
micro-ondes sans placer d'aliment fi
l'int&ieur pent endommager le four.
Cela augmente la temp&atureautour
du magn_tron et pent aft>cter la dur_e
de vie de votre foun
Percez la _<peau ,, qui recouvre certains
aliments, comme les potatoes de terre,
les saucisses flnn_es, les saucissons, les
tomams, les potatoes, le foie de poulet
et atmes abats, lesjaunes d'oeuf, ponr
permettre fi la vapeur de s'_chapper
pendant la cuisson.
•EAU SURCHAUFF_E
Le._liquide._, te5 que l'eau, le carl;ou [e the;
peuve*_t _lre ._uwhaq[f!_._au-dd?_ du point
d7bullition ._a*_._avoir l'air de bouilli*: Une
_;/mllition ou jbrmation de bul&, t*'e*t pas
tou/om:* visible lo_:wue [e r_;ci[D,nt e*tsorti du
jbur _)micro-onde_. CE(J PEUT I_2:\_ITLat]NER
I)ES DI_iBORI)I{M£_\_I'S SOUI)AL\{S DE
1_I+2CItql;2\TEST Dk2PIA CE OU SI {.;\7_
CUIId_ER OU TOUT A UTRk2 USTI:'A_SIIJ_2
EST IATROD{3T I)AA[S LE LIOUII)F..
Pour r6duire le risque de blessures
pour atttrui :
---Ne snichanft>z pas le liquide.
--M61ang>z le liquide avant son
r6chauft>ment et an milieu de celui-ci.
--N'utilisez pas de rOcipient fi bords
xerticaux et fi col _troit.
--Apr&s avoir r_chauff6, laissez un pen le
r_cipient dans le fonr _1micro-ondes
avant de sortir le r_cipient.
--Faites preuve de grande prudence lots
de l'introduction d'une cuiller ou de
tout atme ustensile dans le r_cipient.
MESURES DE SECURITE IMPORTANTES
Fo u rA dv an t iu m
MISE EN GARDE!
Ustensiles
de cuisson
sans danger
pour lefour
(l cugsson
rapide
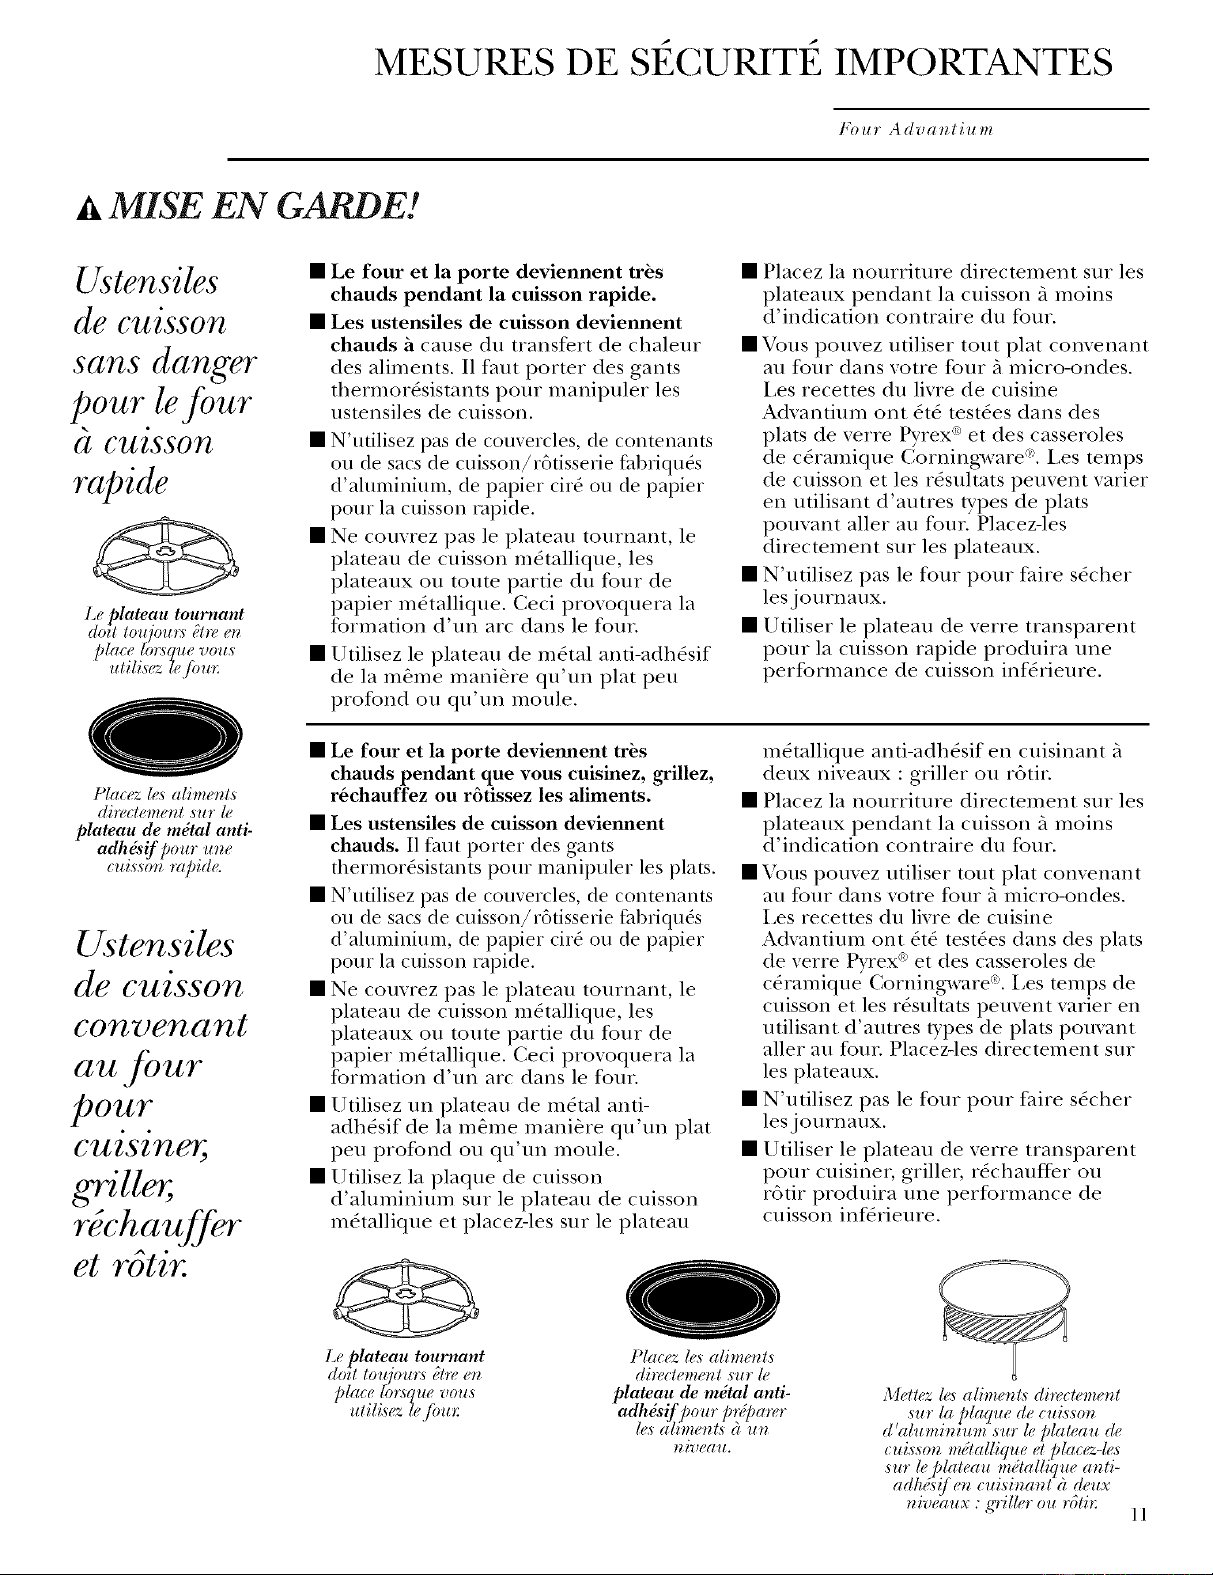
lle plateau tournant
dotl louiours _Tlreerr
)late lbrsc ue you s
.ltlt.,e=_i/i,,tl:
Placez les alimenLs
direclement sur le
plateau de mdtal anti-
adh &if pour un e
cld,s,son rapid<
Ustensiles
de cuisson
convenant
(lU yOU)"
_OUT
cuzszner,
r chauff
et rgtir.
• Le four et la porte deviennent tr_s
chauds pendant la cuisson rapide.
• Les ustensiles de cuisson deviennent
chauds hcause du transfert de chaleur
des aliments. II faut pormr des gants
thermor_sistants pour manipuler les
usmnsiles de cuisson.
• N'utilisez pas de couvercles, de contenants
on de sacs de cuisson/r6tisserie _d)iiqu&
d'ahmfinium, de papier cii_ ou de papier
pour la cuisson rapide.
• Ne couvrez pas le plateau tonrnant, le
plateau de cuisson m_tallique, les
plateaux on toute pattie du four de
papier mStallique. Ceci provoquera la
t5rmation d'un arc dans le fonr.
• Ufilisez le plateau de m_tal anfi-adh_sif
de la re&me mani_.re qu'un plat pen
profond on qu'un moule.
• Placez la nourriture directement snr les
plateaux pendant la cuisson fi moins
d'indication contraire du four.
• Vous pouvez utiliser tout plat convenant
an four dans votre four fi micro-ondes.
Les recettes du livre de cuisine
Advantium ont _t_ test_es dans des
plats de verre Pyrex a>et des casseroles
de c_ramique CorningwareC"L Les temps
de cnisson et les r_sultats peuvent varier
en utilisant d'autres types de plats
pouvant aller an four. Placez-les
directement sur les plateaux.
• N'utilisez pas le four pour faire s_cher
lesjournaux.
• Utiliser le plateau de verre transparent
pour la cuisson rapide produira une
performance de cuisson inf_rieure.
•Le four et la porte deviennent trbs
chauds pendant que vous cuisinez, grillez,
r6chauffez ou rgtissez les aliments.
• Les ustensiles de cuisson deviennent
chauds. I1faut porter des gants
thermor_sistants pour manipuler les plats.
• N'utilisez pas de couvercles, de contenants
on de sacs de cuisson/r6tisserie _d)iiqu&
d'aluminium, de papier ciid on de papier
pour la cuisson rapide.
• Ne couvrez pas le plateau tonrnant, le
plateau de cuisson m_tallique, les
plateaux on mute partie du four de
papier m_tallique. Ceci provoquera la
formation d'un arc dans le four.
• Ufilisez tin plamau de m_tal anti-
adh_sif de la re&me mani&re qu'un plat
pen profond on qu'un moule.
• Ufilisez la plaque de cuisson
d'aluminium sur le plateau de cuisson
m_tallique et placez-les stir le plateau
m_tallique anfi-adh_sif en cuisinant
deux niveaux : griller on r6tir.
• Placez la nonrritnre directement sur les
plateaux pendant la cuisson fi moins
d'indication contraire du four.
• Vous ponvez utiliser tout plat convenant
au four dans votre four ::tmicro-ondes.
i.es recetms du livre de cuisine
Advantium ont _t_ test_es dans des plats
de verre Pyrex a_et des casseroles de
c_ramique Corningware_L Les temps de
cuisson et les r_sultats peuvent varlet en
ufilisant d'autres types de plats pouvant
aller an four. Placez-les directement sur
les plateaux.
• N'ufilisez pas le four pour faire s_cher
lesjournaux.
• Ufiliser le plateau de verre transparent
pour cuisiner, griller, r_chauffer on
r6tir produira une performance de
cuisson inf_rieure.
Le plateau tournant
dotl loujoul:s 31Iven
place lbl:squev0us
ulili, sez l,_tim/:
[ lac_.z l(_,salim(_nl,s
direcl_: me nl ,sitrle
plateau de mdtal anti-
adh&iif ])our _ .)rd )arer
/e5 a It lit _'lt l_ aIt It
12 i_)e(l l t,
Mellez,, le,s,alimenl,s, direclemenl,, ,
sur la plaque de cuis,son
d'aluminium. . ,.sur le _)laleau de
ttu,s,son metalhque el fllat<-le,s
sur le plaleau mdlallique anti-
adh&!/ en cui,sinanl ('_deux
niveaux : g'riller ou r61il: 11
MESURES DE SECURITE IMPORTANTES
Fo u rA dv a _Ii u m
MISE EN GARDE!
Ustensile
de cuisson
convenant
au four gt
micro-ondes
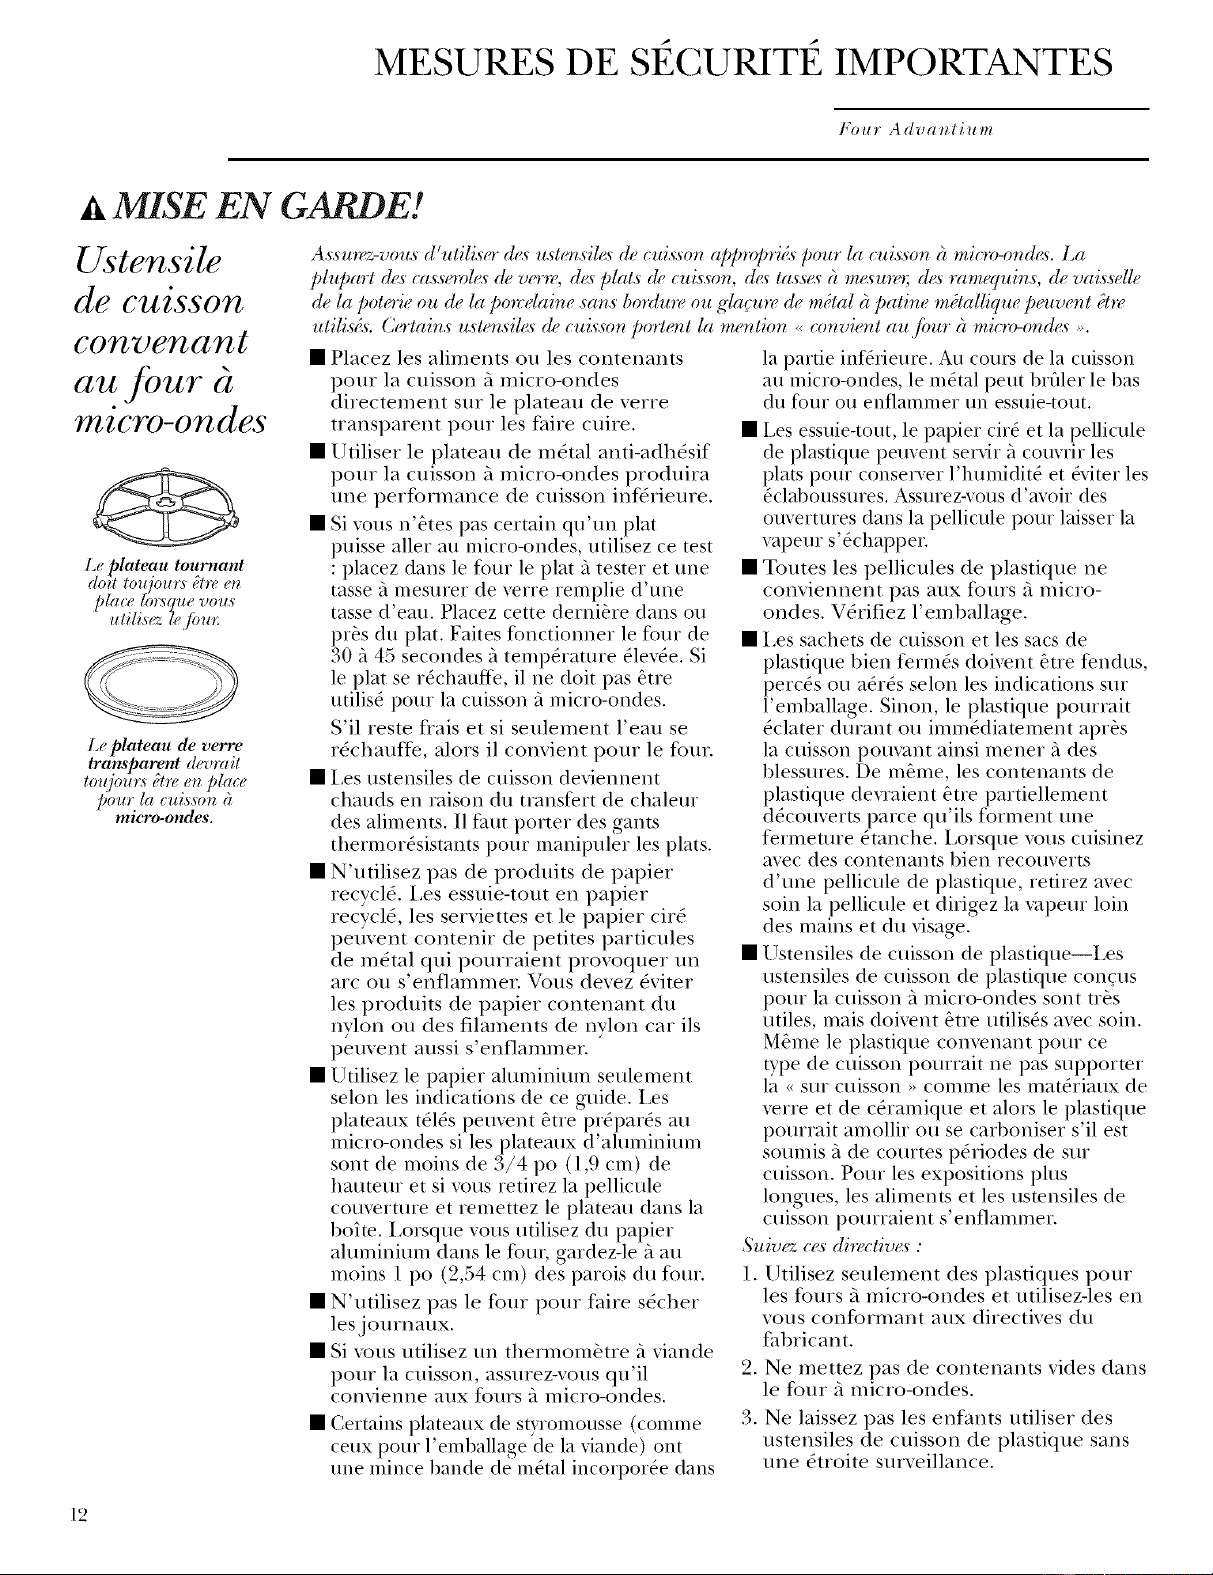
lle plateau tournant
doll lou/ours Flre er_
pla_e [orsque vou,_
ulili,s< #fi*lv:
Le plateau de verre
transparent devrail
lot(/ours Flr_,__ pla_
pour la cui,s,wn :)
micro-ondes.
A.s:smvz-vou.s d'utiliso" (1_ uste_lsiles de cuisson aplmq_ri:s pour la cuisson (1mio>ondes. La
plupart (l_s_ca.v_o_,l(_de w'rm, de_ plat._ oh,cui.v_on, (h_ la.v_z__:1me_u_; de_ ramequins, de vai._:_:lle
de la potoJe ou de la po'_velaine .sans bo_lmz: ou gla_mv de m:tal (1patine m:lallique p_ver, t :tw
utilis:s. Co'lains u._le_.dles de cuis.wn poner_t la me_tion _convie_t au fimr (1 micm-on(h_ ,,.
• Placez les aliments ou les contenants
pour la cuisson _ micro-ondes
directement sur le plateau de verre
transparent pour les faire cuire.
• Utiliser le plateau de mOtal anti-adh_sif
pour la cuisson fi micro-ondes produira
une performance de cuisson inf(4rieure.
• Si vous n'_tes pas certain qu'un plat
puisse aller au micro<redes, utilisez ce test
: placez dans le four le plat a tester et une
tasse fi mesurer de verre remplie d'une
tasse d'eau. Placez cette derni_re dans ou
pros du plat. Faites fonctionner le four de
30 _'_45 secondes fitemp&ature Olev_e. Si
le plat se r_chaufte, il ne doit pas +tre
utilis_ pour la cuisson fi micro-ondes.
S'il reste frais et si seulement l'eau se
r_chauft>, alors il convient pour le four.
• I,es ustensiles de cuisson deviennent
chauds en raison du transfert de chaleur
des aliments. I1 flint porter des gants
thermorOsistants pour manipuler les plats.
• N'utilisez pas de produits de papier
recyclO. I,es essuie-tout en papier
recyclO, les serviettes et le papier cirO
peuvent contenir de petites particules
de m_tal qui pourraient provoquer un
arc ou s'enflammer. Vous devez _viter
les produits de papier contenant du
nylon ou des filaments de nylon car ils
peuvent aussi s'enflammer. •
• Utilisez le papier aluminium seulement
selon les indications de ce guide. I,es
plateaux tOl(_speu\>nt +tie pi(_pai_?s au
micro-ondes si les plateaux d'aluminium
sont de moins de 3/4 po (1,9 cm) de
hauteur et si \'ous retirez la pellicule
cou\>rture et remettez le plateau darts la
boim. I,orsque vous utilisez du papier
aluminium darts le four, gardez-le _ au
moins I po (2,54 cm) des parois du fl)ur.
• N'ufilisez pas le four pour faire s_cher
lesjournaux.
• Si vous ufilisez un thermom&tre 5 viande
pour la cuisson, assurez-vous qu'il
convienne aux fours fi micro-ondes.
• Certains plateaux de styromousse (comme
ceux pour l'emballage de la viande) ont
une mince bande de m&al incorpor_e dans
la pattie infiqieure. Au cours de la cuisson
au micro-ondes, le m_tal peut brOler le bas
du fbur ou enflammer un essuie-tout.
• Les essuie-tout, le papier cir_ et la pellicule
de plastique peuvent servir fi couwir les
plats pour conserver l'humidit_ et &iter les
_claboussures. Assurez-vous d'avoir des
ouvertures dans la pellicule pour laisser la
vapeur s'_chapper.
• Toutes les pellicules de plastique ne
conviennent pas aux fours ;_micro-
ondes. VOrifiez l'emballage.
• I,es sachets de cuisson et les sacs de
plastique bien ferm(_s doi\_nt _tre fendus,
perc_?s ou a(_r_?sselon les indications sur
l'emballage. Sinon, le plastique pourrait
Oclater durant ou imm(_diamment apr_s
la cuisson pou\'ant ainsi mener _ des
blessures. De re+me, les conmnants de
plastique dewaient Otre partiellement
d(_couverts parce qu'ils forment une
fermemre Otanche. I,orsque \'ous cuisinez
avec des contenants bien recouverts
d'une pellicule de plastique, retirez avec
soin la pellicule et dirigez la \'apeur loin
des mains et du visage.
• Ustensiles de cuisson de plastique--I,es
ustensiles de cuisson de plastique concus
pour la cuisson fi micro-ondes sont tr_s
utiles, mais doi\_nt Otre utilis(_s a\>c soin.
M_me le plastique con\'enant pour ce
type de cuisson pourrait ne pas suppormr
la <_sur cuisson ,, comme les mat&iaux de
\>rre et de c&amique et alors le plastique
pourrait amollir ou se carboniser s'il est
soumis fi de courtes p(_riodes de sur
cuisson. Pour les expositions plus
longues, les aliments et les usmnsiles de
cuisson pourraient s'enflammer.
Suivez c_' di*z'<tiv+<_:
I. Utilisez seulement des plastiques pour
les fours _ micro-ondes et utilisez-les en
xous conformant aux directixes du
fabricant.
2. Ne mettez pas de contenants xides darts
le four ;_micro-ondes.
3. Ne laissez pas les enfants utiliser des
ustensiles de cuisson de plastique sans
une Oroite surxeillance.
12
MESURES DE SECURITE IMPORTANTES
Fo u rA dv a n t iu m
MISE EN GARDE!
p p
MES Ut 2S DE SE CURIY 2
Ne dOcongelez pas de boissons
surgel_es dans des bouteilles au col
Otroit (tout particuliOrement les
boissons gazeuses). M_me si le
contenant est ouvert, il pourrait y avoir
une accumulation de pression. Le
contenant pourrait alors Oclamr,
menant _ des blessures possibles.
Les aliments prepares dans des liquides
(comme les prims) ont tendance
bouillir plus rapidement que les
aliments contenant moins d'humidit_.
Si ceci se produit, reportez-vous aux
directives concernant le nettoyage de
l'int_rieur du four dans la section _<
Entretien et nettoyage du four
lllic ro-ondes _.
• Les aliments chauds et la vapeur
peuvent provoquer des brfilures.
Attention en ouvrant des contenants
d'aliments chauds, y compris les sacs de
mais _clat_, les sachets de cuisson et les
boites. Pour _viter les blessures
possibles, dirigez la vapeur loin des
mains et du visage.
• Ne faites pas trop cuire les potatoes de
terre. Elles pourraient se d_.shydrater et
s'enflammer, provoquant des
dommages _ votre fo/li.
• l_vitez de r_chauffer la nourriture de
1)_b_ dans des conmnants en verre,
re&me apr&s avoir retir_ le couvercle.
Assurez-vous que la nourrimre de b_b_
soit bien cuite. M_langez-la pour
r_partir la chaleur uniform_ment.
Attention 5 l'_chaudage en r_chauffant
la preparation des no/lrrissons. Le
contenant peut &tre plus flais au
toucher que la preparation elle-m&me.
Tesmz toujours la preparation avant de
nourrir le b_b_.
• N'essayez pas de grande fliture dans le
fo/lr.
CONSERVEZ CES DIRECTIVES
13
¼tlat is Advantium?
k dva _ti u m Ove_
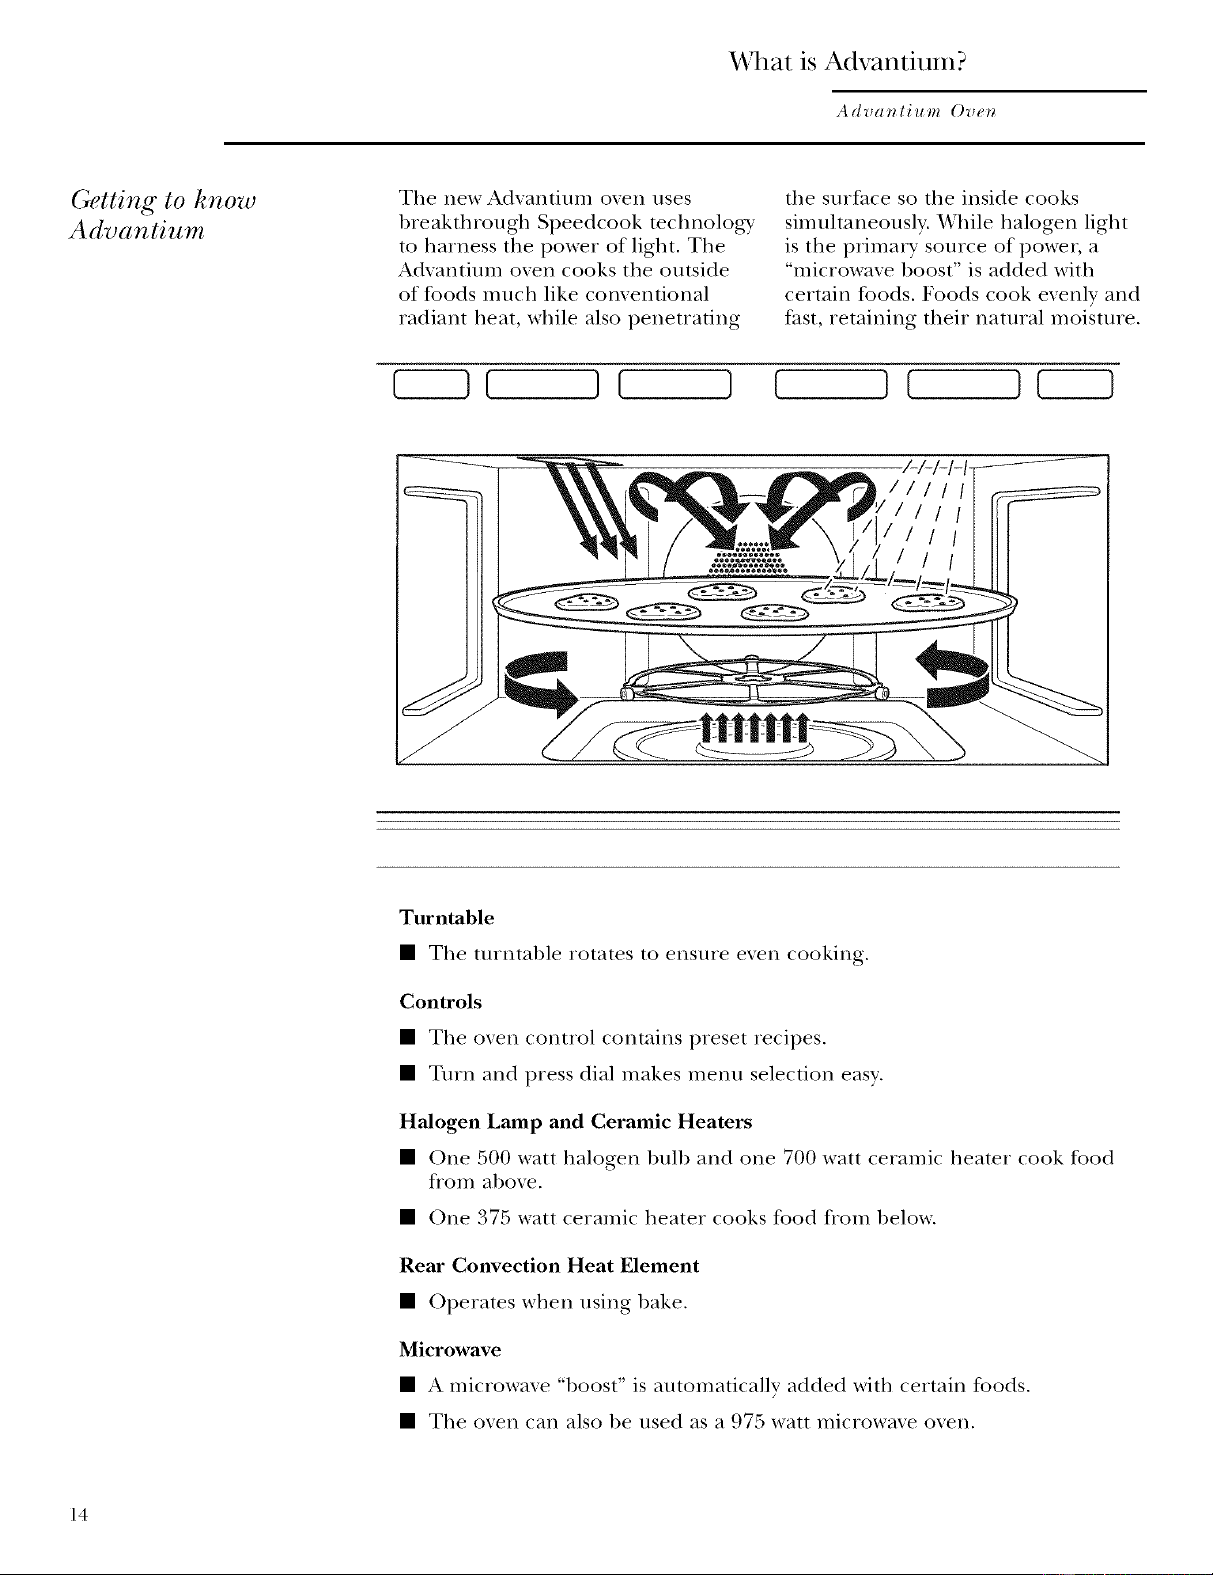
Getting to know
Advantium
The new Adxantium oxen uses
breakthrough Speedcook technology'
to harness tile power of light. The
Adxantium oxen cooks the outside
of foods much like comentional
radiant heat, while also penetrating
the surface so tile inside cooks
sinnfltaneously. While halogen light
is the prima W source of power, a
"microwave boost" is added with
certain foods. Foods cook evenly and
fast, retaining their natural moisture.
It } {
V-l-l-I-I-
IIIIIIIII I
I I
Turntable
• Tile turntable rotates to ensure even cooking.
Controls
• Tile oven control contains preset recipes.
• Turn and press dial makes menu selection easy.
Halogen Lamp and Ceramic Heaters
• One 500 watt halogen bulb and one 700 watt ceramic hearer cook food
flom above.
• One 375 watt ceramic heater cooks food fiom below.
Rear Convection Heat Element
• Operates when using bake.
Microwave
• A microwave "boost" is automatically added with certain foods.
• Tile oxen can also be used as a 975 watt microwaxe oxen.
14
Advantium Quick Start
Advanlium Oven
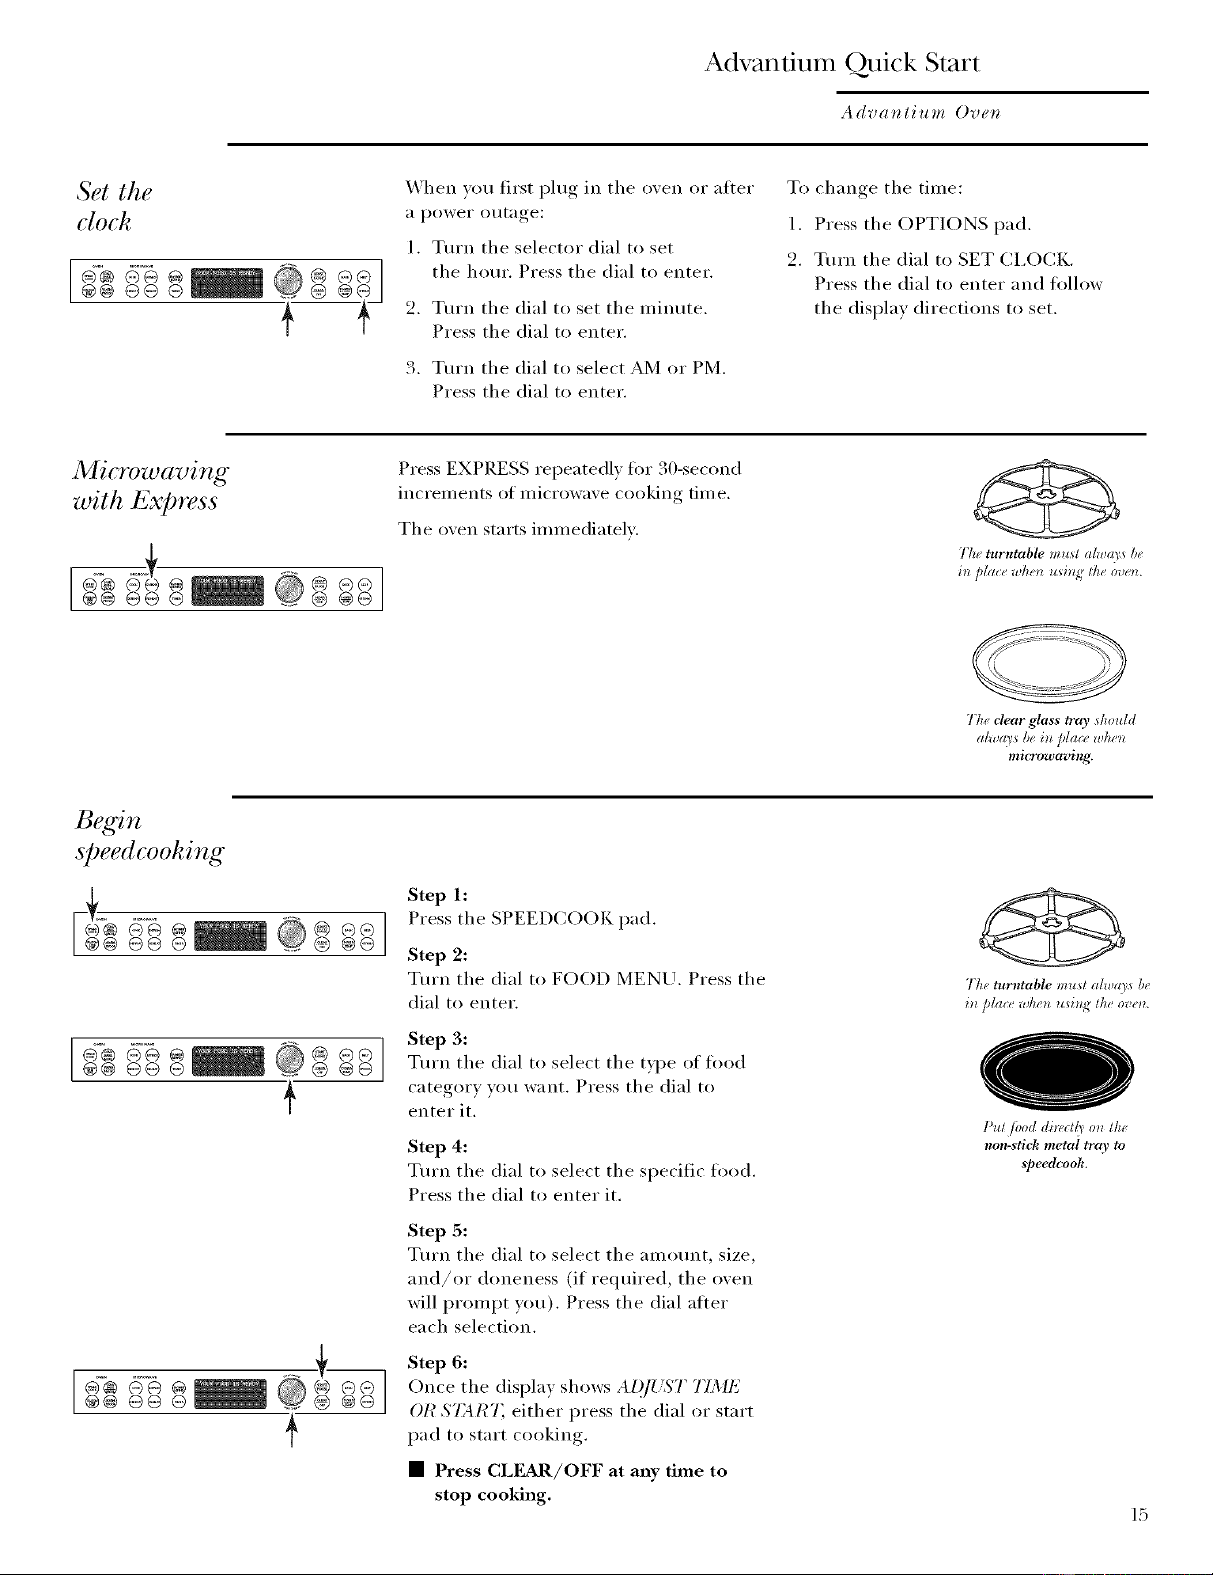
Set the
clock
@@ @@ ®
When you first plug in the oven or after
a power outage:
1. Turn the selector dial to set
the hour. Press the dial to enter.
2. Turn the dial to set the minute.
Press the dial to enter.
3. Tm'n the dial to select AM or PM.
Press the dial to enter.
To change the time:
1. Press the OPTIONS pad.
2. Turn the dial to SET CI,OCK.
Press the dial to enter and fl)llow
the display directions to set.
Microwaving
with k2x[)ress
®.@@
Press EXPRESS repeatedl) fi)r 30-second
iIlcI'eI//eIlts of illici'owax, e cookiilg [iII/e,
The oxen starts immediateE.
Tlu turntable Inusl allva_ _be
it_ /dace wkell using lke oven.
TI,, clear glass tray skouhl
alu,(O _Dein Sa(:_ zvhel*
microwaving.
sJ)eedcoohing
@® @@ @
@@ @@ @ .f
Step 1:
Press the SPEEDCOOK pad.
Step 2:
Tm'n the dial to FOOD MENU. Press the
dial to enter,
Step 3:
Turn the dial to select the t)])e of fi)od
category you want. Press the dial to
enter it.
Step 4:
Turn the dial to select the specific food.
Press the dial to enter it.
Step 5:
Turn the dial to select the amount, size,
and/or doneness (if required, the oven
will prompt you). Press the dial atter
each selection.
Step 6:
Once the display shows AI?]UST TIME
OH $7_4H7; either press the dial or start
pad to start cooking.
• Press CLEAR/OFF at any time to
stop cooking.
The turlztable l_lust alwa3s b(
in/Aace wlun usitzq lke ovell.
Pul /ood diwctl) on tk¢,
non-sticb metal trc9, to
speedcook.
15
Speedcook Menu Gu de
Advantium Oven
Q@®
P_'_-set
speedcooh
T}_ e _l "lg
sdections
16
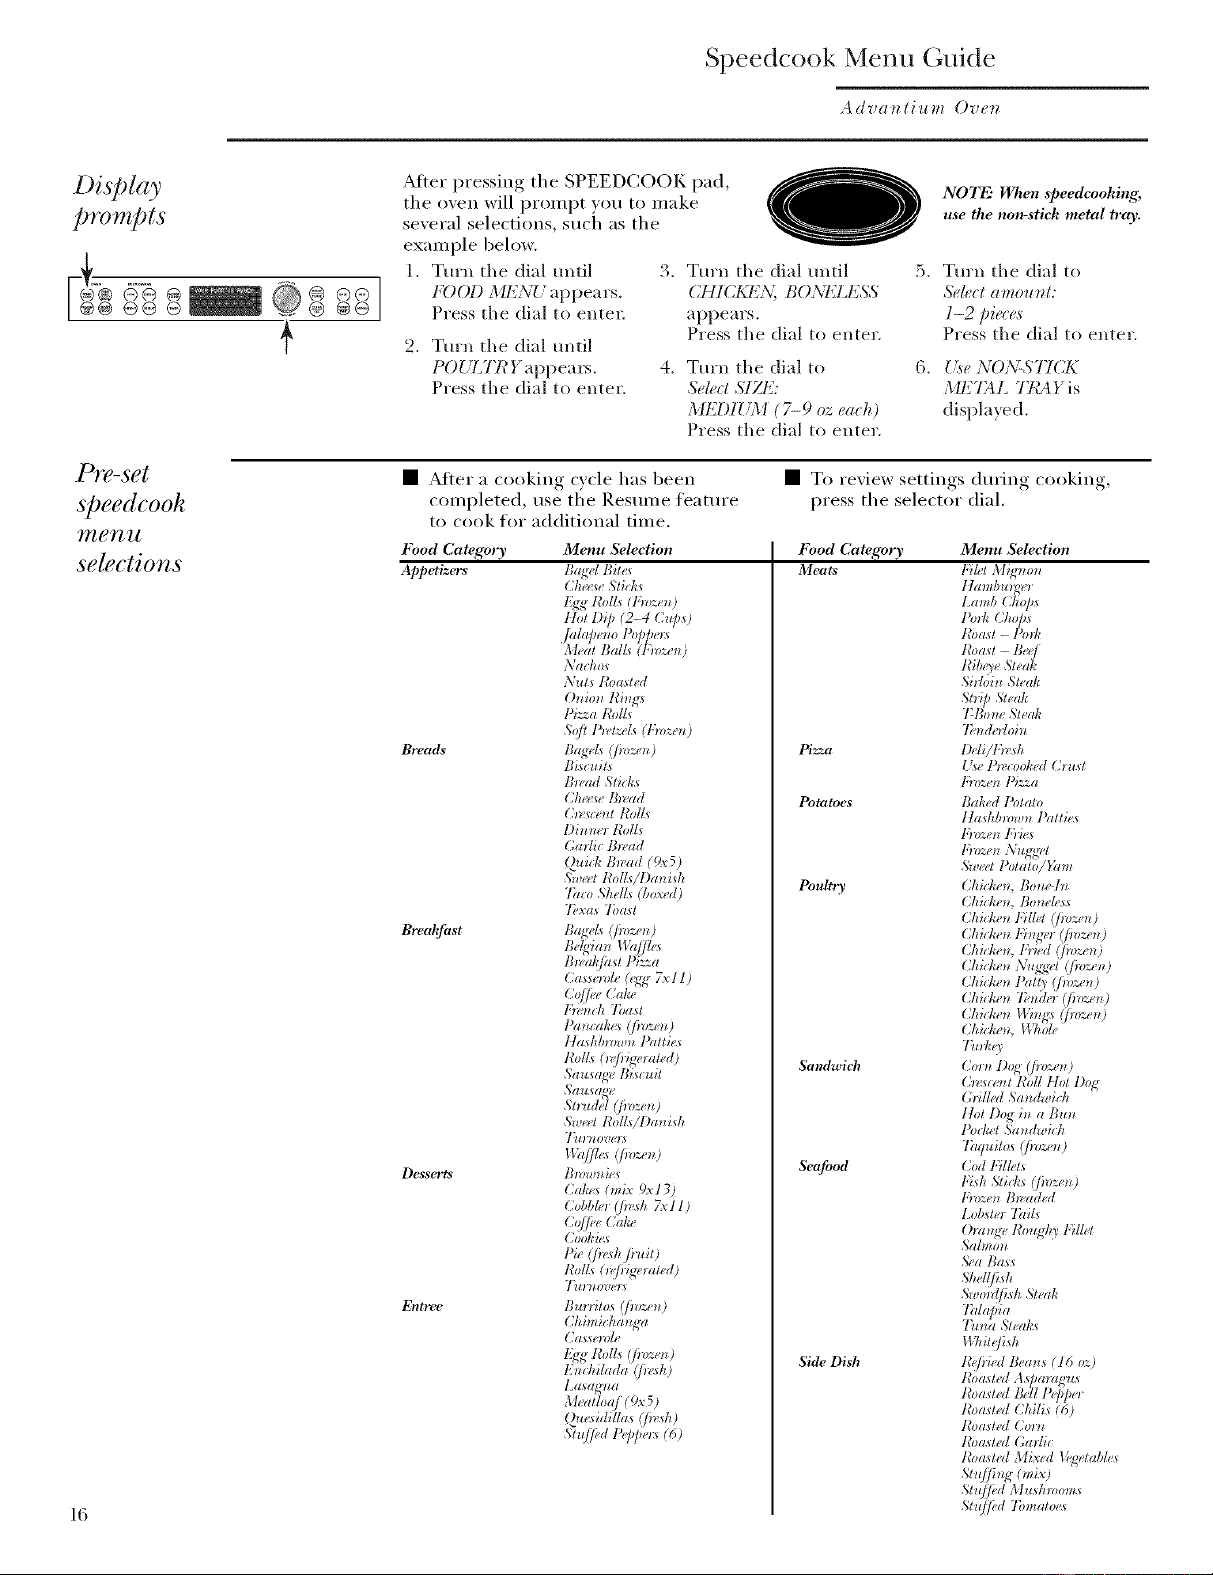
Afier I)ressin<"'_ the SPEEDCOOK pad,
the oven will prompt )ou to make
several selections, such as the
exalnple below.
1. Turn the dial until
FOOD MI_2;VUappears.
Press the dial to entel:
2. Tm'n the dial tmtil
POL'LT_I_ Y appeai_.
Press the dial to enter.
3. Turn the dial until
CHICKEN; BONliLI'2SS
appears.
Press the dial to enter.
4. Turn the dial to
Sdect 57ZE:
MEI)IUM (7-9 oz each)
Press the dial to enter.
NOTE" Wken _peedcoohing,
use tke non-stick metal tray.
5. Tm'n the dial to
Select amount:
l-2 pia es
Press the dial to enter.
6. Use NON-STICK
IL 1AL T/¢AYis
displa) ed.
• _Mter a cooking cycle has been
completed, use the Resume featm'e
to cook for additional time,
Food Category Menu Selection
Appdi_ers Bagd Bit_,s
( heese ?,li( hs
l'_qN Bolls (Frozen)
HOt l)/p (2-4 Cups)
.](tla]_*,_lo Pop/m_
[\l_.al BalLs (l.)_¢en)
,\)tchas
Nuts I¢oa_ted
l>/_za tNgs
Sqfl l%l::eLs (l:mzen)
Breads Bagd_ @vze_z)
B_'ad 5"ti(:hs
Cheese Nvad
(/_vsce_lt ]_o[[s
l)imze_ Rogs
Gad/( Bwad
@zich B_ad (9x5)
5;weet l{olls/l)a_Ash
"1?.:oShdls (boxed)
Texas 7bast
Brecdfast Ba,cd_ (jmze_z)
Bl_.ah/asl Pizza
Cass_.mle (_ 7x I l)
C@e Cake
P)vnch Toast
I>(n_cahe_ ;/m'.._'_O
Hashbrown Pattias
Rolls (wfiN_aled;
,%'ausag_ Bi_( uit
,S'ausao_
5trtt(h lffi_zen )
Swml Rogs/l)a_/sh
"I)O "_ZO_!g)N
Desserts B_wmAas
Cakes (mix 9.'_13)
Cobbh'l @_'sh 7x l 1)
Co//,,e (,(the
Coo/Aas
l);e (/wsh fi_ttit)
l_o//s (wfiN_mte(t;
"])z_'tzl)z!g_:_
Entree Bur/los (jm:_en)
Chimichanwt
Casserole
1_ Bolls (fi_;..e_0
IOnchilada (p_<_h)
Lasagna
_h_atloa/ (gx 5)
Ot.,sidillas (/_'stt)
5t,//;,d P@l.,r_ (61
• To rexiew settings during cooking,
press the selector dial.
Food Category Menu Selection
lldeats l"t/t4 Mi_'tzo_l
ttambu_ _
l.amb (.'hop_
Pod: (hops
tNas! -Pmt:
l_oas! Be_'/
Ribo_ ,%le(t]_
Sirloi_l Sh, ak
SD'ip )#eah
7:B0m _Nl_,a]<
75n(tedoin
Pizza i)di/F_sh
l's_ l%( oohed (hu_t
Potatoes I1ahed Po_alo
tlashbmwn Patti_,s
lOm=e_ f)'h,s
l:m:.e_ Nugg_,l
.'_ve#t Polalo/Yam
Poulttg,, Chicken, Bom_ l)_
Chicken, Bo_de_.s
Chicken NIId @vz_,n)
Chicken N_lg_,_ @vzen)
Chichem 1;)'hd (/h_z_t_)
(2hid:_tz X,;ttgR_l (/h)z_n)
C/tid:en Pair) (/mzen)
(&id_en 7Fnder (/mze_O
Chich_t_ WinRs (Jh)ze_)
Chich_t_, BTmle
7io5_ 3
Sandwich C'o_n Dog (fioze_ )
(h_s,_nt Roll Hot Dog
(;r/Hat 5(tmtwich
no! Dog in a Bull
15)t/_l 5_tn(hvich
Taquilas @_):e_ )
SeaJbod Cod Fd#ts
F;sh ,Stid_s (/mze_O
l:mze_ Bwaded
[.obsle_ TaiLs
()rat_,q_,Roug90' I:ille_
Sabwn
Sea mast
Shellfish
.'_vm_tfi._h St_.ah
Talapia
Tt_na _S'le(ths
VUtil@sh
Side Dish IS,/r/ed Be(his ( 16 o:0
t_o a_!_,d A q_aIaRtts
)1 _ ))1 "
[_l asl_'d ]_dl ] e]] ¢1
t_o(tsl_,d Chilis (6)
I_o(tsl_,d Corn
Roasl_.d (;ad/c
Ibmstd Mix_.d U'g_tables
S¢,/fi_g (mix/
Sltt/fi,d 3htshmoms
Sltt/fi,d Tomatoes
Oven Features
Advat_tium Ovet_
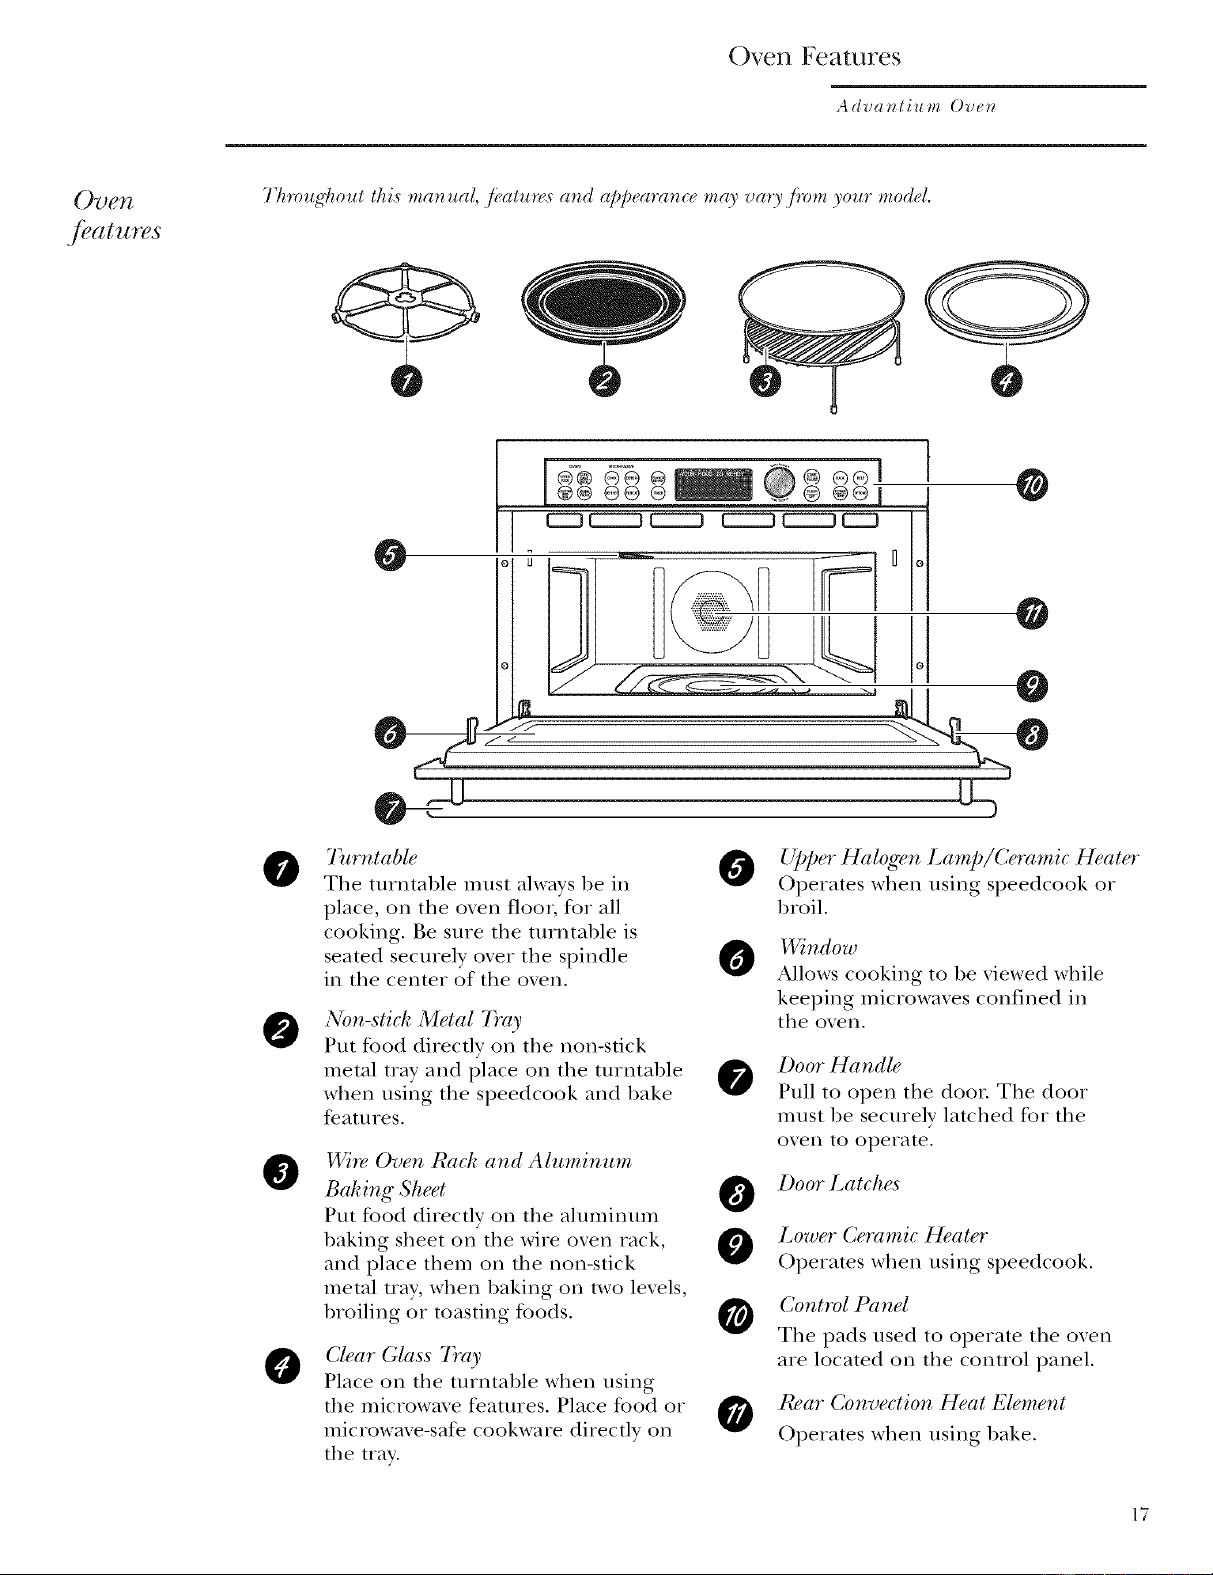
7?zm*zg'ho*ztthi._ mar_ual ,/i,atu_z<_a_zd appearan( e may vary,/}°om yore model.
0
0
@
@
7)lrntable
The turntable must always be in
place, on the oven floor, for all
cooking. Be sure the turntable is
seated securely over the spindle
in the center of the oven.
Non-stick Metal Tray
Put fbod directly on the non-stick
metal tray and place on the turntable
when using the speedcook and bake
features.
Upper Halbert Lamp/Ceramic Heater
Operates when using speedcook or
broil.
0
0
!/Vi)_ ChJen Rack and Aluminum
Baking Sheet 0
Put food directly on the ahnninum
baking sheet on the wire oxen rack,
and place them on the non-stick
metal tray, when baking on two levels,
broiling or toasting fbods.
Clear Glass Tray
Place on the turntable when using
the microwme features. Place food or
microwaxe-safe cookware directly on
the tray.
Windo_l}
Allows cooking to be xiewed while
07
keeping micro_ axes confined in
the oxen.
Door Handle
Pull to open the door. The door
nmst be securely latched for the
oven to operate.
Door Latches
Lower Ceramic Heater
Operates when using speedcook.
Control Panel
The pads used to operate the oxen
are located on the control panel.
Rear Convection Heat Element
Operates when using bake.
17
Oven Features
Advantium Oven
18
With your Adva_6um oven, you ca_ c_& with hig'h-i_te_.sityhalog'e_lig'ttl:s,ceramicheate_:sa_d co_wec6o_heati_g
e&me_l;a_d/or comJe_lionalmicrowavee_e_i_')_.
--o .......... -I-
0
@
@
@
0
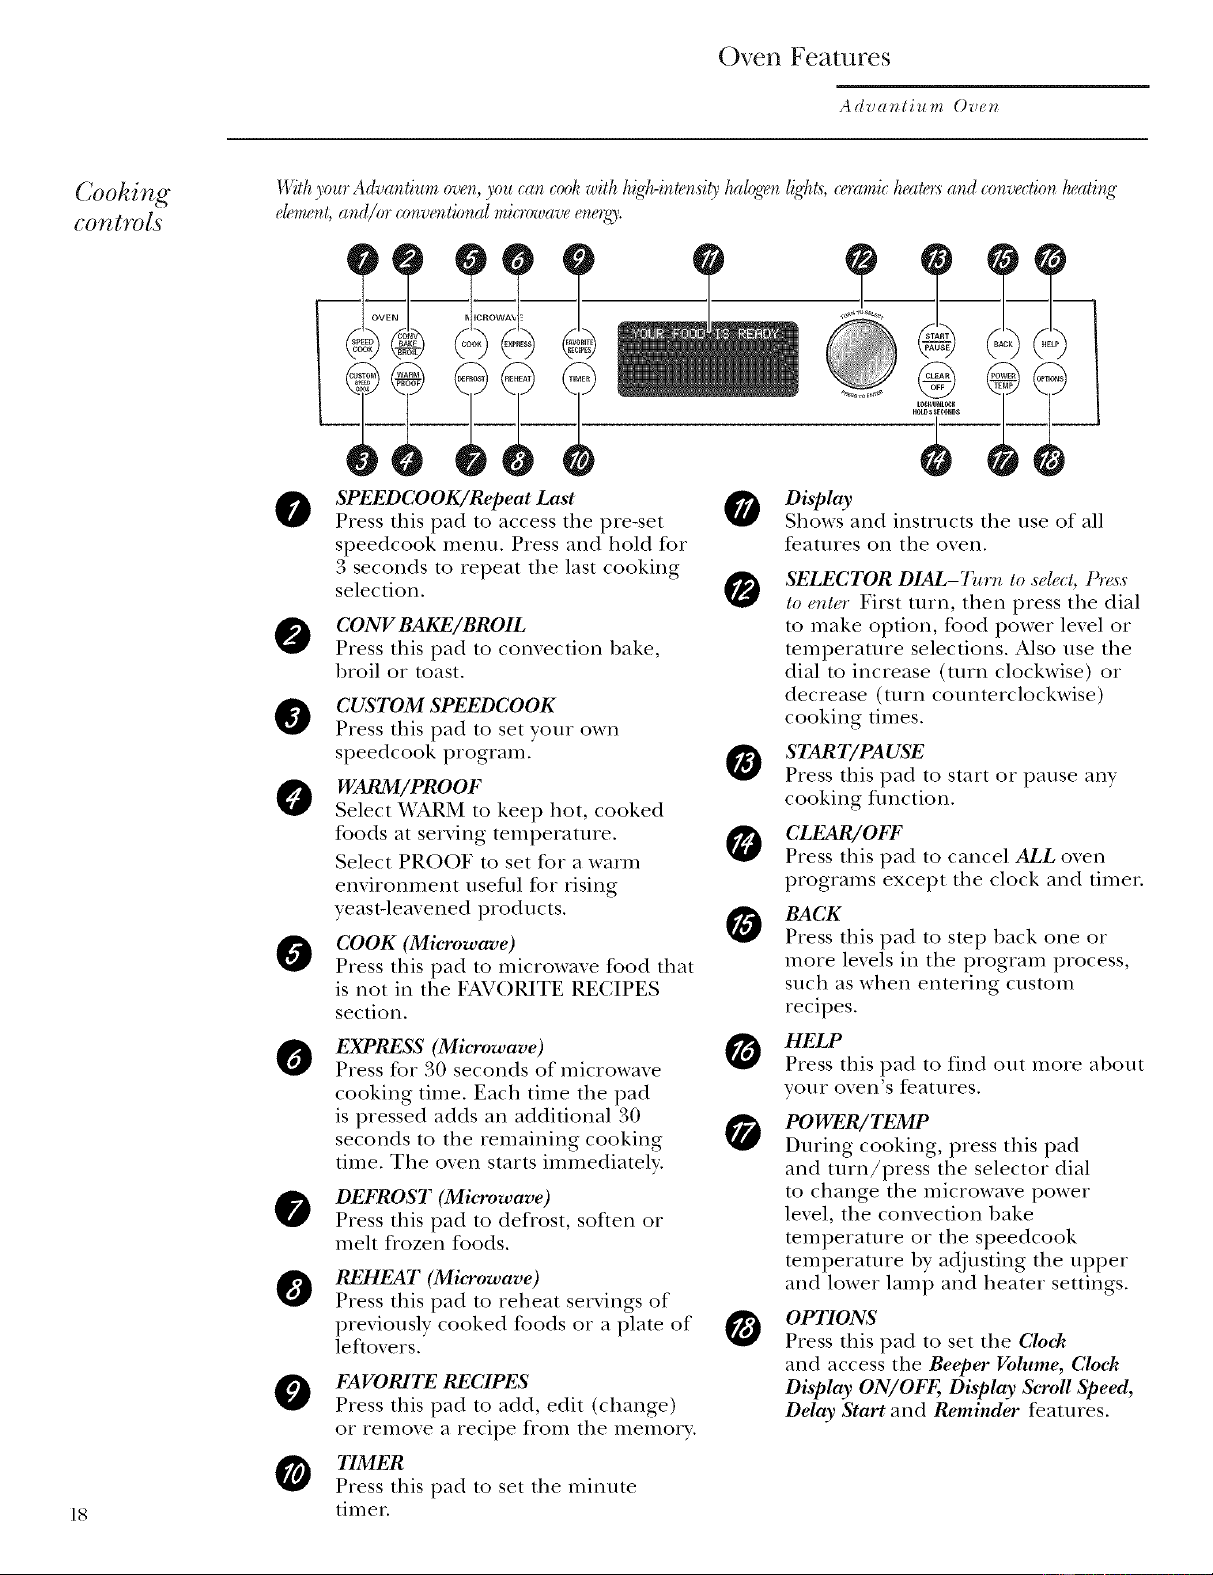
SPEEDCOOK/Repeat Last
Press this pad to access the pre-set
speedcook menu. Press and hold for
3 seconds to rei)eat the last cooking
selection.
CONV BAKE/BROIL
Press this I)ad to comection 1)ake,
broil or toast.
CUSTOM SPEEDCOOK
Press this pad to set your own
speedcook program.
WARM/PROOF
Select WARM to kee I) hot, cooked
foods at serving temperature.
Select PROOF m set for a warm
environment usefld for rising
yeast-leavened products.
COOK (Mio'owave)
Press this pad to microwave food that
is not in the FAVORITE RECIPES
Oisptay
Shows and instructs the use of all
features on the oxen.
SELECTOR D/AL-Thr,_ to sel_.cl, tS_:s
to e_,t#r First turn, then press the dial
to make option, food power level or
temperature selections. Also use the
dial to increase (turn clockwise) or
decrease (turn counterclockwise)
cooking times.
START/PAUSE
Press this pad to start or i)ause any
cooking flmction.
CLEAR/OFF
Press this pad to cancel ALL oven
programs except the clock and timer.
BACK
Press this pad to step back one or
more lmels in the i)rogram process,
such as when entering custom
Osection.
EXPRESS (Mio'owave)
Press for 30 seconds of microwave
cooking time. Each time the pad
is pressed adds an additional 30
seconds to the remaining cooking
time. The oven starts immediately.
DEFROST (Microwave)
Press this pad to defrost, soften or
meh frozen foods.
REHEAT (Microwave)
Press this pad to reheat serxings of
prmiously cooked foods or a plate of
leftoxers.
FAVORITE RECIPES
Press this pad to add, edit (change)
Oor remoxe a recipe flom the memo_w.
71MER
Press this I)ad to set the minute
timer.
recipes.
HELP
Press this pad to find out more al)out
VO/lr oxen's feat/lies.
POWER/ TEMP
During cooking, press this pad
and turn/press the selector dial
to change the microwave power
level, the convection bake
temperature or the speedcook
temperature by adjusting the upper
and lower lain I) and heater settings.
OPTIONS
Press this pad to set the Clock
and access the Beeper Volume, Clock
Display ON/Orb; Display Seroll Speed,
Delay Start and Reminder features.
Speedcooking
Adva*_(ium Ove*_
Using
speedcooh
jeatures
CAUTION: When using speedcook programs, remember that the oven, door and
dishes will be very hot?
[5ior to the,first use qfyour over_, the clock must be .set. See tke Advantinm Quick
Sta'_t sect ior_.
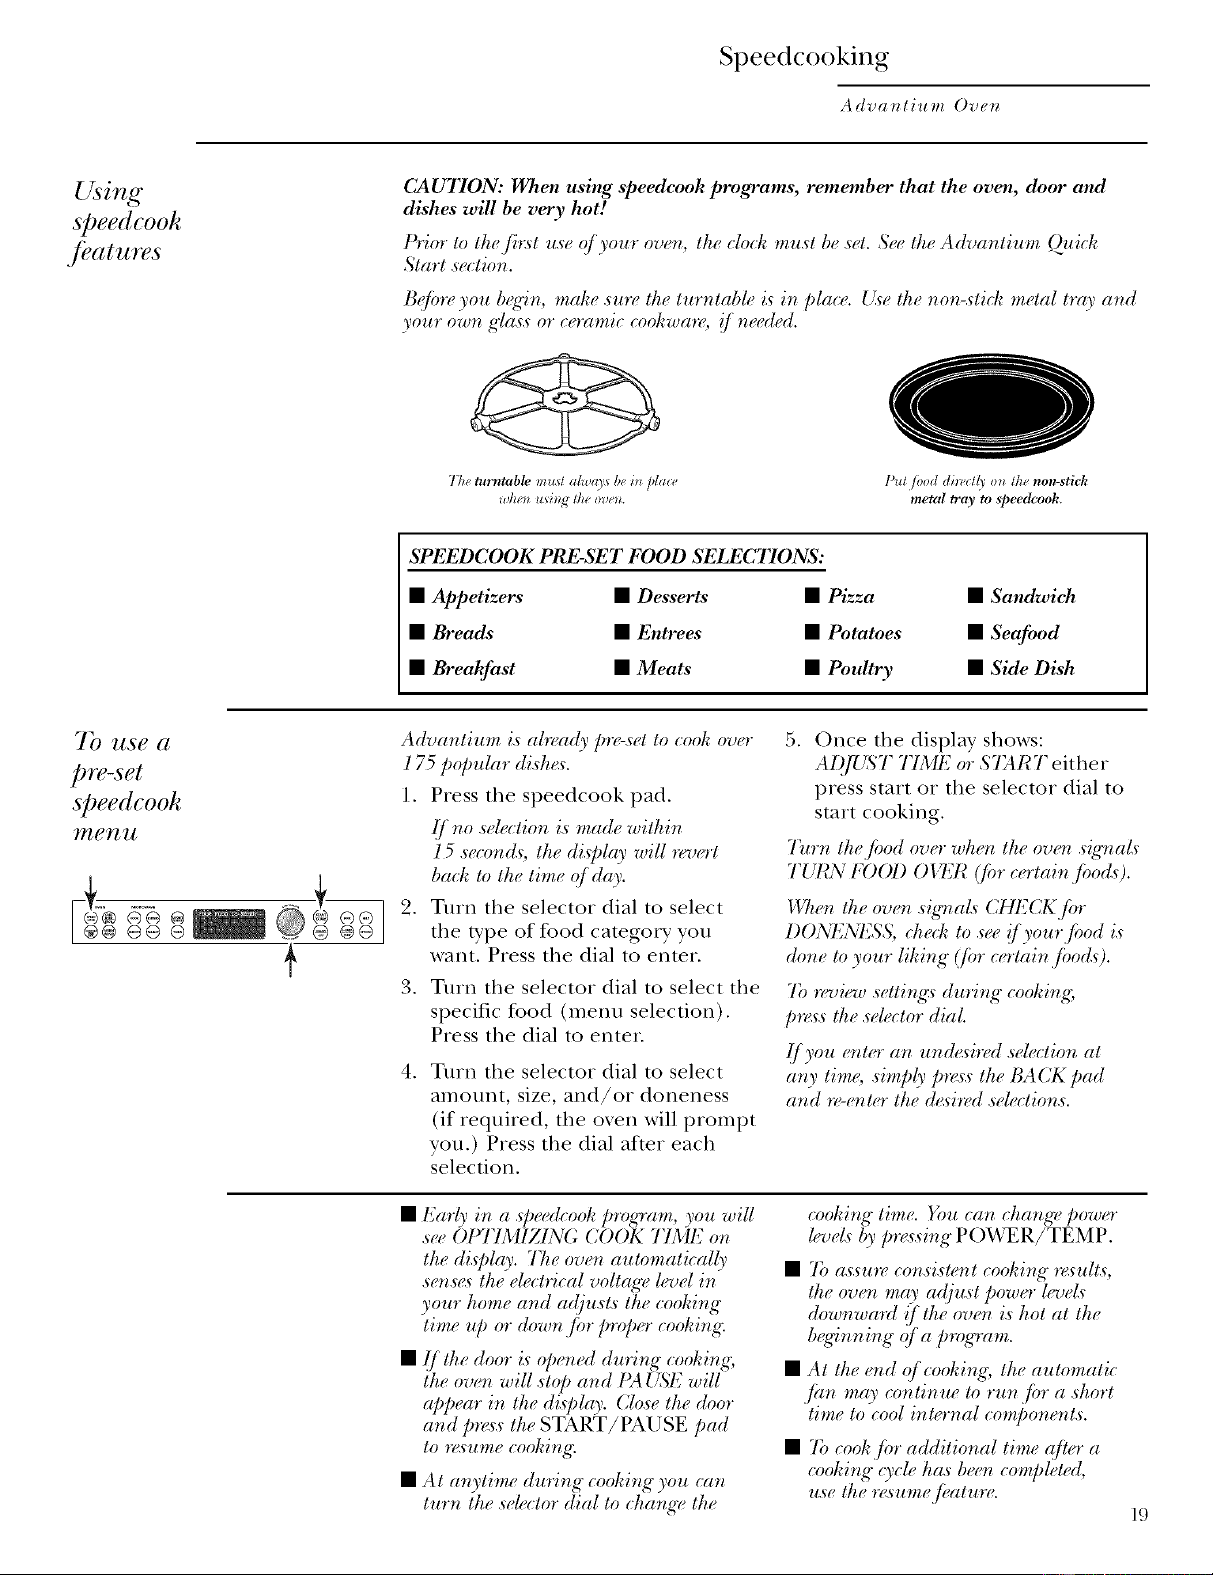
B@re you hegira make ._ure the turntable is in place. U_e the non-stick metal tray and
your own glas._ or ceramic cookwa'_ i/ needed.
The, tm_table must a&,a) sb(, i_ /dace
whe_ usit_ lke ove_. l'ul /ood dil_cll) o_zlke non-stick
metal tray to speedcook.
SPEEDCOOK PRE-SET FOOD SELECTIONS:
•Appetizers • Desserts • Pizza
• Breads • Entrees • Potatoes
• Breakfast • Meats • Poultry
• Sandwieh
• Seafi_od
• Side Dish
7b use a
pre-set
speedcooh
_le)21t
@%@
@@®
Advantium is abe,a@ pre-set to cook ovo"
175 p@ular dishe_.
1. Press the speedcook pad.
I/ no selection is made within
l 5 ._econ&_,the dis])h9, will ,z_zn,rt
back W the time <?/day.
2. Turn the selector dial to select
the type of food category you
want. Press the dial to enter.
). Turn the selector dial to select the
specific tbod (menu selection).
Press the dial to enter.
.Turn the selector dial to select
amount, size, and/or doneness
(if required, the oxen will prompt
yon.) Press the dial after each
selection.
5. Once the display shows:
AI)[L(W _TIME or START either
press start or the selector dial to
start cooking.
7)ow lkejbod over when tke oven sigwal,_
TU/?N FOOl) 0 I'7_R (firr (ertair_ ./i_od_).
D7um the oven .dgna£ CHFX2KJhr
)( :: ::" ' i/you'rji_odis
I )_t._LSS, cheek to see
done to your liking (/br certain ,/bodO.
7b ,vview setlir_g:sdurir_g cooking,
p_._ tke ._eleetor dial.
,t/you er_ter a,_ nndt<sired selection at
any time ,_imply p_s,s tke BACK pad
and _,-enter tke dtM'_,d ._eleetions.
• Early in a .speedco& program, you will
.seeOUITMIZIN(; COOK 7"IME on
the di.s]day. 77_eore, automatically
.se,.sz<sthe electrical voltage lrvel in
your home and adjusl.s the cooking
time up or down jhr propt*rcooking.
•{/lbe door is o[w, ed dining cooking;
the oven will ._top and tM L_S'Ewill
appear in the di._phg,. Close the door
aud p_z<s'._the START/PAUSE pad
to _>_ume cooking.
•At auytime duri,g cooki_g you (a,_
turn the .selector dial to change, the
co&i,g time. _)u can change powo
leve£ by prt<vdng PO_¥ER/TEMP.
•1_)as.su'_z,consister_ t cooki,g *_<sulls,
lke ore, m<9, adjust powo. ltq_eL_
downwind i/ lbe ore, i.s hot at the
b%d_ming qfa pmgram.
• At Ne e,d qfeooki_g, the automatic
,/hu m(9, continue to ru, ,f!)r a.short
time to cool intt,nal compone, t._.
•7b cookjhr additional time qf!#r a
cooking o,ele ha._ bee_ corn/tiered,
use the rt<sume,/i,ature. 19
Speedcooking
Advantium Ove_
Cooking tips
./br great
tasting results
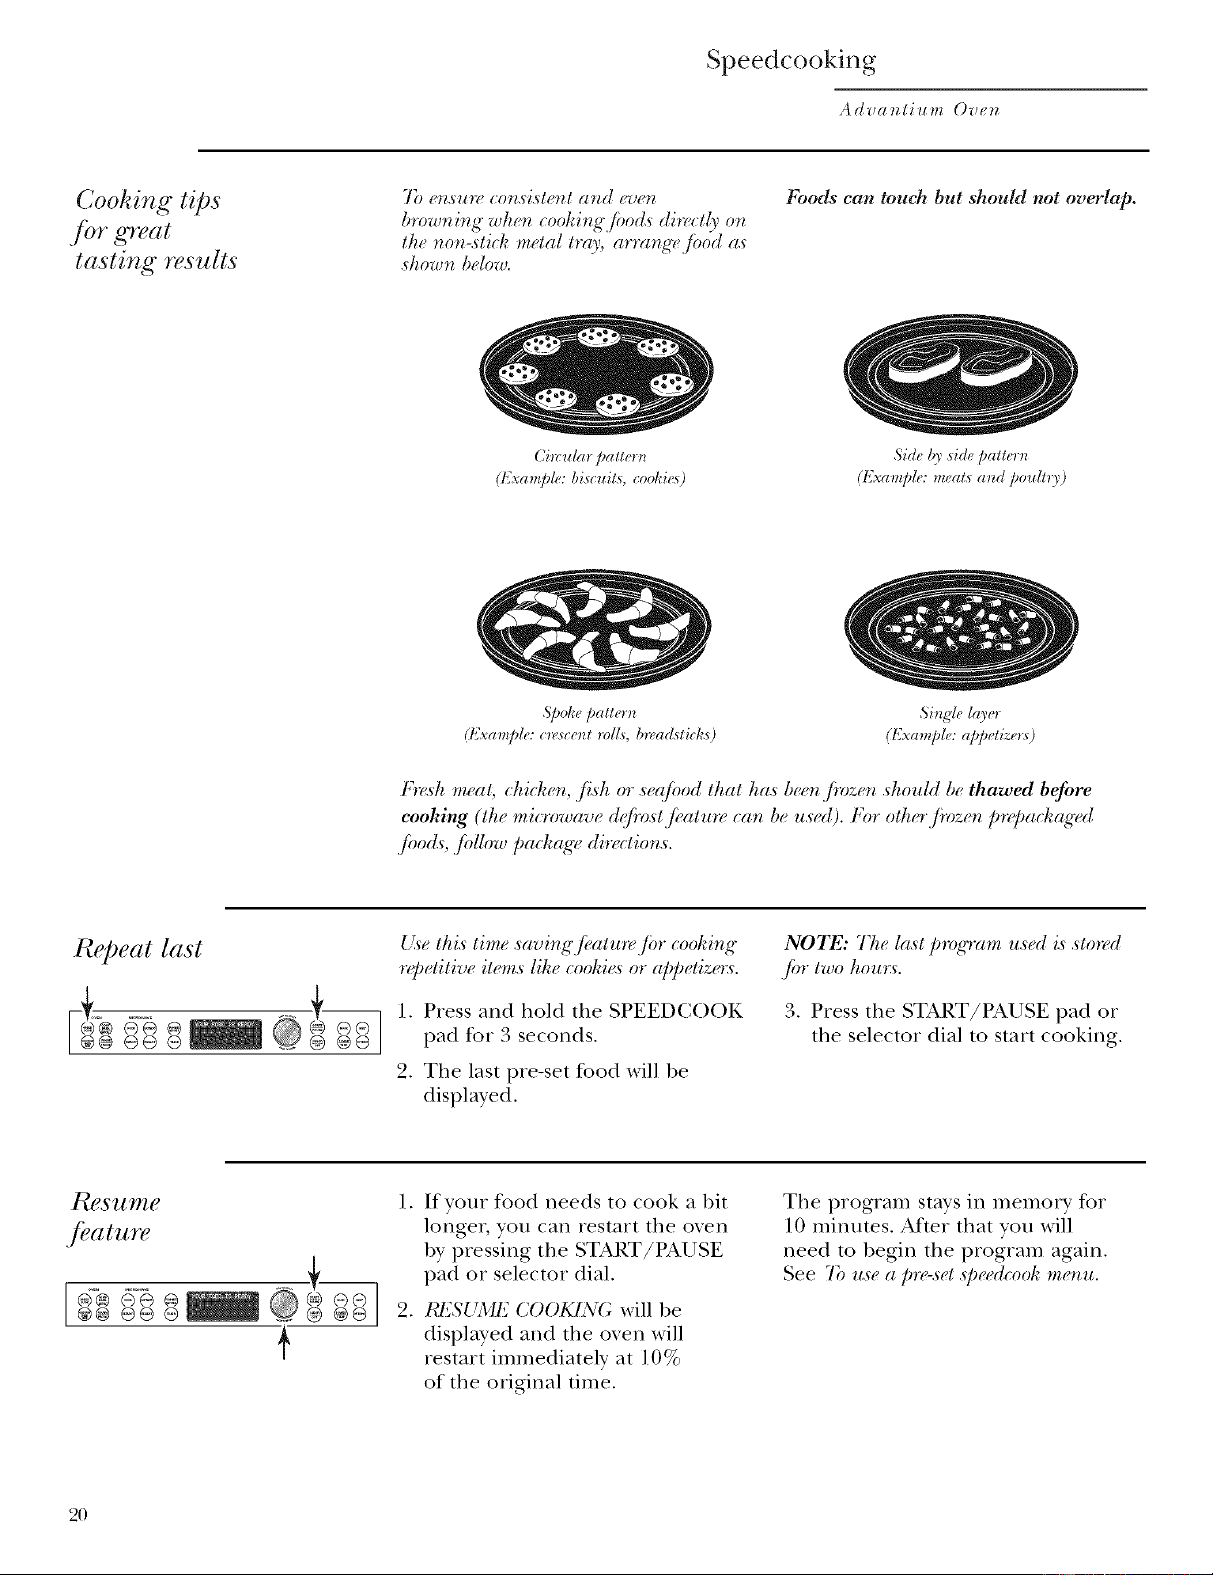
7b en,su_ _:on.si._tenta_d _a)_n
b_w_ming"wlu n(ootdng',/i_od._di'_'__tl3,on
tlu non-stict_ _netal tr(ty, arr(mg_,ji>od a._
._how_ below.
Cimular pat(ern
(Exa_nple: hi,culls, cookie<s)
Foods can touch but should not overlap.
Si& I{_ ,side pall_ __
(Example: meals and poull_3)
Spoke patl#r_ Si_g'le la3er
(t_xample: c_,_ce_l rol{_,b_,adslicl_s) (Example." appeliae_:_)
tS_<sh,n_at chicken, ,fish or .s_@_od dmt has b_en,fivzen should be thawed befi_re
cooking (du ,,zio.,wav_ &fi.o.stji(au,_ cgm be used). For odu*,,f!,,z_n l,,_,Imdmged
,f!_od_,,fidlow pa(l_ag( dir( (tior_s.
Repeat last Use lhi,slime ,_aving.f!_atm_jiw cooking
r@etitive item,_like cooki_<_or appetize_:_.
1. Press and hold the SPEEDCOOK
pad lbr 3 seconds.
2. The last pre-set food will be
displayed.
NOTE: 72_ela,sl[.r,g'r_m used is ,slo_d
.f!,r two t_ou_:_.
3. Press the START/PAUSE pad or
the selector dial to start cooking.
!°_¢s _ _/_ ].
jeature
2.
@@ @@ @ {
If your food needs to cook a bit
longer, yon can restart the oven
by pressing the START/PAUSE
pad or selector dial.
ICE),'UME COOKIN(; will be
displayed and the oxen will
restart immediately at 10%
of the original time.
The program stays in memory %r
10 minutes. 'After that you will
need to begin the program again.
See 7b u._e apre-._et.viwedcool_meH,u.
2O
Speedcooking
Adva_tium Ove_
Speedcooh
power levd Advantium uses power from a
high intensity halogen light, ceramic
hearers, and microwaves m cook
fbod fiom the top, bottom, and
interior simultaneously to sea] in
moisture and flavor.
When using the pre-set speedcook
recipes on the fbod menu, the power
levels are already selecmd for you.
Hove>vet, these power lexels can be
adjusted before or during cooking.
See POWER/TEMP in the Cooking
Controls section. The custom
speedcook feature allows you to
speedcook items not on ti_e pre-set
food menu by selecting your own
cook time and pcm>r level setting:s.
Each power le, el gives you heater
power and microwave energy fbr a
certain percentage of the time.
(,/4" )) ,7_"
L)IIL/{ t ( IU.I{ (I,) controls the
lower heater.
Select a higher setting to brown
foods more on the bottom. Select a
lower setting for less browning on
the bottom.
Press the SPEEDCOOK pad
and turn the dial to select FOOD
MENU or FAVORITE RECIPES,
or press CUSTOM SPEEDCOOK
to manually set power level and
timer. Press the dial to enter.
2. Turn the dial to select a food,
time or power lexel as prompted.
Press the dial to enter.
.
UPPEII POI'I_T.I_(U) controls both the
upper heater and microwaxe power.
A higher UIq_I_R P()l'l_]_2l{setting will 4.
utilize more upper heater power,
browning fbod faster on top. A lower
UPPI_2I{I_()WF.R setting utilizes more
microwave power, causing fbod to 5.
cook more evenly throughout.
Select a higher setting %r foods such
as pizza and baked goods. Select a
lower setting fbr fbods such as
casseroles, meat and fish.
To change the power level
when prompted by the display,
turn the dial clockwise to increase
or counterclockwise to decrease
the upper power level. Press the
dial to enter.
Microwme levels are set
automatically based on the upper
and lower lamp settings.
Press the START/PAUSE pad or
the selector dial to start cooking.
l!'_,0u.,do ?_otwant to change', one oj'th(
settb_g:r,just p'_e*stlu dial to mow Io the
_ext ._d_ctiort.
NOTE: B( car(,/hl whe_ adfl_.stb_g_power
l_)e£ ,so that you do not ov_r- or
urtdercook ji)od.
Follow ltms'eggn(*ralguiddiru<s wher_ sdecting th( b(<stU= and L= settir_g_s'jirryour
javorite ,_(i[)(<_:
U = Select a higher setting for L =
thin foods requiring a golden
brown top (example: fish fillets,
mast, boneless chicken breasts).
Select a lower setting fbr thicker
foods and foods with high sugar
or fat content (example: cakes,
roasts).
Select a higher setting for thick
or dense fbods that may not
cook quickly in the cenmr
(example: casseroles). Select
a lower setting fbr thin foods
(example: cookies) and fbods
containing high fat or sugar
content (example: pasti T,
cakes).
21
Speedcooking
Adva_tium Ove_
[]
[]
[]
[]
[]
Follow cookwan, .sug'g'(<_tio_.so_ tlu
oven di.splay or in tke Cookbook or
Cooking gu ida.
Cookwar( will becom( kot b,:ause q/
tu at tran.!jbr'r('d jmm tke k_ated,/Dod.
Oven mitts will be n_eded to ka_dle
U. cookwar< []
Plac(,/i_od directly o_ tke no_>.stick
metal tray wk(_ (:ooki_g _nl(<s.s
prompted by flu over_ to do oUurwg_e. []
Use tke nor_-stick m(tal tray in tke
._ame way you would use a ._kallow
hakir_g par_ or hakD_g tray.
I_ addition to the (v_okzoar("provided,
yogi ('a_l Iz._("??o_l-_l_gtal (a.gs('ro[("
di._h(<5Die plat(<_and oth('r h('at,*@
cookware. Pla((" them dir('(t(_, o_ the
tur*_tahk'.
[]
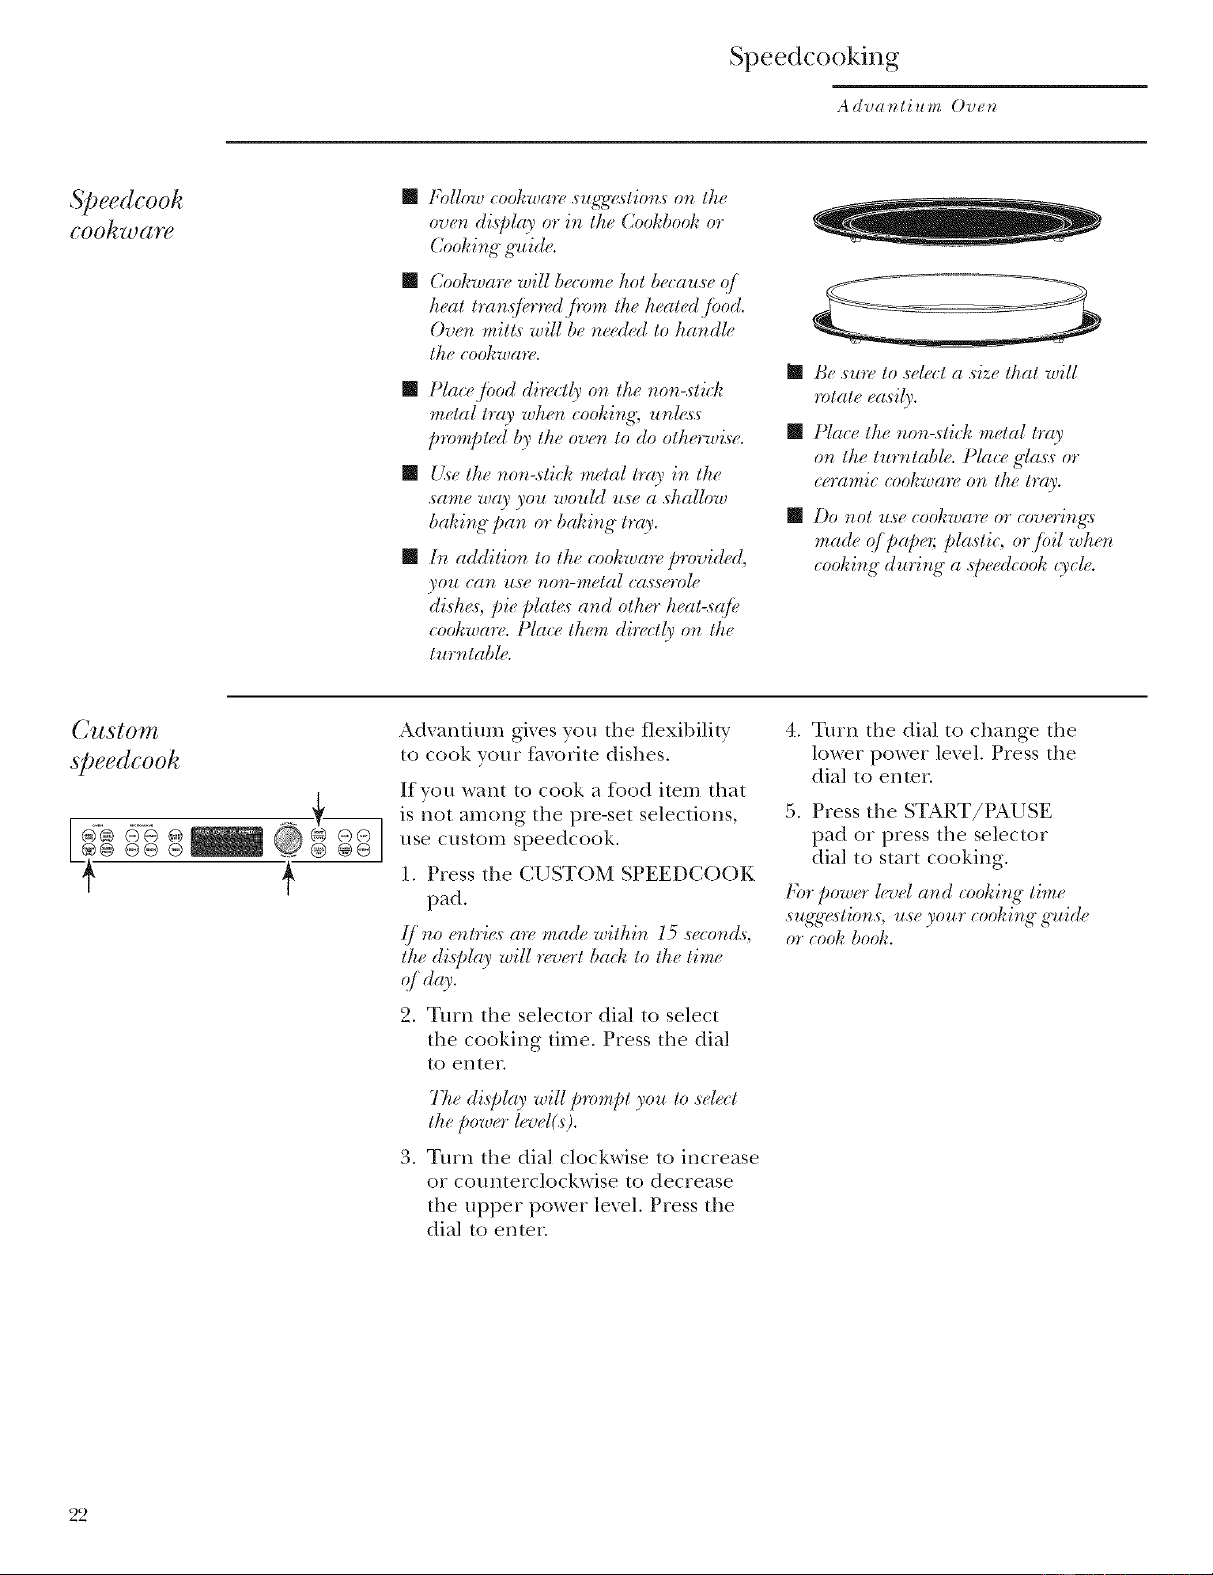
l:}_.su_ so .sel.:t a.siz( tkat will
rotate easily.
[qa(:( tlu _wn-.stick metal tray
on tke turn,table. Plac( g'la.s.sor
ceramic cookwa_, o,_ tk_ tray.
Do Izot 7¢._4 (:o0/;Tz_aT"( or CO73(_r_lzg:_
made 4"paper; pla._tic, or,/Dil wken
cooking', durir_g,"a speedcook (ycle.
Custom
@eedcook
Advantium gives you the flexibility
to cook your f_vorite dishes.
If you want to cook a food item that
is not among the pre-set selections,
use custom speedcook.
1. Press the CUST()M SPEEDCO()K
pad.
(/ _o e,_tri_<sa_v made witDin l 5 .s,:o_d._
tke di._Dla_,will r(_wrt bach to tke tim_
qd<0'.
2. Turn the selector dial to select
the cooking time. Press the dial
to enter.
.
77. di._play will prompt you So ._d(ct
tt. power ltq_el(.s).
Turn the dial clockwise to increase
or counterclockwise to decrease
the upper power level. Press the
dial to enter.
4. Turn the dial to change the
lower power level. Press the
dial to enter.
5. Press the START/PAUSE
pad or press the selector
dial to start cooking.
For power l(q_ela_d cookir_g time
.s**gg'_rtio_.s use you r (:ooki_g" g'uide
or cook book.
22
Speedcooking
A(Iva_tium Ove_
k}tvorite
re€_/)e--
to enter
(l, Tld s(l,_)e
@@®
Add and save up to 30 of your own
Speedcook or microwave recipes, or
pre-set Speedcook menu recipes as a
favorite recipe. Once it's done, you
can quickly recall your favorite so
that your food cooks just tile way
you want it every time!
1. Press the FAVORITE RECIPES or
the SPEEDC()OK pad.
.
o
4.
Turn the dial until I_VOI¢ITF.
I¢F.CII_1_2Sappears. Press the dial
to enter (Skip this step if the
FAVORITE RECIPES pad was
pressed in step 1.)
Turn the dial until AI)D I{F,CH_P2
appears. Press the dial to enter.
,)) ,)¢g
Turn the dial to C( t Y St LLD
I{F_CH_P2or to ADD NEW I¢I¢.CH_P2.
Press the dial to enter.
If COPY SlqCdJl) IlP2CIPF,was
selected, turn dial to food
type(s) and press the FAVORITE
RECIPES pad to enter and save
the recipe.
If ADD NEW ICP2CIIq;,was
selected, turn the dial to select
SPFd_21)COOKor M1CROWA}7_2
recipe. Press the dial to enter
and continue with these stops.
'; ;..... ( "
SLLL(,1 (,0)K TIME appears.
Turn the dial to select the
cooking time. Press the dial
to enter.
77u_di.sJdc9' will prompt you Io select t/u
power levd(s).
6. Turn the dial clockwise to
increase or counterclockwise
to decrease the power le, el(s).
Press the dial to enter.
For power l(q2ela_d coohing time
.s**g_g_s'tio*_s, use y0u r (:oot_i_g"g'uida
or cooh book.
SI'ELL THF. FOOl) ,\_ME
appears. Turn the dial to
the first letter of your food
description and press the dial to
enter. Continue this process to
spell the rest of the tbod name.
Press the START/PAUSE pad to
save the recipe and its name.
P)zvorite
r(¢€@g--
to find
and use
To find and use stored favorite
recipes:
I. Press the FAVORITE RECIPES
or the SPEEDCOOK pad.
2. Turn the dial until FAVOI¢[TF_
I?EC1PI'2Sappears. Press the dial
to enten
3. Turn dial to USE FAVOI¢ITI_
I?EClt_I'2and press to enter
.
5.
5.
The recipe names you entered
will appear.
Turn dial until the recipe you
want is displayed and press the
dial to enter.
Press the START/PAUSE
pad or press the selector
dial to start cooking.
23
Speedcooking
Ad'uat_tium Ovet_
f_vorite
re€_/)e--
to acljust
or change
@@ ® . @@
f
To adjust or change stored custom
speedcook recipes:
1. Press the FAVORITE RECIPES or
the SPEEDCOOK pad.
2. Turn the dial until FAVORITE
RECIPES appears. Press the dial
to enter.
:>. Turn the dial mm] Ll I7 [d/JIL
appears. Press the dial to enmr.
4. Turn the dial to the recipe yon
want to change. Press the dial
to enter Current settings appear.
5. Press the dial to edit.
.The display will prompt you to
select the power level(s) and edit
the name. Turn the dial and
press to enter the appropriate
settings.
Fro"/)owcr l(q_ela_d coohir_g tim_"
.s*_g:#_rtion._,,u._e,_°ur.... <:ootA_#,g,'uide
or <:oot_book.
f_worite
Te€l/)e--
to delete
@@ @ _ @@
@@@@® f
To delete stored custom speedcook
recipes:
I. Press the FAVORITE RECIPES or
the SPEEDCOOK pad.
2. Turn the dial until FAVORITE
RECIPES appears. Press the dial
to enter.
3. Turn the dial until Dt[Lt{77;.
I?ECIt_Ig.appears and press the
dial to enter.
4. Turn dial to the recipe you
want to delete and press the
dial to enter.
24
Speedcooking
A(lva_tium Ove_
7kings that
are normal Cooking Times Oven Heat
• When speedcooking preprogrammed •
foods, you may see OtfI'IMIZ1N(; COOK
TIME in the display several seconds after
you press START/PAUSE. The oven
automatically senses the electrical
voltag> level in your home and
adjusts the cooking time up or
down for proper cooking. •
Fan/Vent
No preheating time is required dnring
Speedcook cycles. The oxen begins
cooking immediately.
The door and inside of the oxen will be
xei y hot. Use caution when opening the
door and remoxing tbod.
Do not use cookware or coverings made
of paper, plastic, or foil when cooking
during a speedcook cycle.
Tile fail will be on during cooking. At •
the end of cooking, the automatic fan
may continue to run for a short time, and
the display will read Oven is Cooli**g. Tile
fail will automatically shut off when the
internal parts of the oven have cooled. Sounds
• The oxen xent will emit warm air while
the oxen is Oil.
Lights
• When tile o_en is on, light may be _isible
around the door or outer case.
• The halogen lights will dim and cycle
on and off during a speedcook cycle,
sometimes even at filll power levels.
This is normal. The oven senses the
heat level and adjusts automatically.
When cooking for an extended period
of time, the oven may automatically
reduce the power levels to maintain
the ai)i)ropriate level of oven heat.
• (:licks and a fan blowing are normal
sounds dnring cooking. The relay 1)oard
is turning components on and off.
25
Baking, Broiling and Toasting
Advat_tium Ovet_
Convection
Baking,
Broiling
and
7basting
Convection baking allows you to cook foods the stone
way as a conventional oven, using a heating element
to ]'aise the temperature of the air inside the oven.
Any oven temperature flom 250°F to 450°F may
be set.
Broiling allows you to broil fbods in the same way as
a conventional oven.
Toasting allows you to toast foods the same way as a
conventional oven.
A fire gently circulates heaed air throughout the
oven, over and around the fbod. Because the heated
air is kept constantly roofing, not pemfitting a layer
of cooler air to develop around the fbod, some fbods
cook slightly filster than in regular oven cooking.
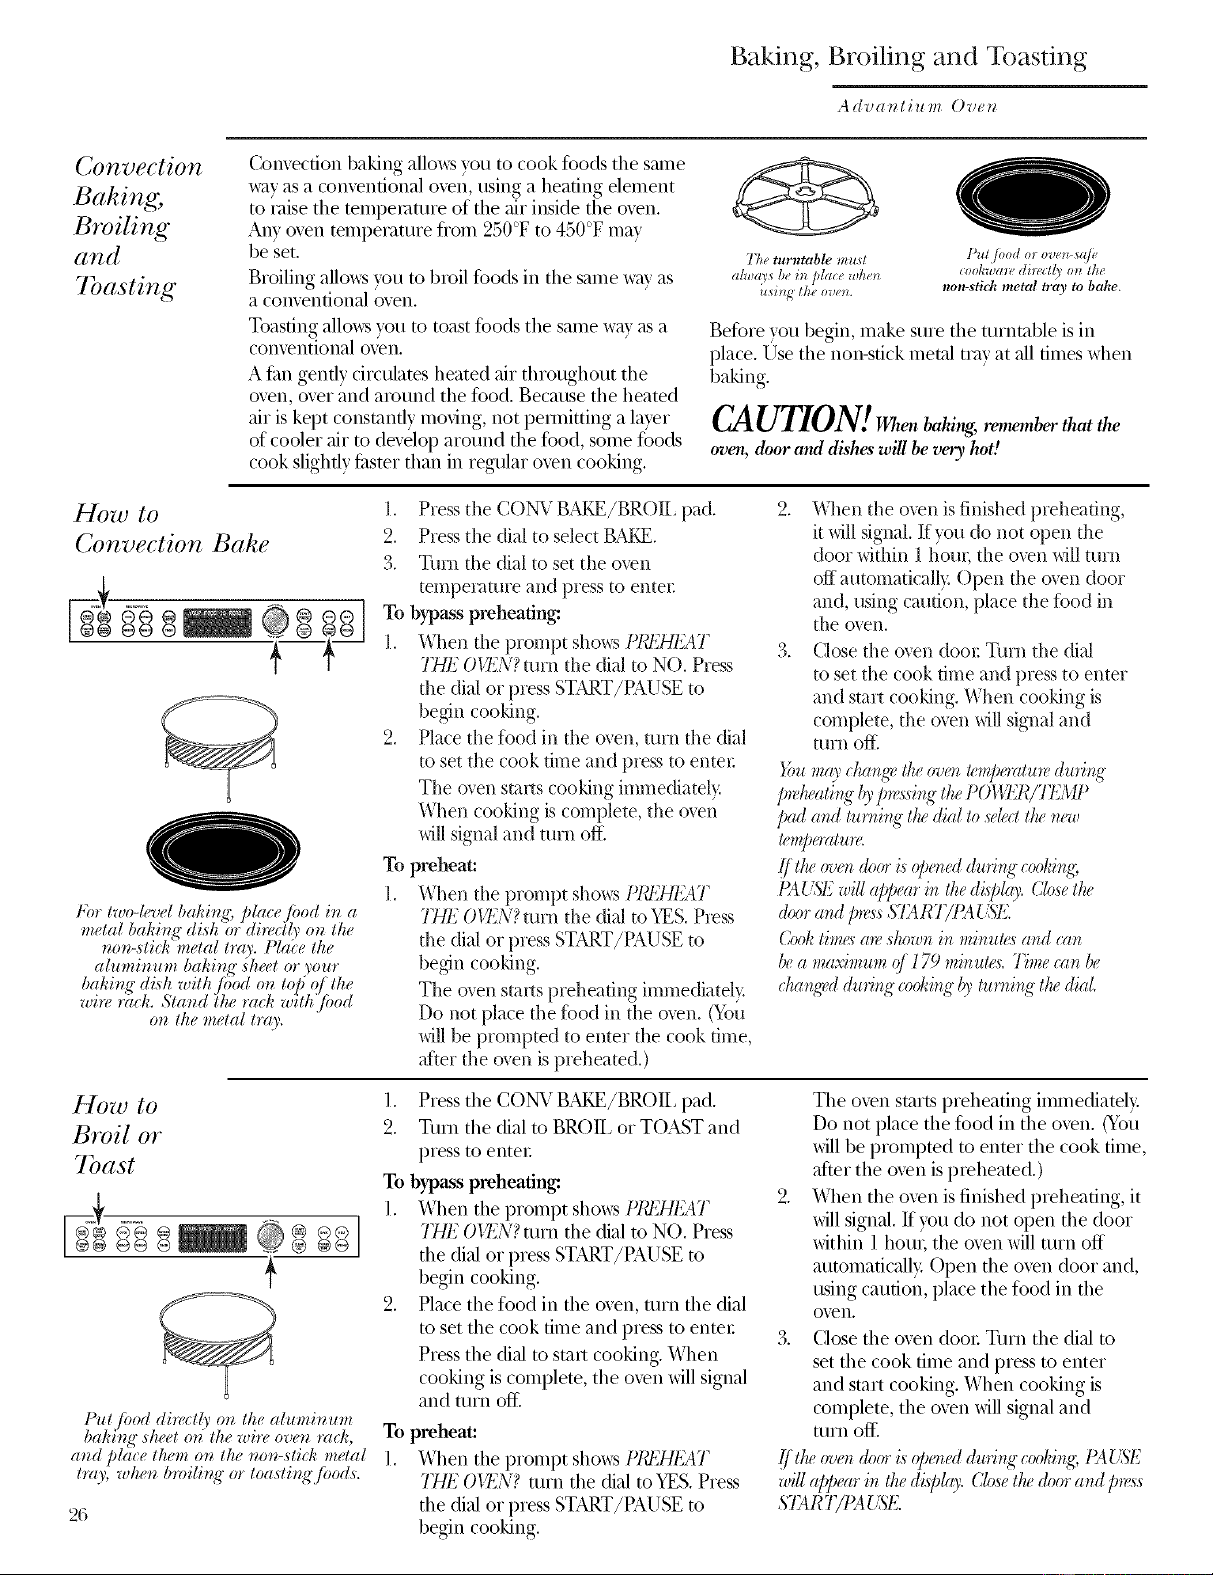
Tke turntable must
a/wa:y_ be it_ place wkell
usillgltle ovell.
15a/hod o_ove_ *@,
cookwal*,(til*,_lt)o_lltu
non-stid¢ metal tray to bahe.
Befbre you 1)egin, make sure the turntal)le is in
place. Use the non-stick metal max at all times when
1)aking.
CAUTION! ,l,.,,he
oven, door a*M dishes will be veol ho#
How to
Convection Bake
For lwo-level bakb_q, place/ood i*_ a
melal bakit_" distz'Or di,w'lly ot_ lke
r_o_-sli_k 'melal h'a_. [ lai e lh,e
alumimtm bakb_q',_keel or your
wir_ r'r_ck, Slated llu rack w_lkjbod
ot_ lke melal lray.
1. Press the C()N\ _BAKE/BROII, pad.
2. Press the dial to select BAKE.
3. Turn the dial to set the oven
temperature and press to enter
To bypass preheating:
1. When the prompt shows PICF,HIs;4T
THE OIT:_N?mrn the dial to NO. Press
the dial or press START/PAUSE to
begin cooking.
2. Place the food in the oven, turn the dial
to set the cook time and press to enter
The oven stmls cooking immediatel>
When cooing is complete, the oven
will signal and turn off.
To preheat:
1. When the prompt shows Plad_HIs;4T
THE OU:_N?turn the dial to YES. PIess
the dial or press START/PAUSE to
begin cooking.
The oven starts preheating immediatel}.
Do not place the food in the oven. (You
will be prompted to enter the cook time,
after the oven is preheated.)
2. When the oven is finished preheating,
it will signal. If you do not open the
door within 1 horn; the oven will turn
off automaticall}: Open the oven door
and, using caution, place the %od in
the oven.
3. Close the oven dooc Turn the dial
to set the cook time and press to enter
and start cooldng. When cooldng is
complete, the oven will signal and
mrn off_
}_mmay ckat_¢etheov_'t_#mpemtu*e du*it_g"
/m4u,atit_g"b)'p,_,s:dt_k_thePOI'I'7"21UTI'2MI_
/u¢dand tun_it_gt/w dial tosde(t t/w n(,w
>m/wmtum
//'tlu, ovet_dooris @et_ddu*it_g"cool;ing;
/{_UST:"wig a/_war h_thedi,sJda)'.Closetlx
doorat_d/m_ssS73RT/I?fi {{S'l_.
Cool;timesa*_,skowt_ it*minules at_dc(m
hea maximum 4179 minut(<s:Time can he
cMt_g'eddu_4tLg"co&ing"b3' tun_ing t/x dial.
How to
Broil or
7bast
@@ ® ,, @@
+
Put/hod directl_ or_ lhe aluminum
bak_t_t{"skeel or_7lk,e wire over_ ra_k,
and pla(e lh,em o_ lke *_o_*-,sli(k melal
t?ro', whetz broili**g"or toasti_g'/bods.
26
1. Press the CONV BMLE/BROII, pad.
2. Turn the dial m BROII, or T(-)AST and
press to enter
To bypass preheating."
l. When the prompt shows PICEHI:;4T
THE OU:_N?mrn the dial to NO. Press
the dial or press START/PAUSE to
begin cooking.
2. Place the food in the oven, turn the dial
to set the cook time and press to entec
Press the dial to st,at, cooking. When
cooking is complete, the oven will signal
and turn off]
To preheat:
1. When the prompt shows [ICEHEAT
THE OU:_N? turn the dial to 'irES. Press
the dial or press START/PAUSE to
begin cooking.
The oven starts preheating immediatel}:
Do not place the fbod in the oven. (You
will be prompted to enter the cook time,
after the oven is p_eheated.)
2. When the oven is finished preheating, it
will signal. If you do not open the door
within l hotm the oven will mrn off
automaticall}: Open the oven door and,
using caution, place the fbod in the
OVelI.
3. Close the oven door Turn the dial to
set the cook time and press m enter
and start cooking. When cooking is
complete, the oven will signal and
turn off_
[/'the _rv(,_doori,_@e_d duri_g"(_t_i_,q;1_4{_S'E
willai)pear i_ &e diqd(O,.Clme tkedoor and pms:s
STk R T/t 'A{'SI:_.
Wanning and Proofing
,4dvantium Oven
Pul /bod direell_' on lhe non-stieh
metal tri9, to warm.
Tips for Crgp Foods:
[] I,eave food uncovered.
[] Do not use plastic containers
or plastic wrap.
[] Preheat prior m use according
to recommended times.
Tips for Moist I_7_ods:
[] Cover fbod with lid or
aluminum foil.
[] Do not use plastic containers
or plastic wrap.
[] Preheat prior to use according
to recommended times.
The 1,154RMfi, ature will ke@ hol, _ooked
Jbods at serving" temperatur< Always start
with hot/hod. Ii.se eookwareand utensil., that
_aa withstand tempemture._ up to 23001 :.
1. Press the WARM/PROOF pad.
2. Turn the dial to select HOI,D
FOOD WARM. Press the dial to
enter.
3. Turn the dial to select the oven
temperature. See the chart and
tips below. Press the dial to enmr.
I,()_4' .............................. 140-160°F
MEDIUM ...................... 160-195°F
HIGH ............................ 195-230°F
4. Turn the dial to select the lmel of
moisture you want. See the chart
and tips below. Press the dial to
enter.
{/the oven door is opened durin:_" warmin:_;
1{4USE will appear in the dispko'. Close lhe
door and p_:._sST4 R 7"/1'At'S1£
To Crisp Stale Items:
• Place food or dishes directly on
the black metal tray.
• Preheat on I,OVV setting and
select CRISP.
• Check crispness after 45 minutes.
Add time as needed.
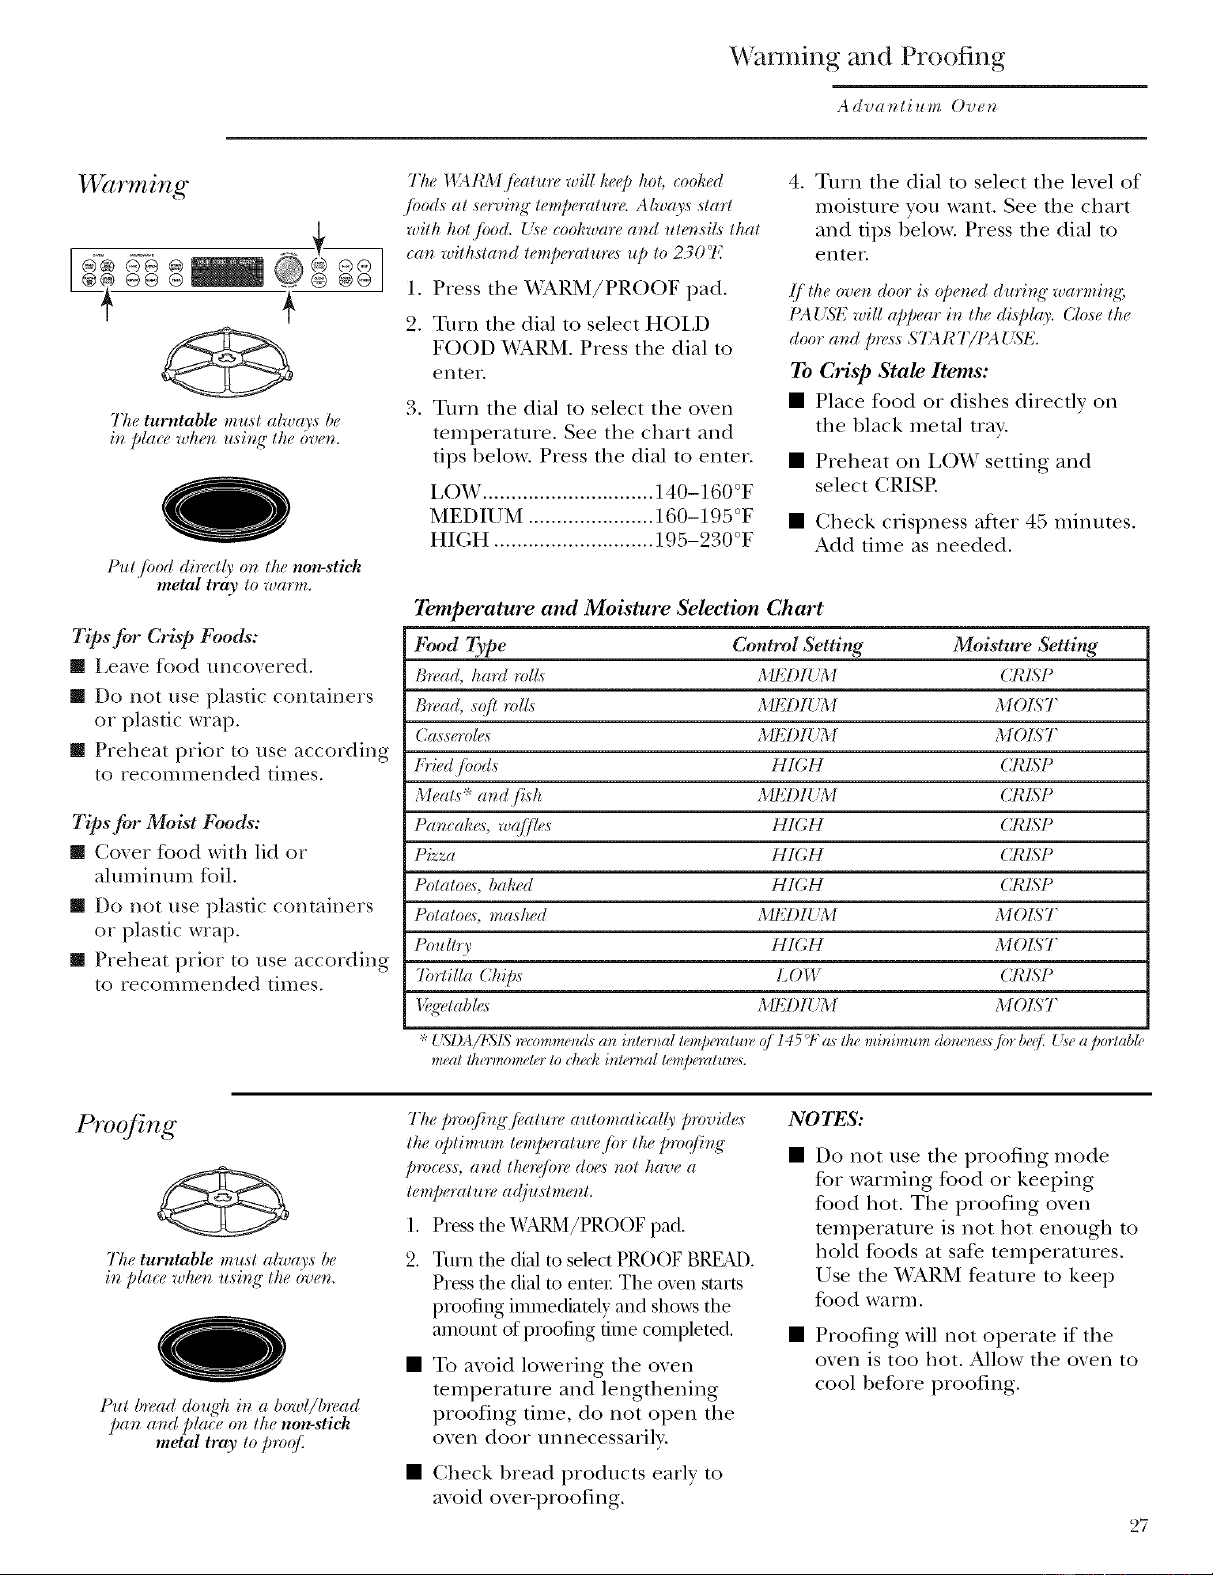
Temperature and Moisture Selection Chart
P_od Type Control Setting Moisture Setting
B_w_d, ha*ff rolL, ,\II'51)I('M CRISP
B*t,ad, soft roll,, ,\II'51)IUM MOIST
Ca,,sooh,,s MI'_I)IUM MOIST
Fried,/hods HIGH ( RIS P
Meats* and /Z,h MI'51)I('M CRISP
Pat_eal:es, w:{//le., HIGH CRISP
Pizza HIGH CRLS'P
l'otatoe,Lbaked HIGH CRISP
I'otatoe, Lma,d_ed ,\II51)[('M MOIST"
I'otdt* FHIGH MOIST
7brtilla (:hi/:,, LOW CRISP
If_wtabh:,s MI'_I)IUM MOIST
'"_{:SI)A/PSISra:o_nmeudsan bzter_taltemperatm_"q/145'7:as the minimum donen_sfin be{,iJ{:_ea porlable
meal thermometerIt chech internal temperature:_.
Prvofing
77_e turntable mu,,l alway,, be
in plage when u,sing the oven.
Pul b*_,ad dou_'h in a bowl/b*_ad
pan and pla_ e on the non-stick
metal tray 1o proqfi
The p***q/ing'/kature atttomalieally p***vide,_
the optimum tempemture f*r the proq/h_ K
proems, and the_*:/i,redora not have a
temperature ag{justmeat.
1. Press the WAI_4/PROOF pad.
2. Turn the dM to select PROOF BREAD.
Press the dial to enter The oven starts
proofing immediately and shows the
amount of proofing time completed.
• To avoid lowering the oven
temperature and lengthening
proofing time, do not open the
oven door unnecessarily.
• Check bread products early to
avoid ovepproofing.
NOTES:
Do not use the proofing mode
%r warming %od or keeping
tbod hot. The proofing oven
temperature is not hot enough to
hold foods at safe temperatures.
Use the WARM feature to kee I)
food warm.
• Proofing will not operate if the
oxen is too hot. Allow the oxen to
cool before proofing.
27
Microwaving
,4 d'oat_tiu m Ove_
Using the
microwave
./eatures
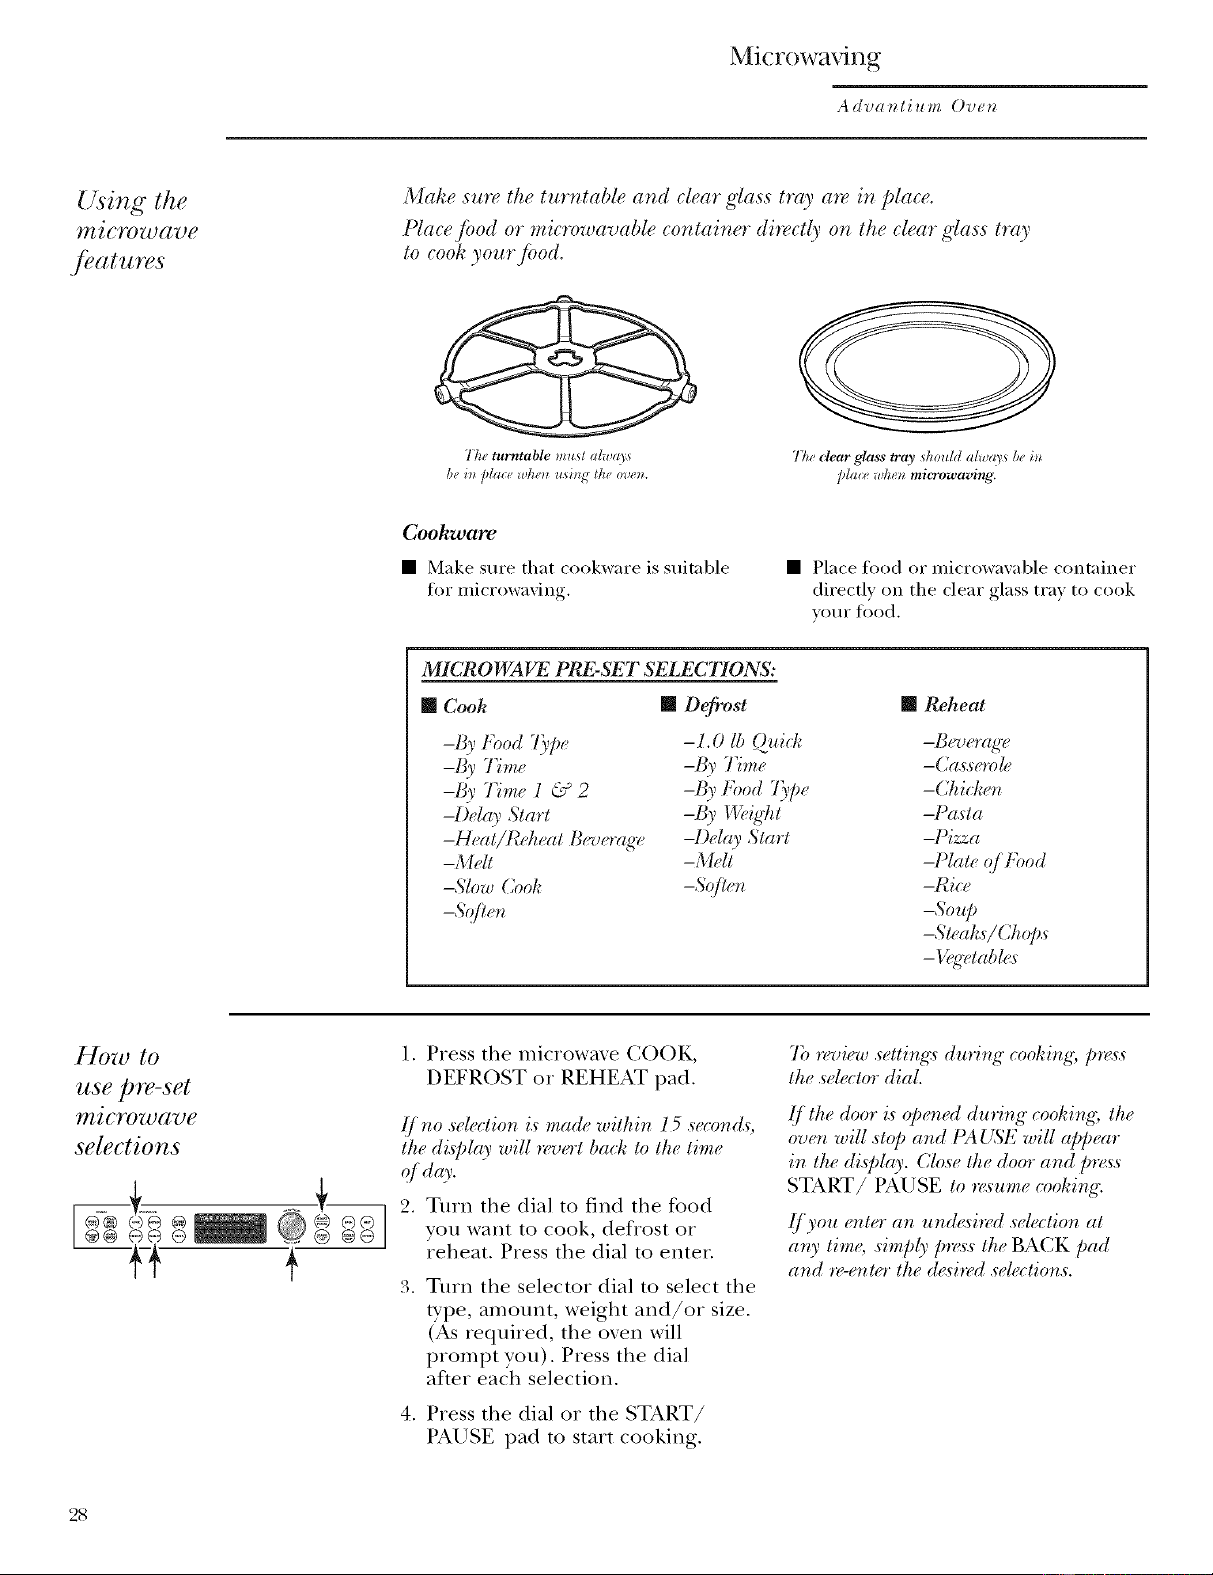
Make sure the tmwtable and clear glass tray are ir_place.
Place jbod or mic_vwavable container di_vc@ on the clear,glass trcry
to cook your fi>od.
Tk¢, turntable must alwa3s
be i_z [dace wizen using tke ov_z.
77ze clear glass tray should alwa3 sbe i_
[dace wlu _microwaving.
CoohwaFe
• Make sure that cookware is suitable
for microwaxing.
• Place food or microwaxable container
directly on the clear o-lass trm to cook
V()/II" food,
MICROWAVE PRE-SET SELECTIONS:
[] Cook [] Defrost [] Reheat
-I_' bbod 7_,[e - l. 0 lh Quid: -B('_,,rag_,
-By Time -By Time -Ca,vwmle
-By Time l & 2 -By Food 7_,pe -Chid'e_l
-Delay Start -I_y I'l,;,ig'kt -Pa,_ta
-Heat/Ib'keat B_qwrag'(" -Deb O,Start -Pizza
-Melt -Melt -Plate q/'Food
-Sb,w Coot" -Sqfie*_ -Rice
-So q,
-Steaks/(k@s
- I'>g'_4abk<s
How to
use pre-set
microwave
se&ctions
-+
I. Press the microwme COOK,
DEFROST or REHEAT pad.
[/ rm ._dection is made witkin l 5 secor_ds
tke disJ)bO_will _'vert ba(k to tlu time
q/ d(o_.
2. Turn the dial to find the food
you want to cook, defrost or
reheat. Press the dial to enter.
Turn the selector dial to select the
type, amount, weight and/or size.
(As required, the oxen will
prompt you). Press the dial
after each selection.
4. Press the dial or the START/
PAUSE pad to start cooking.
7b ,z,view .setting:s durir_g cooking [)_,_
tke .wle(tor dial.
[/the door Ls@em'd during cool'itlg; the
ov(m will ,_to[)and t'A {LS'F.will appear
in the display. Close lke door and pre_:s
START/PAUSE to "_z<_ume (-ooki_g.
._/'you (nter an und(<_i',zd sdection at
ar U time ._imply p'_s'.stke BACK pad
a r_d"_z",-(r_t(_rtk(, d(",si*_,d ,s'(,"l(ctions.
28
Microwaving
,4dvantium Oven
Cook By Time
and Cook By
7 me l & 2
Use COOK BY _ ¥ ;_;IIi IL a_d COOK BY
77M1'] l & 2 to micmwave,f!_od that i,s
_ot in the r_,_ipe,s_tio_ a_d at the Iim_(,s)
yo_ ,set.
[] The power level is automatically
set at high, but you can change it
fbr more flexibility.
1. Press the COOK pad.
2. Turn the dial to select COOK BY
TIME or COOK BY TIME 1 & 2
and press the dial to enter.
3. Turn the dial to set the cook time
and press the dial to enter.
• _ _L IL l & 2(!'_ou ,_d_cted COOK BY _ _,";_
tur_ the dial to ,set tlu ,s_cor_d(ooh time
trod p'r_<s,sthe dial to er_te_:
NO_I_: 7b chang(" the power l(a_el
i!'you don't want •fidl power; p'r_*s_sthe
Iq) h_?'21UTEMI' pad qf!('r _'_t('ri*_gthe
time(,9. 7)o'n the dial to ,_eh'ctand p_z<v_
the dial to ('z_t('_:
4. Press the dial or the START/
PAUSE pad to start cooking.
You may Op_r_du_ door durb_g COOK BY
TIME a_d COOK BY _:'v ,"7'1l lL l &2to
(/ucl_tlu f_od. Clos'e the door a_d pr(_,s
START/PAUSE to r_<s_m0(oohir_g.
_]xpress
@
Press EXPRESS repeatedly %r
,30 second increments of microwave
cooking time. ()_en starts
im media tel},'.
Microwave
power level(s)
.........
®@ ÷@ @
I.
.
o
,').
First, %llow directions %r COOK
BY TIME, COOK BY TIME 1 & 2,
DEFROST BY TIME or EXPRESS.
Press the POWER/TEMP pad.
Turn the dial clockwise to increase
and counterclockwise to decrease
the power lexel. Press the dial
to enter.
4. Press the dial or the START/
PAUSE pad to start cooking.
[] You ca_ char_g_,th("pow('r h_wl b@_"
or d_rb_g a (_ohb_g proKram.
variou.s power l(n_e£:
High 10: Fish, bacon, ,egetables,
boiling liquids.
Med-High 7: Gentle cooking of meat
and poultry; baking casseroles and
reheating.
Medium 5: Slow cooking and
tenderizing for stews and less
tender cuts of meat.
Low 2 or 3: Defrosting; simmering;
delicate sauces.
Warm 1: Keeping food warm;
softening butter.
See the Favorite recipe sections in
the Speedcook section of this book
for instructions on how to save, use,
chang_ or delete a favorite recipe.
Cookir g tips [] When cooking bacon, laver, strips
on a plate. Coxer each laver with
a paper towel.
[] When cooking vegetables,
//sea microwaxe-sate casserole
or bowl. Co_er with a microwave-
sate lid or ,ented plastic wrap.
[] For flozen vegetables, %llow
the package instructions for
adding water.
[] For flesh vegetables, add
2 tablespoons of water for
each serving. 2(.)
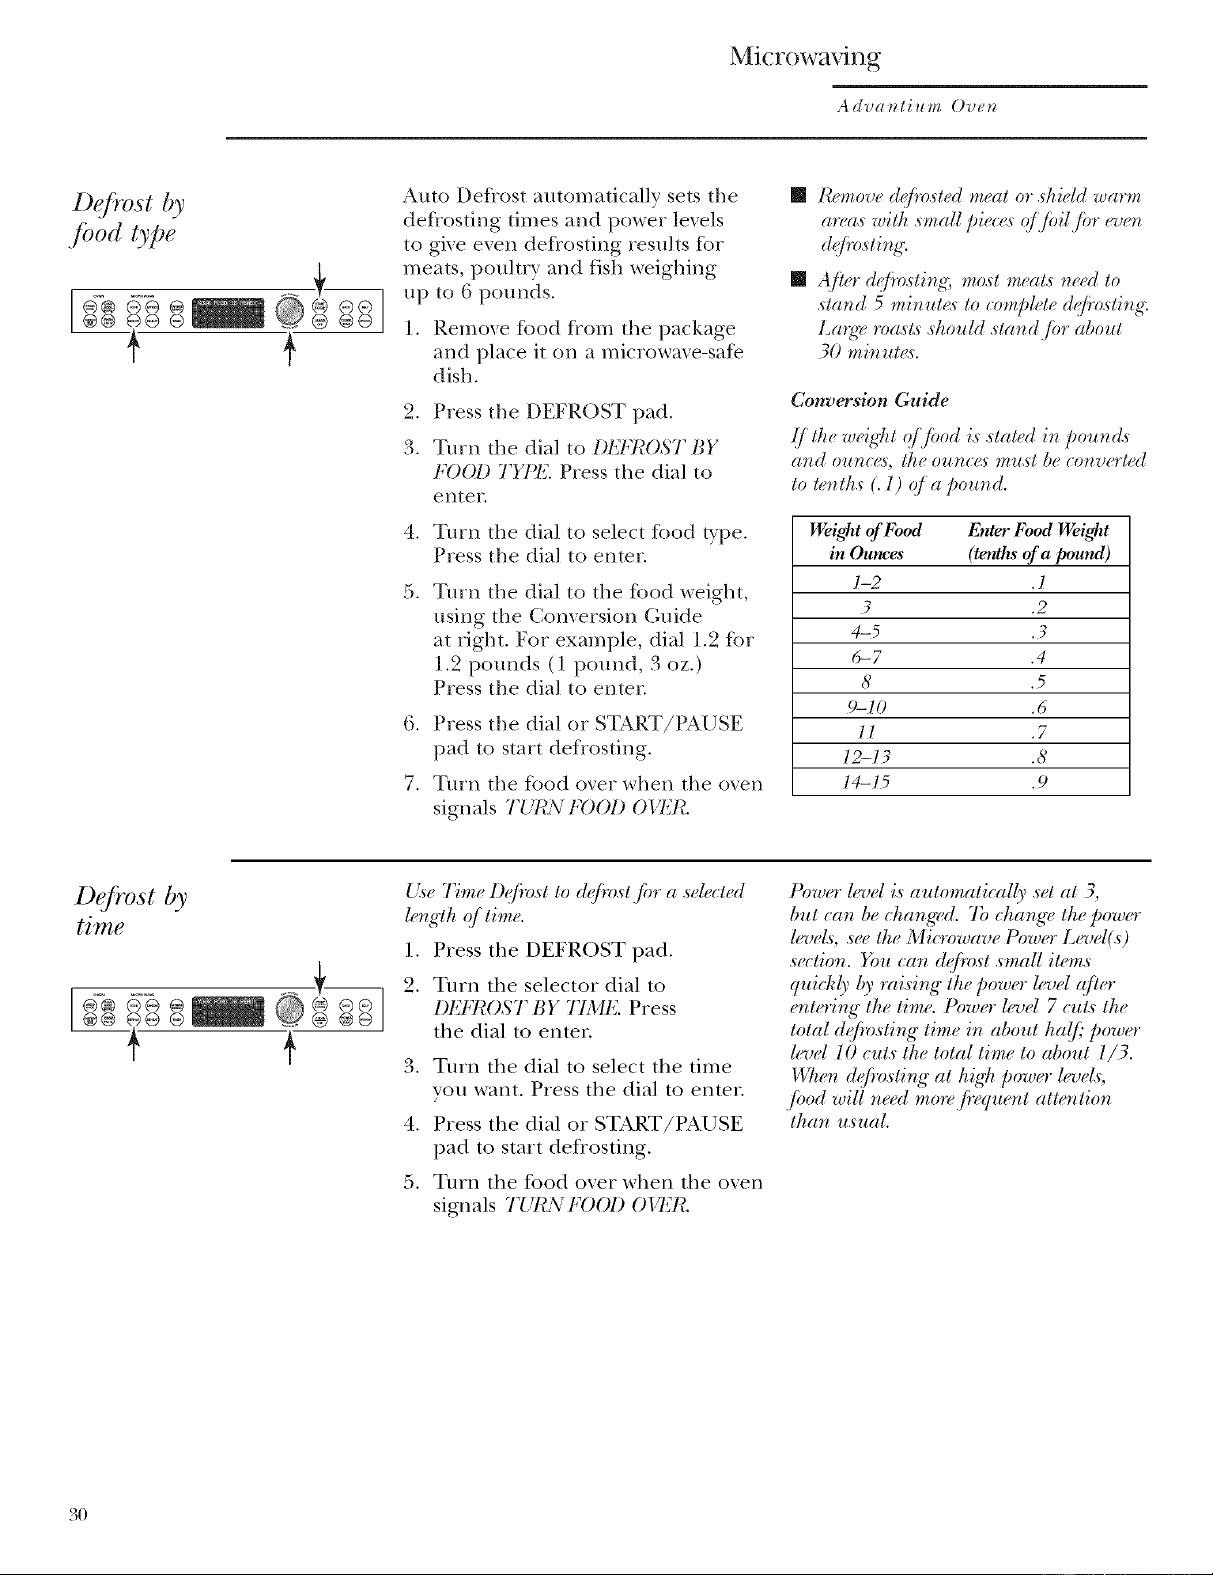
Microwaving
,4dvat_tium Ovet_
[ ............
@® @@ @
@@ @@ ®
Auto Defrost automatically sets the
deflosting times and power levels
to give even defrosting results fbr
meats, pouhry and fish weighing
up to 6 pounds.
1. Remoxe ff)od from the package
and place it on a microwave-safe
dish.
2. Press the DEFROST pad.
a. Turn the dial to I)12 R )S] BY
FOOL) TYPE. Press the dial to
enter.
4. Turn the dial to select ff)od type.
Press the dial to enter.
Turn the dial to the ff)od weight,
using the Comersion Guide
at right. For example, dial 1.2 for
1.2 pounds (1 pound, 3 oz.)
Press the dial to enter.
6. Press the dial or START/PAUSE
pad to start defrosting.
7. Turn the fbod oxer when the oven
signals TURN FOOD OI'ER.
[] I_z'move d@rzsted meat or .skield warm
an.a_with ,mall l,i_.._,q/Ji,il./i,r_wr_
de i'o._tMg"[/ < •
[] After defimting mast meat.s need to
.stand 5 mi_ut(<_ to compkte d@'osting"
I;a_g_,roasts sho*dd sta_d,/br abo*_t
30 mM*d_<v.
Conversion Guide
t/t1. q7i,,4i,,taut1i. po,..z
gln(] olI_?( ( _ t/l(? o11?2( (_ l?zlist l)( (o?2z_( Ft(?d
to t_nth._(. l) q/'a pound.
Weight of Food Enter Food Weight
in Oum.es (tenths of apound)
1-2 .1
7.2
4-5 .3
6-7 .4
8.5
9-10 .6
ll .7
12-13 .8
14-15 .9
Use Time D@r)st to @r)._t,f!, a.selected
lerlglh q/time.
1. Press the DEFROST pad.
2. Turn the selector dial m
DEFROST BY TIMK Press
the dial to enter.
3. Turn the dial to select the time
you want. Press the dial to enter.
4. Press the dial or START/PAUSE
pad to start defrosting.
5. Turn the food oxer when the oxen
signals TURN FOOl) Olq_R.
Powo" lrvel is automatically .setat 3,
but can be changz,d. 7b change the powo
lrve£:, ,we the Mig-rowave Pow_'r Level(s)
section, gou cau @_).st small items
quiHdy @rai.si,g" the powo" lrvel ({rio
<,ntoing the time. Powo level 7 cuts the
total d@vsting time in about ha(ft"powo
level 10 cut.s the total time to about l/3.
DT.'n dqf!'o._ting at hig¢_power lrve£:,
jood will ner'd mo*v,fiwmmt athm tion
than usual.
3O
Microwaving
Advantium Oven
Defrosting
tips
&s+l IJ f_ )S 1 BY FOOD
m<_at /Joultry <md f!,d_. L,,s+DL7 l?( S1
13Y 77ME jbr too,stoth_:rfr_z++njbo&.
[] Foods frozen in paper or plastic
can be time defrosted in the
package, but foods should be
taken out of the package when
using I)I_FI_OST BY FOOD TYPIC.
Closed packages should be slit,
pierced or vented after food has
partially deflosted. Plastic storage
containers should be partially
unco_,_re(l.
[] Family-size, prepackaged frozen
dimmers can be defrosted and
microwaxed. If the flood is in
a Rill container, transfer it to
a microwa\'e-safe dish.
[] Foods that spoil easily should not
be allov_vd tO sit out fbr more
than one hour after defrosting.
Room temperature promotes the
growth of harmflfl bacteria.
[] For more even defrosting of
larger %ods, such as roasts, use
DI_I+I{OST BY TIME. Be sure large
meats are completely defros/ed
before cooking.
[] When deflos/ed, fbod should be
cool but softened in all areas.
If still slightly icy, return to the
microwaxe very briefly, or let
it stand a few minutes.
31
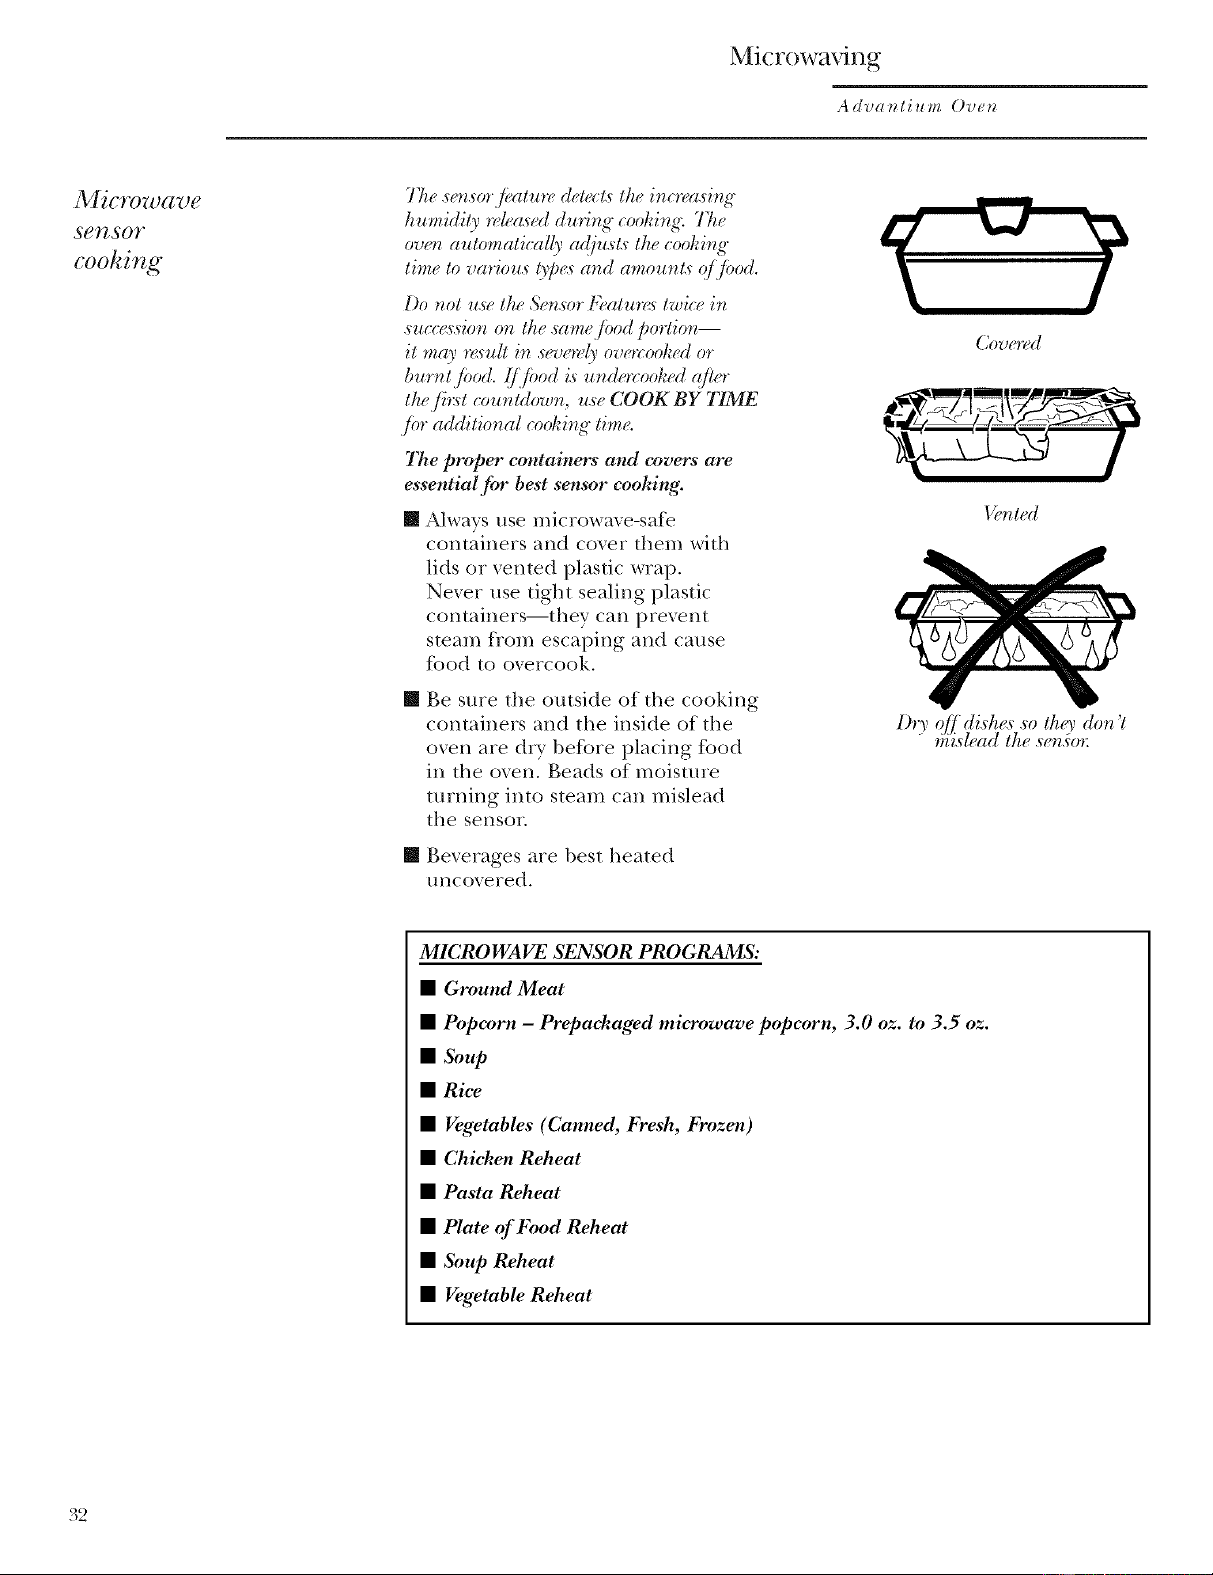
Microwaving
Ad'oantium Oven
_licTo_oct1)e
SgTtSOT
cooking
Tbe ,so_,sorjbatm_, detr.ct; the ino_.a,sb_g
humidil_, rd_.<t,s<.ddmqng coohing; 77_e
ov<.naulomatical(_, adfl_,st,sthe coohi_g
ti,,.,t. <..I
Do not u,s_.the &msvn I:,.atm_<stwice, in
,swv_<vdo_ on lhe ,sronejbod po'_lion--
it "rmO,r_sull in ,s_qn'n'(_,overcoohed or
ttw jh:st coumdow_, _,s_"COOK BY TIME
.fiw additional ou_kb_g"tim<
The proper containers and covers are
essential fi_r best sensor coohi_N.
• Always use microwave-safe
containers and cover them with
lids or vented plastic wrap.
Never use tight sealing plastic
containers--they can prevent
steam Kom escaping and cause
food to o_ercook.
Be sure the outside of the cooking
containers and the inside of the
oven are dry befbre placing food
in the o, en. Beads of moisture
turning into steam can mislead
the sensor.
• gexerages are best heated
l/n c()_ere d.
Coven_d
I,}nted
l)r_ o[1di,st.<s,_othey don't
_)_i'sleadthe s(n,_o,:
MICROWAVE SENSOR PROGRAMS:
•G_umnd Meat
•Popcorn -Prepackaged mim'owave popcorn, 3.0 oz. to 3.5 oz.
•Soup
•Rice
•Vegetables (Canned, 15"esh, l_)'ozen)
•Chicken Reheat
•Pasta Reheat
•Plate of Food Reheat
•Soup Reheat
• Vegetable Reheat
32
Microwaving
Adva_tium Ovet_
7b use all
SgTZSO_"
programs
®
Adva_tium '._mietr_wave mode /batur_<s
.set,sot eookb_g: The owm automati_tlly
.se_.ses wher_ jbod i.s done and .shuts it.sd/"
qffmelim.,, b_at i_ _°"the n_ed to [)to,ram,
cook times and power kq_e£.
1.
.
o
Press the COOK pad and turn the
dial to C()OK BY F()OD TYPE.
Press the dial to enter. Or press
the REHEAT pad.
Turn the dial to select the food
you want. Press the dial to enter.
Press the dial or press the START/
PAUSE pad to start cooking.
Do not open the oven door until
time is counting down in the display.
If the door is opened, close it and
press START/PAUSE immediamly.
If the fbod is not done enough, use
COOK BY 77MF, in the microwaxe
selector to cook fbr more time.
NOTE: Do not use the Sensor
Features twice in succession on the
same fbod portion--it may result in
severely overcooked or hurnt food.
• If you have been speedcooking
and the oven is aheadv hot, it may
indicate that it is too hot fbr
sensor cooking. Of course, you
can always continue with COOK
BY 77ME or SPI_EDCOOKI
NOTE: (/'tk( over_ L_too kot tken it will
automatically ek(mg_, to time cooking.
To shorten or lengthen the
cook time, wait until the time
countdown shows in the display.
Then turn the dial to add or
suhtract time.
If you open the door while
5'E_\5'OR Cooki,_K, 5'EA1_'011E1¢1¢01{
will appear. Close the door, press
START/PAUSE to begin again.
Notes about the Reheat pro_'am:
Reheated %ods may haxe wide
,ariations in temperature. Some
areas may he extremely hot.
It is hest to use COOK BY TIMF. and
not RF.HEAT%r these %ods:
• Bread products
• Food that must he reheated
unco'_ ered.
• Foods that need to he stirred
or turned.
• Foods calling %r a di y look or
crisp surface after reheating.
Things that
are normal Interference
• TV/radio inmrference might he
noticed while using the microwave.
Similar to the interference caused hy
other small appliances, it does not indicate
a prohlem with the microwave. Move
the radio or TV as fat away fiom the
microwax> as possihle, or check the
position of the TV/radio antenna.
Lights
• The oxen cmity light will come on
during a microwme cooking cycle.
Oven Heat
• Cookware may hecome hot hecause of
heat transferred fiom the heated food.
Oxen mitts may he needed to handle
the cookware.
• Steam or xapor may escape flom around
the door
Other Advantium Features
Adva_tium Ove_
COO TIME
COMI 'LE 7"El) To remind you that you have food
in tire oven, the oven will display
COOK TIME COMPLF, TI?D and beep
once a minum until you either
open tire oven door or press the
CLEAR/OFF pad.
l_atures
under the
O[ 770NS
Dad
@@ 0@ @
Clock:
77_edod_ must be set b_fim_you _an use
Sta'rl.fiw instruction._ ).
I. To change tire clock time, press
tire OPTIONS pad arrd turn the
dial to CLOCK. Press the dial
tO enter,
2. Turn tire dial to set hours. Press
the dial to enter.
3. Turn tire dial to set minutes. Press
the dial to enter.
4. Turn the dial to select AM or PM.
Press the dial to enter.
Clock Display ON/OPT:
Use this feature to turn your
clock display on or off. 15ress the
OPTIONS pad, turn the dial to
select CLOCK DISPLAY ON/()FI_7
Turn the dial to select ON or OFE
Press the dial to enter.
Delay Start:
Delay Start allows you to set the
oven to delay cooking up to 24
hours. Press the OPTIONS pad, turn
the dial m select DEIAY S7_RTand
press the dial to enten Follow the
display directions to set the Delay
Start time arrd feature you wish to
delay.
Beeper Volume:
Use this feature to adjust tire volume
of the beeper. You can even turn it
off. Press the OPTIONS pad, turn
tire dial to select BI'21'_7_I'2RV()LL_\,II'2,
press tire dial to enter, arrd follow
the display directions.
&*oil Speed:
Is the message scroll too slow or too
fast? Change it'. Press tire OPTIONS
pad, turn tire dial to select DISPIAY
SCROLL _1'21'21),press tire dial to
enmr, arrd follow the display
directions.
Reminder:
Use this feature to set an alarm beep
to sound at a specific the time of day.
Press the OPTIONS pad, turn tire
dial to SI_T/CLFAR I_EMINI)I'2R and
press the dial to enter. Turn the dial
to select the hour arrd press to enter
Turn tire dial to select the minute
and press to enmr. Turn the dial m
select AM or PM and press to enten
To rexiew tire setting, turn tire dial
to SL1/CLL'AR R£l IhNDLR and pless
tire dial to enter. Turn tire dial to
IIEVIEWand press to enter.
To cancel tire setting, turn tire dial
,_ _, ) 71,, ,, ? , .
to SL1/CLL'A[_ R£l 11;\7)LR and pless
tire dial to enter. Turn the dial to
CLFAR arrd press to enter.
Purview
@@ @@ @ _.
+
{A_ this'.flatu*_ to review the cur'_nt
coohing selections you have set.
Press the selector dial during
speedcooking or microwaxe cooking.
34
Other Advantium Features
Advat_tit_m Ovet_
H@
@® @@ @
®@ @@ ® +
{ffs<'thLs,/i'(ztu?°r,to.find out .wrr. about
your ov('n and it.s./i'atun<s.
1. Press the HELP pad.
2. Turn the dial to select the f>aune
name. Press the dia] to enter.
The display will show a description
fbr the program you have chosen.
t%atu_ L/bund in tke Hl+]LP./:unctio,_.
AddMg Time
Back
Bah<"
B(q_<'rag_,R(,/wat
Broil
Child Lochout
Ck,a_j()ff
Cook
Cooh IO, 7Vine
Cooh!Hg,at lO' bbod
Custo*_ Sp('('d Cook
D(¢i¥_st
D(:f!¥,._tby Food 75,fie
D(fi'ost 19, 7Vine
Dek9, Start
Exl)r(<_:sCook
Faro'tilt" R('(ip(<*
Hall,
Hold Food W<wm
()/)tion,_
I'.w<,/T<'mp
I_ro(j"Br<'ad
I_+'t_<'<tt
[b'/)<'atLast
&'nsor Cooking
&4 B<'_'/,erVolume
&4 Clock
&'t Di,_Jd<9, On/O!/
&'t Di,sJd<ff5'ln'('d
&4 li+'mind<'r
Sbw C.oh
5'qf!<'n/Mdt
5'l)('('d Cooh
Start!Pau,_e
7_me Cook l & 2
Ti,,,,,.0,,/0//
7ha,st
I'/,hrm/I'm(j"
•D
Other Advantium Features
A (l'uantil_m Oven
7C zzld
lock-out
You may lock tke (:o_t_r)lpa_el to p_zq_ent
tk( ov( n ,f!'om beb_g"accide_tally ,_tarted
or _,sed by ckikh'e_.
@® @@ @
®@ @@ ® [ Press and hold CLEAR/OFF for
@ O j 5 seconds to lock and unlock.
When the control panel is locked,
Cont_rd i.s LOCKFJ) will be displayed
briefly anytime a pad or dim is
pressed.
7_mer
@@ @@ @ . @@
+ +
Use tki.Lf!,ature a_ytime you need a
g_neral propose tim_: 1i (an _q_n b_
,_s(d while cookMg Mtk( oven.
1. Press the TIMER pad.
2. Turn the dial to select the hours.
Press the dial to enter.
o
:). Turn the dial to select the
minutes. Press the dial to enter.
7b (:ancd pr(<_._TIMER.
Automatic
fan
An automatic fan protects the oxen
flom too much heat inside the o_en
cavit},'.
It automatically turns on at low speed
if it senses too much heat.
The tim will automatically turn off
when the internal parts are cool. It
may stay on for 30 minutes or more
after the oxen control is turned off.
• 0
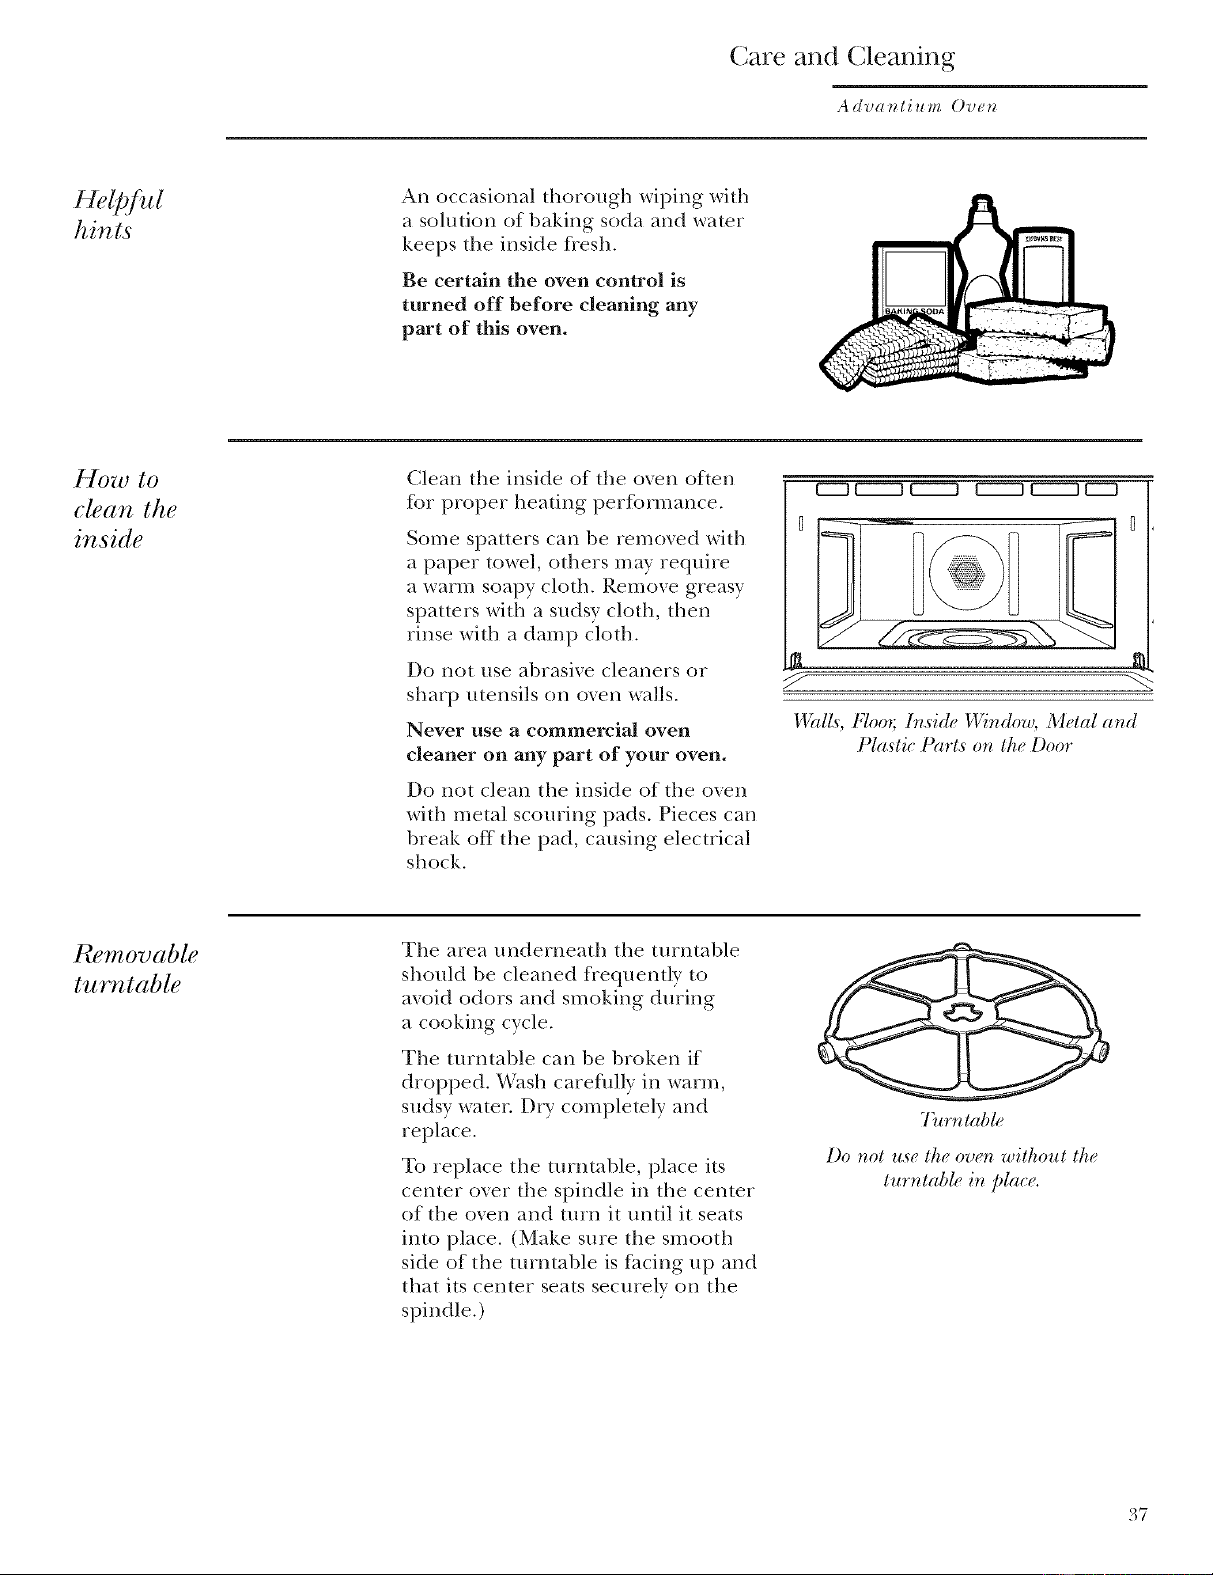
(]are and (]leaning
Adva_til_m Ova_
An occasional thorough wiping with
a solution of baking soda and water
keeps the inside *iesh.
Be certain the oven control is
turned off before cleaning any
part of this oven.
How to
clean the
inside
Clean the inside of tile oxen often
fbr proper heating per%rmance.
Some spatters can be removed with
a paper to_._>l, others may require
a warm soapy cloth. Remove greasy
spatters with a sudsy cloth, then
rinse with a damp cloth.
Do not use abrasive cleaners or
sharp utensils on oven walls.
Never use a commercial oven
cleaner on any part of your oven.
Do not clean the inside of the oxen
with metal scouring pads. Pieces can
break off the pad, causing electrical
shock.
/ r"
l'l!}d£ Floo_ I*_side l_!*ndo_,) Metal and
Plastic Part._ or_ tt_ Door
t_?movable
turntable
The area underneath the turntable
should be cleaned frequently to
a_oid odors and sinoking during
a cooking cycle.
The turntable can be broken if
dropped. Wash carefldly in warm,
sudsy water. Dry completely and
replace.
To replace the turntable, place its
center oxer the spindle in the center
of the oven and turn it until it seats
into place. (Make sure the smooth
side of the turntable is t;_cing up and
that its center seats securely on the
spindle.)
7)¢*'*_table
Do not u._ lt_ oz)_n 7,)it/_out It_e
Imntabl_ ir_pla_.
.t
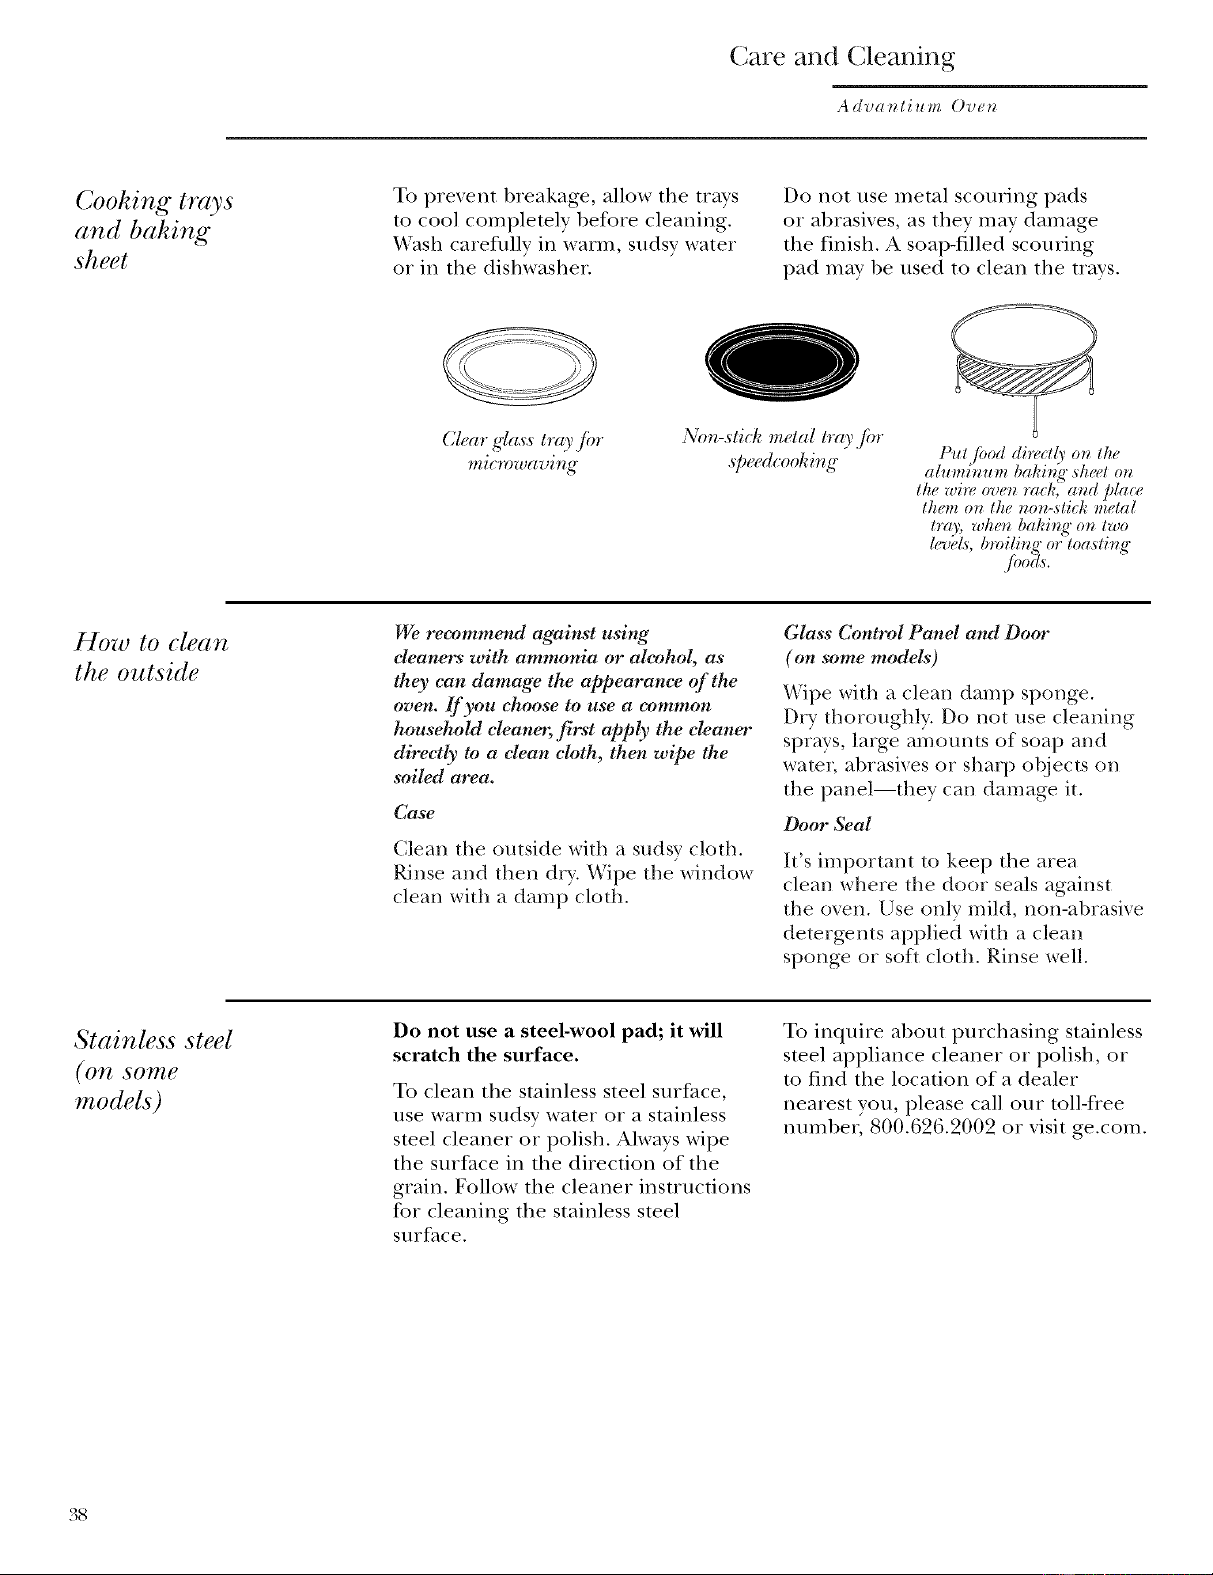
(;are and (;leaning
A(Iva_tium Ove_
Cooking trays
and baking
sheet
To prment hreakage, allow tile trays
to cool completely hefore cleaning.
X4'ash carefldly in warm, sudsy water
or ill tile dishwasher.
Do not use metal scouring pads
or ahrasives, as they may dan)age
the finish. A soap-filled scouring
pad may he used to clean tile trays.
Clear g_a_stray,/iw
mic'mwaving Non-stick metal trayjm.
._p_edcookir_g Pul fi*od direclly or_ the
alumlrzum baki**g',sheet or*
lhe wire ove_ rack, a_d place
lhem or_ lhe nor_-,sli_k melal
h'a_; wher_ baki_ff o_ lwo
lev{Ls, broili_" o__loasli_g"
./i_ocl,s.
How to clean
the outside
We recommend against us4ng
eleaners with ammonia or alcohol, as
they can damage the appearance of the
oven. If you ehoose to use a common
househoM cleaner, f!_:_'t apply the cleaner
directly to adean cloth, then wipe the
soiled area.
Case
Clean tire outside with a sudsy cloth.
Rinse and then d W. Wipe the window
clean with a damp cloth.
Glass Control Panel and Door
(on some models)
Wipe with a clean damp sponge.
Dry thoroughly. Do not use cleaning
sprays, large amounts of soap and
watei; abrasixes or sharp objects on
the panel--they call damage it.
Door Seal
It's important to kee I) the area
clean where tire door seals against
the oxen. Use only mild, non-abrasive
detergents applied with a clean
sponge or soft cloth. Rinse well.
Stainless steel
(on SO_l_e
models)
Do not use asteel-wool pad; it will
scratch the surface.
To clean tile stainless steel surface,
use warm sudsy wamr or a stainless
steel cleaner or polish. Always wipe
tire surface ill the direction of tire
grain. Follow the cleaner instructions
for cleaning tile stainless steel
surface.
To inquire about purchasing stainless
steel appliance cleaner or polish, or
to find tile location of a dealer
nearest you, please call our toll-fiee
numher, 800.626.2002 or visit ge.com.
38
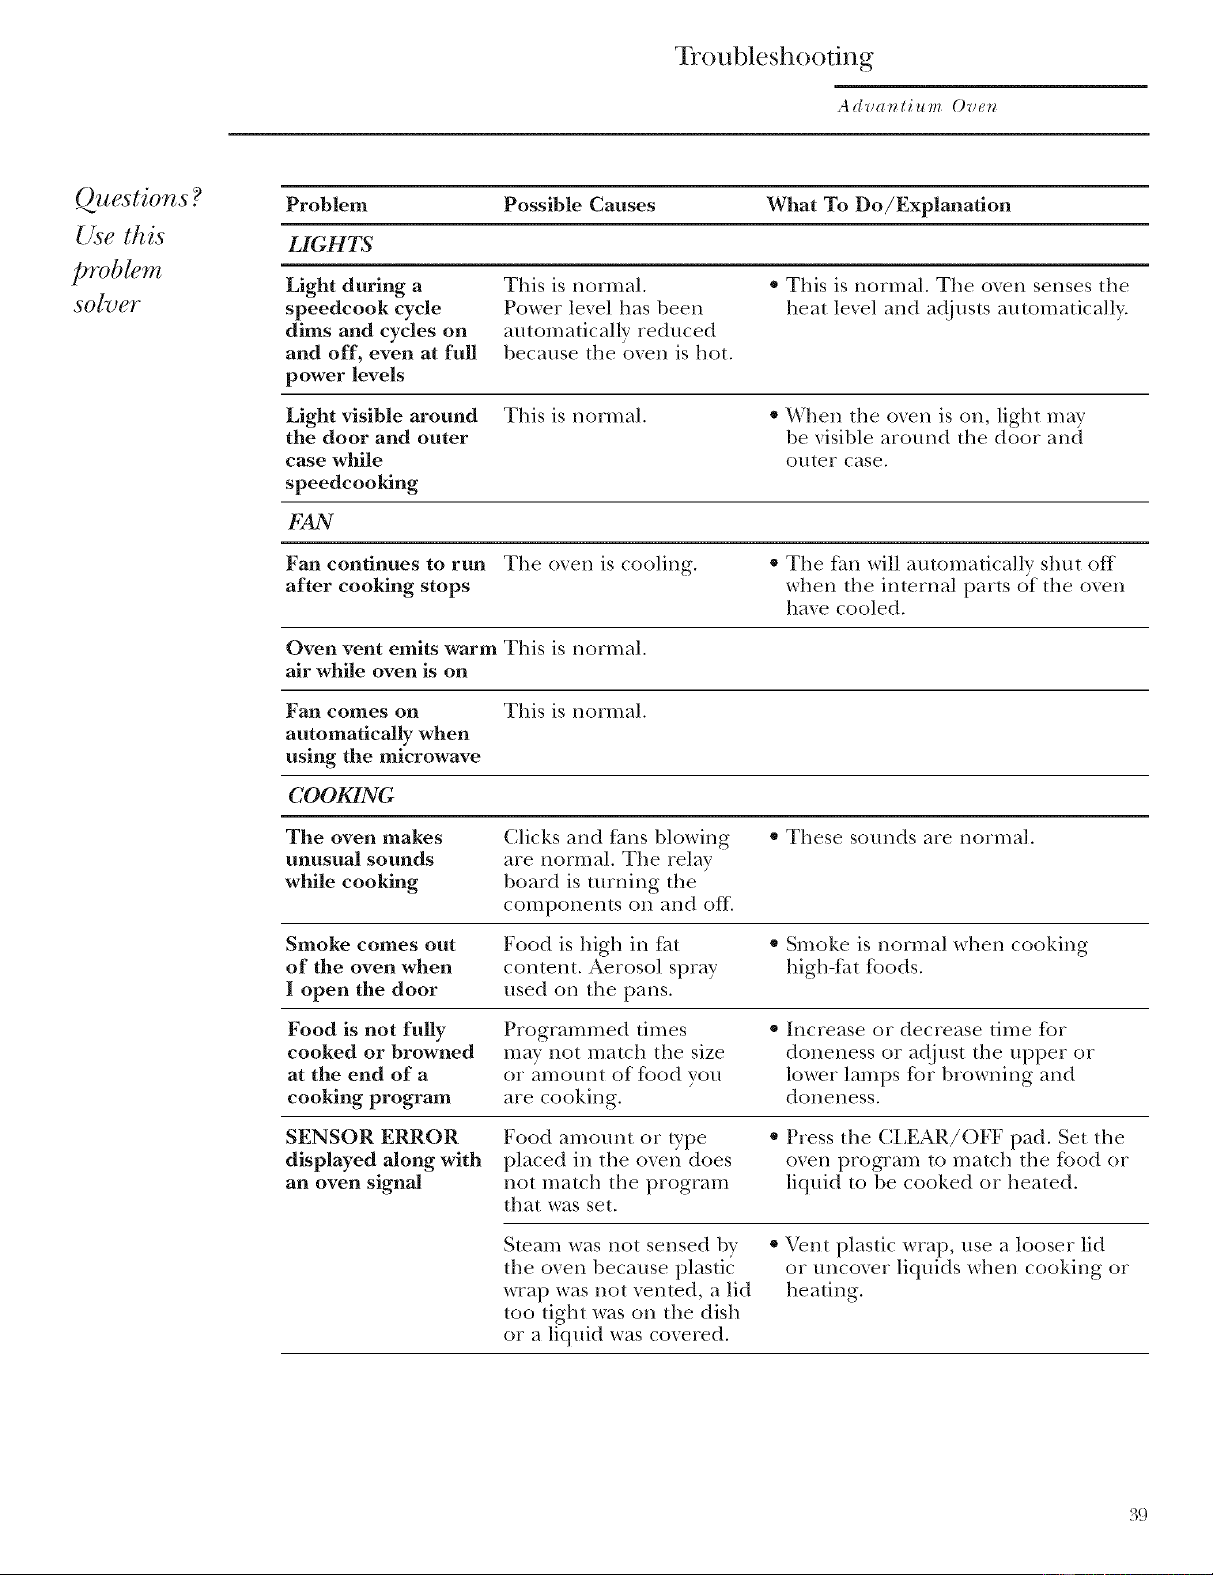
Troubleshooting
Advat_tium Ovet_
Questions?
Use this
prob#m
SO[?)eT
Problem Possible Causes What To Do/Explanation
LIGHTS
Light during a This is normal. * This is normal. The oven senses tile
speedcook cycle Power lexel has been heat level and adjusts automatically.
dims and cycles on automatically reduced
and off, even at full because the oven is hot.
power levels
Light visible around This is normal. * When the oven is on, light may
the door and outer be xisible around the door and
case while outer case.
speedcooldng
£4N
Fan continues to run The oven is cooling. * The fan will automatically shut off
after cooking stops when the internal parts of the oven
haxe cooled.
Oven vent emits warm This is normal.
air while oven is on
Fan comes on This is normal.
automatically when
using the microwave
COOKING
The oven makes Clicks and fhns blowing * These sounds are normal.
unusual sounds are normal. The relay
while cooking board is turning the
components on and ofIi
Smoke comes out Food is high in fat • Smoke is normal when cooking
of the oven when content. Aerosol spray high-fat fbods.
Iopen the door used on the pans.
Food is not fully Programmed times • Increase or decrease time for
cooked or browned may not match the size doneness or adjust the upper or
at the end of aor £m_ount of fbod you lower lamps for browning and
cooking program are cooking, doneness.
SENSOR ERROR
displayed along with
an oven signal
Food amount or type
placed in the o_en does
not match the program
that was set.
* Press the CLEAR/OFF pad. Set the
oven program to match the fbod or
liquid to be cooked or heated.
S/earn was not sensed by
the oven because plasti(
wrap was not xenmd, a lid
too tight was on the dish
or a liquid was covered.
• Vent plastic wrap, use a looser lid
or uncover liquids when cooking or
heating.
39
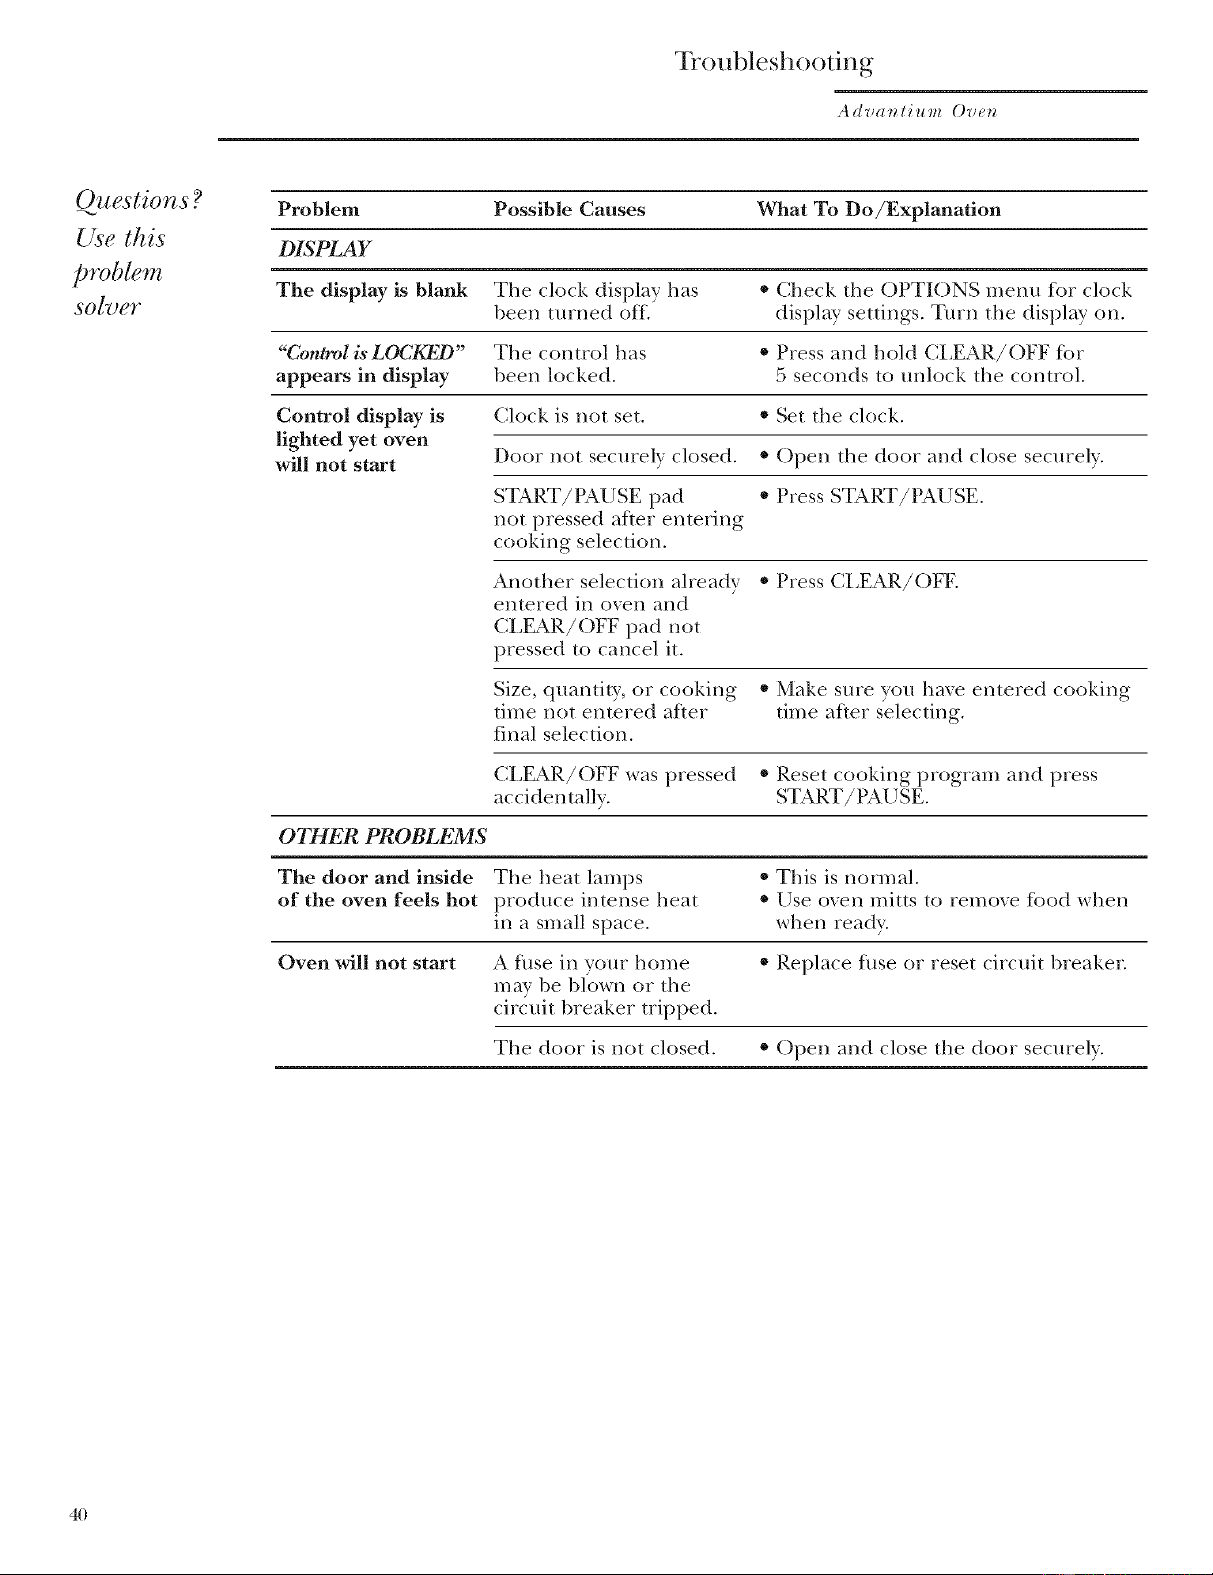
Troubleshooting
Adva_tium Ove_
Questions?
Use this
problem
SO[_)g7"
Problem Possible Causes What To Do/Explanation
DISPLAY
The display is blank The clock display has * Check the OPTIONS menu for clock
been turned ofti display settings. Turn the display on.
_'ControlisLOCI_D" The control has • Press and hold CLEAR/OFF f_)r
appears in display been locked. 5 seconds to unlock the control.
Control display is Clock is not set. * Set the clock.
lighted yet oven
will not start Door not securely closed. * Open the door and close securely.
START/PAUSE pad * Press START/PAUSE.
not pressed after entering
cooking selection.
Another selection alrea@ * Press CLEAR/OFF.
entered in oven and
CLEAR/OFF pad not
pressed to cancel it.
Size, quantity, or cooking • Make sure you haxe entered cooking
time not entered after time after selecting.
final selection.
(:LE_kR/OFF was pressed • Reset cooking program and press
acciden tally. START/PAUSE.
OTHER PROBLEMS
The door and inside The heat lamps • This is normal.
of the oven feels hot produce intense heat * Use oven mitts to remove fk)od when
in a small space, when tea@.
Oven will not start A fllse in your home • Replace fllse or reset circuit breaker.
may be blown or the
circuit breaker tripped.
The door is not closed. • Open and close the door securely.
4(/
GE Service Protection Plus 'M
GE, a name recognized worldwide for qualibl and dependat)ility, offers you
Service Protection Plus'_'--comprehensive protection on all yore appliances--
No Matter What Brand!
Benefits Include:
*Backed by GE
*All brands covered
* Unlimited service calls
* All parts and labor costs included
*No out-of-pocket expenses
*No bidden deductibles
*One 800 number to call
We'll Cover Any Appliance.
Anywhere. Anytime,*
You will be completel_ satisfied with ore" service protection or }ou ma} request your m()ne_ back
on tlle remaining value of your contract. No questions asked. It's their simple.
Protect yore" reffigeratoI _,dishwashex _,washer and dryer, range, TV_ VCR and much more--azay brand!
Plus there's no extra charge for emeizency service and low monthly financing is a\_filable. Even icemaker
coverage and fl)od spoilage protection is oitbred. You call rest easy, knowing that all yore" _duable
household products are protected against expensive repairs.
Pl_|(e }o[ir COlltidell(e ill (_E }_II(| (_]H [Is ill tile [!.S. toll-free at 800.626.2224
for n/ore inl_ol'I//}/tiOll.
:i\ll I)rands co_cl:_ d, up to 20 )cars old, in the ((mdn_m d L.S.
Please place in envelope and mail to:
GeneralElectricCompany
Warranty Registration Department
P.O. Box 32150
Louisville, KY 40232-2150
4/
Consumer Product Ownership Registration
Dear Customer:
Thank you for purchasing our product and thank you for placing your confidence in us.
We are proud to haxe you as a customer!
Follow these three steps to protect your new appliance investment:
Complete and mail
your Consumer
Product Ownership
Registration today:
IIavc the peace ot
mind of knowing we
call collIact y()l/ ill
the unlikelx event of a
saft*tv modification.
After mailing the
registration below,
store this document
in a sat;:, place. It
contains intormation
vou will need should
VOll re(ltliYe service.
Our serxice mlmber is
800 (;E CARES
(800.432.2737).
Read VOllr ()wller'q
Manual careftdly.
It will help you
operate VOllV IIew
appliance properl};
Model Number Serial Number
Important: If you did not get a registration card with your
product, detach and return the form below to
ensure that your product is registered, or register
online at ge.com.
,_- Cut here
Consumer Product Ownership Registration
Model Number Serial Number
M*: his. Mrs. Miss
FirstIIL/stl
Nam< IIIIIIIII Naln< I I I I I I I I I I I I
S[r.[ I
Address IIIIIIIIIIIIIIIIIIIIIIII
,I
I
I
AI,,#I , , , , i , , I F-mailAddress*
Dam l'l _cd
i,,t,_,>l, II,a..I , I_,_,,,-I, IPllo,.,,Nulnber Ii i i i i i
GE Consumer & Industrial
Appliances
General Electric Compan U
Louisville, K¥/40225
ge.com
*Occasionally, we may allow selected companies to send you intormation.
[Check here if you do not want this inlkn-mation.
FAILURE TO COMPI ETE AN[) RETI JRN Tt tlS CARD DOES NOT DIMINISt t YOI JR
"_,IkR1L\N'IY RIGt ITS.
For more intormation about GEA's privacy and data usage polic?, go to ge.com and click on
'Privacy Policy" or call 800.626.2224
42
Consumer Services
77!07_0_'7'(I 1!7. {70 77!
With the purchase of your new Monogram appliance, receive the
assurance that if you ever need information or assistance from GE,
we'll be there. All you have to do is call toll-free?
GEAnswer
Center ®
In the USA:
800.626.2000
Whatever your question about any Monogram major appliance, GE Answer Center )
infln'nmtion service is available to help. Your call--and your question--will be answered
promptly and courteoush'. And you call call any time. GE Answer Center _ service is open
24 hours a da> 7 clays a week.
In Canada, call 888.880.3030
In-Home Repair
Service
In the USA:
800.444.1845
In Canada:
888.880..3030
AGE consumer service i)roiessional will provide expert repair service, scheduled at a time
that's convenient tor you. Many GE Consumer Service compan)_operated locations ofl_br
You service today or tomorrow, or at your convenience (7:00 a.m. to 7:00 pan. weekdays,
9:00 a.m. to 2:00 p.m. Saturdays). Our thctorwtrained technicians know your appliance
inside and otlt--so l_/ost repairs can be handled in just one visit.
For Customers
With Special
Needs'...
In theUSA:
800.626.2000
SECTION
(;E offers Braille controls for a varietx of (;E appliances and a
brochure to assist in I)lanning, a barrie>free kitchen for persons
with limited mobilitx.
Consumers xdth impaired heating or speech x_ho haxe access to a
TDD or a conventional teletype_riter ma? call 800.TDD.GEA(:
(800.833.4322) to request information or service.
Service Contracts"
In theUSA:
800.626.2224
In Canada:
888.880..3030
You can have tile secure feeling that GE (:onsumer Service will still be there after your
warrant} expires. Purchase a GE contract while yore" warrant_ is still in effect and you'll
receive a substantial discount. With a multipleuear contract, you're assured of future
service at today's prices.
Parts and
Accessories
In theUSA:
800.626.2002
In Canada:
888.880..3030
Individuals qualified to service their own appliances can have parts or accessories sent
directly to their home. Tile GE parts system provides access to over 47,000 parts...and all
GE Genuine Renewal Parts are fully warranted. VISA, MasterCard and Discover cards are
accepted.
User maintenance instructions contained in this manual cover procedures intended to be
performed by amy user. Other servicing generally should be referred to qualified service
personnel. Caution must be exercised, since improper servicing may cause unsafe operation.
43
Warranty for Custonlers in the USA
A dva _li u m Ove_
YOUR MONOGRAM ADVANTIUM OVEN WARRANTY
Staple sales slip or cancelled check here. Proof of original purchase
date is needed to obtain service under warranty.
WHAT IS
COVERED
P}vm the Date
of the O'rz_ginal
Purchase
LIMITED ONE-YF)d/WARRANTY
For one _ear fi'om tile (late of tile original purchase, GE will replace any part £/'tlu, mi()'owave oz,e_
which Iifils due t(J a (lelect in matedals or _Jrkmanship. During this limited one-year warrant}; C,E will also
provide, fi'ee of charge, all labor and relamd set\ice to replace the delective part.
FIVE-YF)tR LIMITED WARRANTY
For five years fi'om the (late of the original purchase, C,E will replace the mag'm_h'o_lub4 if the
maglletron tribe Iifils due to a delect in materials or _Jrkmanship. Dining this five-year limited warrant);
)_>uwill be responsible fiJr any labor or in-home service costs.
• QIB ID ID IP IP O O O OOOOOOOQIB a I O O O O O OOOOOOOQO IIO O O O O OOOOO_O)O)) O O O O O OOOOO_O)O)))
All warrant\ service will be provided by our Factory Service Centers or bv our authorized
Customer Care servicers during normal working hours.
Should your appliance need service, during warranty period or beyond, in the U.S.A call
800.444.1845.
Please hme seJial and model numbers mailable when calling fiJr set\ice.
WHAT IS NOT
COVERED
•Service trips to your home to teach you how
to use the product.
• Improper installation, delivery or maintenance.
• Product not accessible to provide required service.
• Failure of the product or damage to the product
if it is abused, misused (for example, cavity arcing
from wire rack or metal/foil), or used for other
than the intended purpose or used commercially.
• Replacement of house fuses or resetting of
circuit breakers.
•Damage to the product caused by accident,
fire, floods or acts of God.
•Incidental or consequential damage caused
by possible defects with this appliance.
• Damage caused after delivery.
EXCLUSION OFIMPLIED WARRANTIES--Your sole and exclusive remedy is product
repair as provided in this Limited Warranty. Any implied warranties, including the
implied warranties ofmerchantability or fitness for a particular purpose, are limited
to one year or the shortest period allowed by law.
This warranty is extended t(J the original purchaser and an) succeeding owner for products
purchased flJr home use within the USA. If the product is located in an area where service bv a
C,E Authorized Servicer is not a\ailable, you may be responsible Ior a trip charge or you may be
reqtfired to bring the product t(J an Authorized C,E Service I,ocation fiJr service. In Alaska, the
warranty excludes the service calls to your home.
Some states do not allow the exclusion or limitation of incidental or consequential damages, so the
aboxe limitation or exclusion ma) not apply to you. This warranty gixes you specific legal rights, and
you may also have other rights which vary lrom state to state. To know what your legal rights are in
your state, consult your local or state consumer allhirs office or \_Jur state's Attorney General.
Warrantor: General Electric Company, Louisville, KY 40225
Printed in Korea
GE Consumer & Industrial
Applionces
General Electric Compon U
Louisville, KY 40225
ge.com

