GEAppliances
©
_J
JES1351
Part No. 164D3370P084 Pub,No,49.40085 2..99CG 3828WSA1132
IMPORTANTSAFETYINFORMATION.
READALLINSTRUCTIONSBEFOREUSING.
2
WARNING'!
Foryoursafety, theinformation in this manual must be
followed tominimize the risk offire or explosion, electric
shock, or toprevent property damage, personal injury, or
loss of life.
PRECAUTIONSTOAVOID
POSSIBLEEXPOSURETO
EXCESSIVEMICROWAVEENERGY
m
DoNotAttempt to operate m
this oven _4Ih the door open
since open-door operation
can resull in hm_nthl
exposure tO microwave
ene_g T. II is important nol
to defeat or tamper _dth the
s'a[>lyinlerlocks.
OoNot PlaceaW object
between the oven flont fa(e
and the door or allow soil
or cleaner residue to m
accumulate on sealing
surf_tces.
OoNot Operatethe oven if it
is damaged. It isparticularly
important that the oven
door close properly and that
there is no damage to the:
[_] door (ben0,
[_ hinges and latches
(broken or loosened),
[_] door sealsand sealing
sm_tces.
TheOvenShouldNotbe
a_!justedor repaired by
anyone except properly
qualified se_qce personnel.
SAFETYPRECAUTIONS
This microwave oven is not approved or tested for
marine use.
m Read and fbllow the specific m
precautions in dm Precautions
toAvoidPossibleExposureto
ExcessiveMicrowave Energy
se(tion above.
m
This appliance must be
grounded. Connecl only
to a properly grounded
outlet. See lhe &ounding
Instructions section on page 8.
m
Install or locale this appliance
only in acc(:)rdance _4th the
provided Installation
Inst_uctions.
f_ certain to place the flont
sud_tce of the door fl_ree
inches or more back flom
fi_e countenop edge to avoid
accidenlal tipping ofthe
appliance in normal usage.
Use this appliance only for its intended purpose as
described in this Owner's Manual
• Do not mount lifts appliance •
over a sink.
• Do not mounl lhe microwave
oven over or near any portion
of a heating or cooking
appliance.
• Do not store anything directly
on lop of the microwave oven
surface when dm microwave
oven is in operation.
• Do not operate lllis appliance
ifit has admnaged power
coM or plug, ifit is not
_xnking properly, or ifit has
been damaged or dropped.
• Do not cover or block any
openings on llle appliance.
• Use this appliance only tor ils
intended use as described in
this manual. Do not use
con-osive chemicals or vapors
in lhis appliance. This
microwave oven is specitically
designed to Ileal, &)- or cook
toed, and isnol inmnded tor
laboralol Tor indusuial use. •
• Do not store this appliance
ouldoors. Do not use this
product near waler-tbr
example, in a wel
basemem, near a sx_mming
pool or near a sink.
• Keep power cord mvay ff()m
healed surtaces.
• Do not innnerse power cord
or plug in wamr.
• Do not let power coM hang
over edge of lal)le or counler.
To reduce the risk of fire in
the oven cavily:
-- Do not overtook tood.
Careflflly allend appliance
ifpaper, plastic or olher
combustible materials are
placed inside lhe oven while
cooking.
-- Remove _dre t_vist-ties and
metal handles from paper
or plastic containers betore
placing them in file oven.
-- Do not use tile oven tor
slorage pm])oses. Do not
leave paper producls,
cooking ulensils or toed in
the oven when not in use.
If mamrials inside llle oven
should ignim, keep lhe oven
door closed, nm_ lhe oven off
and disconnect the power
cord, or shuI offpower at file
tilse or circuit breaker panel.
If lhe door isopened, the fire
may spread.
See door surface cleaning
inslructions in tile Careand
cleaningof the microwave
ovensection of dtis manual.
• This appliance should be
serviced only by qualified
service personnel. Conlact
nearesl aulhorized service
thcili W tor examination,
repair or adjusmmnt.
• As _dth any appliance, close
supervision is necessary
when used by children.
3
IMPORTANTSAFETYINFORMATION.
READALLINSTRUCTIONSBEFOREUSING.
WARNING!
ARCING
If you see arcing, press the CLEAR/OFFpad and correct
the problem.
Arcing is the microwave term
for sparks in tim oven. Arcing
is caused by:
• Metal or foil louching lhe
side of lhe oven.
• Foil not molded to food
(upturned edges acl like
anlennas).
• Melal, such as lxdsl-ties,
poultD7 pins, orgold-rimmed
dishes, in the microwave.
• Recycled paper lowels
conlaining small melal pieces
being used in lhe microwave.
FOODS
Do nol pop popcorn in )xmr
microwave oven unless in a
special microwave popcorn
accesso_Tor unless }l)ti use
popcorn labeled for use in
microwave ovens.
• _mm producls such as
whole eggs and sealed
conlainers_fbr example,
closedjars-_dll explode and
should nol be heamd in lhis
microwm-e oven. Such use of
lhe microwm-e oven could
resuh in inju U.
• Do not boil eggs in a
microwm-e oven. lhessure _dll
build tip inside egg yolk and
_dll cruise il 1obursl, possibly
resulting in inju U.
• ()perafing lhe microwave
xdth no tood inside ff)rmore
lhan a minule or l_s) may
cruise damage u) lhe oven
and could stmt a fire. It
increases lhe heal around lhe
magnelron and can shorlen
tim lite of the oven.
Foods _dth unbroken ()tiler
"skin" such as potatoes, hot
dogs, sausages, lomau)es,
apples, chicken livers and
olher giblels, and egg >4ks
should be pierced lo allow
sleam 1oescape during
cooking.
4
• SUPERHEATEDWATER
Microwavedwater and other
liquidsdonotalwaysbubble
when theyreachthe boiling
point.Theycanactually get
superheatedandnotbubble
atall.
Superheatedliquidwill bubble
upout ofthecupwhen itis
movedorwhen somethinglike
a spoonorteabagisput intoit.
Topreventthis fromhappening
andcausinginjury, donotheat
anyliquidfor morethan2
minutespercup.Afterheating,
let thecupstandin the
microwave for30 seconds
beforemovingit orputting
anything intoit.
• Avoid healing baby food in
glassjars, even xdfl_tim lid
off. Make sure allinfant food
is thoroughly cooked. Stir
tood to dislribule the heat
evenly. Be careflfl lo prevent
scalding when wanning
ftmnula. The container mW
teel cooler than the Rmnula
really is.Always lest lhe
ft)nnula beft)re teeding
the bal)y.
• Don't defiost ftozen
beverages in nammmecked
bottles (especially
carbonated beverages). Even
itthe conlainer isopened,
pressure can build up. This
can cause the container to
burst, possibly resulting in
injm T.
Spontaneous boiling-I Jnder
certain special circumstances,
liquids mW start to boil
during or shortly after
removal ftom the microwave
oven. To prevent burns ftom
splashing liquid, we
recommend the fblloxdng:
beRne rem(Mng the
container ftom the oven,
allow tim container m stand
• .o
in the oven fo_o0 to 40
seconds after tim oven has
shut off. Do not: boil liquids in
nanox_mecked containers
such assoft drink bottles,
_dne flasks and especially
nanxmmecked coffee cups.
Even if the container is
opened, excessive slealn can
build up and cause it to burst
or overflow.
Hot foods and smmn can
cause bums. Becareful when
opening any containers of
hot ft)od, including popcorn
bags, cooking pouches and
boxes. To prevent possible
in.juU, direct steam mvay
ftom hands and face.
• Do not overcook polaloes.
They could dehydram and
caleb fire, causing damage
to your oven.
Cook meat and pouhJ T
thoroughly-meal lo at
least an INTERNAL
temperature of 160°F.
and poulu T to at least an
INTERNAL temperature
of 180°F. Cooking to these
temperatures usually protects
against toodbome illness.
5
IMPORTANTSAFETYINFORMATION.
READALLINSTRUCTIONSBEFOREUSING.
WARNING!
MICROWAVE-SAFECOOKWARE
Make sure all cookware used in
your microwave oven is suilable
for microwming. Mosl glass
casseroles, cooking dishes,
measuring cups, custard cups,
polm U or china dinnerware
which does nol have melallic
lfim or glaze _dfl_a melallic
sheen can be used. Some
cookware is labeled "suilal)le
for microwaving."
• Ifyou are nol sure ifa dish is
microwm-e-safe, use daislesl:
Place in lhe oven bolh tim
dish you are lesfing and a
glass measuring cup filled
xdfla 1cup ofwaler-se! lhe
measuring cup eilher in or
nexl 1othe dish. Microwave
1minule al high. If rimdish
heals, il should nol be used
fi)r microwm-ing.
If lhe dish remains cool and
onlylhe wamr in lhe cup
heals, lhen lhe dish is
microwm-e-safe.
• Ifyou use a meal
lhennomemr while cooking,
make sure il iss_e fbr use
in microwm-e ovens.
• Do not use recycled paper
producls. Recycled paper
lowels, napkins and wmxed
paper can conlain melal
flecks which may cause ardng
or ignile. Paper producls
conlaining nylon or nylon
filmnenls should be avoided,
as lhey may also ignile.
• Some Sl}TOfimmlrays (like
lhose flint meal ispackaged
on) have alhin slfip ofmelal
embedded in the bollom.
_&qmnmicrowaved, the melal
can bum dm floor ofdm oven
or ig_ailea paper towel.
• Do not use the microwm-e lo
dO-ne_,s_spapers.
• Nol allplasticx_Tapis suilable
fi)rusein microwave ovens.
Check lhepackage for
proper use.
• Paper lowels, waxed paper
and plastic x_Tapcan be used
lo cover dishes in order u)
relain moisture and prevenl
spallering. Be sure 1ovent
plasuc x_TapSOsleam can
escape.
• Cookware may become hot
because of heat transfimed
fiom lhe healed fi)od. Pot
holders mWbe needed 1o
handle lhe cookwme.
6
• "Boilable" cooking pouches
and tightly closed plastic bags
should be slit, pierced or
venmd as direcmd by
pmkage. Ifttmy are not,
plastic could burst during or
immediately after cooking,
possibly resulting in injm T.
Also, plastic storage
containers should be at least
partially uncovered because
they ftmn a tight seal. When
cooking xJlh containers
tightly covered _dth plastic
wrap, remove covering
carefiflly and direct smam
awW flom bands and face.
• Use toil only as directed in
this guide. TV dinners may
be microwaved in toil trays
less than 3/4" high',,remove
tim top fttil cover and remm
the uW u) tim box. When
using R)il in tim microwave
oven, keep the Rillat least
1inch awW ftom the sides
oftim oven.
l'lastic cookware--Plastic
cookware designed tor
microwm-e cooking is veU
usefifl, but should be used
carefiflly. Even microwm-e-
s_e plastic mWnot be as
tolerant of overcooking
conditions as are glass or
cermnic mamrials and mW
soften or chin if subjected
to short periods of
overcooking. In longer
exposures to overcooking,
the tood and cookware
could ignite.
Follow these guidefines:
%
1Jsemicrowave-sate
plastics only and use
lhem in stricl compliance
_dth tim cookware
manuimmrer's
recommendations.
Do not microwave empty
containers.
Do not permit children
to use plastic cookware
withoul complete
supel_ision.
IMPORTANTSAFETYINFORMATION.
READALLINSTRUCTIONSBEFOREUSING.
WARNING!
Improper use of thegrounding plug can result in a risk of
electric shock.
GROUNDINGINSTRUCTIONS
This appliance must be grounded. In the event of an electrical shorl
circuit, grounding reduces the risk of elecuJc shock by providing an
escape wire tor lhe elecuJc cmTenl.
This appliance is equipped _dth a power cord having a grounding
u_re with a grounding plug. The plug must be plugged inlo an
oullel lhal is properly inslalled and grounded.
Consuh a qualified elecuician or service lechnician iflhe grounding
inslruclions are not complelelv understood or if
doub! exists as 1owhelher the appliance is properly grounded.
If the oullel is a standard 2-prong wall outlet, it is your personal
responsibility and obligation to have it replaced u_th a properly
grounded 3-prong wall oullel.
Donotunder anycircumslances cul or remove lhe third (ground)
prong flom the power cord.
We do not recommend using an exmnsion cord xdth this appliance.
If the power cord is1oo shorl, have a qualified elecuician or service
lechnician inslall an oullet near lhe appliance. (See WARNING--
EXTENSIONCORDSsection.)
For best operation, plug this appliance into its oxm elecuical outlet
to prevenl flickering of lighls, 1)lo_dngoffllse or uipping of circuil
1)reaker.
8
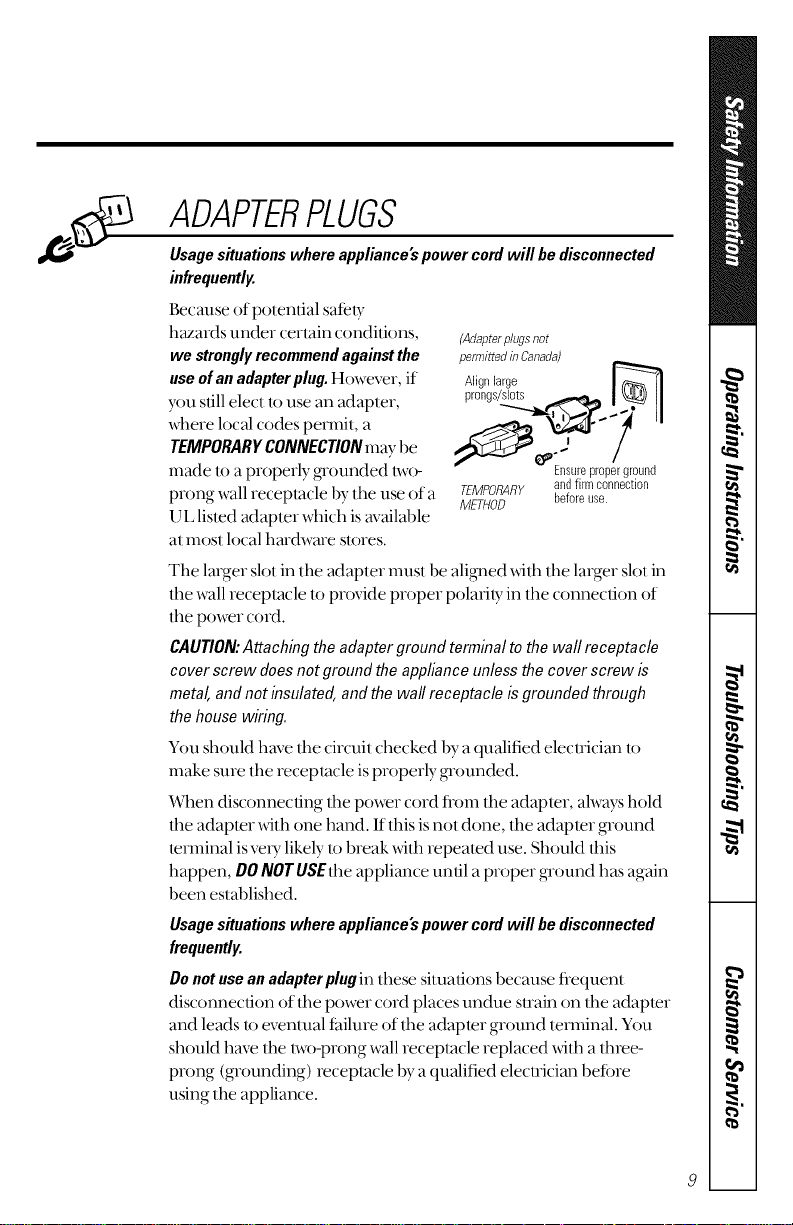
ADAPTERPLUGS
Usage situations where appliance's power cord will be disconnected
infrequently.
Because ofpolential safely
h_ards under certain conditions,
westronglyrecommendagainstthe
useofan adapterplug.Ho-_ver, if
youstill elect lo use an adapter,
where local codes permit, a
TEMPORARYCONNECTIONmay be
made loa properly gTounded lwo-
prong wall receplacle bythe use of a
I) Llisted adapter which is availal)le
atmost local hardware slores.
(Adapterplugsnot
perrni#ed in Canada)
Ensure proper ground
TEMPORARY andfirmconnection
METHOD beforeuse.
The larger slot in the adapter must be alig_md xdfl_the larger slot in
the wall receptacle to provide proper polarity in the connection of
the power cord.
CAUTION:Attaching the adapter groundtemfinal tothe wallreceptacle
coverscrew doesnot groundthe applianceunlessthe coverscrew is
metal,and notinsulated,andthe wallreceptacleisgroundedthrough
the housewiring.
You should have tim circuit checked 1)ya qualified electrician to
make sure the receptacle is properly gTounded.
When disconnecting the power cord flom lhe adaptor, alwws hold
the adaptor xdth one hand. Ifthis is not done, tim adapter ground
terminal is veU likely to break xdlh repeamd use. Should lhis
happen, DO NOT USEthe appliance until a proper gTound has again
been established.
Usagesituations whereappliance'spowercordwill be disconnected
frequently.
Donotusean adapterplugin these situations because flequent
disconnection of lhe power cord places undue suain on the adaptor
and leads U)eventual tailure of tim adaptor ground mnninal. You
should have lhe t_s_-prong wall receptacle replaced _dlh a lhree-
prong (grounding) receptacle bya qualified electrician betore
using the appliance.
9
IMPORTANTSAFETYINFORMATION.
READALLINSTRUCTIONSBEFOREUSING.
WARNING!
EXTENSIONCORDS
A shorl po_r supply cord isprovided 1oreduce d_e risks resulting
flom becoming entangled in or tripping over a longer cord.
Exlension cordsmay be used ifyou are careflfl in using lheln.
If an exlension cord is used-
The mmked eleclfical rating of the exlension cord should be
al leasl as steal as lhe eleclrical rating of the appliance;
_] The extension cord musl be a gToundinFlype 3-_drecord and
it illusl be plugged inlo a 3-slol oullel;
_] The extension cord should be ananged so lhat it _dll not
drape over the counter top or tabletop where it can be pulled
on bychildren or tripped over unintentionally.
If you use an extension cord, the interior ligh! mW flicker and the
blower sound mWvaU when the microwave oven is on. Cooking
times mW be longer, 1oo.
10
fleadandfollow thisSafety
Informationcarefully.
SAVETHESEINSTRUCTIONS
11
Congratulations!
YouAreNow PartoftheGEFamily.
Welcome to the GE family. We're proud of our quality products and we are commitled
to providing dependable service. You'll see it in this easy-to-use Owner's Manual and
you'll hear it in tlae fliendly voices of our customeI seTvice depanmenl.
Best of all,you'll experience flmse values each dine you use your microwm_e oven.
That's important, because your new microwave oven will be part of your f_tmily fbr
mmayyears. And we hope you will be pan of ores fbr a long time tocome.
Wethankyou fbr buyingGE.We appreciate your purchase, and hope you will
condnue torelyon uswhenever youneed qualib_appliances fbr your home.
,,,_-
Important!
Fill out and retmn the (]onsumer Produ(t Registration Card
lhal is packed wilh lhis product.
WritetheModel&SerialNumbersHere.
#
#
Youcan find themona labelinside theoven.
Staple sales slip or cancelled check here.
Proofof the original purchase date is needed toobtain service
under thewarran_
72
GE& You,
A ServicePartnership.
Ask anyGEappliance owner and they will
tellyou we stand behind our products with
unmatched quality service. However, did
you know that most questions result from
simple problems that you can easily fix
yourself in just a few minutes? This
Owner's Manual can tell youhow
(_ ReadthisManual
Inside you will find many helpflll
hintson how touse and mainlain
)x)urmicrowaveoven properly.
Just a lillle preventive careon Dmr
part can saveDma great deal of
time and moneyover tile liIe of
yOtlymicrowaveoven.
ReviewtheSectionon
TroubleshootingTips
You'll find many answers 1/)
common problems here. If
)x)u review our charl of
Troubleshooting Tips firsl,
)x)tlIn W nol need 1ocall tbr
sel_ice alall.
If YouNeedService
If you do need sewice, you can
relax knoxdng help is only a phone
call away.A lisl of loll-flee
cusR)mer service numbers is
included in tile back section.
()r you can always call the
GE Answer Cenler ®at
800.626.2000, 24 hours a day,
7 days a week.
Safety Information
PrecautionstoAvoid
PossibleExposureto
ExcessiveMicrowaveEnergy ...2
SafetyPrecautions......... 2,3
Arcing ..................... 4
Foods.................... 4,5
Microwave-SafeCookvvare..6, 7
GroundingInstructions ........ 8
AdapterPlugs ............... 9
ExtensionCords ............ 10
OperatingInstructions
Featuresof Your
MicrowaveOven......... 14,15
ChangingPowerLevel........ 16
TimeFeatures........... 17-22
AutoFeature ............... 23
SensorFeatures......... 24-27
OtherFeatures .......... 28-30
Mbrowave Terms........... 31
Careand Cleaning........ 32,33
Troubleshootingtips
BeforeYou
CarlForService.......... 34,35
ThingsThatAre Normal With
YourMicrowave Oven ....... 36
CustomerService
Warranty.................. 39
ServiceTelephone
Numbers........... BackCover
13
g
g

P.
|
|
€=
Aboutthe features of your microwave oven.
Throughout this manual, features and appearance may vary from
your model
1100Watts
I
i
@ O
I
m m
E3
/--) 3{£7_
_c _0
_-Jc
Qc 2 o
OE 3
3
0 0
Featuresof theOven
0
@
@
O
0
0
DoorLatches.
Windowwith Metal Shield.Screen allows cooking to be
viewed while keeping microwaves confined in dm oven.
ConvenienceGuide.
Touch Control Panel and Display.
DoorLatch Release. Press latch rdease to open door.
Removable Turntable.Turntable and support must be
in place when using timoven. The turntable may be
removed tor cleaning.
NOTE."Ratingplate,oven vent(s)andovenlightarelocatedonthe inside
wallsofthemicrowaveoven.
14
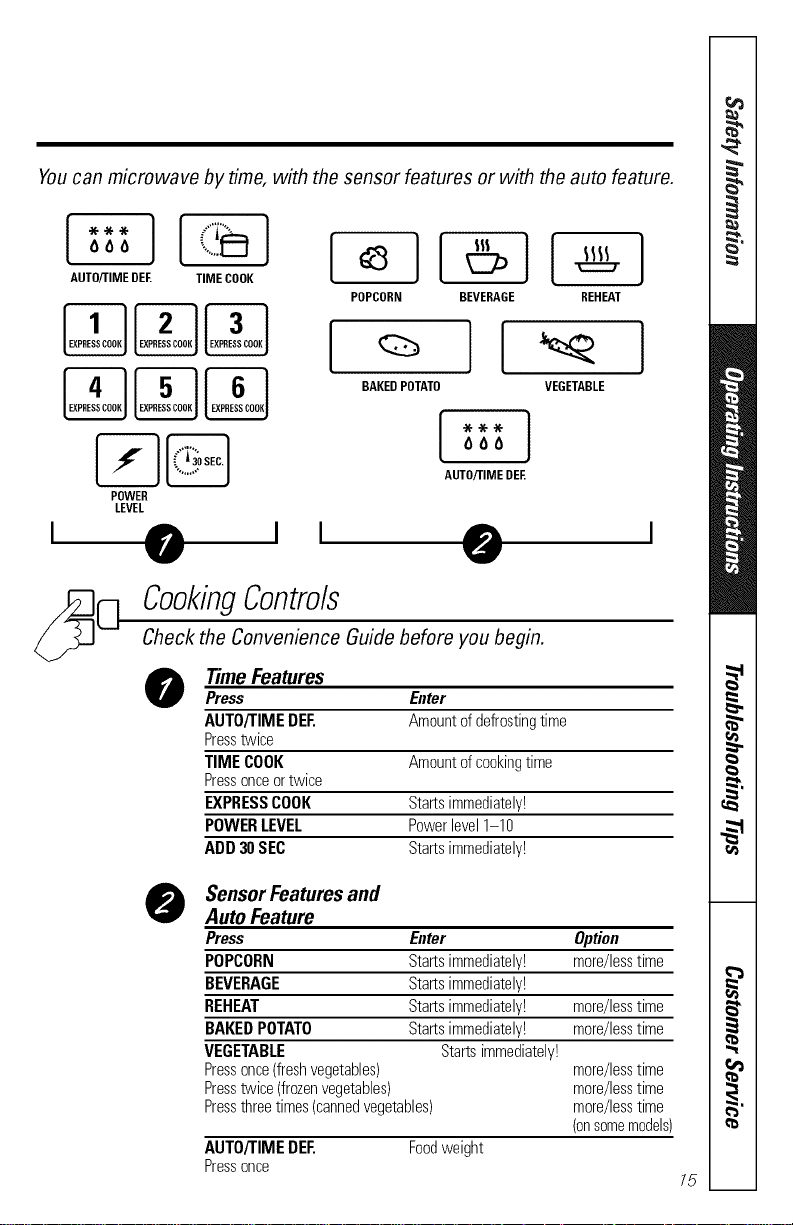
Youcanmicrowave bytime,with thesensor features or with theauto feature.
AUTO/TIME DEE TIME COOK
POPCORN BEVERAGE REHEAT
I II
* * * ]
AUTO/TIME DEE
POWER
LEVEL
€ i i 0
VEGETABLE
I
I
CookingControls
Checkthe Convenience Guide before youbegin.
Time Features
Press Enter
AUTO/TIMEDEF. Amountofdefrostingtime
Presstwice
TIMECOOK Amountofcookingtime
Pressonceortwice
EXPRESSCOOK Startsimmediately!
POWERLEVEL Powerlevel1-10
ADD30SEC Startsimmediately!
SensorFeaturesand
Auto Feature
Press Enter Option
POPCORN Startsimmediately! more/lesstime
BEVERAGE Startsimmediately!
REHEAT Startsimmediately! more/lesstime
BAKEDPOTATO Startsimmediately! more/lesstime
VEGETABLE Startsimmediately!
Pressonce(freshvegetables) more/lesstime
Presstwice(frozenvegetables) more/lesstime
Pressthreetimes(cannedvegetables) more/lesstime
(onsomemodels)
AUTO/TIMEDEE Foodweight
Pressonce
i
!
15
_d
|
|
_d
',a
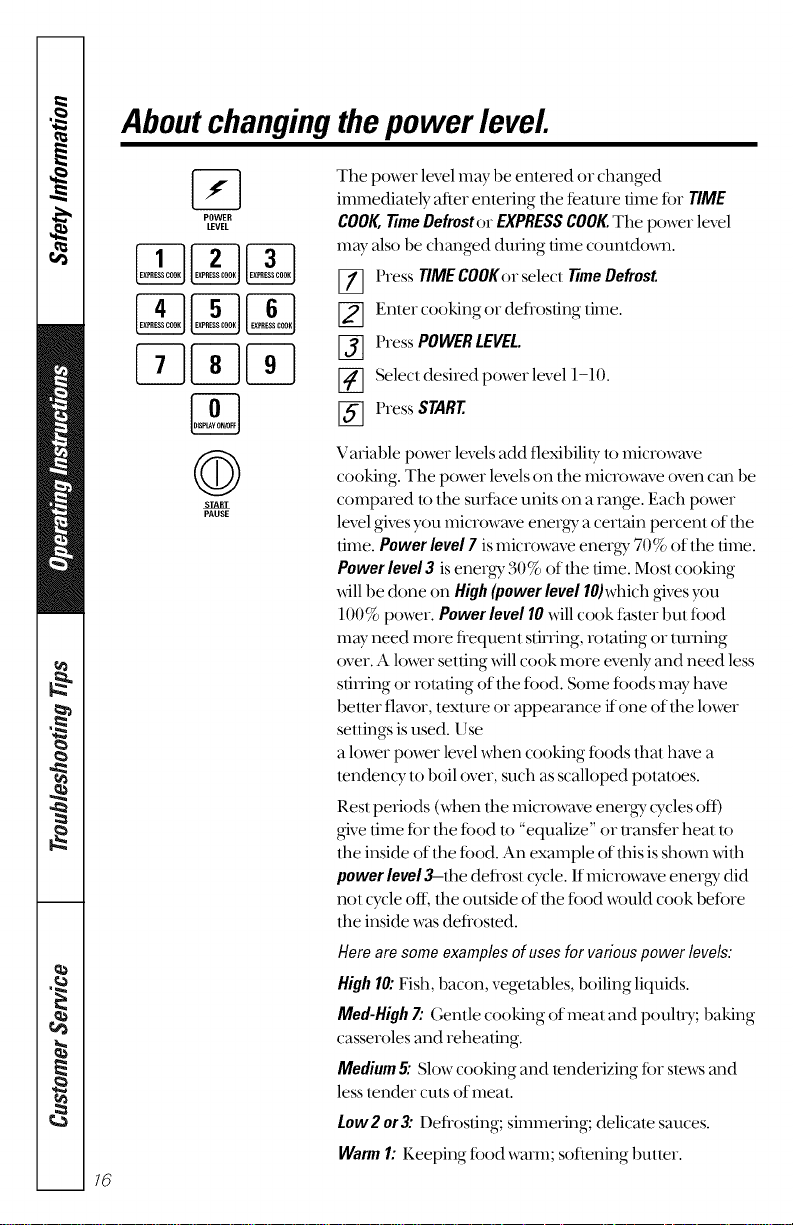
Aboutchanging the power level
16
POWER
LEVEL
©
START
PAUSE
The power level may be enlered or changed
immediately after entering tile fealure time tbr TIME
COOK,7TmeDefrostor EXPRESSCOOK.The power level
may also be changed during time count&m_.
Press TIME COOKor select 77meDefrost.
Enter cooking or deflosdng time.
Press POWER LEVEL
Select desired power level 1-lO.
Press START
Variable power levels add flexibility to microwave
cooking. The power levels on tim microwave oven can be
compared to tim surthce unils on a range. Each po_r
level gives you microwave energ Ta certain percent of lbe
time. Powerlevel7 ismicrowave energy 70% of the time.
Powerlevel3 is energ T30% of lbe time. Most cooking
_dll be done on High(powerlevellO)which givesyou
]00% power. Powerlevel10will cook ias/er but ibod
may need more flequent stining, relating or mining
over. A lower setting xdllcook more evenly and need less
sdning or rotating of tim tbod. Some tbods mW have
better flavor, texture or appearance ifone of tim lower
setlings is used. Use
a lower po_r level when cooking R)ods that have a
tendency to boil over, such asscalloped potatoes.
Rest periods (when tim microwave energ Tcycles off)
give lime tor tlae t()od lo "equal_e" or transter heat to
the inside of lbe toed. An example of Ibis is shoxm xdfla
power level 3-the deflost cycle. If microwave energy did
not cycle off; lbe outside of the toed xxxmldcook betore
the inside was deflosted.
Herearesomeexamplesof usesforvariouspowerlevels:
High10:Fish, bacon, vegelables, boiling liquids.
Med-High 7."(,entle cooking of meat and pouluT; baking
casseroles and reheaung.
Medium 5: Slow cooking and tenderizing tor ste_.vsand
less tender cuts of meat.
Low2or3: Defl-osdng;simmering; delicate sauces.
Warm1:Keeping toed warm; soflening butter.
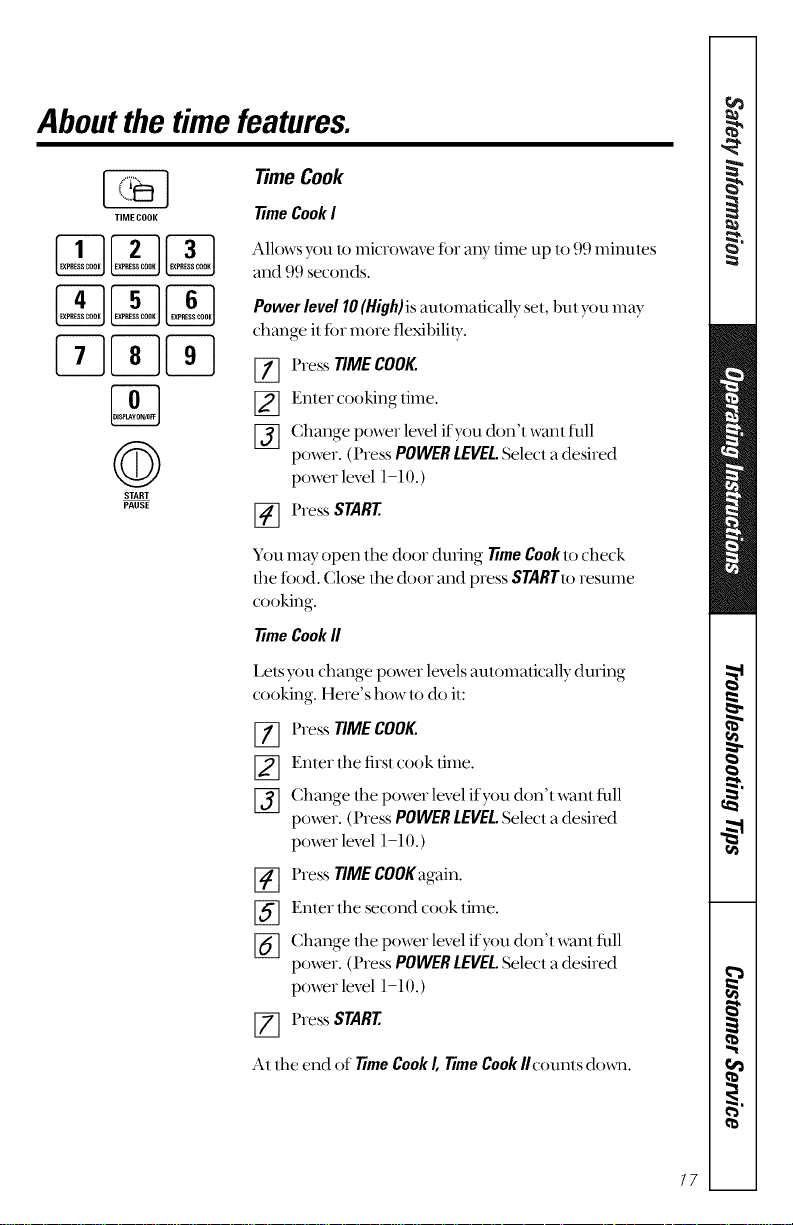
Aboutthe time features.
TIME COOK
©
START
PAUSE
Time Cook
77meCookI
Allows you lo microwave tbr any time up It) 99minules
and 99 seconds.
Powerlevel10(High)isautomatically set, bul you may
change it tor more flexibility.
[_ Press TIMECOOK..
_2] Enter cooking time.
[_] Change power level ifyou don't want thll
power. (Press POWERLEVEL.Select a desired
power level 1-10.)
[_ Press START.
You may open the door during 77meCooktocheck
the tood. Close the door and press STARTtoresume
cooking.
time Cook fl
Lets you change power levelsautomatically during
cooking. Here's how todo it:
%
%
%
%
Press TIMECOOK.
Enter the first cook time.
Change the power level ifyou don't want flfll
power. (Press POWERLEVEL.Select a desired
power level 1-10.)
Press TIMECOOKagain.
Enter tim second cook time.
Change the power level ifyou don't want fllll
power. (Press POWERLEVEL.Select a desired
power level 1-10.)
[77 Press START
At the end of ]TmeCook I,]TmeCook//counts doom.
i
I
"z
17
_d
ti
|
|
_d
',a
Aboutthe time features.
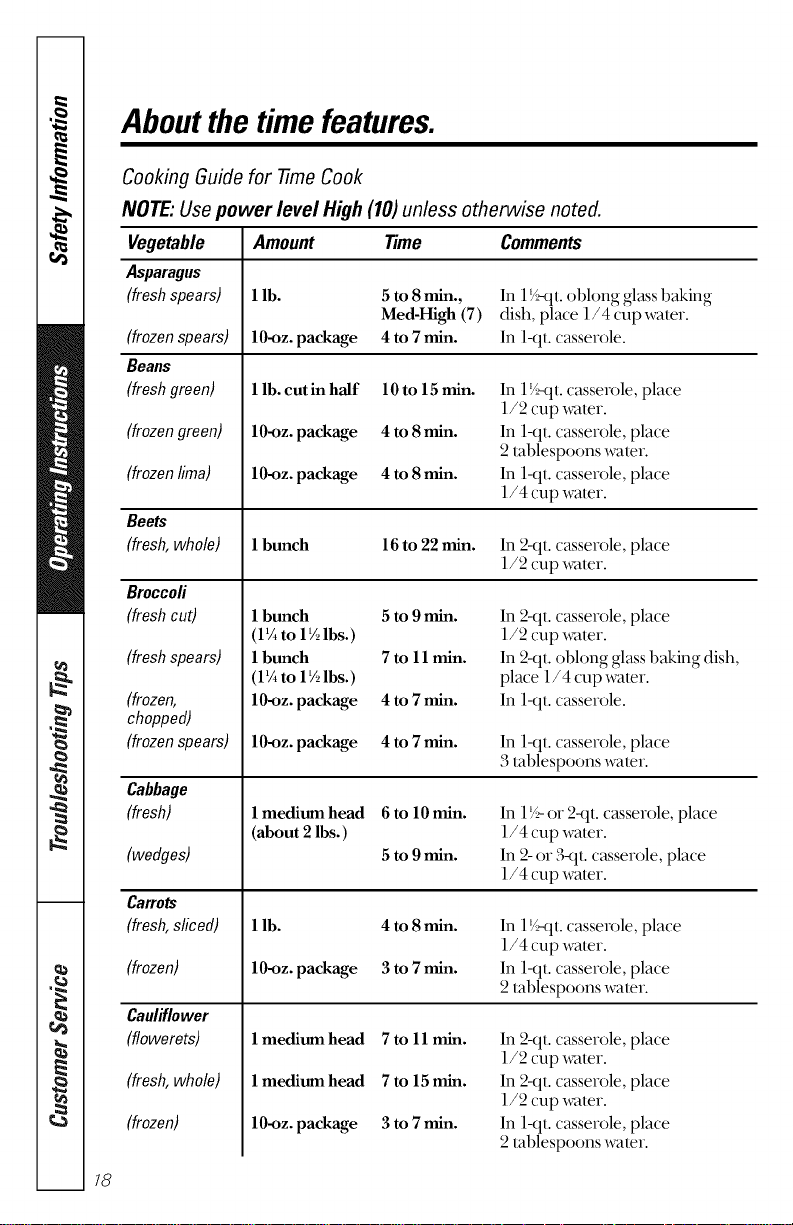
Cooking Guide for -time Cook
NOTE:Usepower level High (10)unless otherwise noted.
Amount Time Comments
I lb. 5 to 8 rain., Ill lg,__lt,ol)hmg glass baking
Me&High (7) dish, place l/4 (up water.
10-oz. package 4 to 7 rain. In 1-qt. casserole.
Vegetable
Asparagus
(freshspears)
(frozenspears)
Beaus
(freshgreen)
(frozengreen)
(frozenlima)
Beets
(fresh,whole)
Broccofi
(freshcut)
(freshspears)
(frozen,
chopped)
(frozenspears)
Cabbage
(fresh)
(wedges)
Carrots
(fresh,sliced)
(frozen)
Cauliflower
(flowerets)
(fresh,whole)
(frozen)
1 lb. cutin half 10 to 15 min.
10-oz. package 4 to 8 min.
10-oz. package 4 to 8 min.
In 17__tt.casserole, place
1/2 cup wa/er.
In 1-qt.casserole, place
2 lablespoons wa/er.
In 1-qt.casserole, place
1/4 cup water.
1 bunch
16to 22 rain. In 2-qt. casserole, place
1/2 cup water.
1 bunch
(UA to 1_ lbs.)
1 bunch
(UA to 17_lbs.)
10-oz. package
10-oz. package
5to9min.
7toll_n.
4to7_n.
4to7_n.
In 2-(tl.casserole, place
1/2 cup wa/er.
In 2-qt. oblong glass baking dish,
place 1/4 cup water.
In 1-qt.casserole.
In 1-qt.casserole, place
3lablespoons waler.
1 medium head
(about 2 lbs.)
6 to 10 min.
5 to 9 min.
In 17_,-or 241t.casserole, place
1/4 cup water.
In 2-or 3-qt. casserole, place
1/4 cup water.
1 lb.
10-oz. package
4 to 8 min.
3 to 7 min.
In 1V_lt. casserole, place
1/4 cup water.
In 1-qt.casserole, place
2 lablespoons waler.
1 medium head
1 medium head
10-oz. package
7 to 11 min.
7to 15 min.
3 to 7 min.
In 2-(tl.casserole, place
1/2 cup wamr.
In 2-(tl.casserole, place
1/2 cup wa/er.
In 1-qt.casserole, place
2 lablespoons waler.
18
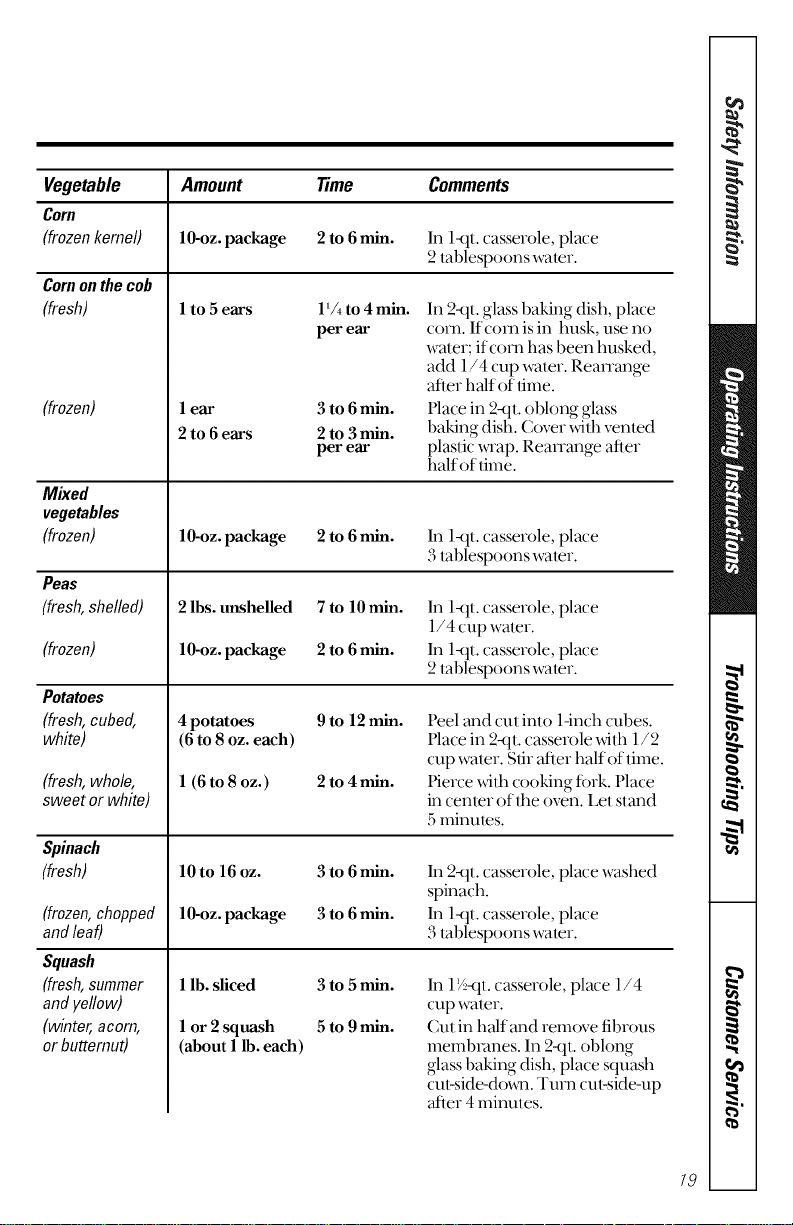
Vegetable Amount Time Comments
Corn
(frozenkernel) lO-oz, package 2to 6rain. In l-qt. casserole, place
2tablespoons water.
Cornon the cob
(fresh)
(frozen)
Mixed
vegetables
(frozen)
_eas
(fresh,shelled)
(frozen)
Potatoes
(fresh,cubed,
white)
(fresh,whole,
sweetor white)
Spinach
(fresh)
(frozen,chopped
andleaf)
Squash
(fresh,summer
andyellow)
(winter,acorn,
or butternut)
1 to 5 ears 1% to 4 min.
per ear
1 ear 3 to 6 min.
2to 6ears 2 to 3min.
per ear
In 2-qt. glass baking dish, place
com. Ifcorn is in lmsk, use no
wamr; ifcorn has been lmsked,
add 1/4 cup wamr. Reanange
after half of time.
Place in 2-qt. oblong glass
baking dish. Cover xdlh venmd
plastic xwap. Reanange after
balfofume.
1O-oz. package 2 to 6min. In 1-qt.casserole, place
3tablespoons water.
2 lbs. unshelled 7 to 10 min.
1O-oz. package 2 to 6min.
In 1-qt. casserole, place
1/4 cup water.
In 1-qt. casserole, place
2tablespoons water.
4 potatoes 9 to 12 min.
(6 to 8 oz. each)
1 (6 to 8 oz.) 2 to 4min.
Peel and cut into 1-inch cubes.
Hace in 2-qt. casserole xdlh 1/2
cup water. Stir after half of lime.
l'ierce xdlb cooking tork. Place
in cenler of the oven. Let stand
5minutes.
lOto 16 oz. 3to 6rain.
1O-oz. package 3 to 6min.
In 2-qt. casserole, place washed
spinach.
In 1-qt. casserole, place
3tal)lespoons water.
1 lb. sliced 3 to 5 min.
1 or 2 squash 5 to 9 min.
(about 1lb. each)
In 1V-,-qt.casserole, place 1/4
cup water.
Cut in half and remove fibrous
membranes. In 2-qt. oblong
glass baking dish, place squash
cul-side-doxm. Turn cut,side-up
atier 4minutes.
i
I
10
_d
€1
|
|
_d
',a
Aboutthe time features.
2O
AUTO/TIMEDEF.
©
START
PAUSE
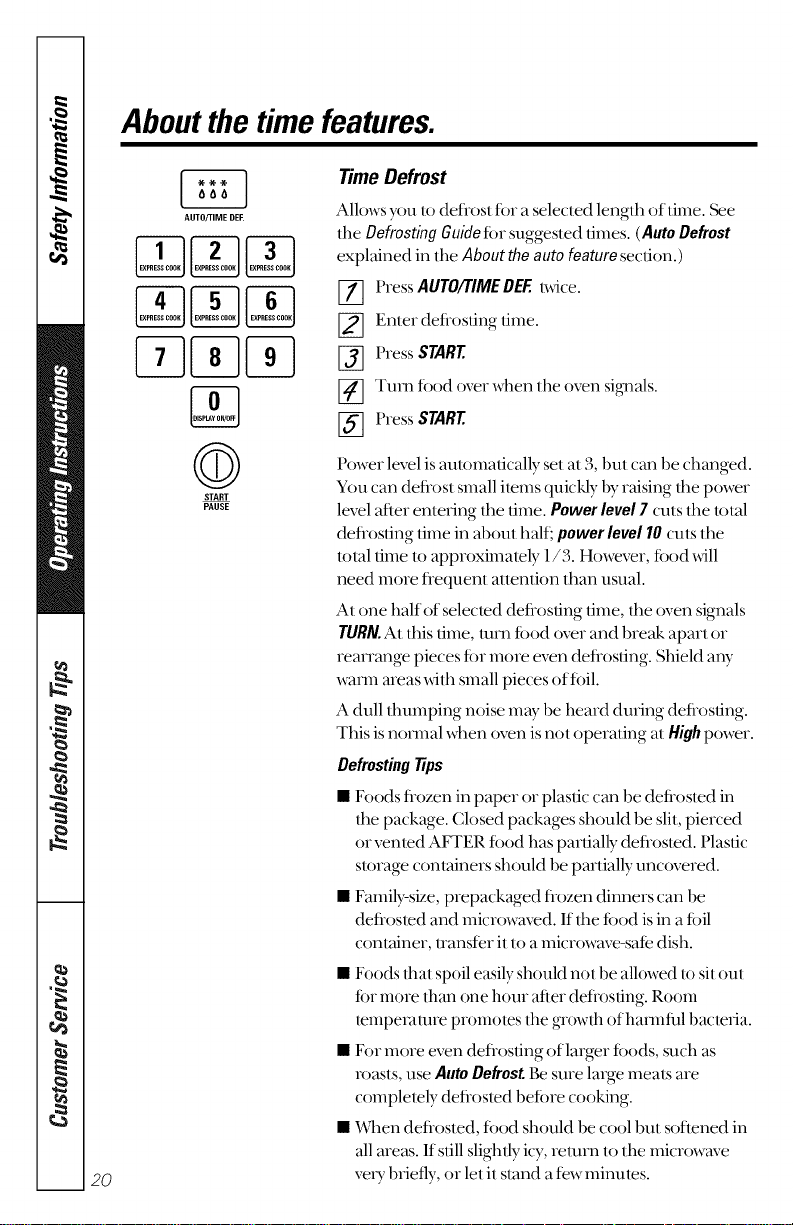
Time Defrost
Allows )_m lo deflost for a selecled lenglh of time. _e
lhe Defrosting Guide for suggesled times. (Auto Defrost
explained in the About the auto feature section.)
[77 Press AUTORIMEDEF,l_dce.
Enler defiosfing time.
[_ Press START
[_] Turn food over when tl_eoven sig_als.
1_ Press START
Power level is aulomalically sel at 3,bu! can be changed.
You can deflost small items quicldy 1)yraising fleepower
level after enlering tim lline. Powerlevel7culs fl)e lolal
deflosling time in about half; power level 10culs the
total lime 1oapproximately 1/3. However, food xdll
need more flequenl anenfion llaan usual.
AI one half of selected deflosfing time, lhe oven signals
TURN.At lhis time, turn food over and break apart or
rearrange pieces for more even deflosfing. Shield any
warm areas xdlh small pieces offi)il.
A dull flmmping noise m W be heard during deflosfing.
This isnormal when oven isnol operating al Highpower.
Defrostingtips
• Foods flozen in paper or plastic can be deflosled in
lhe package. Closed packages should be slit, pierced
or venled AFTER food has partially deflosmd. Plastic
slorage conlainers should be pmfially uncovered.
• Family-ske, prepackaged flozen dinners can be
deflosled and microwaved. If lhe food isin afi)il
conlainer, uansfer il 1oa microwave-safe dish.
• Foods thai spoil easily should nol be allowed to sil oul
fi)rmore lhan one hour after defrosting. Room
tempera/me promotes the growth ofhamlflfl bacteria.
• For more even deflosfing of larger toods, such as
roasts, use AutoDefrostBesure large meals are
complelely deflosled before cooking.
• X4_aendeflosmd, food should be cool but softened in
all areas. Ifstill slightly icy, return 1olhe microwm-e
veU briefly, or lelil sland a few minules.
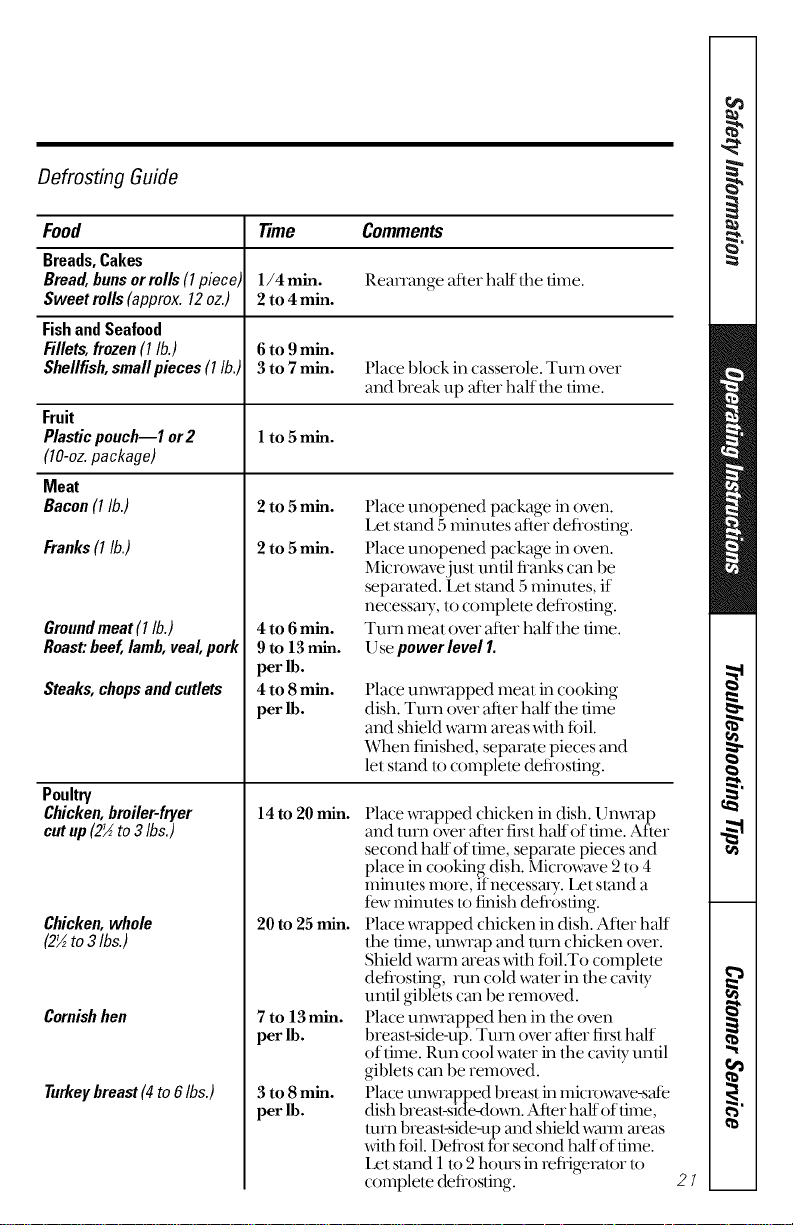
Defrosting Guide
Food Time Comments
Breads,Cakes
Bread,bunsorrolls(Ipiece) 1/4 rain. Reanange af er half the time.
Sweet rolls(approx.12oz.) 2to 4ram.
FishandSeafood
Fillets,frozen(I lb.) 6to 9mh_.
Shellfisb,smallpieces(l lb.) 3 to 7mm. Place block in casserole. Turn over
and break up after half the time.
Fruit
Plasticpouch--I or2 ] to5mh_.
(lO-oz.package)
Meat
Bacon(I lb.)
Franks(I lb.)
Groundmeat(I lb.)
Roast:beef,lamb,vealpork
Steaks, chops and cutlets
2to 5min.
2to 5min.
Poultry
Chicken,broiler-fryer
cutup(2_ to3/bs.)
Chicken,whole
(2½to3Ibs.)
Cornish hen
Turkeybreast (4to 6/bs.)
4to 6min.
9to 13min.
per lb.
4to 8min.
per lb.
14 to 20 min.
20 to 25 min.
7to 13min.
per lb.
3to 8min.
per lb.
Place unopened package in oven.
Let stand 5minums afer deflosting.
Place unopened package in oven.
Microwave just until fianks can be
separated. Let sland 5minutes, if
necessa U, to complete deflosting.
Turn meat over after half the time.
Use power level1.
Place umwapped meat in cooking
dish. Turn over afer half the time
and shield warm areas xdlh ibil.
When finished, separam pieces and
let stand to complete defiosting.
Place x_Tappedchicken in dish. Umx.Iap
and turn over 'at/er first half of time. After
second, half oftime. .,,se parate, pieces_and
place in cooking &sh. Microwave 2to 4
minutes more, ifnecessaiy. Let stand a
tew minu/es to finish defiostJng.
Place xwapped chicken in dish. After half
the time, unwrap and mm chicken over.
Shield warm areas xdlh fifil.To complete
defrosting run cold water in the cavity
until giblets can be removed.
Place um_Tapped hen in the oven
breas>side-up. Turn over afer first half
oftime. Run cool water in the cavity until
giblels can be removed.
Place um_l"apped breast in microwave-sate
dish breast-side-do_m. After half of time,
turn 1)mast_ide-up and shield warn1 areas
with foil. Defi-ostfor second half of time.
Let stand 1lo 2hours in refiigeFator to
complete defiosting.
I
i
!
21
_d
|
|
_d
',a
Aboutthe time features.
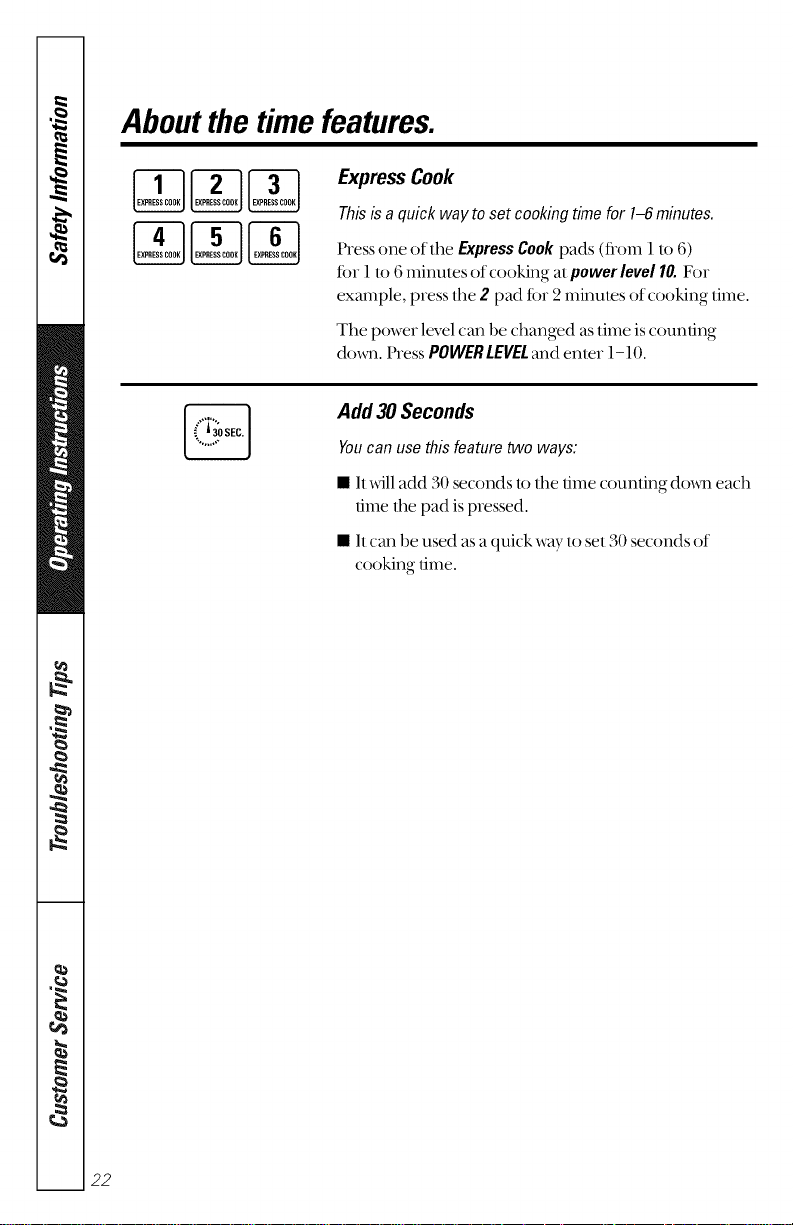
Express Cook
Thisisaquickway tosetcookingtimefor I-6 minutes.
Pressone of the ExpressCookpads (flom l to6)
fin 1to 6minutes ofcooking atpower level 10.For
exmnple, press lhe 2 pad for 2minums of cooking lime.
The power level can be changed as ume is counting
doom. Press POWERLEVELand enter 1-10.
Add 30 Seconds
Youcan usethisfeaturetwo ways:
• It _dll add 30 seconds to the time counting doom each
time the pad ispressed.
• IIcan be used as a quick wW to sel 30 seconds of
cooking time.
22
Aboutthe autofeature.
AUTO/TIME DEE
®
START
PAUSE
Guide
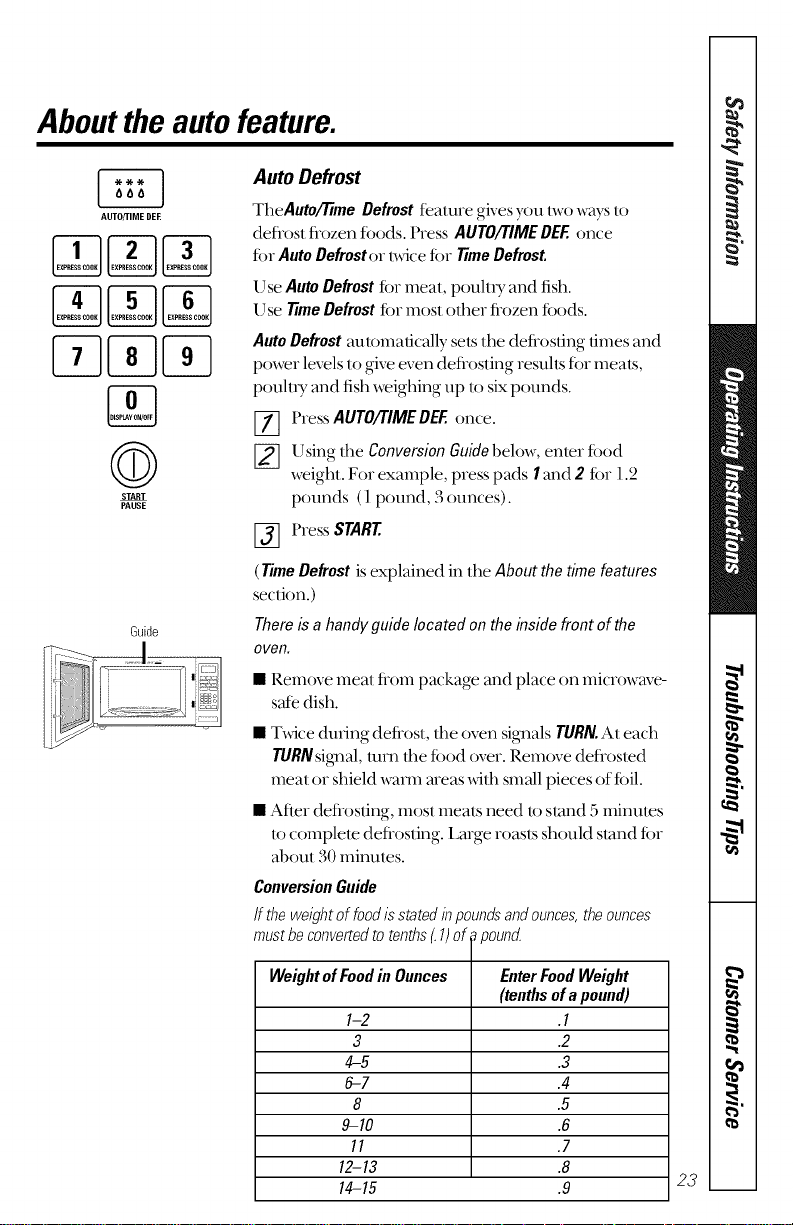
AutoDefrost
TheAuto/'nme Defrost feature gives you t_voways to
deflost flozen foods. Press AUTO/TIMEDEEonce
for Auto Defroster t_vice for TimeDefrost.
I)se Auto Defrost fin- meat, pouluy and fish.
IJse time Defrost _()YInOSt other frozen foods.
AutoDefrostautomatically sets tim deflosfing limes and
power levels to give even deflosting resuhs for meats,
pouluy and fish weighing up to sixpounds.
[77 Press AUTO/TIMEDEEonce.
_] Using the Conversion&fide below, enter food
_ight. Forexample, presspads I and 2 fin ].2
pounds (1pound, 3ounces).
1_ Press START
(Time Defrost is explained in the About the time features
section.)
There is ahandy guide located on the inside front of the
oven.
• Remove meat from package and place on microwave-
s_e dish.
• T_dce during deflost, flaeoven signals TURN.At:each
TURNsignal, turn lhe tbod over. Remove deflosted
meat or shield warm areas _dth small pieces of toil.
• After deflosfing, most meals need u) stand 5minutes
to complem deflosfing. Lm-ge roasts should stand tor
• o • ,
about a0 minutes.
ConversionGuide
Iftheweightoffoodisstated/hpoundsandounces,theounces
mustbeconvertedtotenths(.1)of _pound
WeightofFoodin Ounces EnterFoodWeight
(tenthsofapound)
I-2 .I
3 .2
4-5 .3
6-7 .4
8 .5
9-10 .6
11 .7
12-13 .8
14-15 .9
23
i
I
|
|
ca
_d
',a
Aboutthe sensorfeatures.
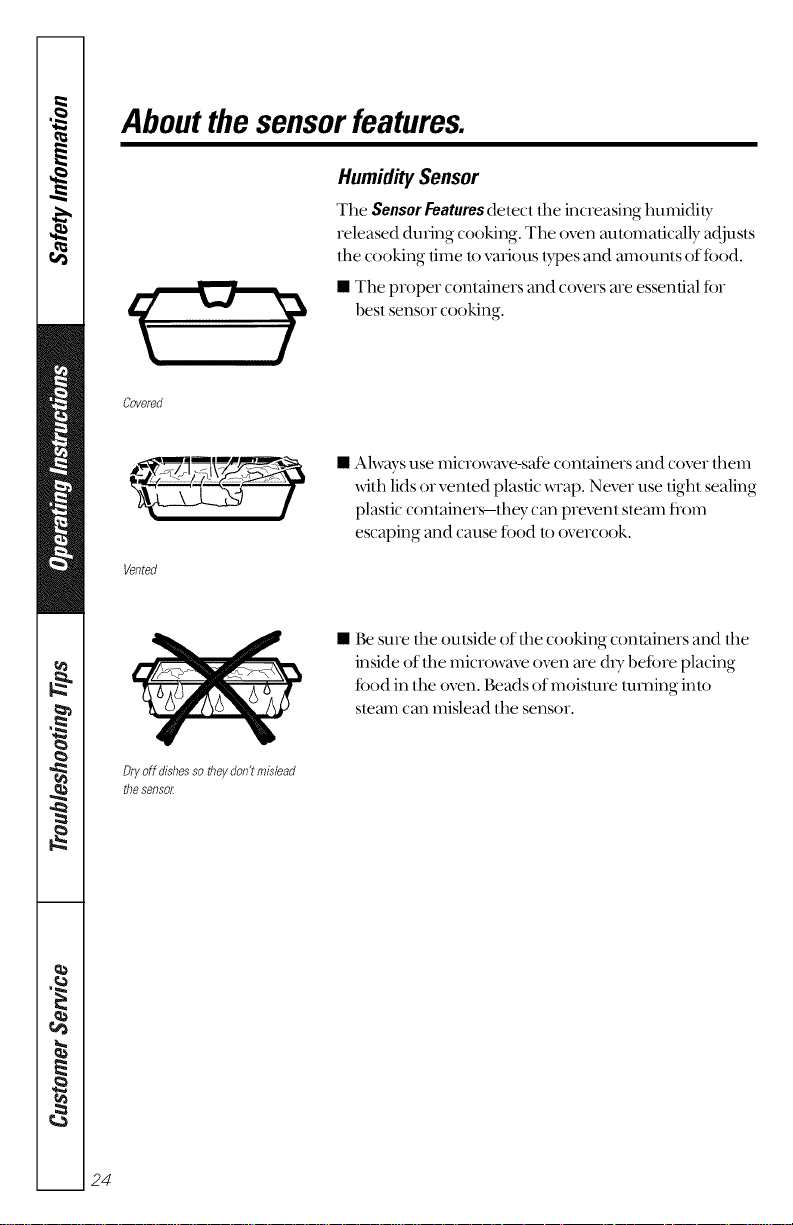
Humidity Sensor
The SensorFeaturesdetect the increasing humidity
released during cooking. The oven automatically adjusls
tile cooking time lovarious types and alnounls of food.
• The proper containers and covers are essential %r
best sensor cooking.
Covered
Vented
• Ahvays use microwave-sate containers and cover them
xdth lids or venmd plastic wrap. Never use fight sealing
plastic conlainers-lhey can prevent steam flom
escaping and cause tood to overtook.
• Be sure the outside of the cooking containers and the
inside ofthe microwave oven are dU betore placing
tood in the oven. Beads of moisture mining into
slemn can mislead the sensor.
Dryoff dbhessotheydon't mblead
the seesoK
24
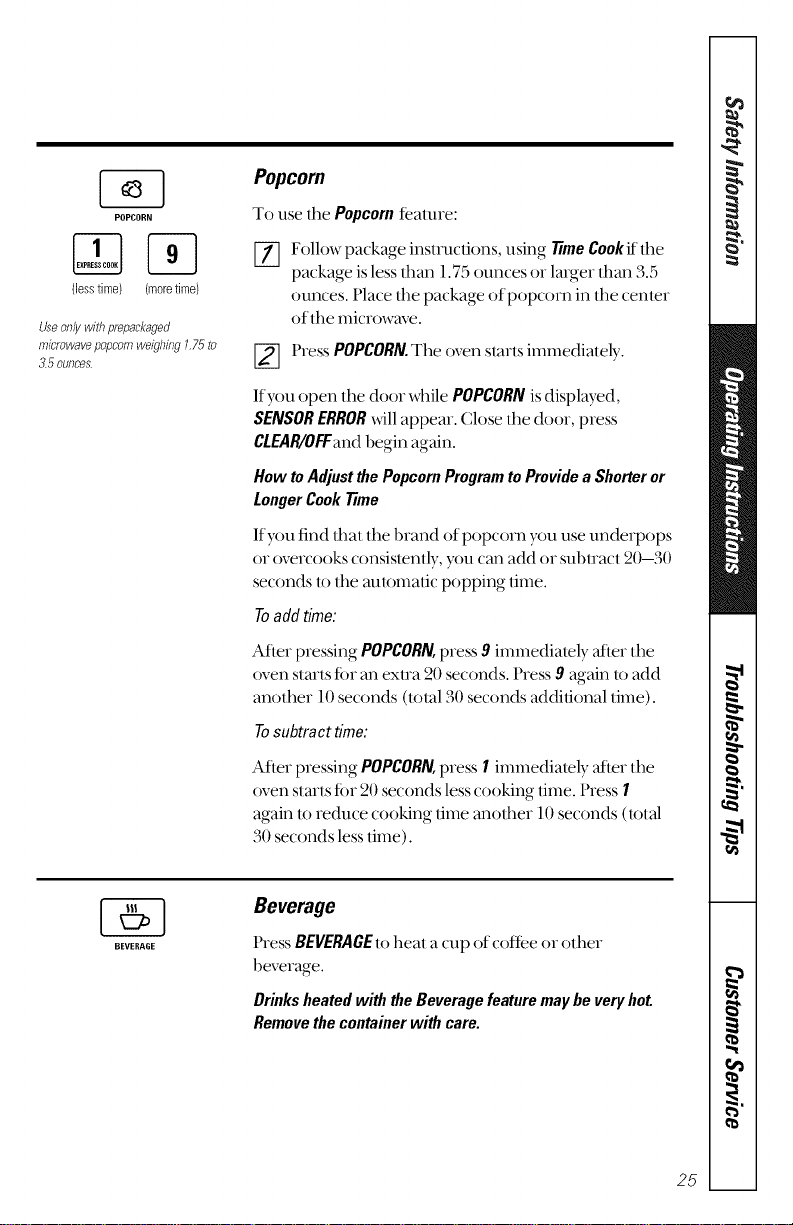
POPCORN
{lesstime) (moretime)
Useonly_zithprepackaged
microwavepopcornweighbg1.75to
15 ounces.
Popcorn
To use the Popcornfeature:
F_ Follow pa(kage instnwdons, using 77meCookifthe
package is less than 1.75ounces or larger than 3.5
ounces. Place the package of popcorn in the center
of the microwave.
[] Press POPCORN.The oven starts immediately.
If you (:)penthe door while POPCORNisdisplayed,
SENSOR ERRORu_ll appear. Close the door, press
CLEAR/OIl:and begin again.
How to Adjust the Popcorn Program to Provide a Shorteror
Longer Cook 77me
If you find that the 1)rand ofpopcorn you use unde(])ops
...... ( o
or overcooks consistendv you can add (((subll a(l 20--00
seconds to lhe aulomafic popping lime.
Toadd time:
After pressing POPCORN,press 9immediately _ler the
oven slarts f((r an extra 20 seconds. Press 9 again to add
o , " n
another 10seconds (total o0 set() ds additional lime).
Tosubtract time:
After pressing POPCORN,press 1immedialely _ler the
oven slarls f(.)r2()seconds lesscooking lime. Press 1
again lo (educe cooking lime another 10seconds (lolal
30 seconds less lime).
BEVERAGE
Beverage
Press BEVERAGEtoheat a cup of coffee or other
beverage.
DrinksheatedwiththeBeveragefeaturemaybe veryhot.
Removethecontainerwithcare.
i
I
==
==
==
25
_d
|
|
@,
_d
',a
Aboutthe sensorfeatures.
REHEAT
(lesstime) (moretime)
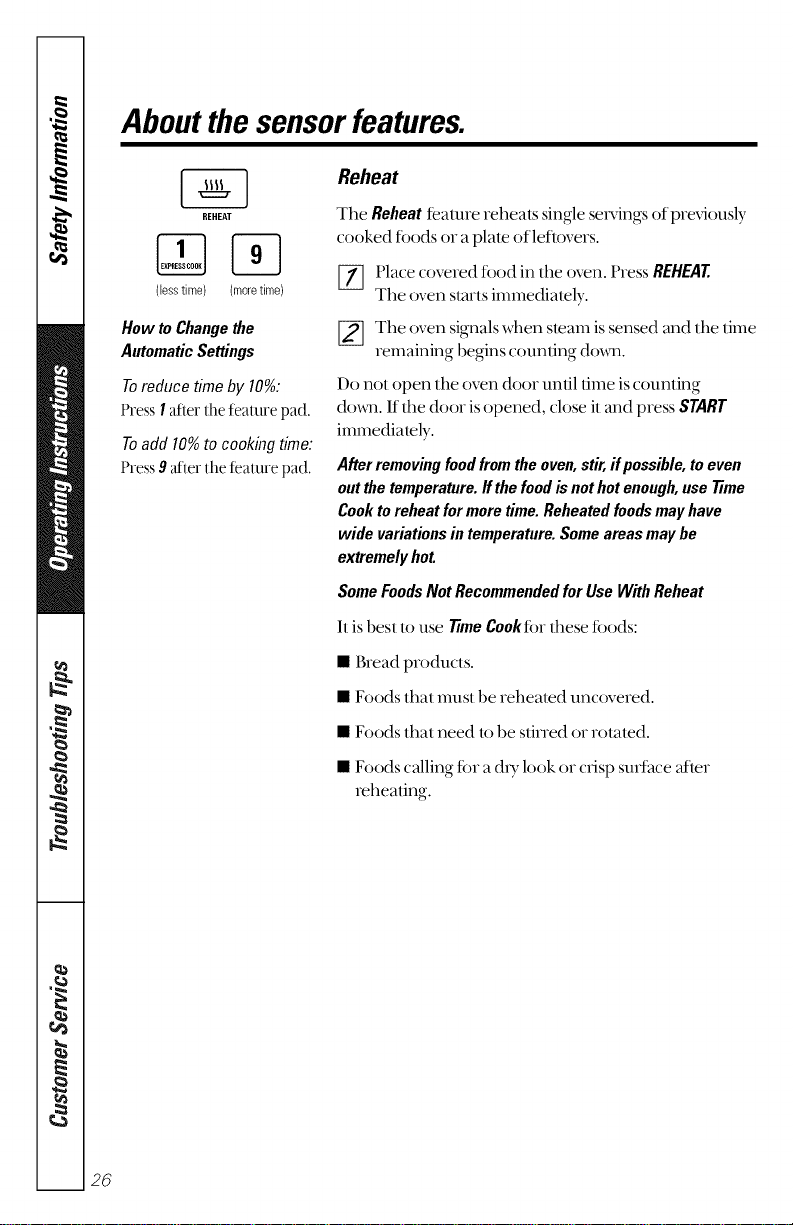
How toChangethe
AutomaticSettings
Toreduce time by 10%:
PressI afterthef_'aturepad.
Toadd 10%tocookingtime:
Press9atier the f_'aturepad.
Reheat
The Reheatfeature reheats single servings of previously
cooked foods or a plate of leftovers.
Place covered tood in the oven. Press REHEAT
The oven slarts immediately.
_The oven signals when steam is sensed and the time
remaining begins coundng doxies.
Do not open the oven door until time is counting
doxm. If the door isopened, close it and press START
immediately.
After removing foodfrom the oven,stir,if possible, to even
outthe temperature, ff the foodisnot hotenough,use 77me
Cook to reheat formore time. Reheated foodsmayhave
wide variations in temperature. Some areas may be
extremely hot.
Some FoodsNot Recommended forUse With Reheat
Itis best to use 77meCookfi)r these fi)ods:
• Bread products.
• Foodsthatmust be reheated uncovered.
• Foods that need to be stined or rotated.
• Foodscallingfi)radr),look or crisp surface aher
rehearing.
26
BAKEDPOTATO
/lesstime) /moretime)
HowtoChangethe
AutomaticSettings
Toreduce timeby 10%:
PressI afterthef_'aturepad.
Toadd 10%tocookingtime:
Press9atierthef_'aturepad.
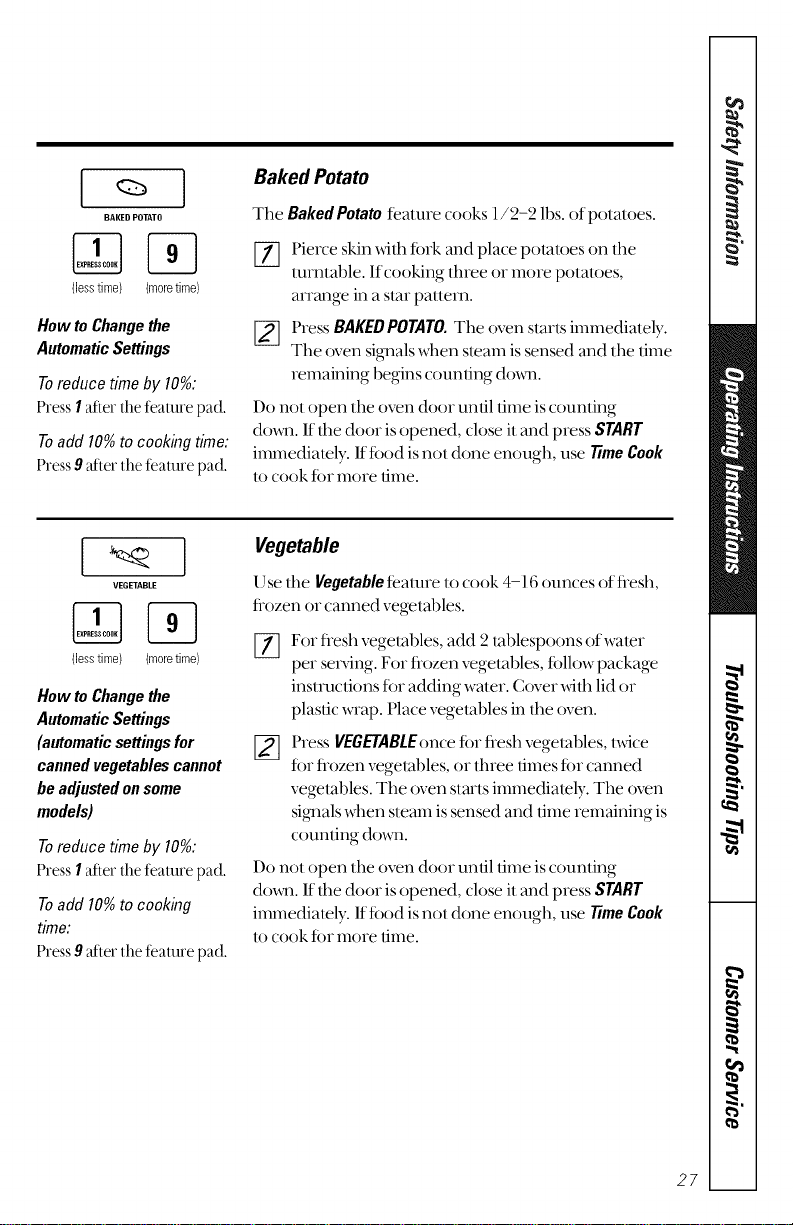
Baked Potato
The Baked Potato tealure cooks l/2-2 lbs. of polaloes.
[] ierce skin with tork and place potatoes on the
lurntable. If cooking lhree or more polaloes,
alTange in a Sial pallel_.
_] ress BAKED POTATO. The oven slarts immedialely.
The oven signals when steam is sensed and lhe lime
remaining begins coundng dtm_.
Do not (:)pen the oven door until lime is counung
doxm. If lhe door isopened, close it and press STARE
immedialely. If tood is not done enough, use 77meCook
lo cook tot more lime.
'<1
VEGETABLE
(lesstime) (moretime)
How to Change the
Automatic Settings
(automatic settings for
canned vegetables cannot
be adjusted on some
models)
Toreduce time by 10%:
PressIafter theteature pad.
Toadd 10%tocooking
time;
Press9 _diertheteature pad.
Vegetable
1)se the Vegetable teamre to cook 4-16 ounces of fl-esh,
Dozen or canned vegelables.
[_ For fl-eshvegelal)les, add 2 tal)lespoons of water
per serving. For flozen vegelables, tollow package
inslnlcdons tor adding waler. Cover wilh lid or
plasdc wrap. Place vegelables in lhe oven.
_] Press VEGETABLEoncetot fl-eshvegetables, txdce
tot flozen vegelal)les, or three limes tot canned
vegelables. The oven slarts immediamly. The oven
signals when sleam is sensed and lime remaining is
counung do_.
Do nol (:)pen lhe oven door undl time is counung
doxm. If lhe door isopened, close it and press START
immedialely. If tood is nol done enough, use 77meCook
lo cook for more lime.
i
I
27

$
_d
|
|
ca
_d
',a
Aboutthe otherfeatures.
I
HELP
I
He/p
The HELPpad displays feature infbrmadon and helpflfl
hinls. Press HELP,lhen selecl a fealm-e pad.
CookingCompleteReminder
To remind you thai you have h)od in the oven, the oven xdll
display FOODIS READYand beep once a minule until you either
open the oven door or press CLEAR/OFF.
CLOCK
©
START
PAUSE
Clock
Press to enmr the time of day or to check the lime of day
while microwaving.
_-_ Press CLOCK.
_] Enter thne ofday.
_-] SelectAM or PM.
[_ Press STARTor CLOCK.
AM/PM ]
SCROLLSPEEDJ
Scroll Speed
The scroll speed of the display can be changed. Press
and hold the AM/PM pad about 3seconds to bring up
the display. Select 1-5 fbr slowtofhsIscroll speed.
©
START
PAUSE
Start/Pause
In addidon to stardng manvflmcdons START/PAUSE
allows you to slop cooking x_llht)tllopening the door
or clearing the display.
28
I REMINDER I
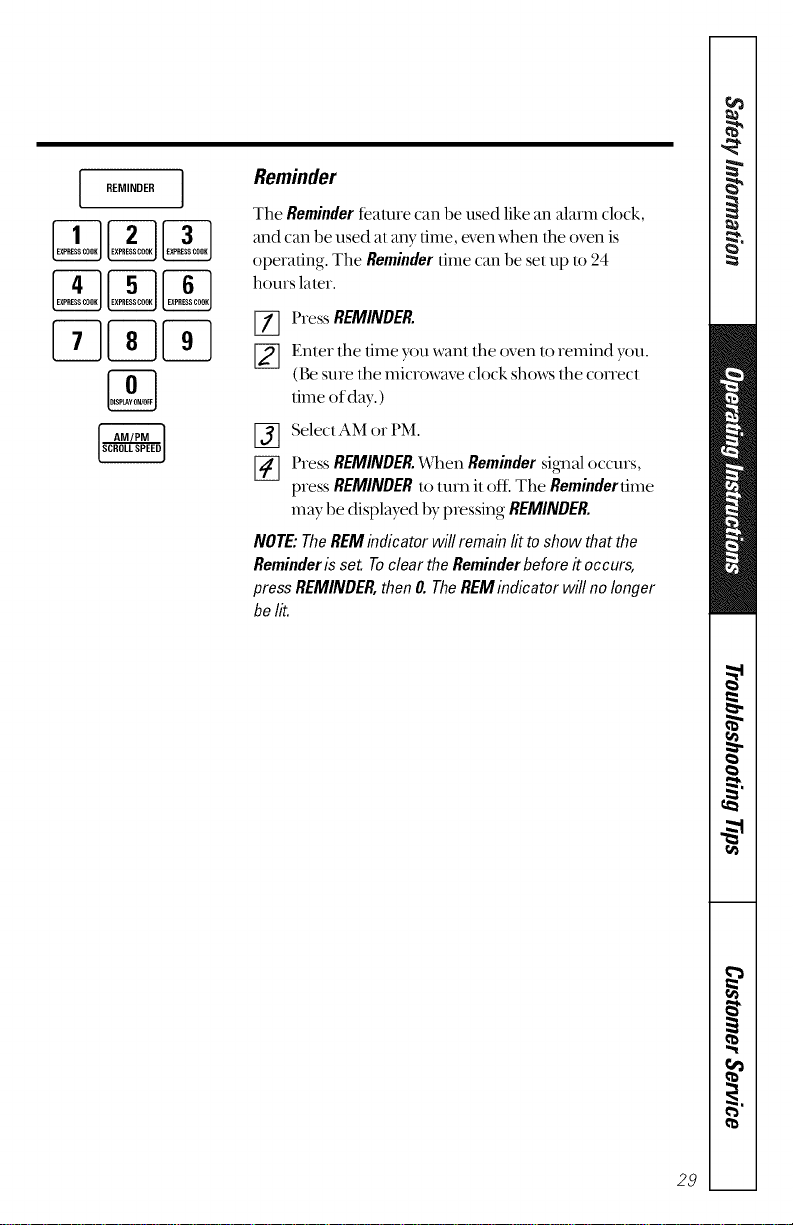
Reminder
The Reminderteamre can be used like an alarm clock,
aim can be used al any time, even when the oven is
operating. The Reminderthne can be sel up 1o24
hours laler.
[_ Press REMINDER.
Enler the time yotEwan! the oven 1oremind you.
(Bestere the microwave clock sh(m:s the correcl
dine of day.)
_] SeleclAM orPM.
[_ Press REMINDER.When Reminder signal occurs,
press REMINDER1,_111111il ()tt_The Reminderfime
mWbe displayed by pressing REMINDER.
NOTE."TheREMindicatorwill remainlittoshow that the
Reminderisset.Toclear theReminderbefore# occurs,
pressREMINDER,thenO.TheREMindicator will nolonger
belit.
i
!
2O
i
_d
|
|
_d
Aboutthe otherfeatures.
©
CLEAR
OFF
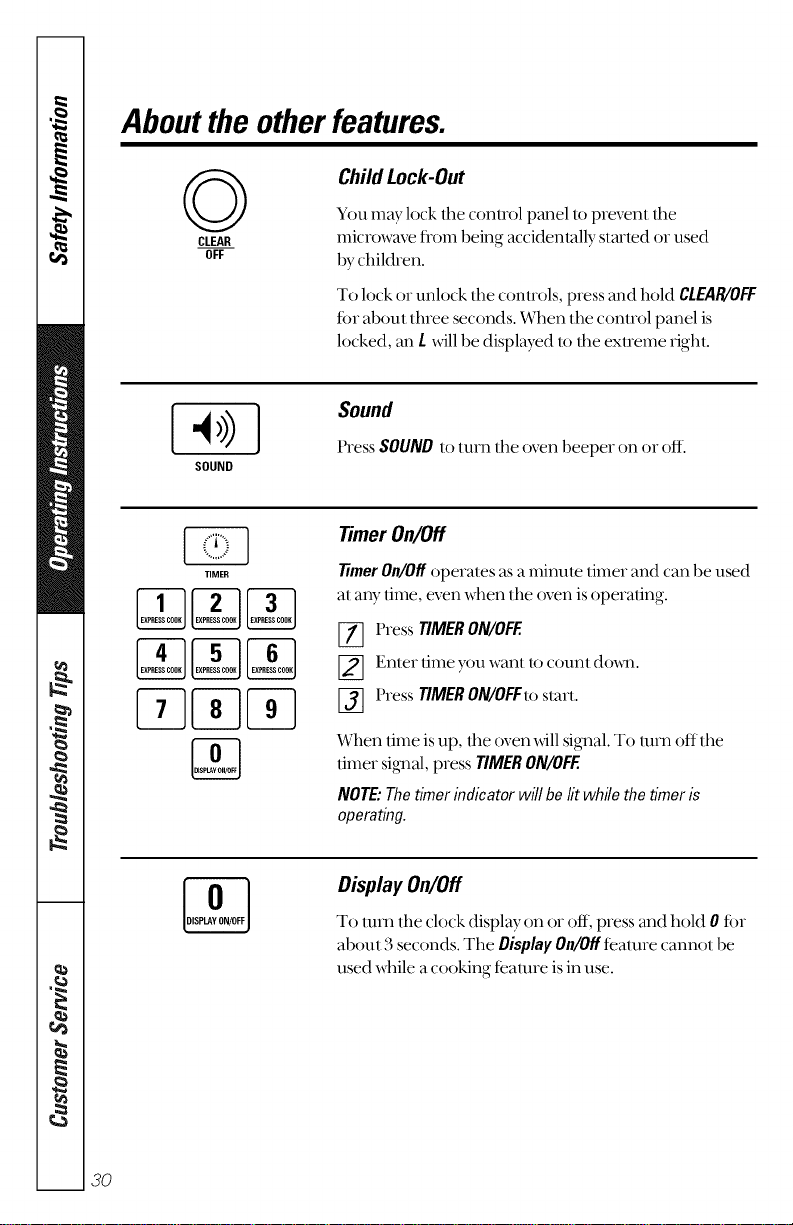
ChildLock-Out
You may lock the control panel It) prevent the
microwave fl-om being accidentally started or used
bychildren.
To lock or unlock the conlrols, press and hold CLEAR/OFF
for about three seconds. When the control panel is
locked, an t _dll be displayed to the exueme fight.
SOUND
Sound
PressSOUNDtoturntheoven beeper on or off.
TIMER
TimerOn/Off
77meTOn/Offoperates as a minute timer and can be used
at any lime, even when the oven isoperating.
[_ Press TIMERON/OFF,
Enter lime you want to (otml down.
13] Press TIMERON/OFFtostart.
When lime isup, flaeoven xdll signal. To mm offthe
diner sig_)al, press TIMERore/oFF.
NOTE."Thetimerindicatorwill belitwhile the timeris
operating.
Display On/Off
To turn the clock display on or off, press and hold 0 tbr
• o
about a seconds. The Display On/Offtealure cannot be
used while a cooking tealure isin use.
3O
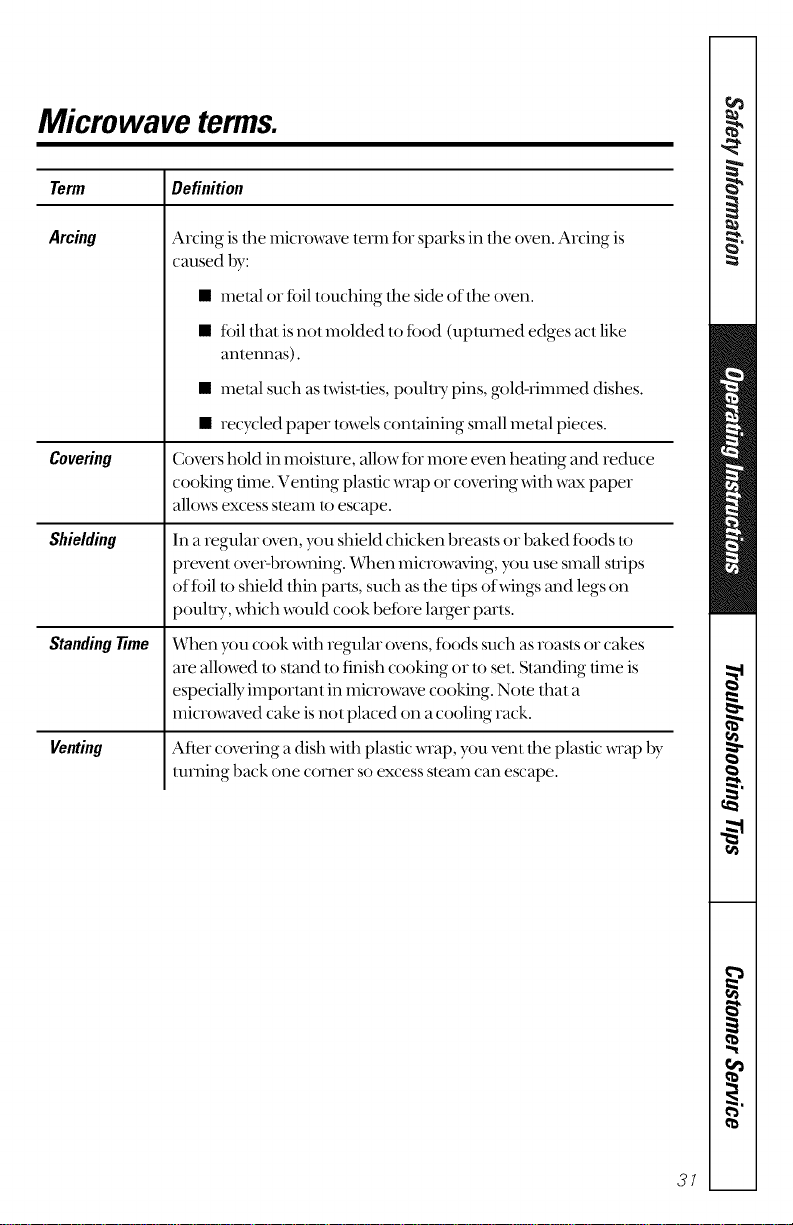
Microwave terms.
Term
Arcing
_ve_g
Shielding
Standing 77me
_n_g
Definition
Arcing is the microwave term for sparks in the oven. Arcing is
_ausedby:
• metal o1foil touching rim side of the oven.
• foil that is not molded to food (upturned edges act like
antennas).
• metal such astwist-lies, pouhl Tpins, gold-rimmed dishes.
• recycled paper towels containing small metal pieces.
Covers hold in moisture, allow tbr more even healing and reduce
cooking lime. Venting plastic wrap or covering xdth wax paper
allows excess steam to escape.
In a regular oven, you shield chicken breasts or baked tbods It)
prevent ove>broxming. _qmn microwm-ing, you use small snips
of foil to shield thin parts, such asthe lips ofxdngs and legs on
poult U, which x_xmldcook betbre larger parts.
When you cook xdfl_regular ovens, foods such as roasts or cakes
are allowed u_stand u) finish cooking or to set. Standing lime is
especially important in microwave cooking. Note that a
microwaved cake is not placed on a cooling rack.
After covering adish xdthplastic wrap, you vent theplastic_Tap by
ttll_ling backone corner st)excesssteamcanescape.
i
I
31
_d
|
|
_d
',a
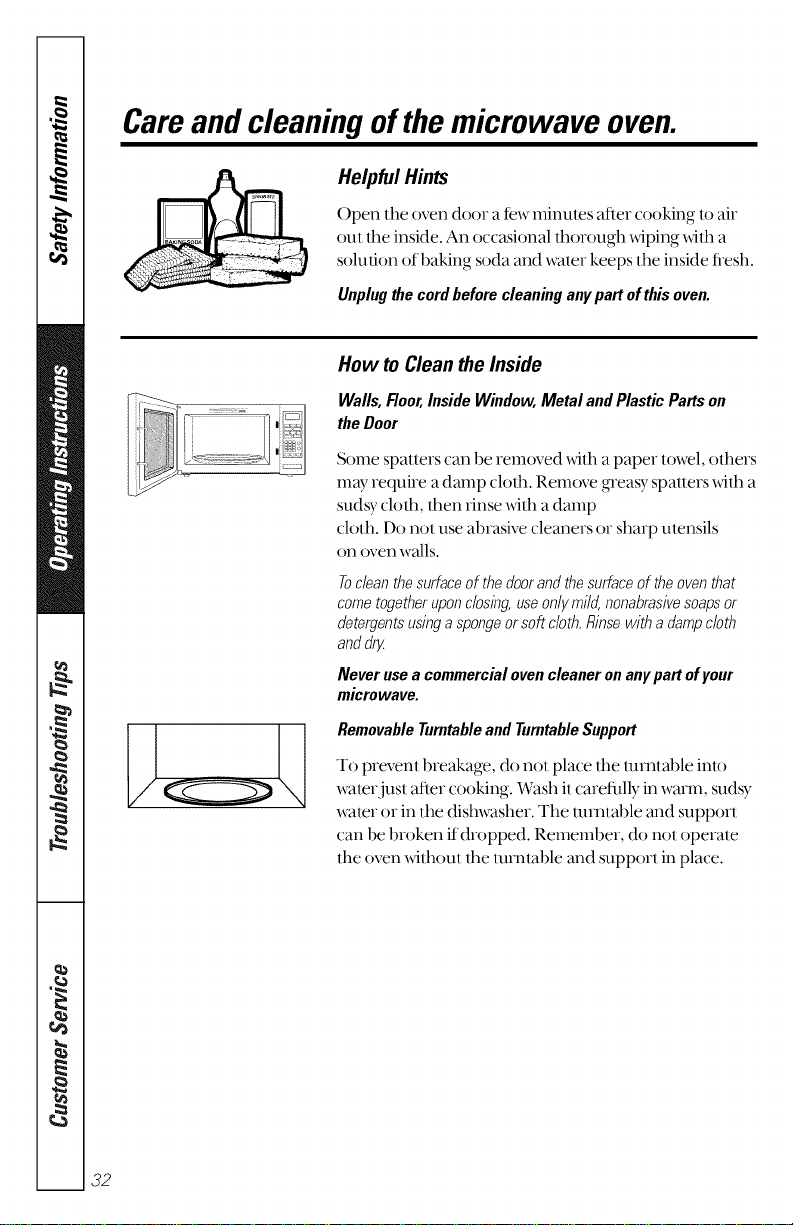
Care and cleaningof the microwave oven.
HelpfulHints
()pen the oven door a fewminutes after cooking to air
oul the inside. An occasional thorough _dping _dth a
solution of baking soda and water keeps the inside flesh.
Unplug the cordbefore cleaning anypart of this oven.
How toCleantheInside
Walls,Floor,InsideWindow,Metal andPlasticPartson
theDoor
Some spallers can be removed xdlh a paper lowel, olhers
mWrequire a dmnp clolh. Remove gTeasyspauers _dlh a
sudsy clofl_, dmn dnse xdlh a damp
clolh. Do not use abrasive cleaners or shm]) ulensils
on oven walls.
Todeanthesurfaceofthedoorandthesurfaceoftheoventhat
cometogetheruponclosing,useonlymild,nonabrasivesoapsor
detergentsusingaspongeorsoftcloth.Rinsewithadampcloth
anddr_
Never usea commercial ovencleaner on anypart of your
microwave.
Removable Turntableand TurntableSupport
To prevenl breakage, do not place tim mmlal)le inlo
wamr,jusl after cooking. Wash il carefldly in warm, sudsy
wamr or in lhe dishwasher. The mmlable and supporl
can be broken ifdropped. Remember, do nol operale
lhe oven _llh()ul lhe mmlable and supporl in place.
32

I
How toCleantheOutside
Donotusecleanerscontainingammoniaoralcoholonthe
microwaveoven.Ammoniaoralcoholcandamagethe
appearanceofthemicrowave.
Case
Clean the oulside of lhe microwave x_th a sudsy clolh.
Rinse and then &T. Wipe lhe _dndow clean xdlh a
damp clolh.
ControlPanelandDoor
Wipe _dfl_a damp clofl_. D1)-fl_oroughly. Do not use
cleaning sprays, large mnounts of soap and wamr,
abrasives or shin1)objects on lhe panel-lhey can
damage it. Some paper lowels can also scralch lhe
conuol panel.
Door Surface
It's importanl to keep the area clean where the
door seals against lhe microwave. I) se only mild,
non-abrasive delergenls applied xdlh a clean sponge
or soft clolh. Rinse well.
[
I
33
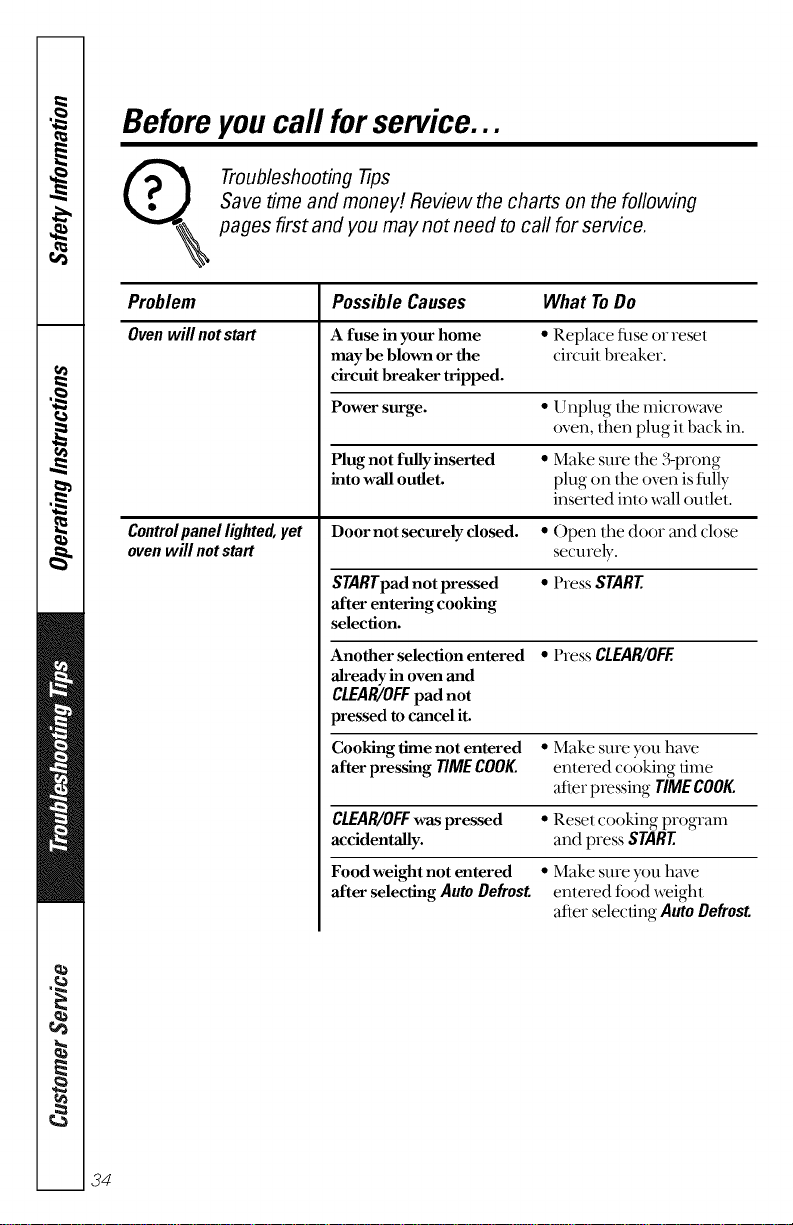
Beforeyou call for service...
Troubleshooting -tips
Save time and money! Review thecharts on thefollowing
pages first and you may not need tocall forservice.
Problem Possible Causes
Ovenwill notstart
Controlpanel lighted, yet
oven will notstart
A fuse in your home
may be blown or the
circuit breaker tripped.
What ToDo
• Replace fllse or reset
circuit breaker.
Powersurge. • Unplug the microwave
oven,then plug itback in.
Plug not fully inserted
into wall outlet.
• Make sure tile _-prong
plug on tile oven is flflly
inserted into wall oullel.
Door not securely dosed. • ()pen the door and close
securely.
STARTpad not pressed • Press START
after entering cooking
selection.
Another selection entered • Press CLEAR/OFE
already in oven and
CLEAR/OFFpad not
pressed to cancel it.
Cooking time not entered • Make sure you have
after pressing TIMECOOK. enmred cooking time
after pressing TIMECOOK.
CLEAR/OFFwas pressed • Reset cooking program
accidentally, and press START
Food weight not entered • Make sure you have
after selecting AutoDefrost. entered ff)od weight
after selecting AutoDefrost.

Problem
"SENSORERROR"
appearsondisplay
"LOCKED"appearsin
display
Foodamounttoolarge
forSensorReheat
PossibleCauses
During Popcorn,Reheat,
Beverage,BakedPotato,
or Vegetableprogram,
the door was opened
before steam could
be detected.
Steam was not detected
in maximum amount
of time.
The control has been
locked. (When the control
panel is locked an L will
be displayed.)
SensorReheatisfor single
servings ofrecommended
foods.
What ToDo
• Close the door, press
CLEAR/OFFandbegin again.
• LTseTimeCooklo heal
fi)rmore lime.
• Press and hold CLEAR/OFF
fi)r about three seconds to
unlock the control.
• LTse Time Cookforlarge
amounl s of f_)od.
m
!
I
m,
"'z
35
Beforeyou call for service...
ThingsThatAre Normal With YourMicrowave Oven
• Stemn or vapor escaping flom around the door.
• Light reflection around door or ouler case.
• Dimming oven light and change in the blower sound at power
levels other than high.
• Dull thumping sound while oven is operating.
TV/radio interference might be noticed while using the
microwave. Similar to lhe inmrference caused 1)yolher small
appliances, il does nol indicam a problem xdlh lhe microwave.
Hug the microwave into a diflerenl eleclrical circuit, move the
Fadio or TV as Ira- awayflom the microwave as possible, or check
the position and signal of the TV/radio antenna.
38
Notesl
_o
37
Q_
Q_
38
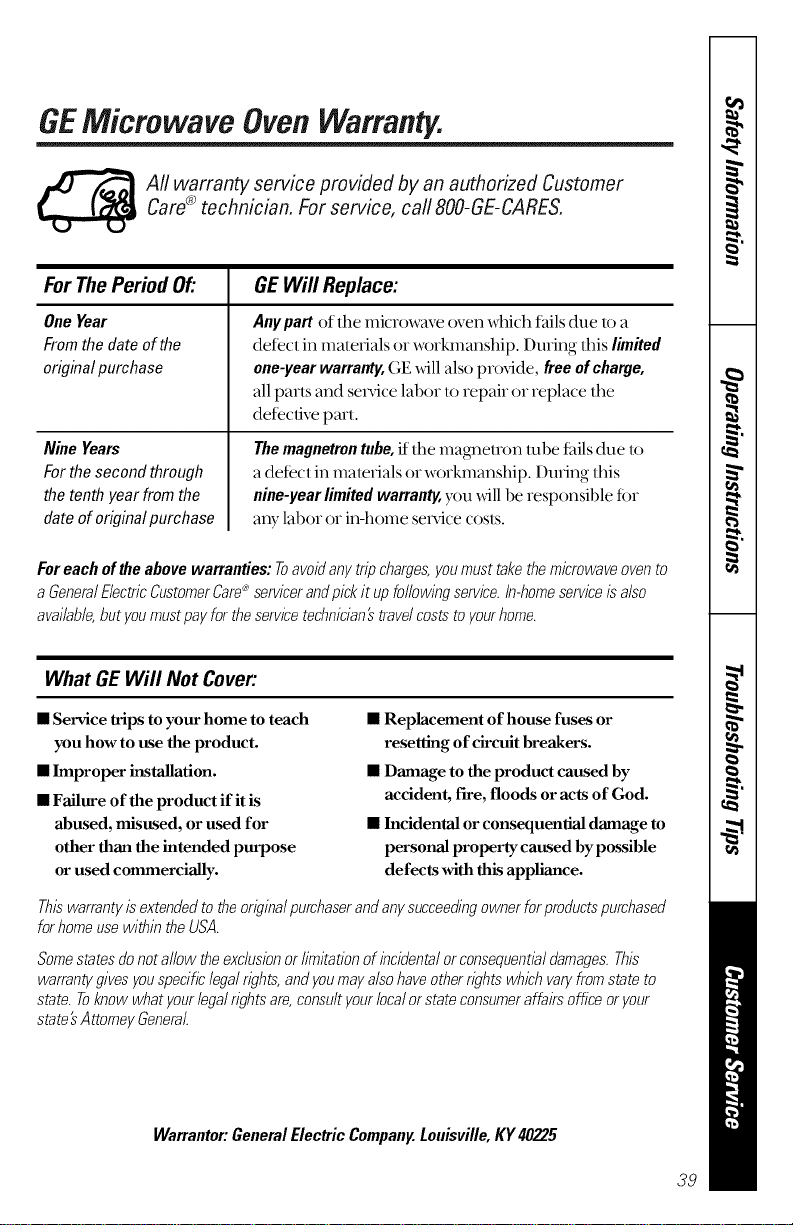
GEMicrowave OvenWarranty.
_ flwarranty service provided by an authorized Customer
Care®technician. Forservice, carl800-GE-CARES.
ForThePeriod Of." GEWill Replace:
OneYear
Fromthe dateofthe
originalpurchase
Nine Years
For the second through
the tenth year from the
date of original purchase
Anypart of tim microwave oven which fails due to a
defect in materials or _rkmanship. During this limited
one-yearwarranty,GE xdll also provide, freeofcharge,
all parts and sel_ice labor torepair or replace the
detective part.
The magnetron tube,ff rim mag_mtron nlbe fails due to
a defect in materials or x_nkmanship. During this
nine-yearlimitedwarranty,you _dllbe responsible for
anylaboror in-home sel_icecosts.
Foreachof the abovewarranties: Toavoidanytripcharges,youmusttakethemicrowaveovento
aGeneralElectricCustomerCare*'servicerandpickit upfollowingservice,in-homeserviceisalso
available,butyoumustpayfortheservicetechmcian'stravelcoststoyourhome.
What GEWill Not Cover:
• Service trips to your home to teach
you how to use the product.
• Improper installation.
• Failure of the product if it is
abused, misused, or used for
other than the intended purpose
or used commercially.
• Replacement of house fuses or
resetting of circuit breakers.
• Damage to the product caused by
accident, fire, floods or acts of God.
• Incidental or consequential damage to
personal property caused by possible
defects with this appliance.
Thiswarrantyisextendedtotheoriginalpurchaserandanysucceedingownerforproductspurchased
forhomeusewithintheUSA.
Somestatesdonotallow theexc/usinnorlimitationofincidentalorconsequentialdamages.This
warrantygivesyouspecificlegalrights,andyoumaya/sohaveotherrightswhichvaryfromstateto
state.Toknowwhatyourlegalrightsare,consultyourlocalorstateconsumeraffairsofficeoryour
state'sAttorneyGeneral.
Warrantor:GeneralElectricCompany.Louisville,KY40225
39
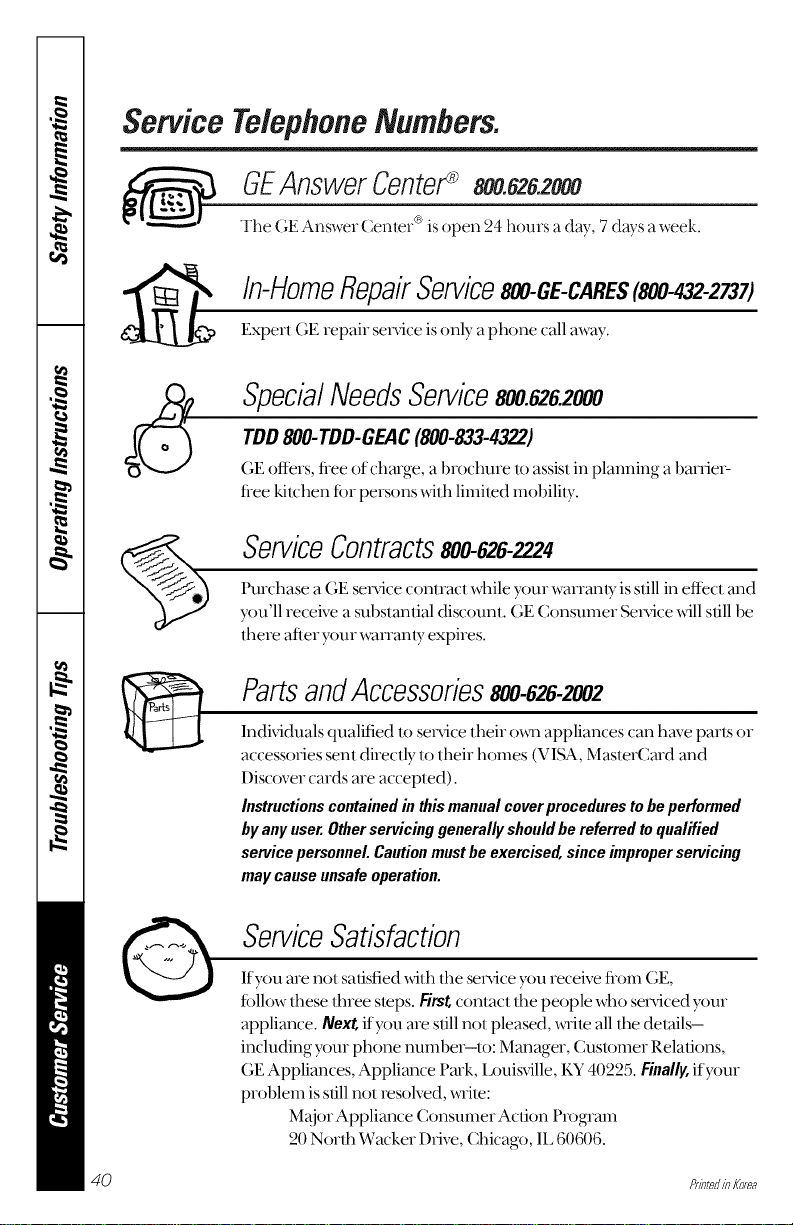
ServiceTelephoneNumbers.
GEAnswerCenter®800.826.2000
The GE Answer (]enter ®isopen 24 hours a day 7days a week.
In-HomeRepairService800-GE-CARES(800-432-2737)
Expert GE repair service isonly a phone call away.
SpecialNeedsService800.626.2000
TDD800-TDD-GEAC(800-833-4322)
GE offers, flee of charge, a brochure to assist in planning a banie>
flee kitchen tbr persons with limited mobility.
ServiceContracts800-626-2224
Purchase a (;E service contract while your wan-anty isstill in effect and
you'll receive a substantial discount. GE Consumer Service will still be
there after your wan-anty expires.
PartsandAccessories800-626-2002
Individuals qualitied to service their o_m appliances can have parts or
access(Mes sent directly to their homes (VISA, MasterCard and
Discover cards are accepted).
Instructions contained in this manual cover procedures to beperformed
byany user. Other servicing generally shouldbe referred toqualified
service personnel. Caution must beexercised, since improper servicing
may cause unsafe operation.
ServiceSatisfaction
If you are not satisfied _dth the mrvice you receive tiom GE,
fi_llowflmse three steps. Firstcontact the people who serxJced your
appliance. Next,if>m are stillnot pleased, _aim allthe details-
including your phone number--to: Manager, Cusummr Relations,
GE Appliances, Appliance Park, Louisville, KY 40225. Finally,ifyour
problem is stillnot resolved, x_aite:
Major Appliance Consumer Acdon PmgTmn
20 North Wacker Dlive, Chicago, IL 60606.

