Loading ...
Loading ...
Loading ...
4
3
1-4
A
B
C
C
2
D
E
F
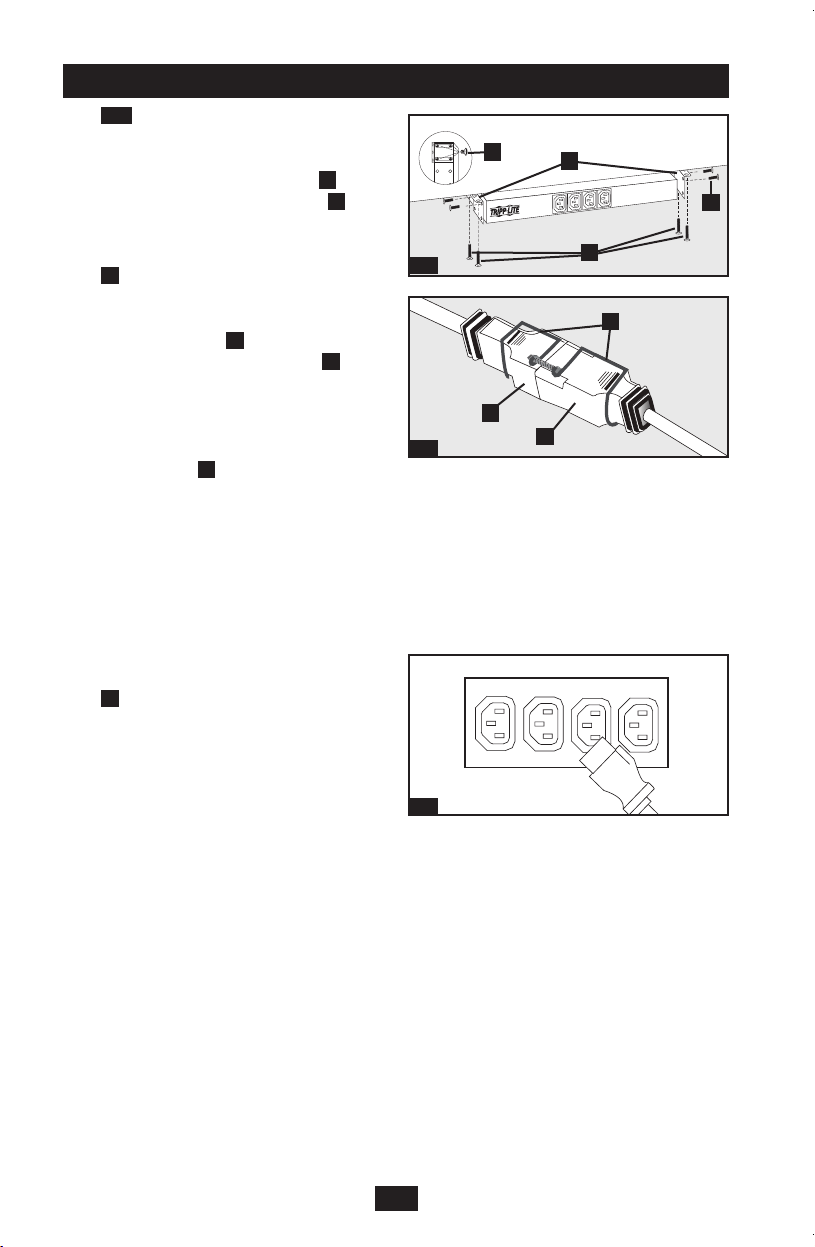
Installation (continued)
Step
1-4
: Under-Counter Installation:
AfterrepeatingPart1above,attachthe
PDUtoastablemountingsurfaceby
insertingfouruser-suppliedscrews
A
throughthePDUmountingbrackets
B
and into secure mounting points on the
mounting surface.
Step
2
: Connect PDU to a Properly
Grounded Power Source: The
PDUH20DVincludesanIEC-320-C19to
IEC-320-C20cordset
D
andanIEC-
320-C19toNEMAL6-20Padapter
E
.Use
thiscordsettoattachthePDUtoaC19
orL6-20RpowersourcesuchasaTripp
LiteUPSSystem.WhenusingtheL6-20P
adapter, secure the connection with the Cord
Retention Bracket
F
by using the included
bolts to fasten the two halves of the bracket
around the connection as shown.
ThePDUH20HVL6comeswithanattached
NEMAL6-20Pinputplug.Attachthisplug
to a properly grounded AC outlet or to a
TrippLiteUPSSystem.
Note: Connect input plug to an AC outlet that does not
share a circuit with a heavy electrical load (such as an
air conditioner or refrigerator).
Step
3
: Connect Equipment to PDU:
ConnectequipmenttothePDUwithuser-
suppliedIEC-320interconnectioncords.
Becarefulnottoexceedtheloadratingfor
each outlet nor the total load rating for the
PDU.
14-02-329-933047.indb 4 4/23/2014 3:39:25 PM
Loading ...
Loading ...
Loading ...