Loading ...
Loading ...
Loading ...

GB
- 16 -
4. Operation
4.1 Installing the battery (Fig. 4)
Press the push/lock button of the battery pack
as shown in Fig. 4 and slide the battery pack into
the mount provided. Make sure that the push/lock
button engages properly. To remove the battery
pack, follow the steps in reverse order.
4.2 Charging the lithium battery pack (Fig.
4/5)
1. Remove the battery pack (10) from the bat-
tery mount (8), pressing the push/lock button
(11) downward to do so.
2. Check that your mains voltage is the same as
that marked on the rating plate of the battery
charger. Insert the power plug of the charger
into the socket outlet. The green LED will then
begin to fl ash.
3. Push the battery pack onto the battery char-
ger.
In section 8 (Charger indicator) you will fi nd a
table with an explanation of the LED indicator on
the charger.
If the battery pack fails to charge, check for the
following:
•
whether there is a voltage at the mains power
socket;
•
whether there is good contact at the charging
contacts of the charging unit
If the battery pack still fails to charge, please send
•
the charging unit
•
and the battery pack
to our customer service center.
Recharge the battery pack promptly to ensure
that it provides long service. Always recharge the
battery pack when you notice that the power of
the cordless lamp starts to drop. Never allow the
battery pack to become fully discharged. This will
cause it to develop a defect.
4.3 ON/OFF switch (Fig. 3 / item 3)
Warning:
Do not look into the light beam.
Switching on:
•
Press the ON/OFF switch (3).
•
For safety reasons, the lamp will always come
on in its lowest brightness setting.
Switching off :
•
Press the ON/OFF switch (3) again.
4.4 Adjusting the brightness (Fig. 3/ item 4)
Warning:
Do not look into the light beam.
•
Three different brightness settings are availa-
ble so that the lamp can be adjusted to the
particular lighting conditions.
•
For safety reasons, the lamp will always come
on in its lowest brightness setting.
•
To increase the brightness, press the bright-
ness control (4).
•
The brightness increases to the next level
every time you press the button.
•
The current brightness setting is displayed by
the brightness indicator (5).
4.5 Adjusting the lamp position
•
You can set the lamp to any position by rota-
ting the lamp head.
•
To do this, undo the fixing screw (6) on the
right-hand side of the lamp.
•
Then adjust the lamp to the required position
and retighten the fixing screw (6).
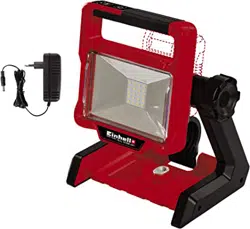
4.6 Operation with a power supply unit (9)
•
The lamp can also be used in conventional
fashion with the enclosed power supply unit
(9).
•
Check that your mains voltage is the same as
the one marked on the rating plate.
•
Plug the mains plug (9a) of the power supply
unit into the socket outlet.
•
Then connect the plug (9b) into the power
connection (7) of the lamp.
Note: You do not need to take out the battery
when you are operating the lamp with the po-
wer supply unit.
Note: The battery will not be charged when
you are operating the lamp with the power
supply unit.
4.7 Fastening the lamp
The lamp can be fastened quickly and easily in
various ways via the diff erent cutouts on the bot-
tom of the foot.
•
Hook (Fig. 6 / item 14): The hook can be used
for quick and easy attachment of the lamp to
e.g. a railing or scaffolding.
•
Sawtooth (Fig. 7 / item 15): The sawtooth cu-
tout can be used to hang the lamp to a nail or
similar. The fine tooth spacing allows the lamp
Anl_TE_CL_18_2000_LiAC_SPK9.indb 16Anl_TE_CL_18_2000_LiAC_SPK9.indb 16 02.04.2019 07:21:1102.04.2019 07:21:11
Loading ...
Loading ...
Loading ...