Loading ...
Loading ...
Loading ...
6
4. If your model has water dispensing in the door, please open
the water lter door by pulling it toward you (A).
See graphic 2.
5. Using a Phillips screwdriver tip #2, remove the screws of the
base grille(B). See graphic 2.
6. To dislodge the base grille pull it up strongly toward you from
one side then from other side (C). See graphic 2.
7. To remove the base grille completely, pass it underneath the
refrigerator door. See graphic 3.
8. Use a 3/8" nut driver to turn the leveling screws located in
both sides of the refrigerator. See graphic 10.
9. Raise the wheels while one person pushes on the refrigerator
to lift from front side. Use the bubble level on top of the
refrigerator or on its side to level refrigerator. Check bubble
level and at the same time observe the gaps and squareness
to the adjacent cabinets, furniture or trim. If adjacent
furnishings are not level, it may not be possible to achieve
even gaps when product is level.
NOTE: Depending on uneven oor conditions, you must
turn one or both screws to the right or left several times to
raise or lower the refrigerator. Continue adjusting until all four
corners are steady without rock.
10. Close both doors and check that they close as easily as
you like. If not, turn both screws to the right to raise the
refrigerator by tilting it more to the back until the doors close
as easily as you like.
11. Check and make sure that the technician sheet is placed in
the base grille cavity before assembling the base grille into
the cabinet.
12. Reinstall the left side of the base grille rst, and then the
right side. See graphic 3. You may insert the water dispenser
tubing and wiring into base grille cavity below the left bottom
hinge.
13. Attach the base grille by pushing it into the cabinet clips. See
graphic 2.
14. Using Phillips screwdriver, reinstall the screw to x the base
grill.
Door Alignment
The refrigerator doors are designed to be slightly misaligned
vertically when the refrigerator is empty. If the doors are uneven
after food has been placed, please follow the next instructions:
1. Close both the doors.
2. Use an 11/16" open-ended wrench tool to loosen the
locking nut of refrigerator lower hinge . See graphic 11.
Accommodate the wrench tool so that it ts in the space.
3. Use a 5/16" open-ended wrench tool to turn the alignment
screw. See graphic 12. Depending on how the refrigerator
door is misaligned in relation to the freezer door, you must
turn the screw to the right to raise or to the left to lower
the refrigerator door until both doors have been aligned
vertically.
NOTE: Several turns may be required.
4. Tighten the 11/16" locking nut with the wrench tool again.
5. Reattach the base grille if it was dislodged.
Handle Installation and Removal
PARTS INCLUDED: Door handles (2)
To Install the Handles:
1. Remove the handles, which are packed inside the
refrigerator.
NOTE: To avoid scratching the nish, place the handles
on a towel or other soft surface.
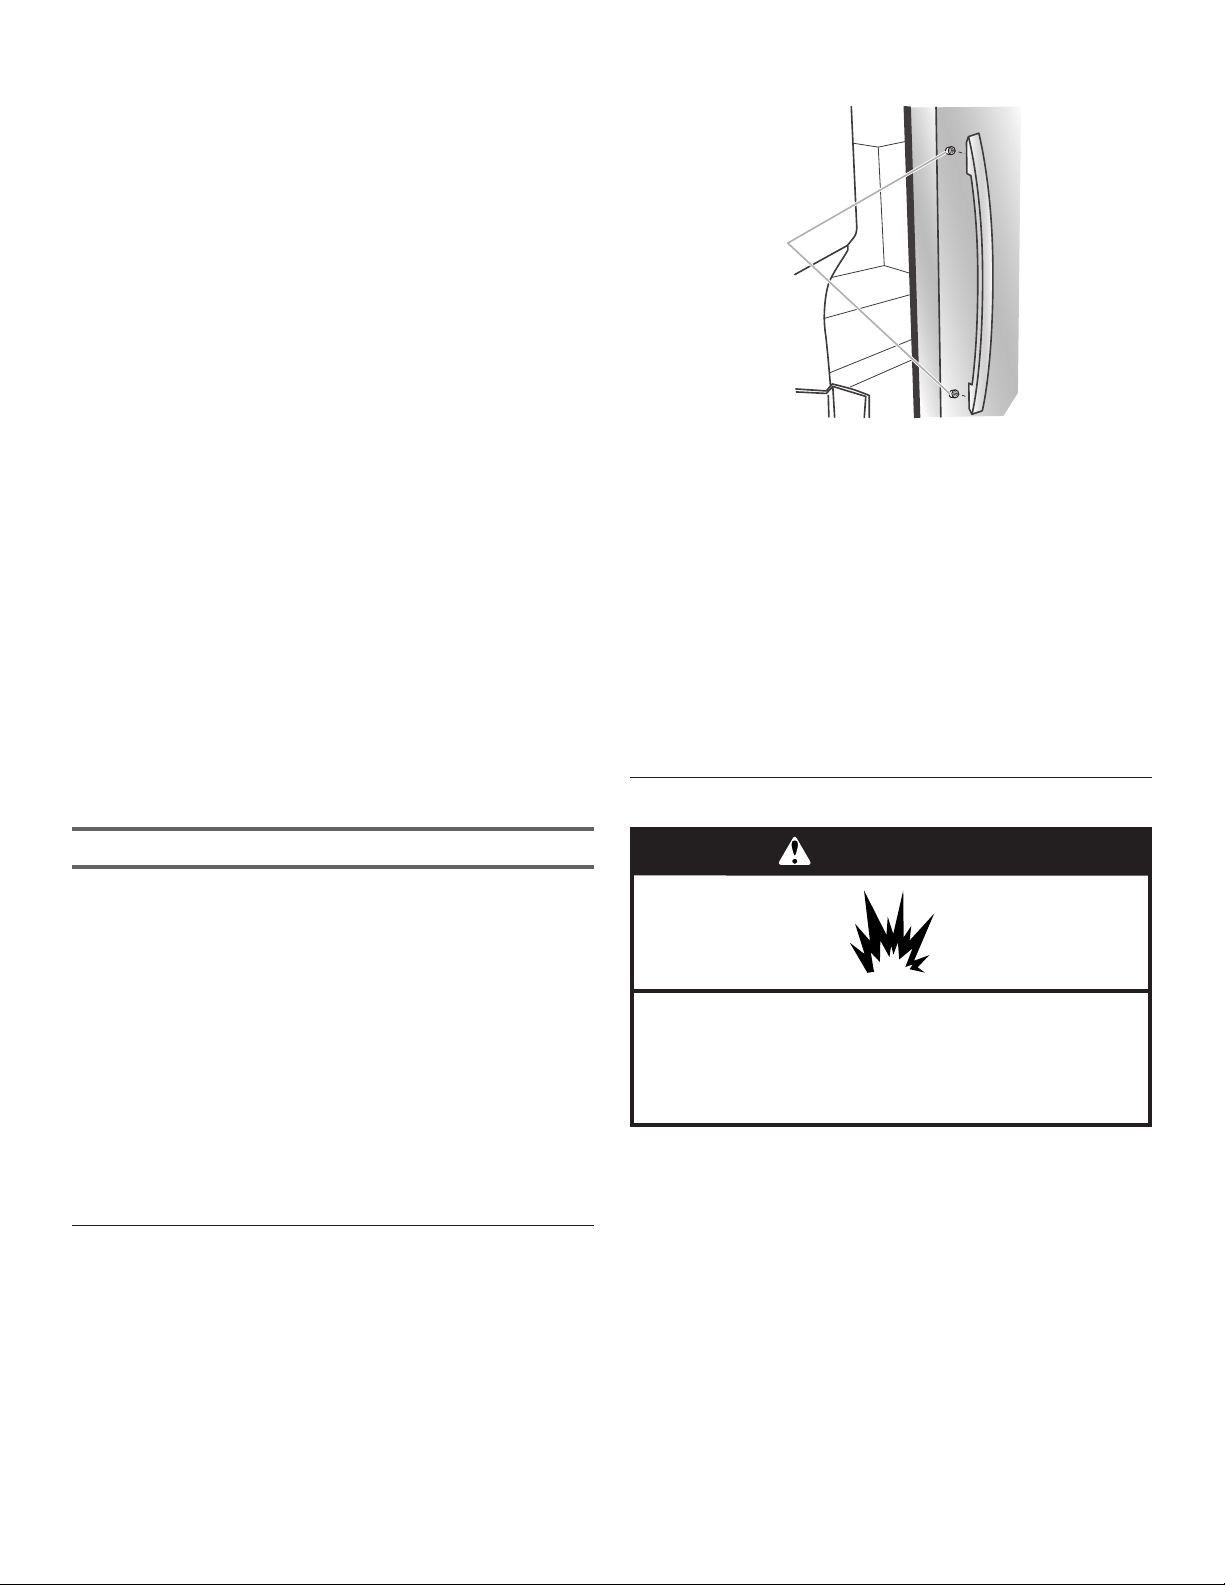
2. Open the freezer door. On the refrigerator door, place the
handle on the shoulder screws.
A
A. Shoulder screws
3. Firmly push the handle toward the door until the handle base
is ush against the door.
4. While holding the handle, push downward until the handle
rests rmly on the shoulder screw.
5. Open the refrigerator door and close the freezer door.
Repeat steps 2 through 4 to install the other handle onto
the freezer door.
To Remove the Handles:
1. While holding the handle, push upward until the handle is
released from the shoulder screw.
2. Gently pull the handle away from the door.
3. If necessary, use a Phillips screwdriver to remove the
shoulder screws from the door.
Location Requirements
WARNING
Explosion Hazard
Keep flammable materials and vapors, such as
gasoline, away from refrigerator.
Failure to do so can result in death, explosion, or fire.
IMPORTANT: This refrigerator is designed for indoor household
use only.
To ensure proper ventilation for your refrigerator, allow for
1/2" (12.7 mm) of space on each side and at the top. Allow for
2" (50.8 mm) of space behind the refrigerator. If your refrigerator
has an ice maker, allow extra space at the back for the water
line connections. When installing your refrigerator next to a
xed wall, leave a 2" (50.8 mm) minimum space on each side
(depending on your model) to allow the doors to swing open.
Loading ...
Loading ...
Loading ...