OK
NO
Repeat steps
2b
–
2c
with 1 MEDIUM extension
on the other side of the
gate. Insert extension
caps ONLY IF you are not
adding another extension
to this side.
Repeat step
2c
with
final MEDIUM extension
on either side of the gate.
Insert extension caps in all
4 corners.
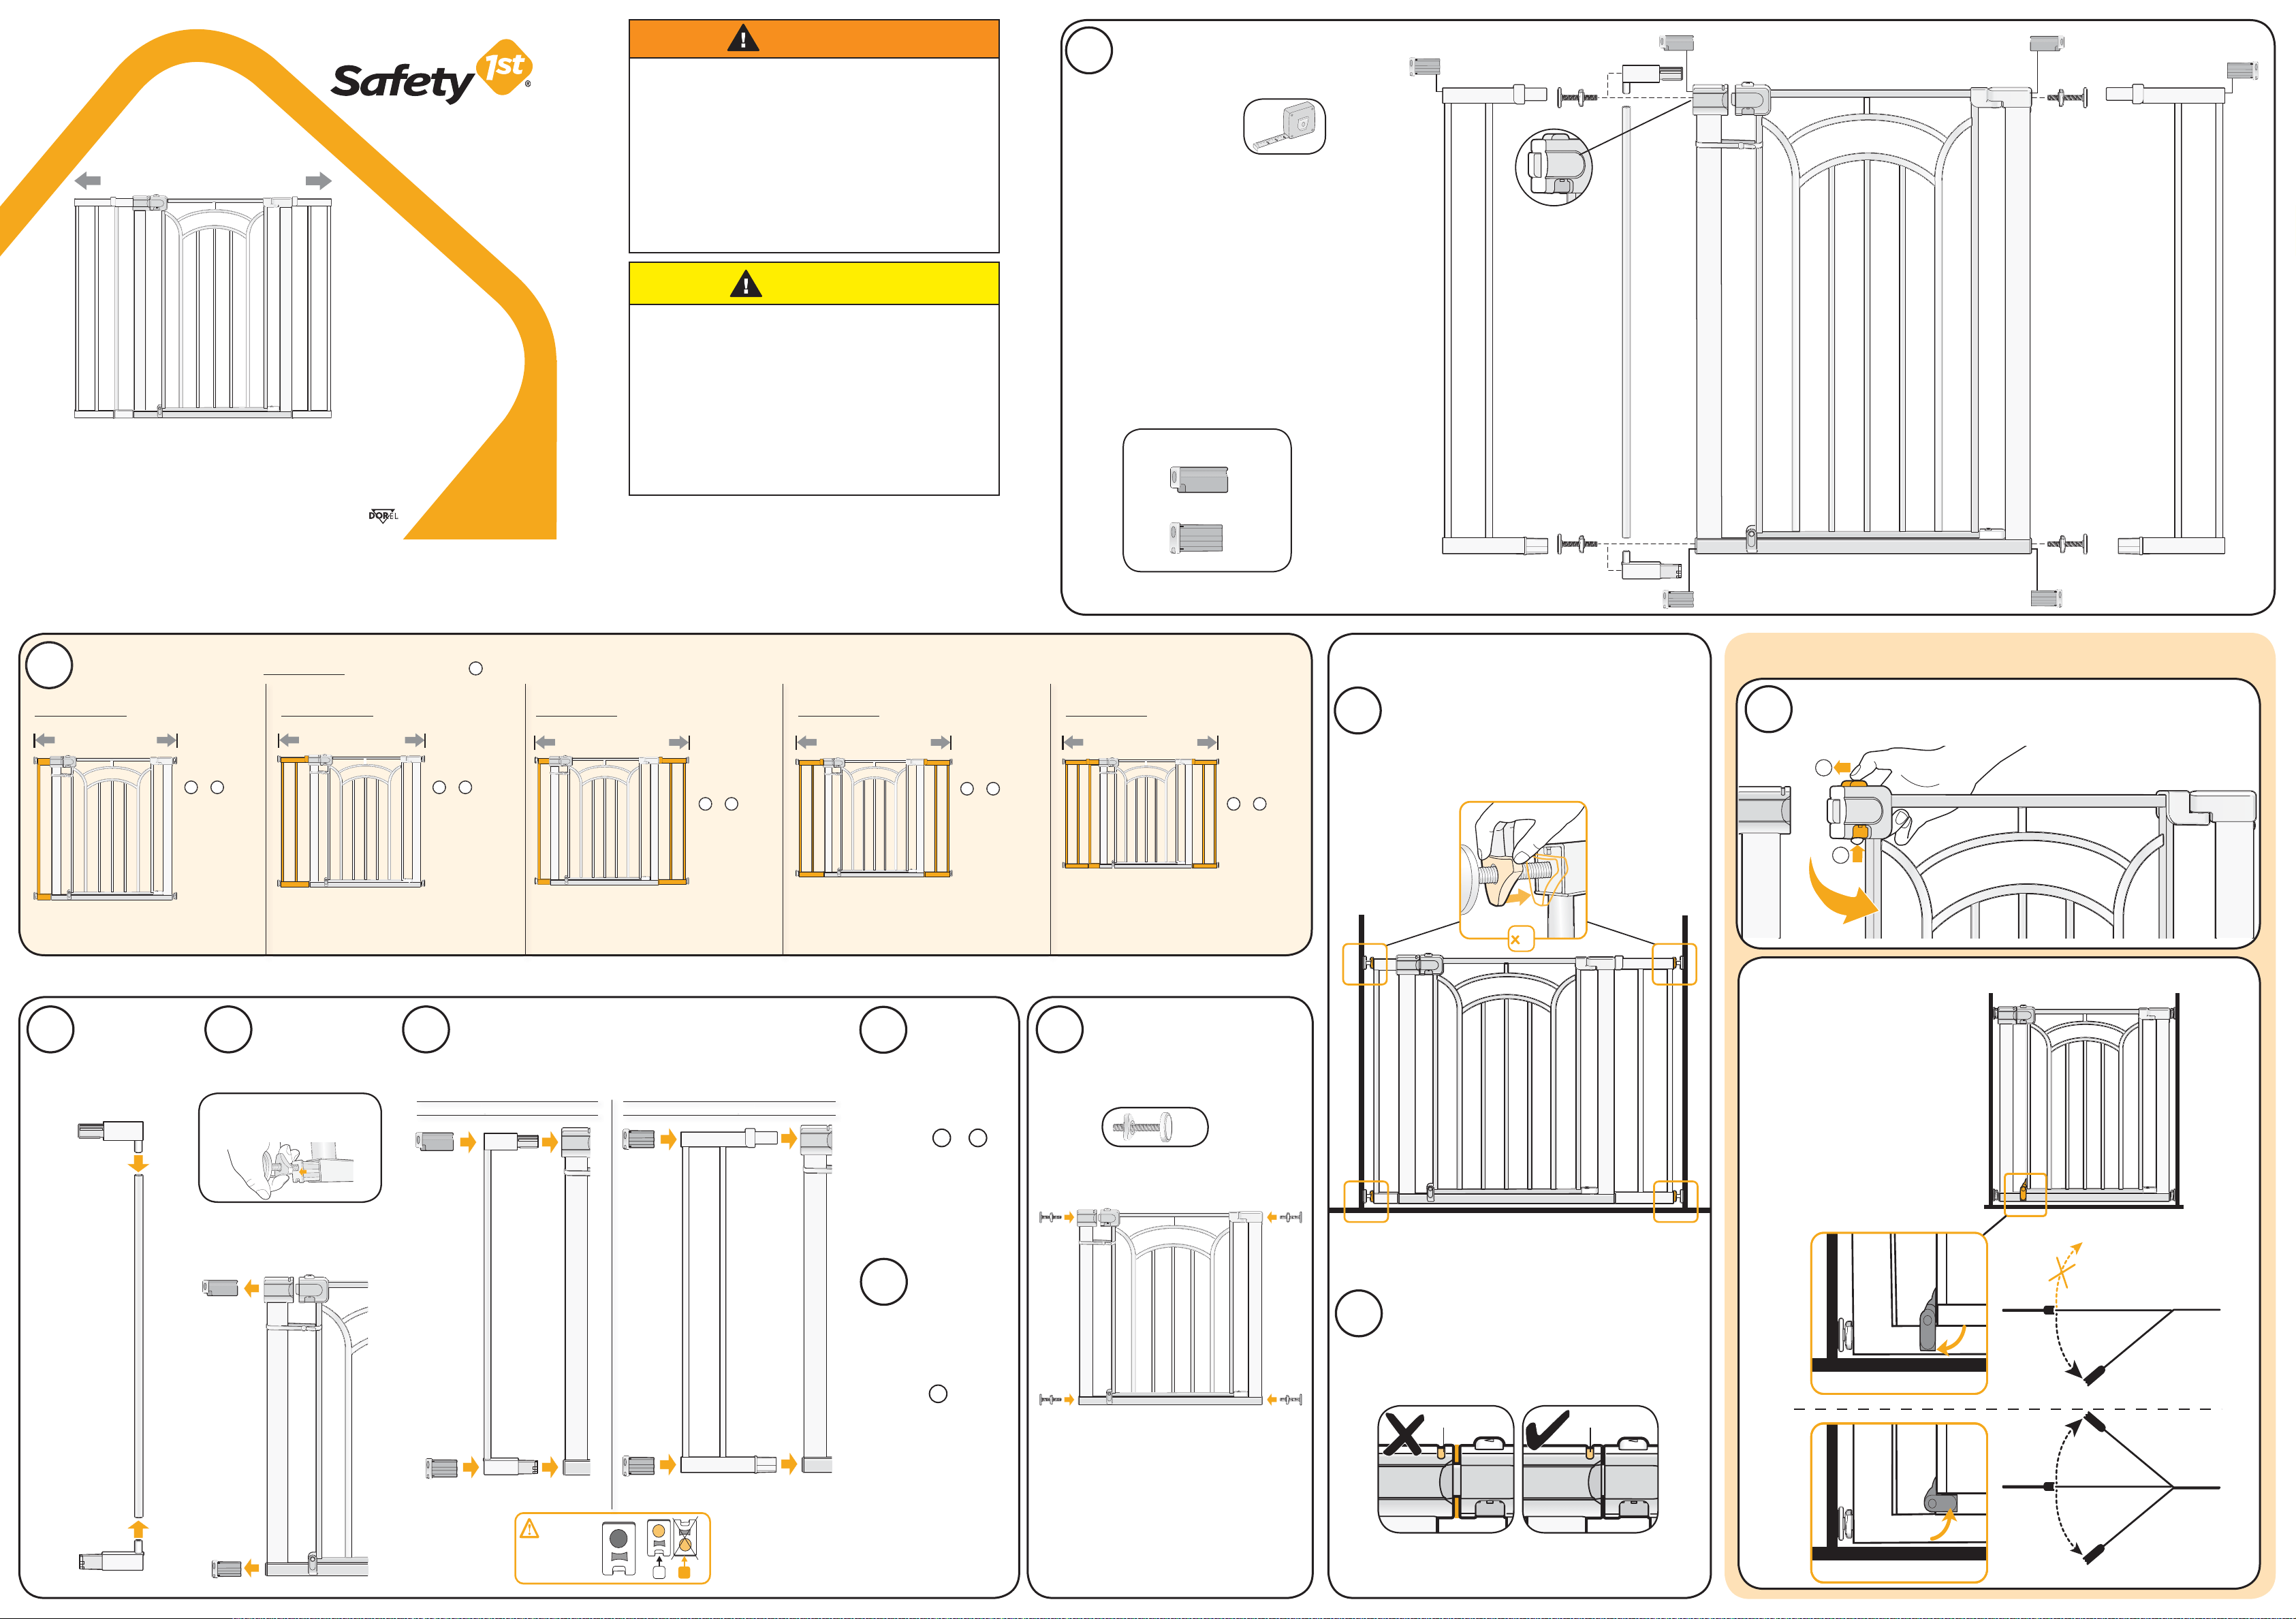
Lay out all parts
Install in doorway
TIP: Think about which side you’ll want the handle on during
daily use when you position the gate.
Position gate flush to floor. Hand tighten top and
bottom pressure bumpers until SecureTech
TM
indicator
turns green.
IF you are using the SMALL extension, always add it to the gate
FIRST. Insert extension into gate. Insert extension caps ONLY IF
you are not adding another extension to this side.
TIP: Use the bolt side of the
bumper to gently extract the
extension caps from the gate.
• Remove all contents from packaging and
discard box, and/or poly bags.
• Lay out all parts.
• Do not return this product to the place of
purchase. If any parts are missing, email
[email protected], call Consumer
Relations at (800) 544-1108, or fax at
(800) 207-8182. You can also visit our
website at www.safety1st.com. Have ready
the model number (GA107) and date code
(manufacture date) located on inside of
gate panel.
1
2
Use 1 SMALL
and
2 MEDIUM
extensions,
Go to steps
2a
–
2e
Use 2 MEDIUM
extensions,
Go to steps
2b
–
2d
Use 1 SMALL
and
1 MEDIUM
extension,
Go to steps
2a
–
2d
Use 1 SMALL
extension,
Go to steps
2a
–
2c
Use 1 MEDIUM
extension,
Go to steps
2b
–
2c
4
USA
USA
USA
1
Up to 47”Up to 44”Up to 41”
If Opening is...If Opening is...If Opening is...
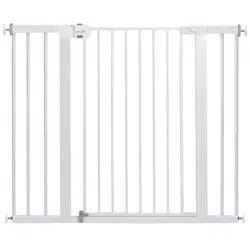
Easy Install
Extra Tall
and Wide
Walk-Thru Gate
min 29” - max 47”
BOTTOM
TOP
Measure opening
Up to 35” Up to 38”
If Opening is... If Opening is...
Assemble
SMALL
extension
Add extension
For openings
over 38” - 44”
only
For openings
over 44” - 47”
only
Remove
extension
caps
USA
USA
TOP
BOTTOM
USA
USA
USA
BOTTOM
TOP
A
BB
B
B
caps:
check!
Insert pressure
bumpers into 4
corners
x4
Remove extension caps from
gate. Keep them near by;
you will need them for final
assembly.
To Use
Remove ‘STOP’ sign, raise swing stops
and open gate
Optional: Using the swing stops
Check and re-check the indicator
Gate is fully pressurized when SecureTech
TM
indicator
turns green. Be sure to re-check the indicator regularly
and re-tighten the bolts if you see any red when gate
is closed.
USA
USA
Red Green
Gate will swing both ways unless
one of the swing stops is down.
Gate will not swing at all if both
swing stops are down.
If Opening is
up to 32”
go to step
3
. No extensions are required.
Age: 6 to 24 months.
Adult assembly
required.
GA107
2
2b 2c
2d
2e
2a
3
5
4
6
MEDIUMSMALL
U
S
MEDIUM
SMALL
A
B
B
BB
A
A
B
Extension caps
©2017 Dorel Juvenile. (800) 544-1108 www.safety1st.com Made in CHINA. Hecho en CHINA.
Styles and colors may vary. Los estilos y los colores pueden variar.
Distributed by (distribuido por) Dorel Juvenile Group, Inc., 2525 State St., Columbus, IN 47201-7494
Dorel Juvenile Canada, 2855 Argentia Road, Unit 4, Mississauga, ON, L5N 8G6 05/10/17
4358-6675B
Importado y Distribuido en Chile por: Comercial e Industrial Silfa S.A. - San Ignacio 0201 / Parque Industrial Portezuelo Quilicura, Santiago Chile.
Fono (562) 2339 9000. En Perú por: Comexa S.A. - Los Libertadores 455 – San Isidro, Lima – Perú. Fono (511) 4469014. En Centro América,
Caribe y Ecuador por: Best Brands Group S.A. – Av. Balboa, Bay Mall Plaza, Planta Baja, local 9, Panamá. - Fono: (507) 300 2884.
En Colombia por: Baby Universe S.A.S. - Vía 40 No. 77-29, Barranquilla, Colombia - Fono: (575) 353 1110
Importador: DJGM, S.A. DE C.V. Gabriel Mancera No. 1041 Col. Del Valle Delegación Benito Juárez C.P. 03100 México, D.F. R.F.C.
DJG140305GN9 Tel. (55) 67199202
CAUTION:
• Keep small parts away from children during assembly.
• ALWAYS check regularly to ensure gate and locking systems
are secure. Tighten locking hardware as necessary. DO NOT
over-tighten.
• DO NOT use gate if any parts are missing or broken. Contact
Dorel Juvenile Group for replacement parts and instructional
literature if needed.
• DO NOT substitute parts.
• Install according to manufacturer’s instructions.
• Intended for use with children from 6 months through 24
months.
WARNING:
• Children have died or been seriously injured when gates or
enclosures are not securely installed. ALWAYS install and
use gates or enclosures as directed using all required parts.
• STOP using when a child can climb over or dislodge the
gate or enclosure.
• Use only with the locking mechanism securely engaged.
• This product will not necessarily prevent all accidents.
Never leave child unattended.
• NEVER use to keep child away from pool.
• To prevent falls, NEVER use at top of stairs.
• ALWAYS install as close to the floor as possible.
Care and Maintenance:
DO NOT immerse in water.
Wipe with a damp cloth and dry.
Tools needed (not
included): Measuring
tape
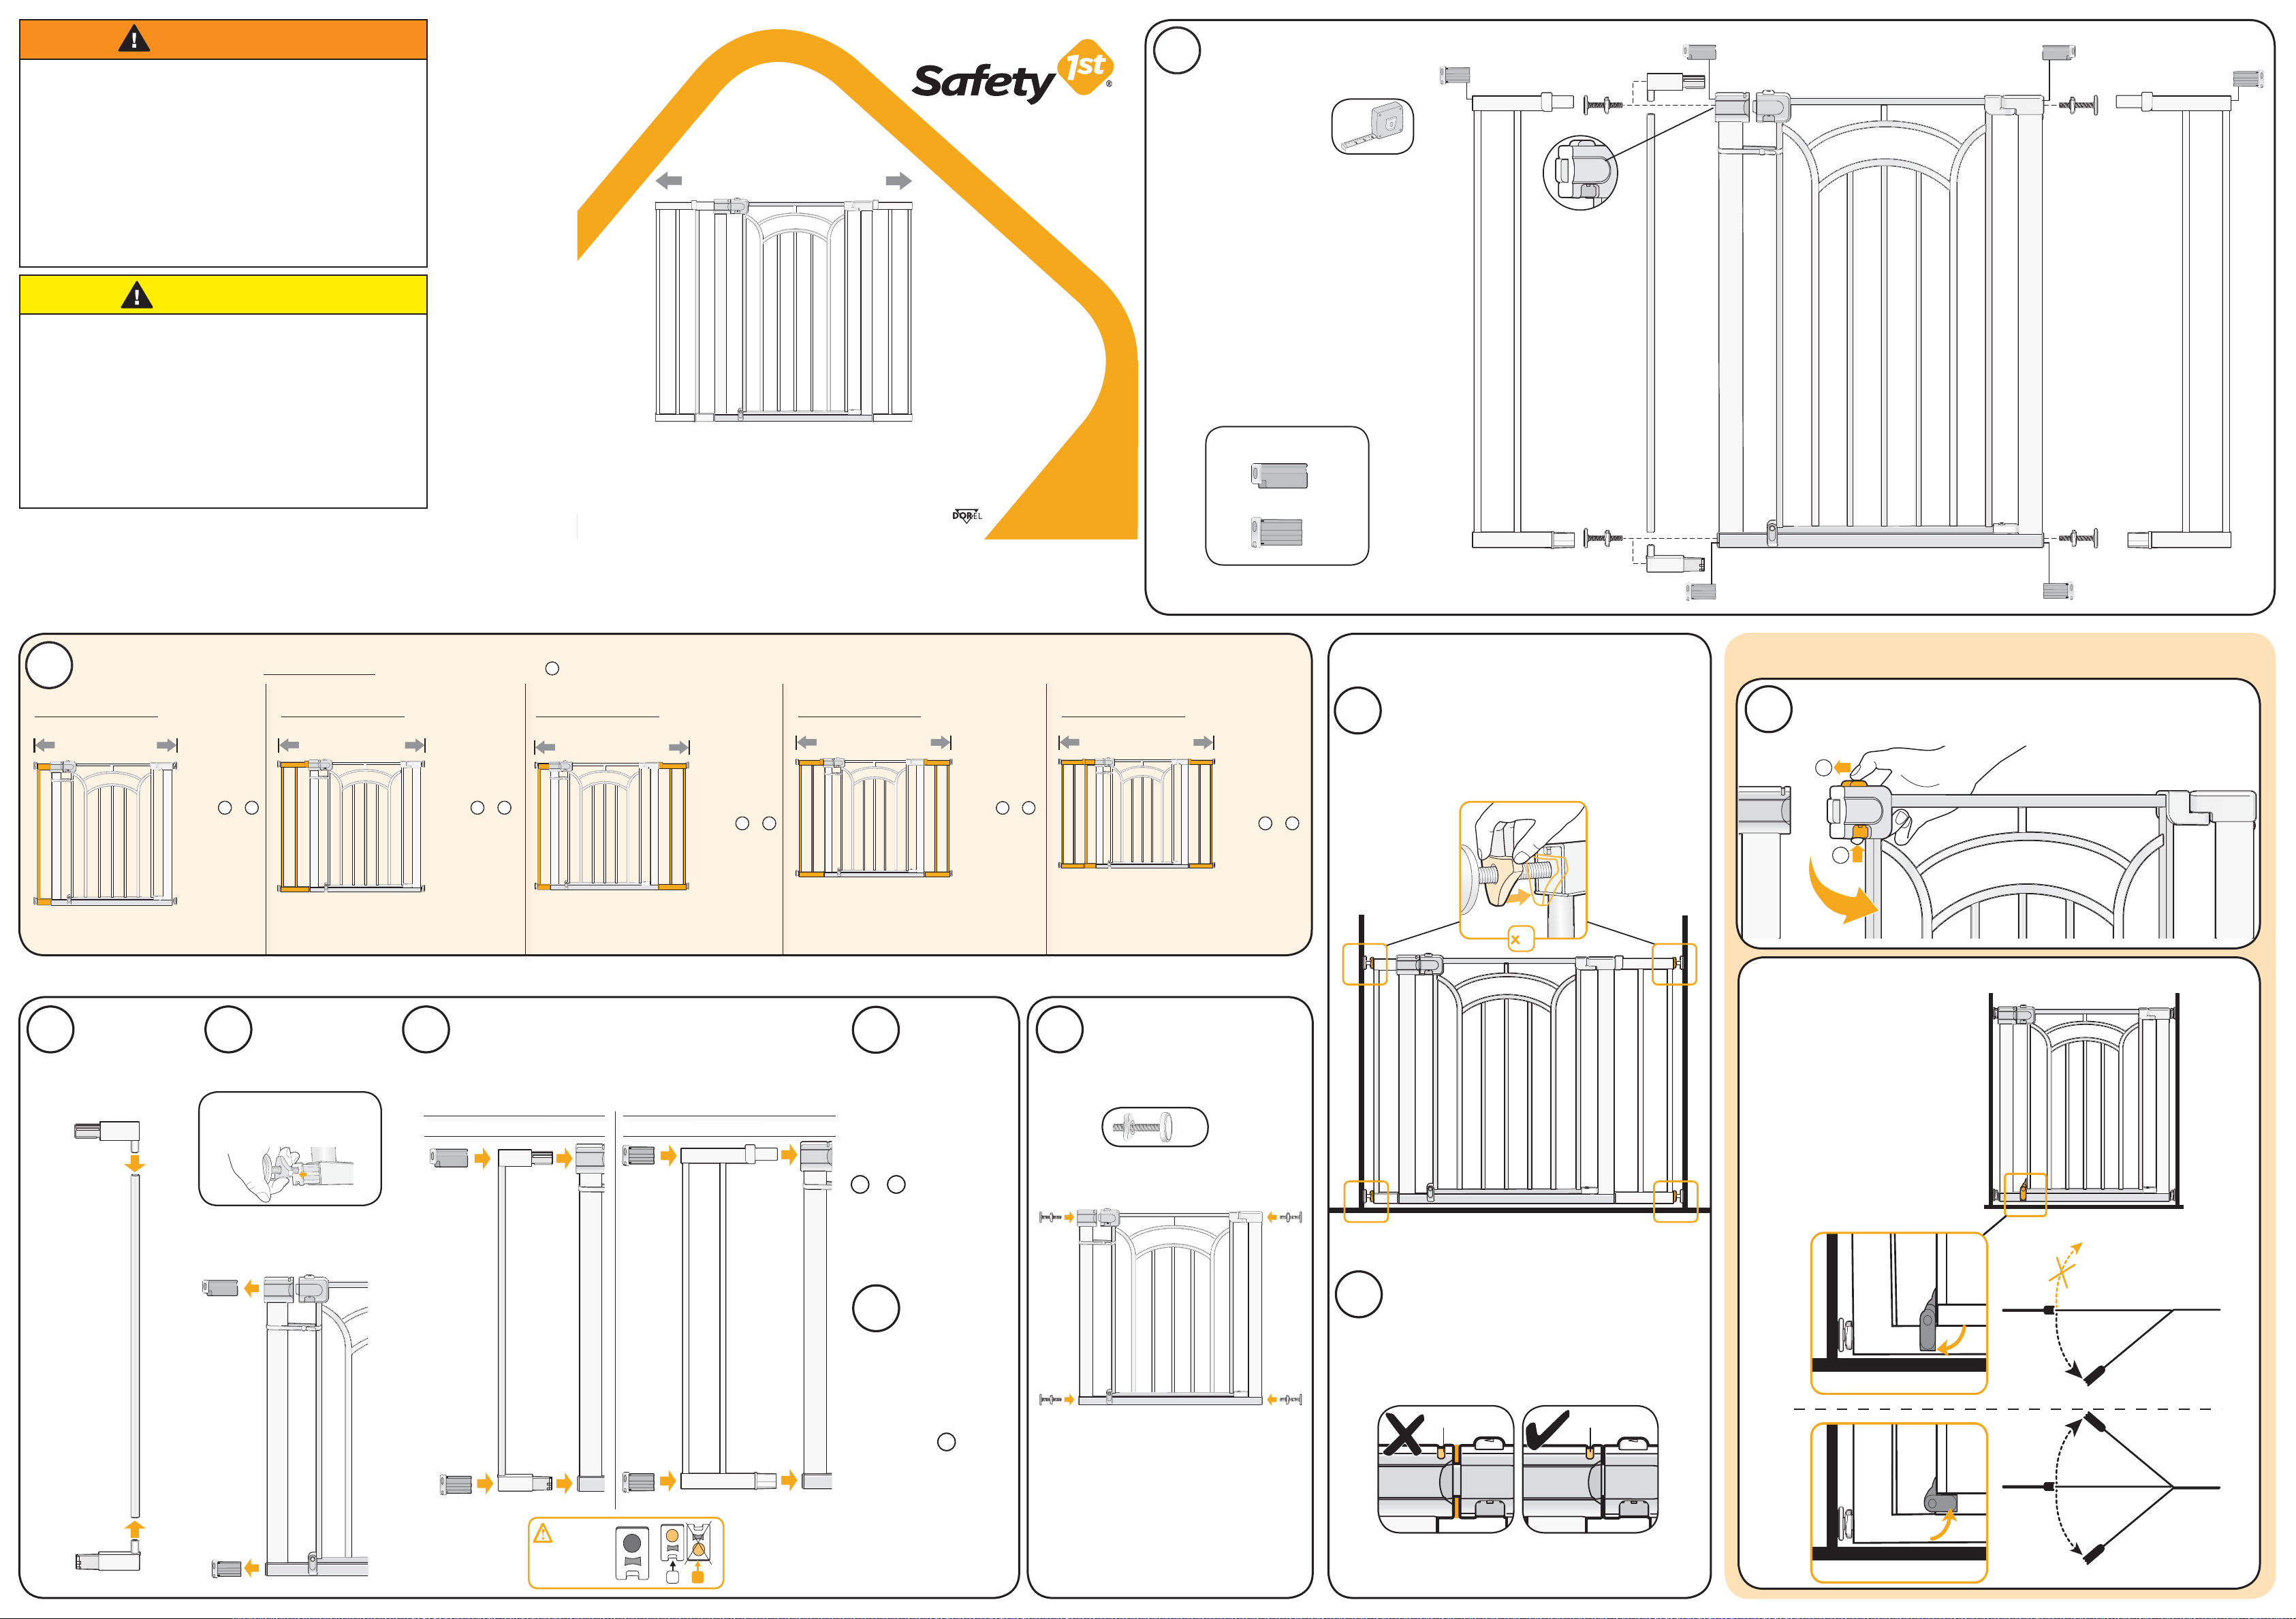
Ordenar todas las
partes
Puerta
pasante extra
alta y ancha
fácil de instalar
mín 29” - máx 47”
Cuidado y mantenimiento:
NO SUMERJA la unidad
en agua. Utilice un paño húmedo y luego séquela.
1
GA107
Edad: de 6 a 24 meses.
Se requiere el armadopor
parte de un adulto.
• Retire todo el contenido del embalaje y
deseche la caja y/o las bolsas de polietileno.
• Despliegue todas las piezas.
• No devuelva este producto al lugar donde
lo compró. Si falta alguna pieza, envíe un
correo electrónico a [email protected],
llame al Departamento de Relaciones con el
Consumidor al (800) 544-1108, o envíe un
fax al (800) 207-8182. También puede visitar
nuestro sitio web en www.safety1st.com.
Tenga a mano el número de modelo (GA107)
y el código de fecha (fecha de fabricación),
ubicado en el interior del panel de la puerta.
(119.4 cm)(73.6 cm)
Repetir los pasos
2b
–
2c
con 1 extensión
MEDIANA del otro lado de
la puerta. Inserte las tapas
de la extensión SOLO SI no
va a agregar otra extensión
de este lado.
Repetir el paso
2c
con
una extensión MEDIANA
final sobre de cualquier
lado de la puerta. Inserte
las tapas de las extensiones
en las 4 esquinas.
Colocar en el espacio
correspondiente
CONSEJO: Decida de qué lado quiere que se encuentre la
manija para su uso diario al colocar la puerta.
Coloque la puerta a nivel del piso. Ajuste a mano los topes
a presión superiores e inferiores hasta que los indicadores
SecureTech
TM
aparezcan verdes.
Si está utilizando la extensión PEQUEÑA, siempre colóquela en la puerta PRIMERO.
Insertar la extensión en la puerta. Insertar la extensión en la puerta. Inserte las
tapas de la extensión SOLO SI no va a agregar otra extensión de este lado.
CONSEJO: Use el lado del
perno del tope para extraer
cuidadosamente las tapas de la
extensión de la puerta.
1
2
4
USA
USA
USA
Armar
extensión
PEQUEÑA
Agregar la extensión
Para aberturas
superiores a
38” - 44”
solamente
Para aberturas
superiores
a 44” - 47”
solamente
Quitar las
tapas de la
extensión
USA
USA
TOP
BOTTOM
USA
Insertar los topes
a presión en las 4
esquinas
x4
Quite las tapas de la extensión
de la puerta Déjelas cerca; las va
a necesitar para el armado final.
Para usar
Quite la señal ‘PARAR’, eleve los topes de giro
y abra la puerta
Optional: Using the swing stops
USA
USA
La puerta va a girar hacia ambos
lados a menos que uno de los topes
de giro esté bajo. La puerta no va
a girar hacia ningún lado si ambos
topes de giro están bajos.
2b 2c
2d
2e
2a
3
5
4
6
Controle una y otra vez el
indicador
La puerta queda bien cerrada a presión cuando los
indicadores SecureTech
TM
aparecen verdes. Asegúrese
de volver a controlar el indicador con regularidad y
volver a ajustar los pernos si se ve rojo cuando la puerta
está cerrada.
Rojo Verde
USA
USA
BOTTOM
TOP
OK
NO
A
BB
B
B
Tapas:
¡controlar!
MEDIANA: PEQUEÑA:
MEDIANA
PEQUEÑA
BOTTOM
TOP
A
B
B
BB
A
A
B
Tapas de la extensión
Usar
2 extensiones
MEDIANAS,
Seguir los
pasos
2b
–
2d
Si la abertura es...Si la abertura es...Si la abertura es...
Medir abertura
Si la abertura es... Si la abertura es...
Si la abertura es hasta 32”
seguir el paso
3
. No se requieren extensiones.
2
Usar
1 extensión
PEQUEÑA
y
2 MEDIANAS,
Seguir los
pasos
2a
–
2e
Hasta 47”
(119.4 cm)
Usar
1 extensión
PEQUEÑA
y
1 MEDIANA,
Seguir los
pasos
2a
–
2d
Hasta 41”
(104.1 cm)
Hasta 44”
(111.7 cm)
Usar
1 extensión
PEQUEÑA,
Seguir los
pasos
2a
–
2c
Usar
1 extensión
MEDIANA,
Seguir los
pasos
2b
–
2c
Hasta 35” Hasta 38”
(88.9 cm) (96.5 cm)
B
B
©2017 Dorel Juvenile. (800) 544-1108 www.safety1st.com Made in CHINA. Hecho en CHINA.
Styles and colors may vary. Los estilos y los colores pueden variar.
Distributed by (distribuido por) Dorel Juvenile Group, Inc., 2525 State St., Columbus, IN 47201-7494
Dorel Juvenile Canada, 2855 Argentia Road, Unit 4, Mississauga, ON, L5N 8G6 05/10/17
4358-6675B
Importado y Distribuido en Chile por: Comercial e Industrial Silfa S.A. - San Ignacio 0201 / Parque Industrial Portezuelo Quilicura, Santiago Chile.
Fono (562) 2339 9000. En Perú por: Comexa S.A. - Los Libertadores 455 – San Isidro, Lima – Perú. Fono (511) 4469014. En Centro América,
Caribe y Ecuador por: Best Brands Group S.A. – Av. Balboa, Bay Mall Plaza, Planta Baja, local 9, Panamá. - Fono: (507) 300 2884.
En Colombia por: Baby Universe S.A.S. - Vía 40 No. 77-29, Barranquilla, Colombia - Fono: (575) 353 1110
Importador: DJGM, S.A. DE C.V. Gabriel Mancera No. 1041 Col. Del Valle Delegación Benito Juárez C.P. 03100 México, D.F. R.F.C.
DJG140305GN9 Tel. (55) 67199202
PRECAUCIÓN:
• Mantenga las piezas pequeñas fuera del alcance de los niños durante
el ensamblado.
• SIEMPRE revise con frecuencia para asegurarse de que la puerta y los
sistemas de tranca estén firmes. Ajuste los elementos de traba según
necesidad. NO ajuste excesivamente.
• NO UTILICE la puerta si alguna de sus piezas falta o está rota. Si
necesita piezas de reemplazo o instrucciones adicionales, comuníquese
con Dorel Juvenile Group.
• NO SUSTITUYA ninguna pieza.
• Instale la puerta siguiendo las instrucciones del fabricante.
• Diseñada para utilizar con niños de 6 a 24 meses de edad.
ADVERTENCIA:
• Han muerto o se han lesionado gravemente unos cuantos niños por
culpa de barreras mal instaladas. Instale y use SIEMPRE las barreras
según las instrucciones, incluyendo todas las piezas indicadas.
• NO SIGA usando cuando el niño pueda trepar por encimo o burlar el
cometído de las barreras.
• Utilice exclusivamente con el mecanismo de cierre bien asegurado.
• Este producto no puede prevenir todos los accidentes. NUNCA deje
solo al niño.
• NUNCA la use para evitar que el niño ingrese a la piscina.
• Para evitar caídas, NUNCA utilice en la parte superior de las
escaleras.
• SIEMPRE instale la puerta lo más cerca posible del piso.
Herramientas necesarias
(no incluidas): cinta
métrica