Loading ...
Loading ...
Loading ...
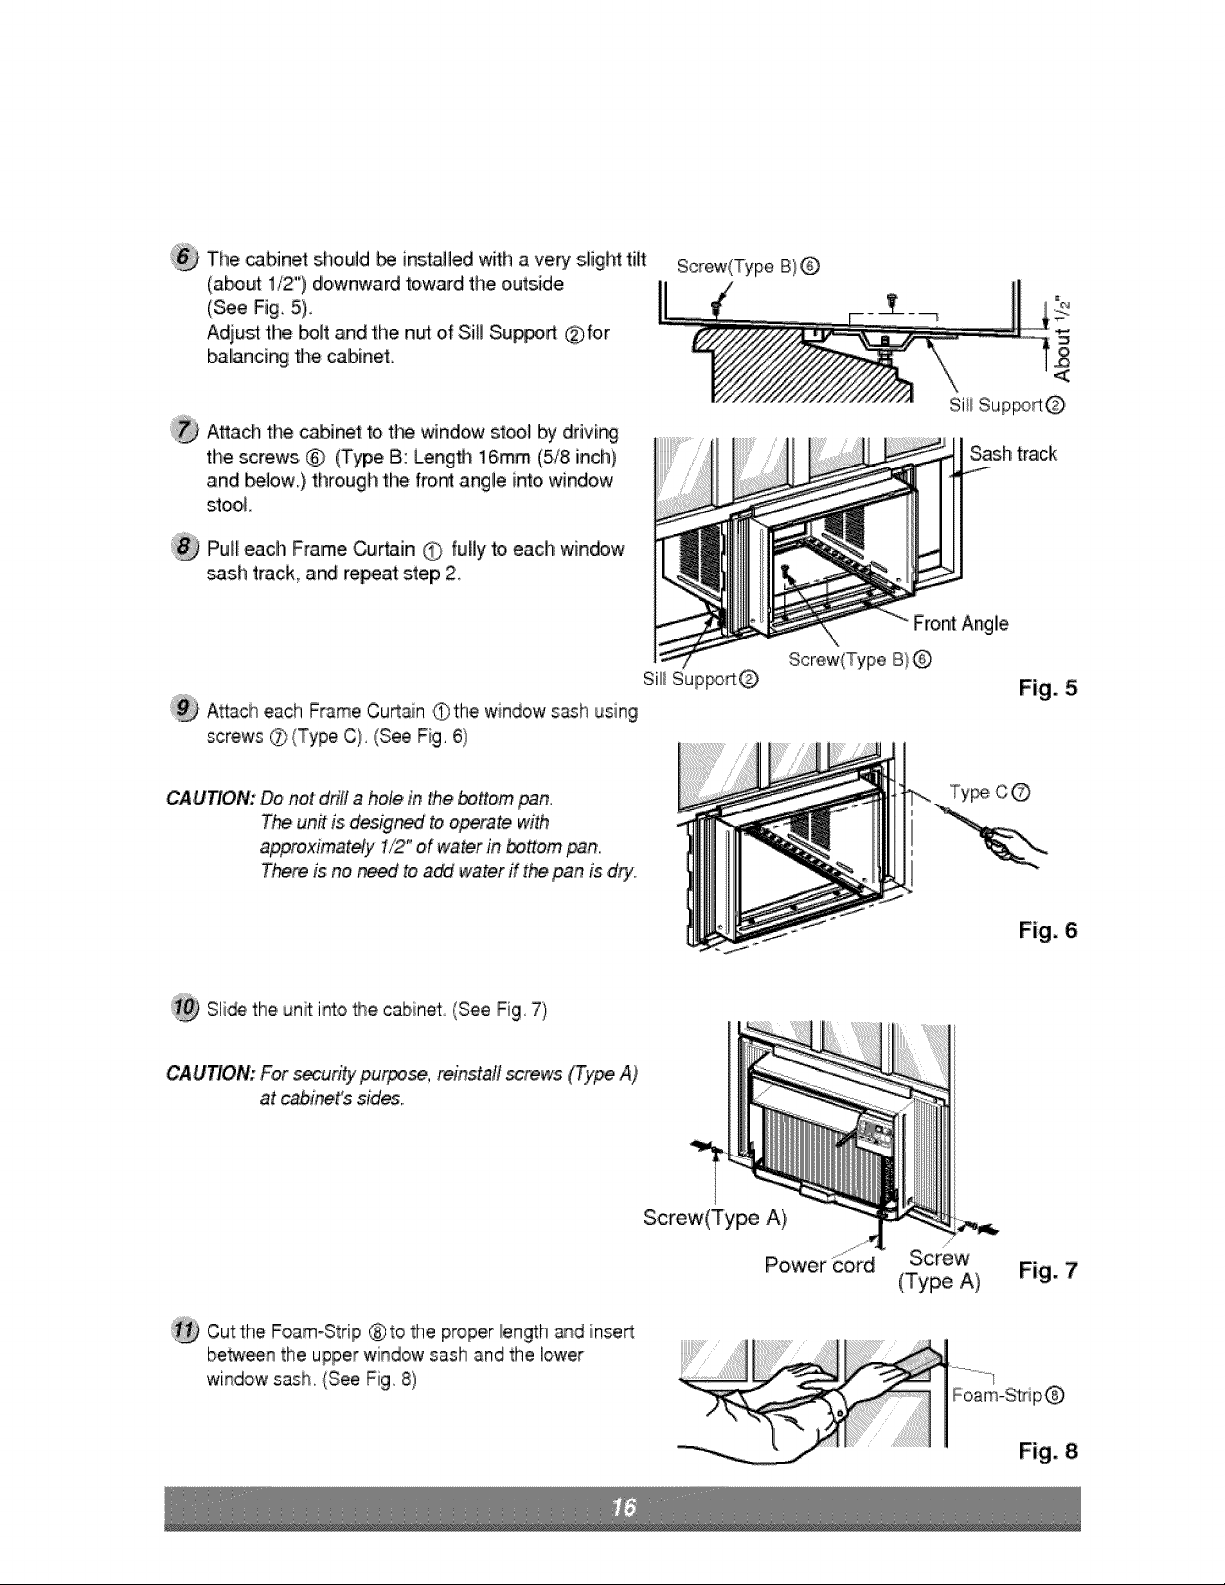
The cabinet should be installed with ave_ sl!ighttilt
(abo_ 1/2") downward toward the outside
(See Fig, 5},
Adju_ the bolt and the n_ of Sill Su_rt ®for
ballancir_ fl_e calbinel,
A_ach the cabinet to tl°_ window stool by drivir_9
the screws ® (Type B: Leng#_ 16ram (518 inch)
and _bw.) through the fron_angle into window
stool
Pul_each,Frame Curtain0 fullyto,each window
sash track and re_a,t step 2,
Attac[heach Frame CuRain (#the window sash using
screws O (Type C), (See Fig, 61)
Screw(Type B! @
Front Angle
Screw(Type B!@
Sill Sup_O
Sash track
Fig. 5
CA,UTION:Do no{ drill ahole in the _,#om _n,
The un# is desig_ to operate with
approximat#y I/2" oil water in _ttom pan,,
There is no _to a_ water ff the pan' is dry,
c©
Fig. 6
Sli_ the unffi_o _e cabinet (See Fig, 7)
CAUTION: ,Forsecurity purpose, reinstall _rews (Type A)'
at cabi_t's sides,,
Cutthe Foam-Strip @to the proper _engthand inseR
be_n the uppe wndow _a_h and the lower
window sash, (See Fig, 8)
Screw(Type A)
Power Cor'c Screw
(Type A) Fig. 7
Fig. 8
Loading ...
Loading ...
Loading ...