Loading ...
Loading ...
Loading ...
Installation instructions en
37
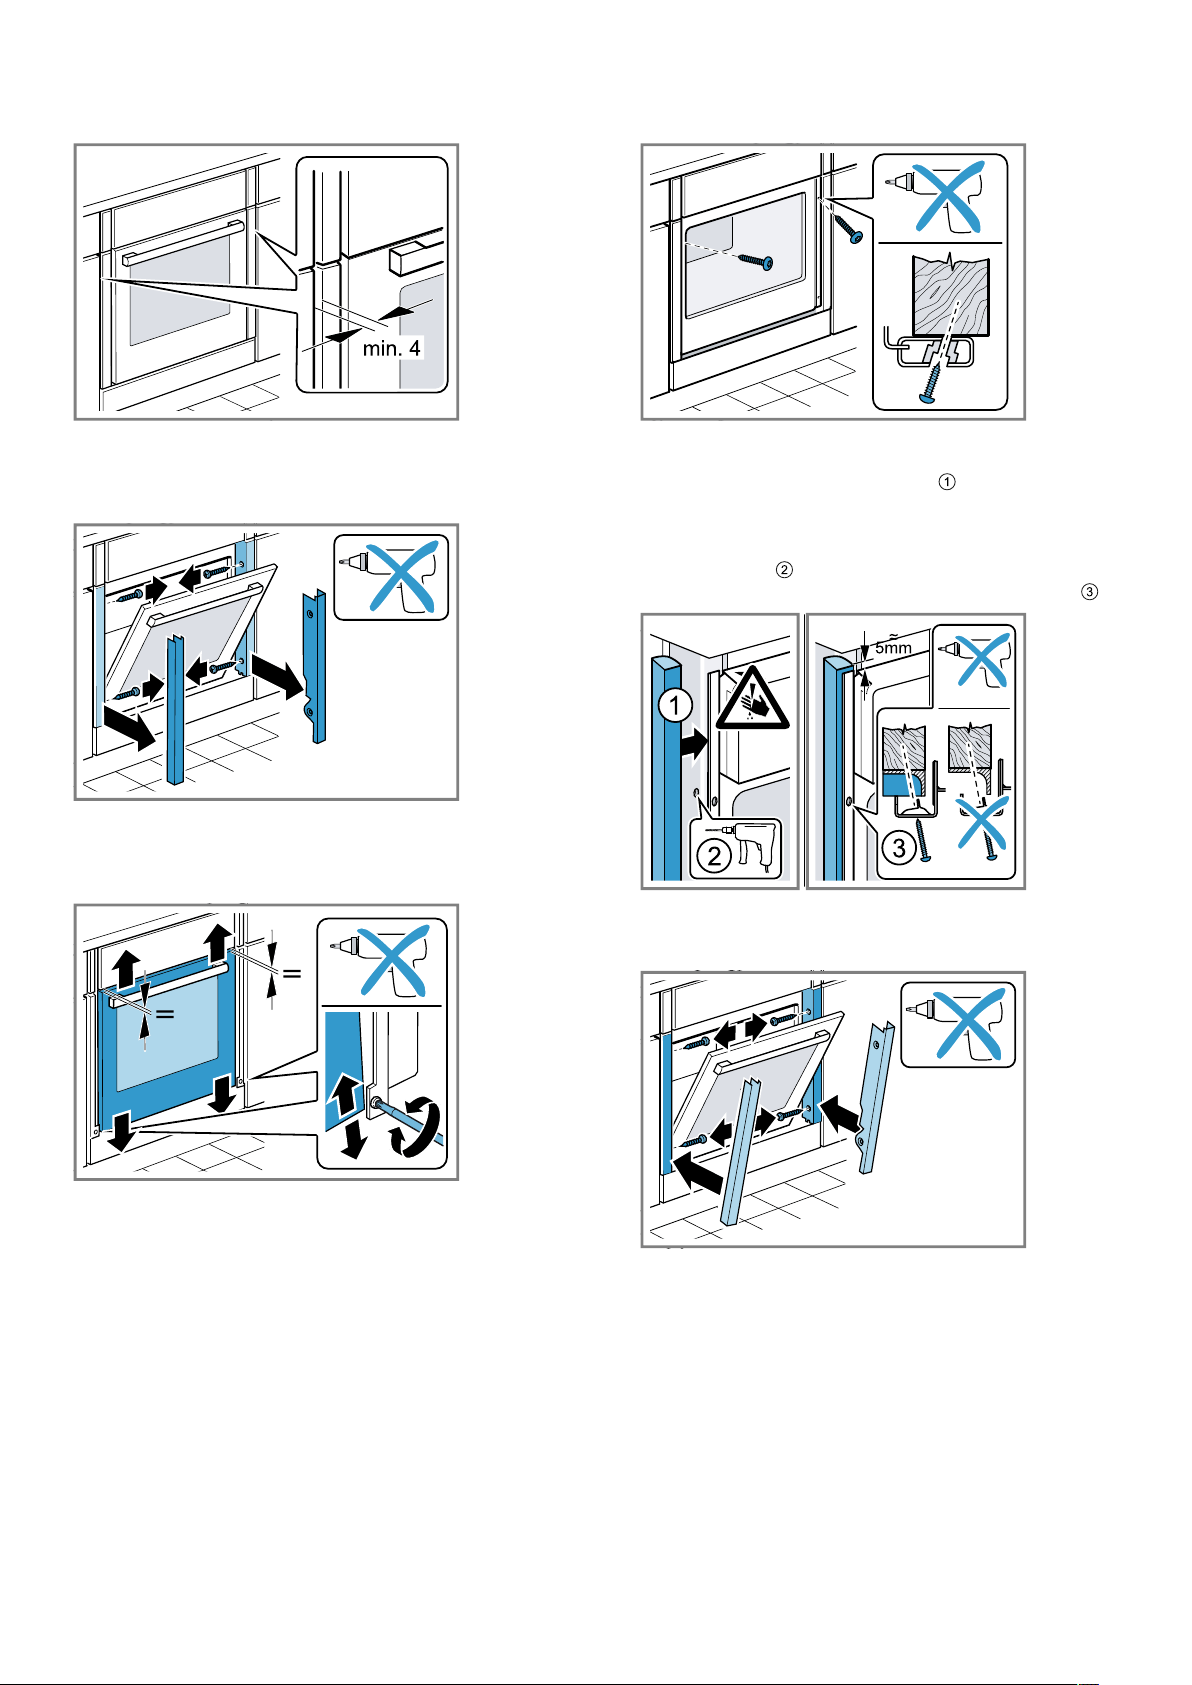
3.
Centre the appliance.
There must be an air gap of at least 4mm between
the appliance and adjacent unit fronts.
4.
Open the appliance door slightly and unscrew pan-
els on the left and right.
5.
Close the appliance door.
6.
If required, you can adjust the height of the appli-
ance door using the adjustment screws on the left
and right.
Turning the screws clockwise makes the gap smal-
ler
Turning the screws anti-clockwise makes the gap
larger
7.
Screw the appliance into place.
8.
For handleless kitchens with vertical bar handle
strips:
‒ Attach a suitable filling piece in order to cover
any sharp edges and to guarantee a safe install-
ation.
‒ Pre-drill aluminium profiles to establish a screw
connection .
‒ Secure the appliance using a suitable screw .
9.
Open the appliance door slightly, then refit the pan-
els and screw them in place, first at the top and
then at the bottom.
Note:The gap between the worktop and the appliance
must not be closed by additional battens.
Thermal insulation strips must not be fitted to the side
panels of the surround unit.
24.10 Removing the appliance
1.
Disconnect the appliance from the power supply.
2.
Undo the fastening screws.
3.
Lift the appliance slightly and pull it out completely.
Loading ...
Loading ...
Loading ...