Loading ...
Loading ...
Loading ...
en Installation instructions
36
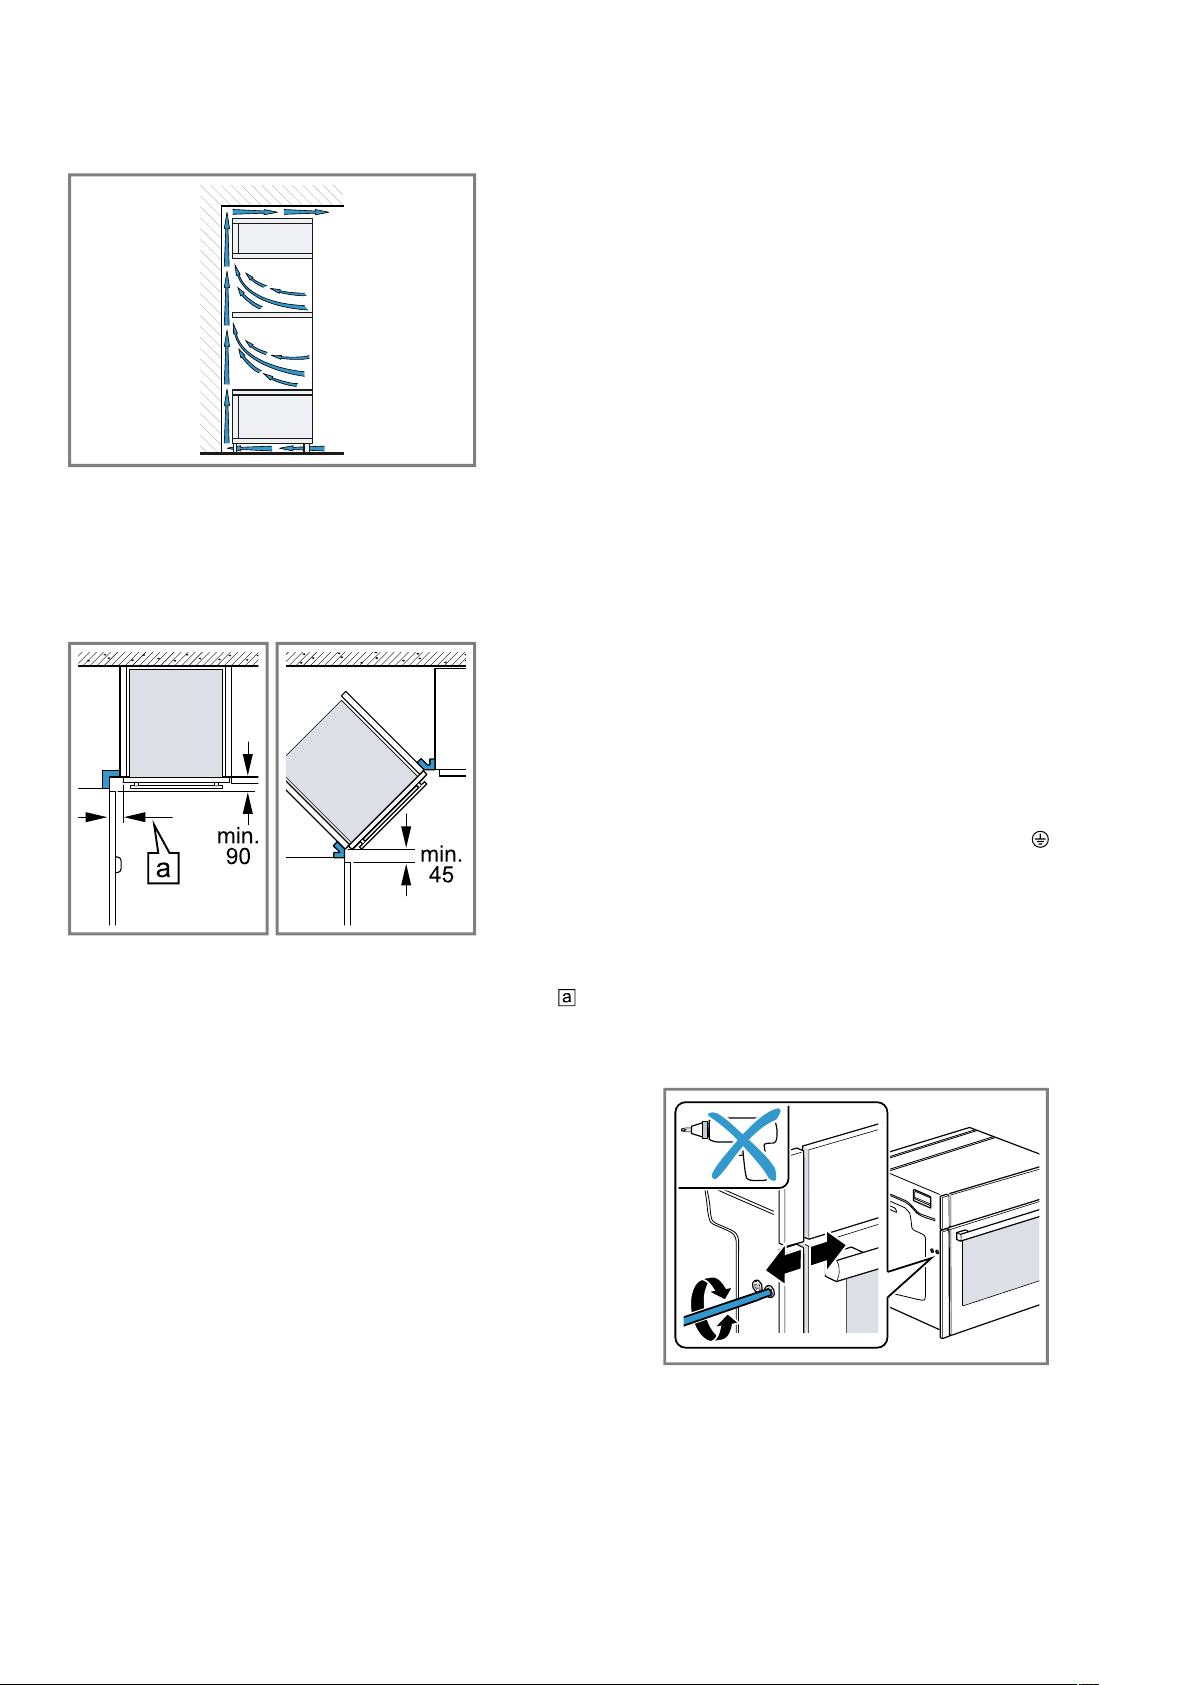
¡ Ensure that air exchange is guaranteed in accord-
ance with the diagram.
¡ Only fit appliances up to a height that allows ac-
cessories to be easily removed.
24.7 Corner installation
Observe the installation dimensions and the installation
instructions when installing in a corner.
¡ To ensure that the appliance door can be opened,
you must take the minimum dimensions into consid-
eration when installing in a corner. The dimension
is dependent on the thickness of the unit front and
the handle.
24.8 Electrical connection
In order to safely connect the appliance to the elec-
trical system, follow these instructions.
¡ The appliance corresponds to protection class I and
must only be operated with a protective earth con-
nection.
¡ The fuse protection must correspond to the power
rating specified on the appliance's rating plate and
to the local regulations.
¡ The appliance must be disconnected from the
power supply whenever installation work is being
carried out.
¡ The appliance must only be connected using the
power cable provided.
¡ The power cable must be plugged in at the rear of
the appliance until you hear a clicking sound. A 3 m
power cable can be obtained from the after-sales
service.
¡ The power cable must only be replaced with a cable
from the original manufacturer. This is available from
after-sales service.
¡ Contact protection must be guaranteed by the in-
stallation.
Electrically connect the appliance with the
protective contact plug
Note:The appliance must only be connected to a pro-
tective contact socket that has been correctly installed.
▶
Insert the plug into the protective contact socket.
When the appliance is installed, the mains plug of
the power cord must be freely accessible. If free ac-
cess to the mains plug is impossible, an all-pole
isolating switch must be integrated into the perman-
ent electrical installation in accordance with the in-
stallation regulations.
Electrically connecting an appliance without a
protective contact plug
Note:Only a licensed professional may connect the ap-
pliance. Damage caused by incorrect connection is not
covered under the warranty.
An all-pole isolating switch must be integrated into the
permanent electrical installation according to the install-
ation regulations.
1.
Identify the phase and neutral conductors in the
socket.
The appliance may be damaged if it is not connec-
ted correctly.
2.
Connect the hob in accordance with the connection
diagram.
See the rating plate for the voltage.
3.
Connect the wires of the mains power cable accord-
ing to the colour coding:
‒ Green/yellow = Protective conductor
‒ Blue = Neutral conductor
‒ Brown = Phase (external conductor)
24.9 Installing the appliance
Note:Do not use a cordless screwdriver to secure the
panels. This may damage the panels.
1.
If required, you can adjust the gap between the ap-
pliance door and the panels using the adjustment
screws on the left and right.
Turning the screws clockwise makes the gap larger
Turning the screws anti-clockwise makes the gap
smaller
2.
Push the appliance in fully.
Do not kink or trap the connection cable, or route it
over sharp edges.
Loading ...
Loading ...
Loading ...