Loading ...
Loading ...
Loading ...

9
Before First Use:
Read all instructions and safety information carefully before first use. Please retain this information
for future reference.
1. Remove all packing material and accessories. Examine the oven and cord for any damage.
DO NOT install if the oven is damaged and contact your place of purchase.
2. Remove any protective film found on the microwave oven cabinet surface. DO NOT remove the
light brown Mica cover that is attached to the oven cavity to protect the magnetron.
3. Microwave ovens must be placed under dry and non-corrosive environments and kept away
from heat and humidity, such as a gas burner or water tank.
4. Select a level surface that provides enough open space for the intake/ outlet vents.
5. To ensure sufficient ventilation, the following distances should be observed: At least 10cm
from the back of the microwave to the wall, at least 20cm from the microwave to the side of
the wall, and at least 30cm above the microwave. The minimum installation height for the
microwave should be 85cm.
6. The oven should be positioned away from TVs, radios or antennae, as the microwaves may
cause disturbances to their picture or sound.
7. The appliance must be positioned so that the plug is accessible.
8. The microwave oven must be operated with the door closed.
9. The microwave oven must not be placed in a cabinet. The microwave oven is intended to be
used free-standing. DO NOT remove the legs from the bottom of the oven.
10. Your appliance is now ready for normal use.
11. Dispose of the packaging in a responsible manner.
Using Your Appliance:
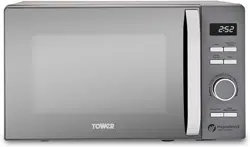
Door lock: The microwave’s oven door must be properly closed in order for it to operate.
Oven window: Allows users to see the contents at any time.
Roller ring: The glass turntable sits on its wheels; it supports the glass turntable and helps it to
balance when rotating. Do not use the microwave without the roller ring.
Rotating axis: The glass turntable sits on the axis; the motor underneath it drives the glass
turntable to rotate.
Glass turntable: Rotates during operation to help food cook evenly.
Control panel: Lets you choose between different functions when operating your microwave.
Setting the digital clock:
Note: There will be a single sound prompt when the control dial is turned and also with a press of a
control panel button.
To set the clock:
1. Plug in the appliance and switch on at the socket. The display will show 0:00 and there will be
a sound prompt.
2. Press the CLOCK/PRE-SET button. The hour will flash.
3. Turn the control dial to adjust the hour figure.
4. Press the CLOCK/PRE-SET button. The minutes figure will flash.
5. Turn the control dial to adjust the minutes figure.
6. Press the CLOCK/PRE-SET button to set the time.
Note: If the clock is not, set the microwave will not operate.
Note: During clock setting, if no operation is performed within 1 minute, the appliance will revert
back to its previous status.
Child Lock:
Locking: Whilst the microwave is not operating, press the “STOP/CLEAR” button for 3 seconds.
There will be a long sound prompt, confirming the activation of the safety lock function.
The screen will display .
Unlocking: Press the “STOP/CLEAR” button for 3 seconds. There will be a long sound prompt,
confirming the de- activation of the safety lock function.
Loading ...
Loading ...
Loading ...
