Loading ...
Loading ...
Loading ...
www.fhiaba.com · www.thevettagroup.com · Info Line 1-855-4-FHIABA (1-855-434-4222)
47
EN
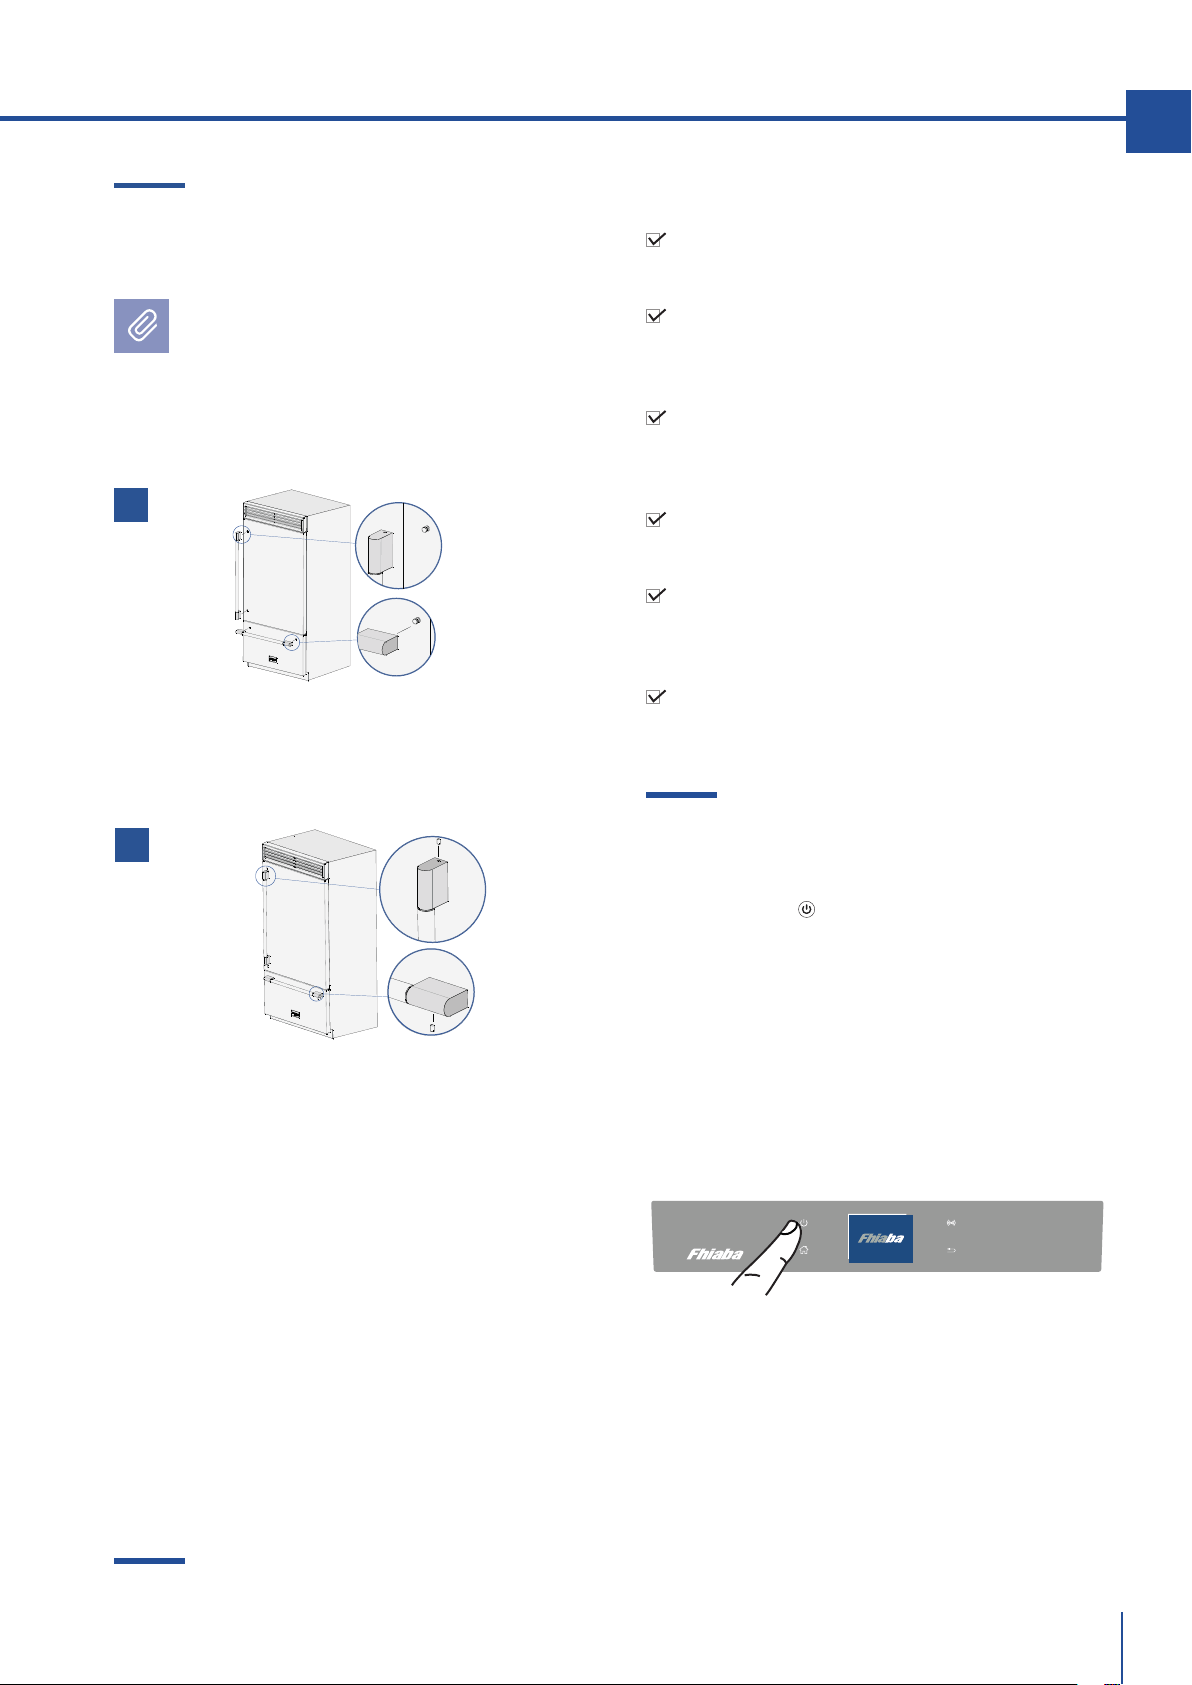
7.3 Mounting the handles on cladded
models
To mount the handles onto the door and
the drawer, proceed as follows:
Proceed as follows:
> Insert the ends of the handle onto the supports
already installed on the door and on the drawer
[ 1 ].
> Screw in the set screws available on the handle [ 2 ].
The screws must be tightened in with a 2.5 mm
(1/8”) Allen wrench or driver.
7.4 Post-installation checklist
Check that the front leveling feet have been
properly installed.
Check that the connection to the water system
does not have any leaks and that the shut-o valve
is easily accessible.
Check that the electrical connection is correctly
installed and that the socket and/or breaker are
easily accessible.
Check that the appliance is perfectly aligned
with adjacent structures.
Check that all adhesive tape and external or
internal temporary protective devices have been
removed.
Check that the doors close perfectly and that the
drawers and shelves slide smoothly.
7.5 Start-up
>To turn all the appliance compartments on,
press the Unit button for three seconds. The
display will show the message “Initial test” for
approximately two minutes. After this phase, the
compressors will start up and remain on until the
set temperatures for the compartment are reached.
> If the appliance is provided with an Ice Maker,
make sure that the water filter cartridge is
installed prior to switching it on (unless water
supply source is already filtered by other means
such as reverse osmosis).
> Purge air from the water lines by performing
the ‘Manual Clean’ function from the Menu-
>Functions->Water Filter options. You may need
to complete this sequence several times until you
stop hearing air sputtering from the ice maker fill
tube (Refer to your Use & Care Manual).
> Once you are satisfied that the system has been
purged of air, switch the Ice Maker on in the ice maker
7. COMPLETING THE INSTALLATION
1
2
Loading ...
Loading ...
Loading ...