
Loading ...
Loading ...
Loading ...
DJI Mini 3
User Manual
26
©
2022 DJI All Rights Reserved.
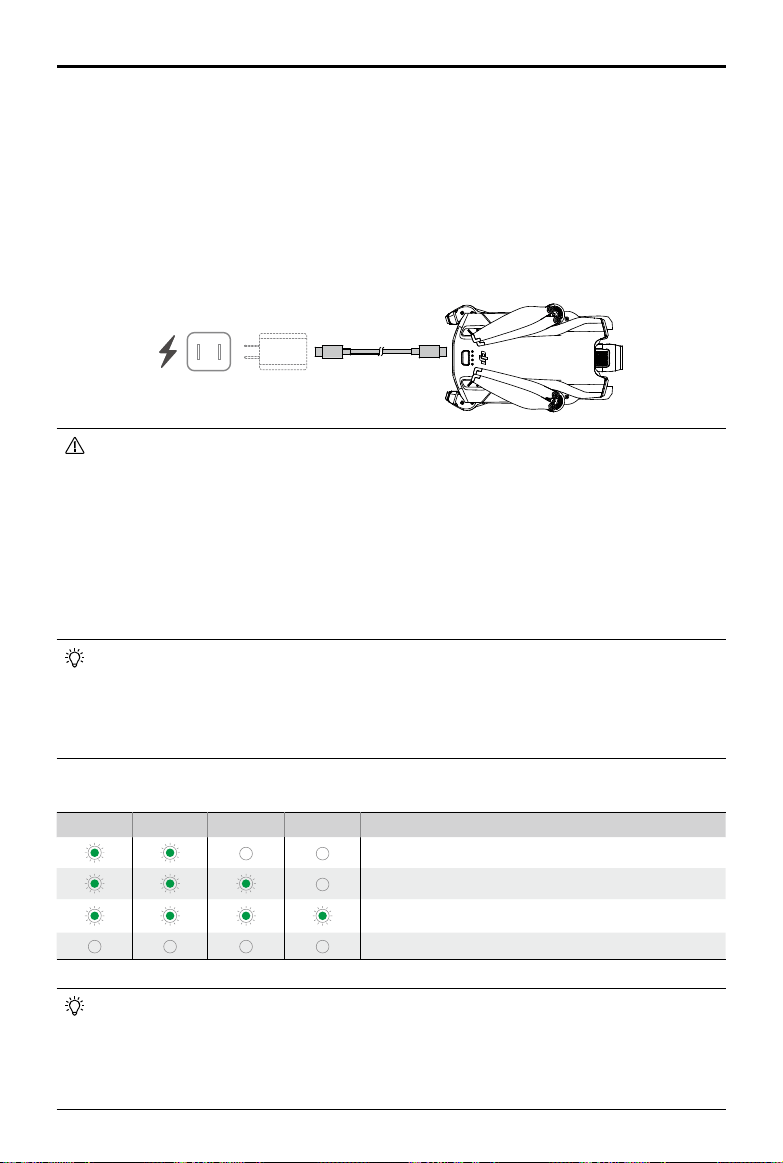
Using A Charger
1. Ensure the battery has been correctly installed on the aircraft.
2. Connect the USB charger to an AC outlet (100-240V, 50/60 Hz). Use a power adapter if
necessary.
3. Connect the USB charger to the charging port on the aircraft using a USB-C cable.
4. The battery level LEDs display the current battery level during charging.
5. The battery is fully charged when all the battery level LEDs emit a solid light. Remove the
charger after charging is complete.
•
The battery cannot be charged if the aircraft is powered on.
•
The maximum charge voltage for the aircraft charging port is 15 V.
•
DO NOT charge an Intelligent Flight Battery immediately after flight as it may be too
hot. Wait for the battery to cool down to room temperature before charging again.
•
The charger stops charging the battery if the cell temperature is not within 5° to 40° C
(41° to 104° F). The ideal charging temperature is from 22° to 28° C (71.6° to 82.4° F).
•
Fully charge the battery at least once every three months to maintain battery health.
It is recommended to use the DJI 30W USB-C Charger or other USB Power Delivery
chargers.
•
When using the DJI 30W USB-C Charger, the charging time for Mini 3 Pro Intelligent
Flight Battery is approximately 1 hour and 4 minutes, while for Mini 3 Pro Intelligent
Flight Battery Plus it is approximately 1 hour and 41 minutes.
•
For safety purposes, keep the batteries at a low power level in transit. Before
transportation, it is recommended to discharge the batteries to 30% or lower.
The table below shows the battery level LED statuses during charging.
LED1 LED2 LED3 LED4 Battery Level
1%-50%
51%-75%
76%-99%
100%
•
The blinking frequency of the battery level LEDs differs depending on the USB charger
used. If the charging speed is fast, the battery level LEDs will blink quickly.
•
If the battery is not correctly inserted into the aircraft, LEDs 3 and 4 will blink
simultaneously. Insert the battery again and make sure it is securely mounted.
•
The four LEDs blinking simultaneously indicates the battery is damaged.
Loading ...
Loading ...
Loading ...