
Loading ...
Loading ...
Loading ...
After Sales Support
(AU) 1300 886 649 (NZ) 0800 836 761 | tempo.org/support
8
Getting Started
Unpacking
• Packaging materials: This product has been packaged to protect it against
transportation damage. Remove all packaging materials from around and inside the
appliance and keep the original packaging carton and materials in a safe place. It
will help prevent any damage if the product needs to be transported in the future,
and you can use it to store the appliance when it is not in use. In the event that the
carton is to be disposed of, please recycle all packaging materials where possible.
Plastic wrapping can be a suffocation hazard for babies and young children, so
ensure all packaging materials are out of their reach and disposed of safely.
• Parts: Check to ensure you have all the parts listed in the Product Overview section.
• Damage: When unpacking, check the appliance carefully for damage. If it is
damaged, do not install the appliance. Contact our after sales support centre for
advice on examination or return of the damaged appliance.
• Power cord: Unwind the power cord to its full length and inspect it for damage.
Do not use the appliance if the appliance or its cord has been damaged or is not
working properly. In case of damage, contact our after sales support centre for
advice on examination, repair or return of the damaged product.
• Read the manual: Before installing your new fridge, read all safety instructions,
especially the sections on installation and electrical safety on pages 4-5. Installation
instructions follow below and on the next page.
Installation
Space requirements
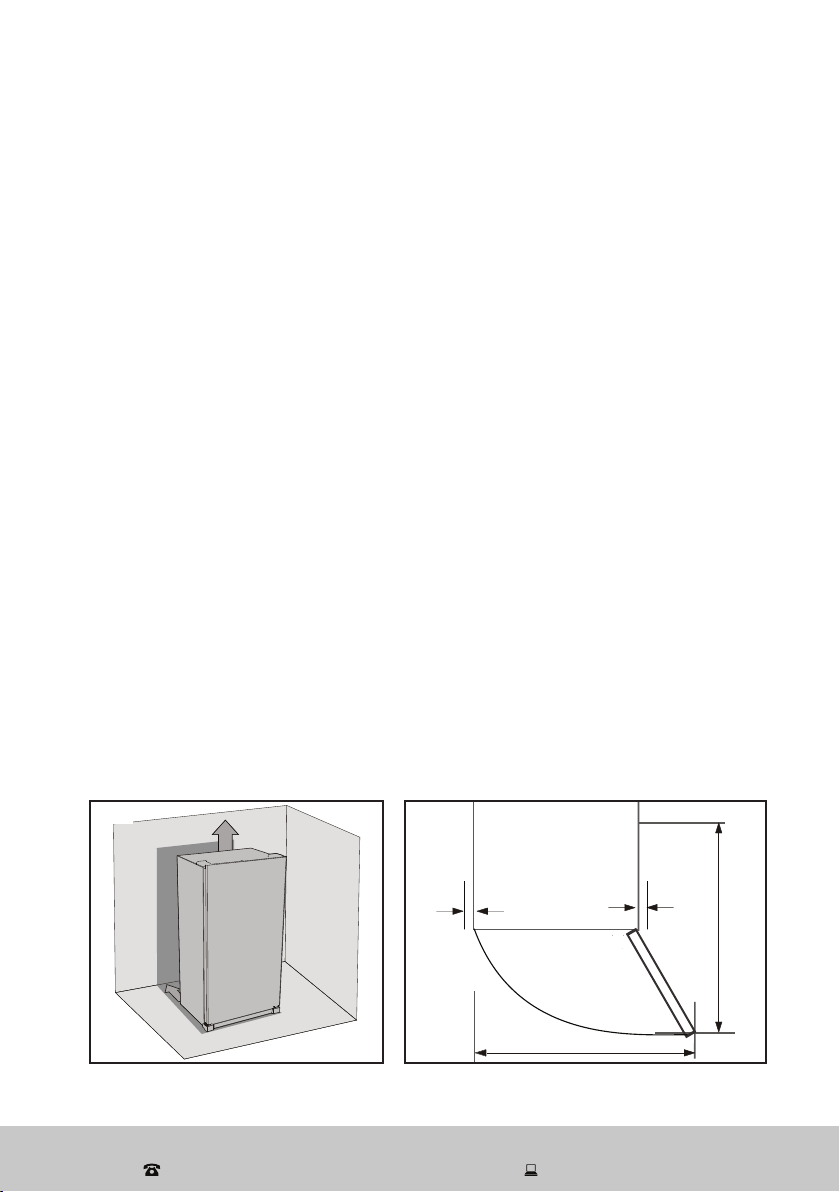
• Door opening: Place the unit so there is enough space for the doors to open easily.
• Clearances: Ensure that air can circulate freely around the back of the cabinet,
which is necessary to cool the compressor and condenser. Allow at least 100 mm
clear space at the back of the unit (Fig. 1) and 50 mm at the sides (Fig. 2).
Fig. 2
50 mm (min)
50 mm (min)
1250 mm
1300 mm
135°
Fig. 1
100 mm
Loading ...
Loading ...
Loading ...