Loading ...
Loading ...
Loading ...

PAGE: 7 / 11
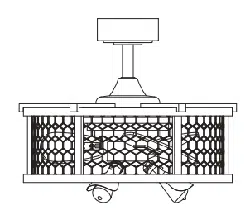
Slide the canopy up to ceiling and over
the two canopy screws on hanger
bracket. Rotate canopy clockwise, next,
while holding the canopy with one hand,
slide the canopy cover over the screws
and rotate clockwise until tight.
Note: Adjust the canopy screws as
necessary until the canopy and
canopy cover are snug.
Fig.11
Canopy Screw
Hanger Bracket
Canopy
Canopy Cover
NOTE: Before installing blade
brackets to the motor, please
remove the plastic inserts.
Remove the motor screws from fan motor
assembly.
Secure blade brackets to the motor with
motor screws.
Fig.12
Blade Screw
Blade Bracket
Blade
Decorative
Plate
Fig.13
Motor Screw
Blade Bracket
Decorative
Plate
Plastic Insert
Thread the blade screws through the
blade bracket and blade into the
decorative plate. Tighten all blade
screws securely. Repeat to other
blades.
Fig.14
3-5W E12 Base ST15
Type LED Bulbs (included)
E12 Base ST15 Type
LED bulbs Max.60W
LED Bulb Cover
Decorative Screw
Install LED bulbs (included). See relamping label at socket area
or packaging for maximum wattage allowed.
Optional: To avoid reflection of light, remove the decorative
screw from the lampholder, gently screw LED bulb covers on
the lampholder with decorative screws.
The slide switch on switch box sets direction
of fan rotation. Select the desired direction of
fan rotation.
Push the slide switch down for "Forward" and
up for "Reverse”.
Note: Wait for fan to stop before reversing the
direction of blade rotation.
Slide Switch
Reverse
Fig.15
Switch Box
Forward
Turn ON the electric circuit at the
main fuse or circuit breaker box.
Fig.16
220104
Loading ...
Loading ...
Loading ...