Skip to content
Manuals+
User Manuals Simplified.
PYLE PHSKR14 3-Piece Wireless BT Streaming Stereo
System User Guide
August 31, 2022September 1, 2022 Leave a comment on PYLE PHSKR14 3-Piece Wireless BT Streaming
Stereo System User Guide
Home » Pyle » PYLE PHSKR14 3-Piece Wireless BT Streaming Stereo System User Guide
Document
Contents hide
1 PYLE PHSKR14 3-Piece Wireless BT Streaming Stereo System
2 Safety Instructions
3 Remote Control Function Keys
4 Front Panel
5 Rear Panel
6 CONNECTIONS
7 SYSTEM SETUP FOR DVD MODE
8 REMOTE FUNCTIONS
9 HOW TO SEARCH
10 SYSTEM SETUP
11 TROUBLESHOOTING
12 USB COPY
13 COMMON OPERATION
14 Features:
15 What’s in the Box:
16 Technical Specs:
17 Documents / Resources
17.1 References
17.2 Related Manuals / Resources
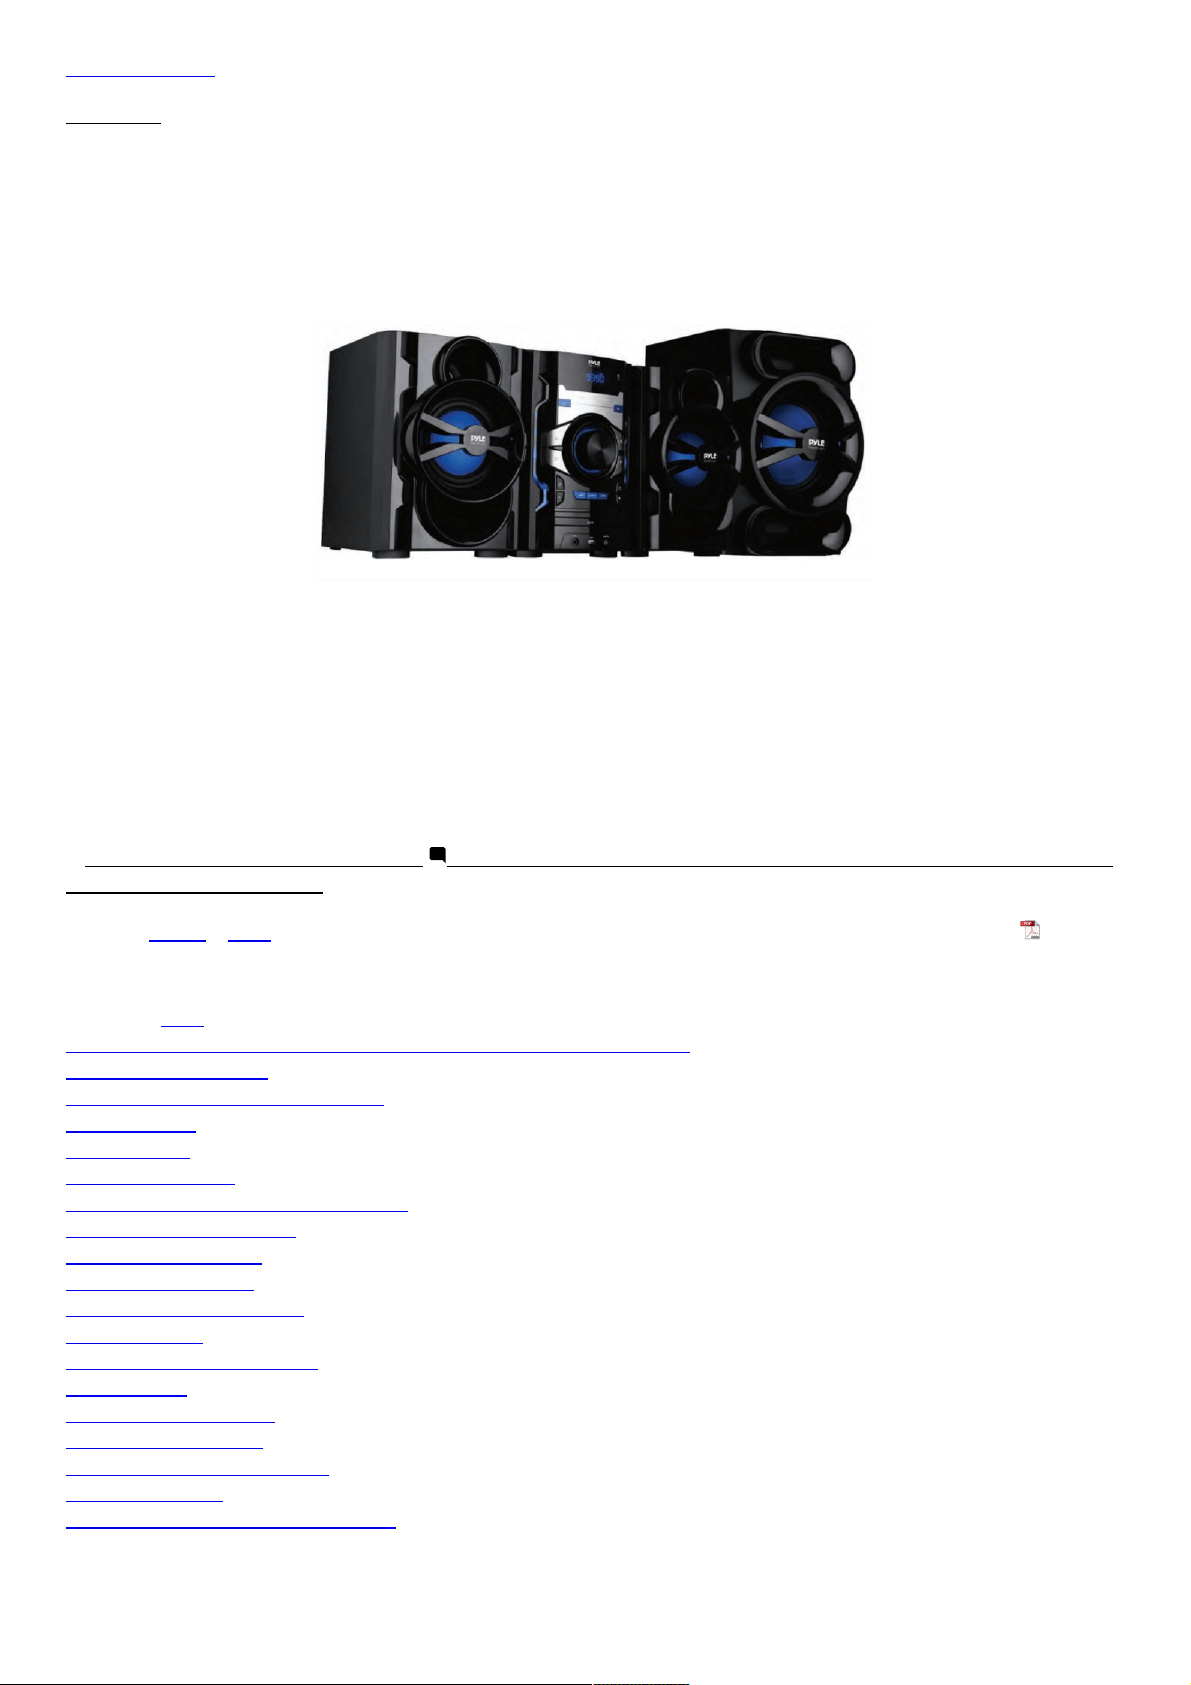
PYLE PHSKR14 3-Piece Wireless BT Streaming Stereo System
Safety Instructions
Basic Safety Requirements
1. Unplug the unit during lightning storms or when you do not intend to use it for a long period of time.
2. To remove the plug from the electrical outlet, do not pull on the supply cable. Grasp the plug firmly and pull to
remove.
3. If the supply cord is damaged in any way, it must be replaced by the manufacturer, its service agent or a
similarly qualified person in order to avoid a hazard.
4. Place the unit where there is good ventilation.
Place on a flat, hard and stable surface.
5. Do not place the unit of a bed, sofa, rug or similar surfaces as this may lead to the ventilation openings being
blocked.
6. Do not expose the unit to direct sunlight or place it in any abnormally hot locations.
7. Do not place the unit under any heavy object or in an unventilated place.
8. This product has no user-serviceable parts. Do not attempt to repair this product yourself. Only qualified service
personnel should perform servicing.
Take the unit to the authorised service centre for inspection and repair.
9. Due to the high risk of fire or electric shock, do not expose this unit to rain or moisture. Do not open the cabinet
as dangerous high voltages are present inside the enclosure. Only qualified service personnel should attempt to
open the cabinet.
10. There is a laser system inside this unit classified as CLASS 1 LASER PRODUCT. Do not stare directly into the
beam as this may harm your eyes.
11. If it is very cold, please place the unit in a warm room and turn the power on for about an hour. After that, the
unit will be ready to be used.
12. Always ensure that the product is unplugged from the electrical outlet before moving or cleaning. Clean it with a
soft cloth slightly moistened with a mild detergent. Do not use any abrasive pads, sourcing powder or solvents
such as alcohol as they may damage the surface of the unit.
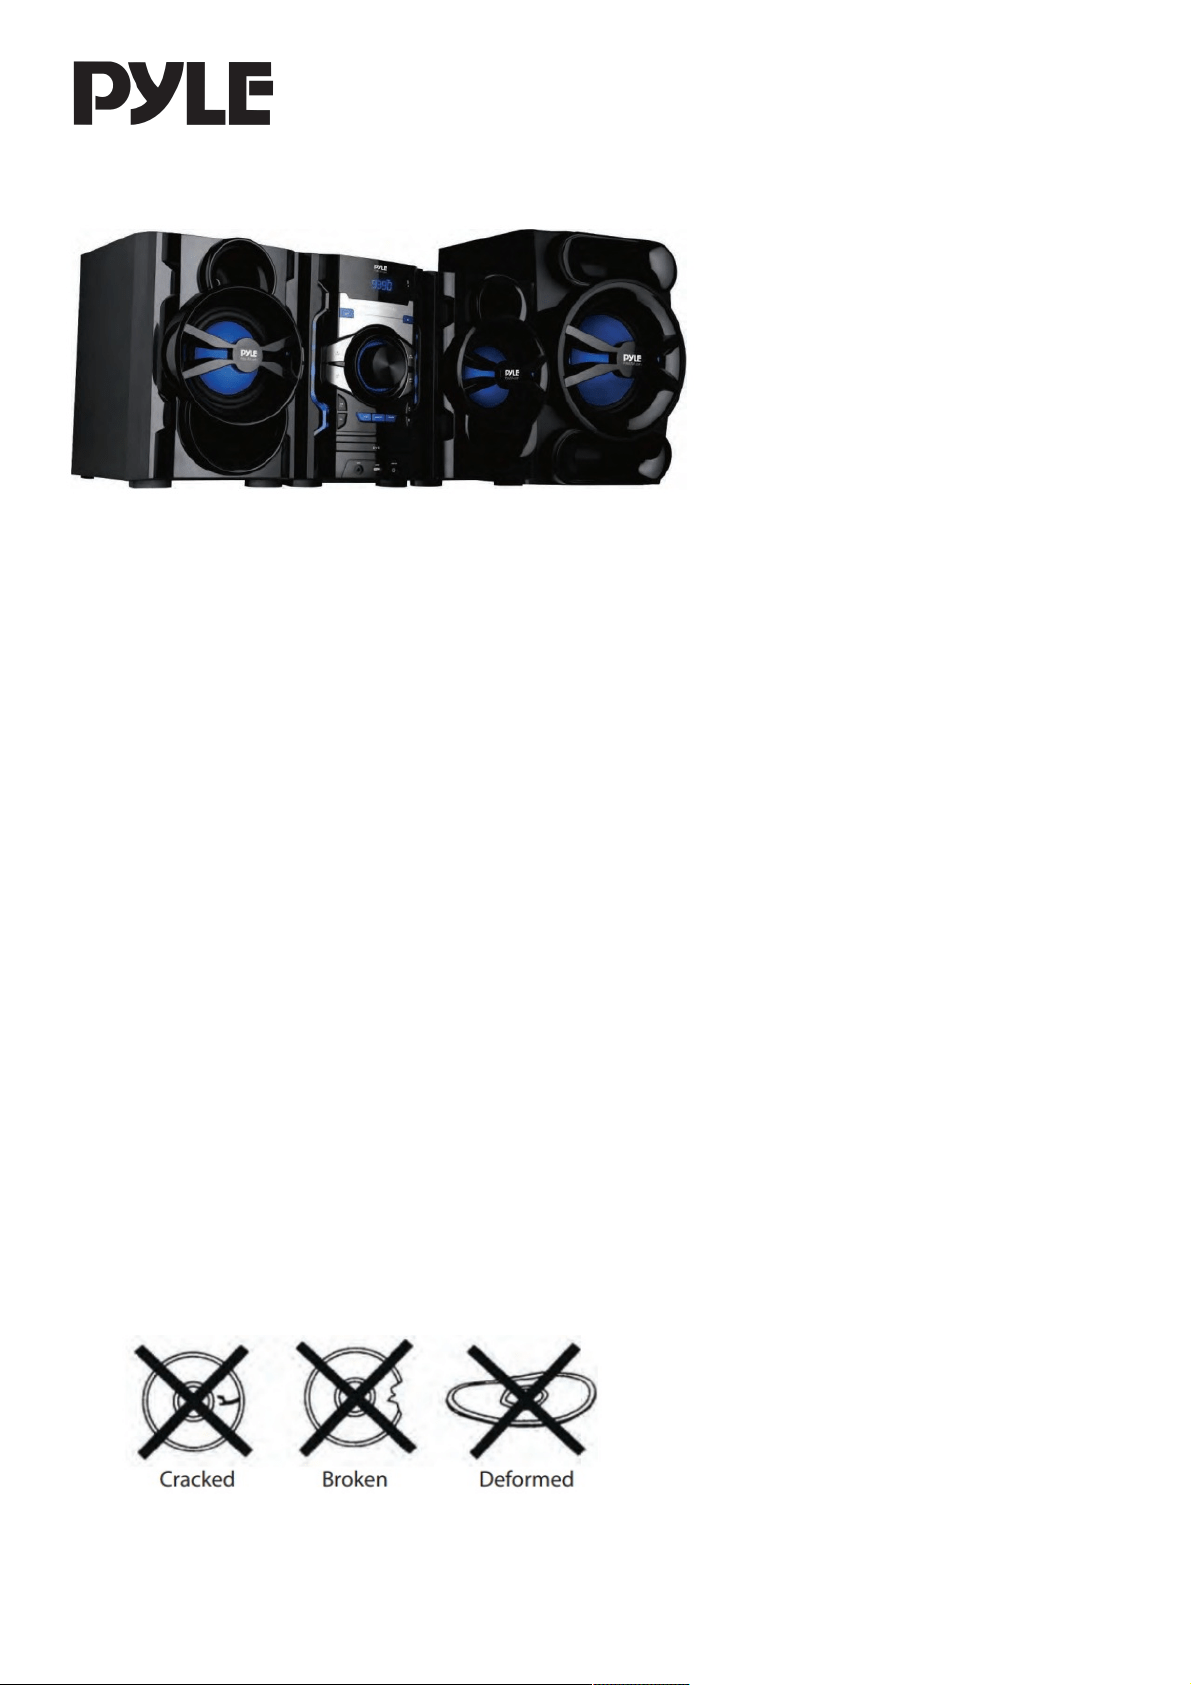
13. Do not use discs with scratches and/or deformities.
As a disc is rotated at a high speed, it is dangerous to play a broken or deformed disc. Do not apply any tape or
glue to the disc as this could lead to damage of the player. Should there be a strange noise or vibration whilst
playing, if the picture or sound skips, or if the picture is distorted, stop the player immediately.
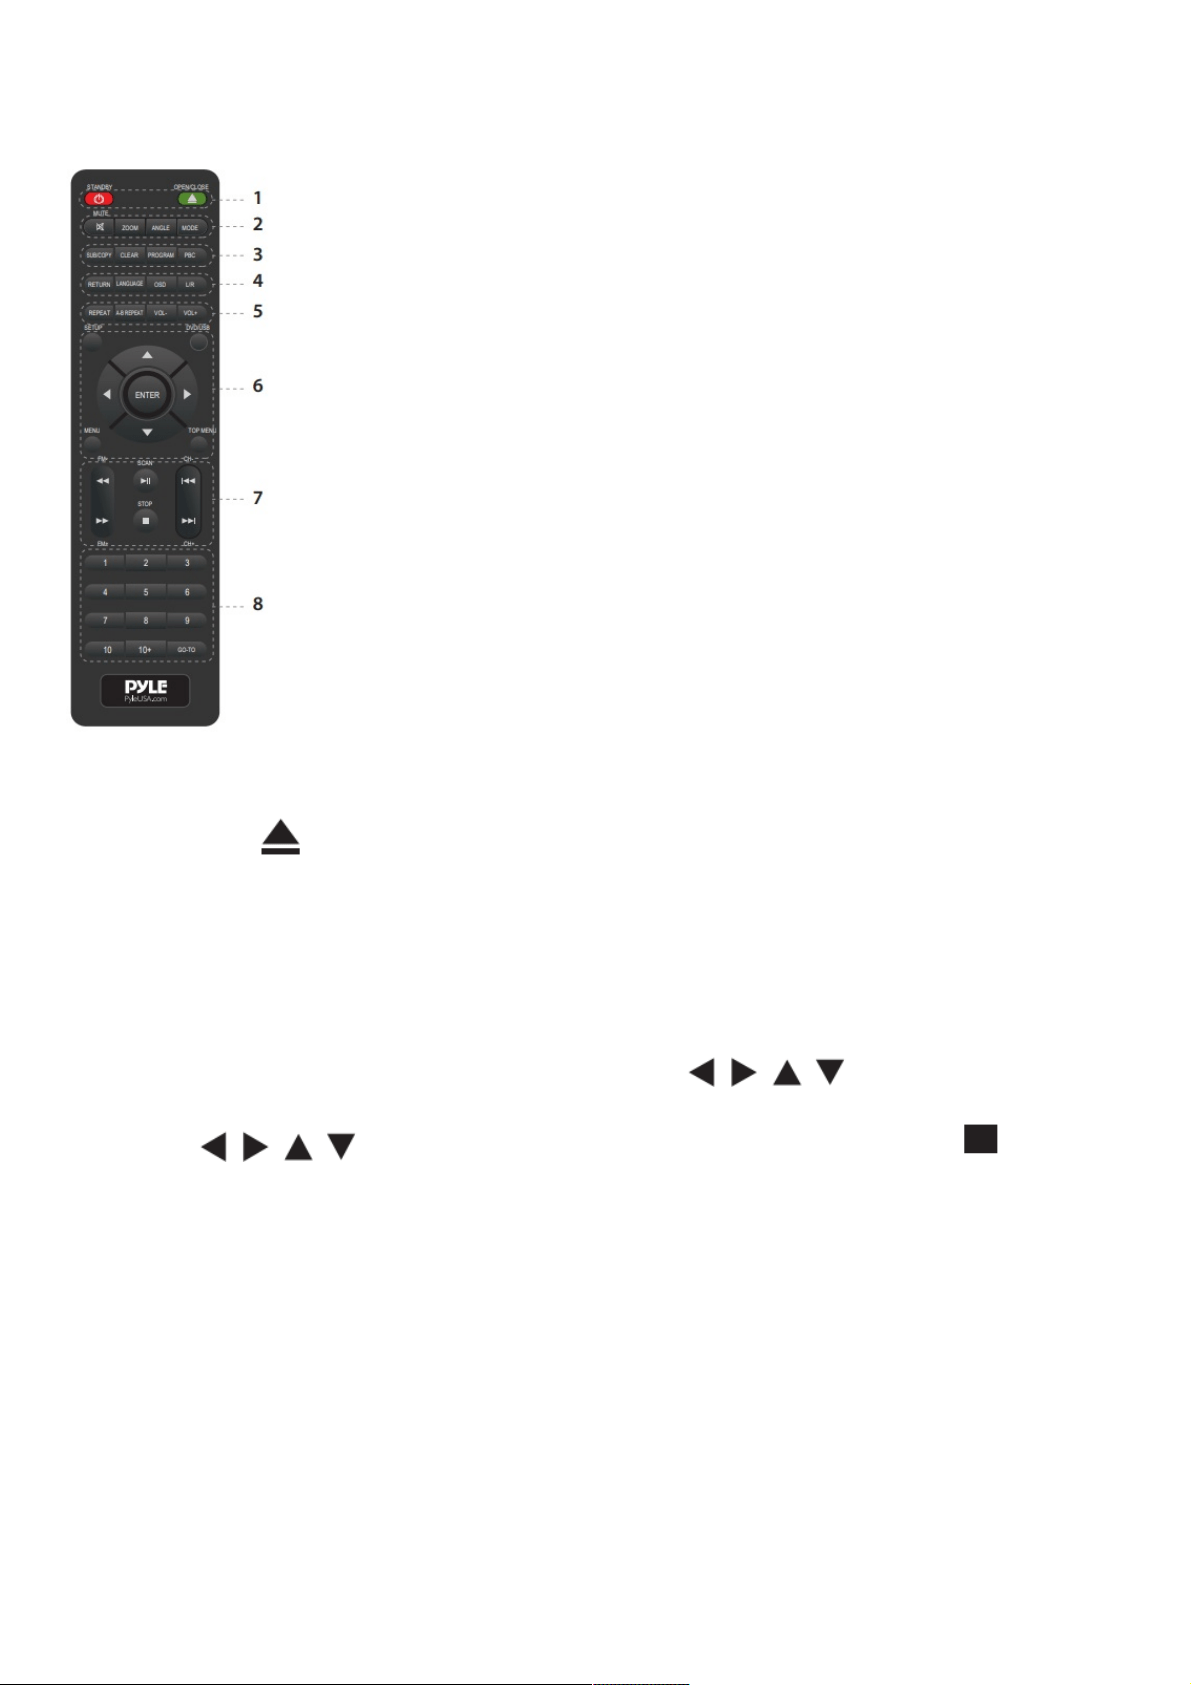
Remote Control Function Keys
Note: Use 2 x ‘AAA’ batteries (Don’t included). Keep away from children.
1. Standby/Power on/off switch: Press to open/close the unit power. In this mode, he unit is still consuming a
small amount of power.
OPEN/CLOSE : Open/Close the disc tray.
2. Mute: Press to mute or unmute the sound
Zoom: Magnifies/Shrinks the screen image size
Angle: Chose the different angles in the same image (Only support have multi-angle discs) Mode/Source:
Press to choose Line in (AUX)/BT/DVD/USB/FM modes
3. SUB/COPY: Press subtitle button to displays the subtitles in dvd mode (Only supports multi-subtitle discs) Copy
music contents from loaded CD disc to inserted USB drive
Clear: When using PROGRAM feature, press CLEAR to clear the input number.
4. PROGRAM: First, press PROG to enter program status. Then , press to select the item.
Press 0 to 9 to specify the 2-digit order (To cacle, press clear).
Press to select Start, press OK to start programed playback. Press STOP twice to
clear the whole proram.
Front Panel
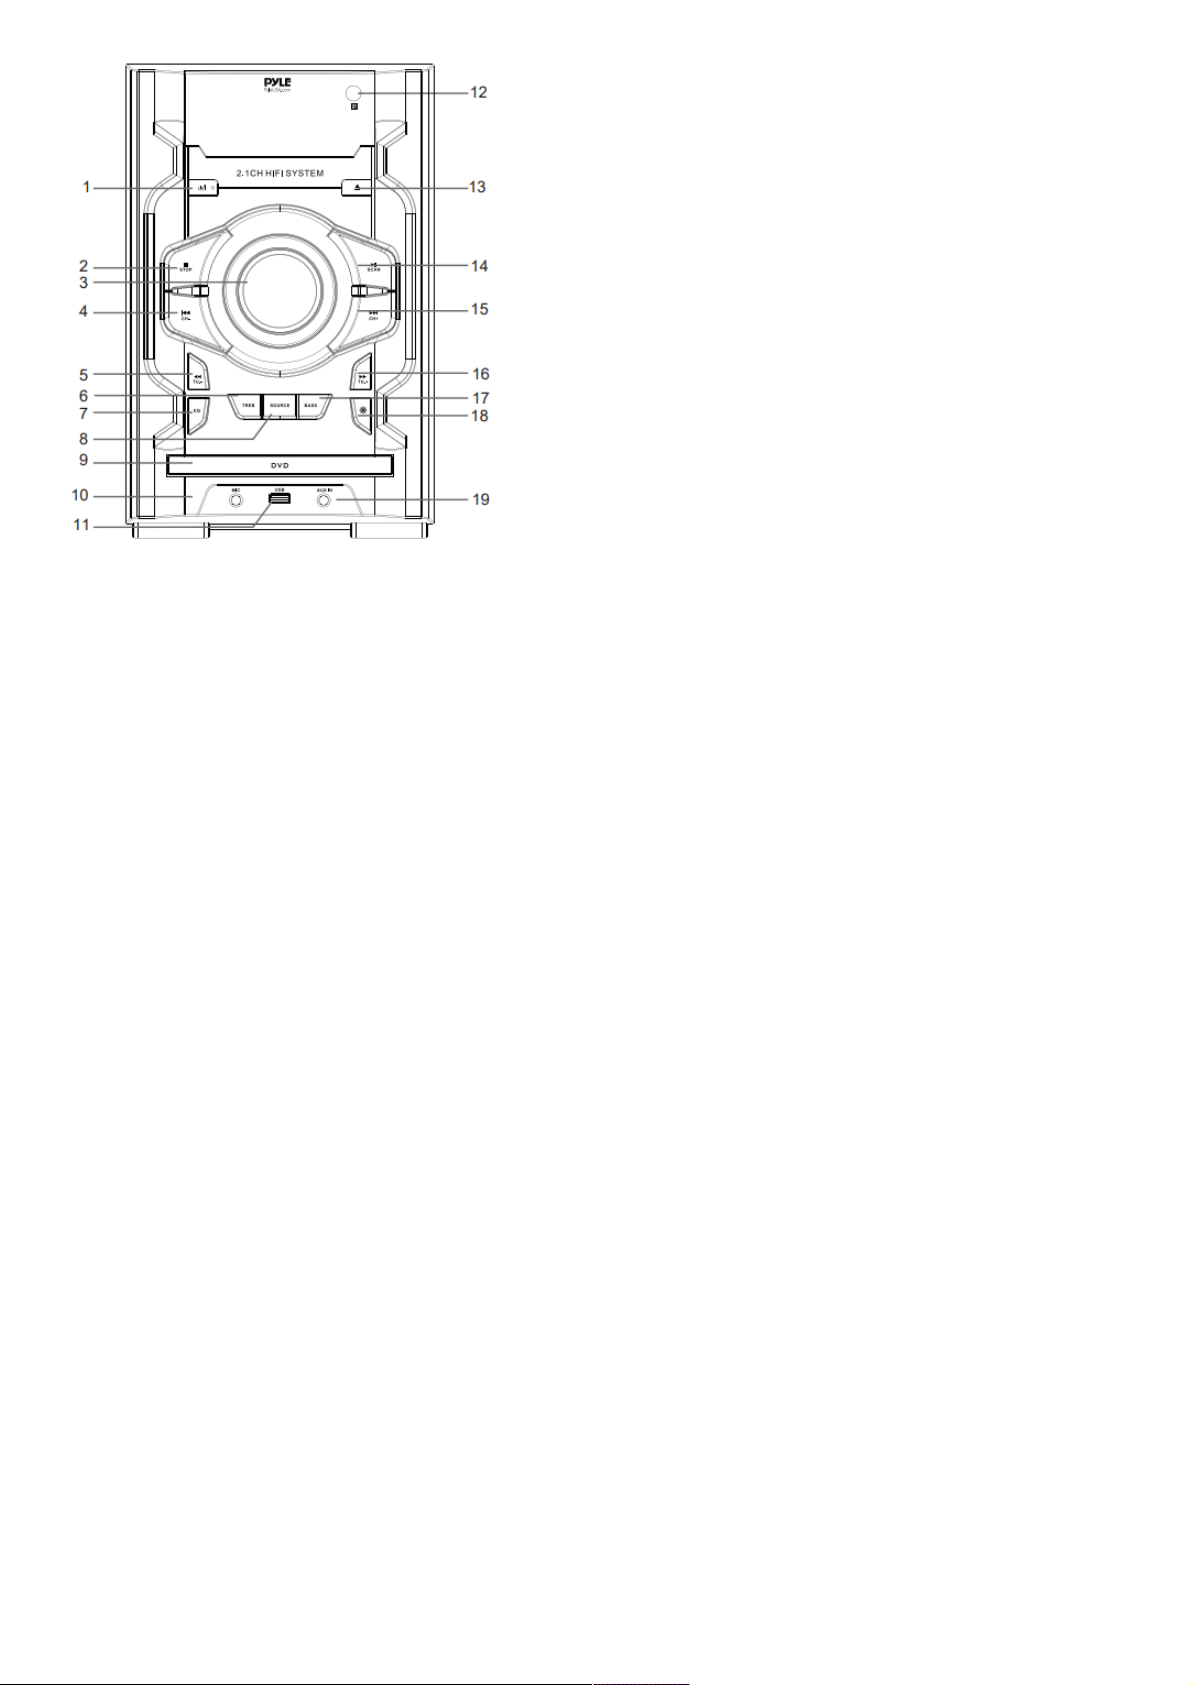
1. POWER BUTTON
2. STOP BUTTON
3. VOLUME
4. PREV/CH-
5. PEV/TU.-
6. TREB
7. EQ
8. SOURCE
9. DISC TRAY
10. MIC
11. USB PORT
12. REMOTE CONTROL SENSOR
13. OPEN/CLOSE BUTTON
14. PLAY/PAUSE/SCAN
15. NEXT/CH+
16. FWD/TU.-
17. BASS
18. LIGHT SWITCH
19. AUX INPUT
Rear Panel
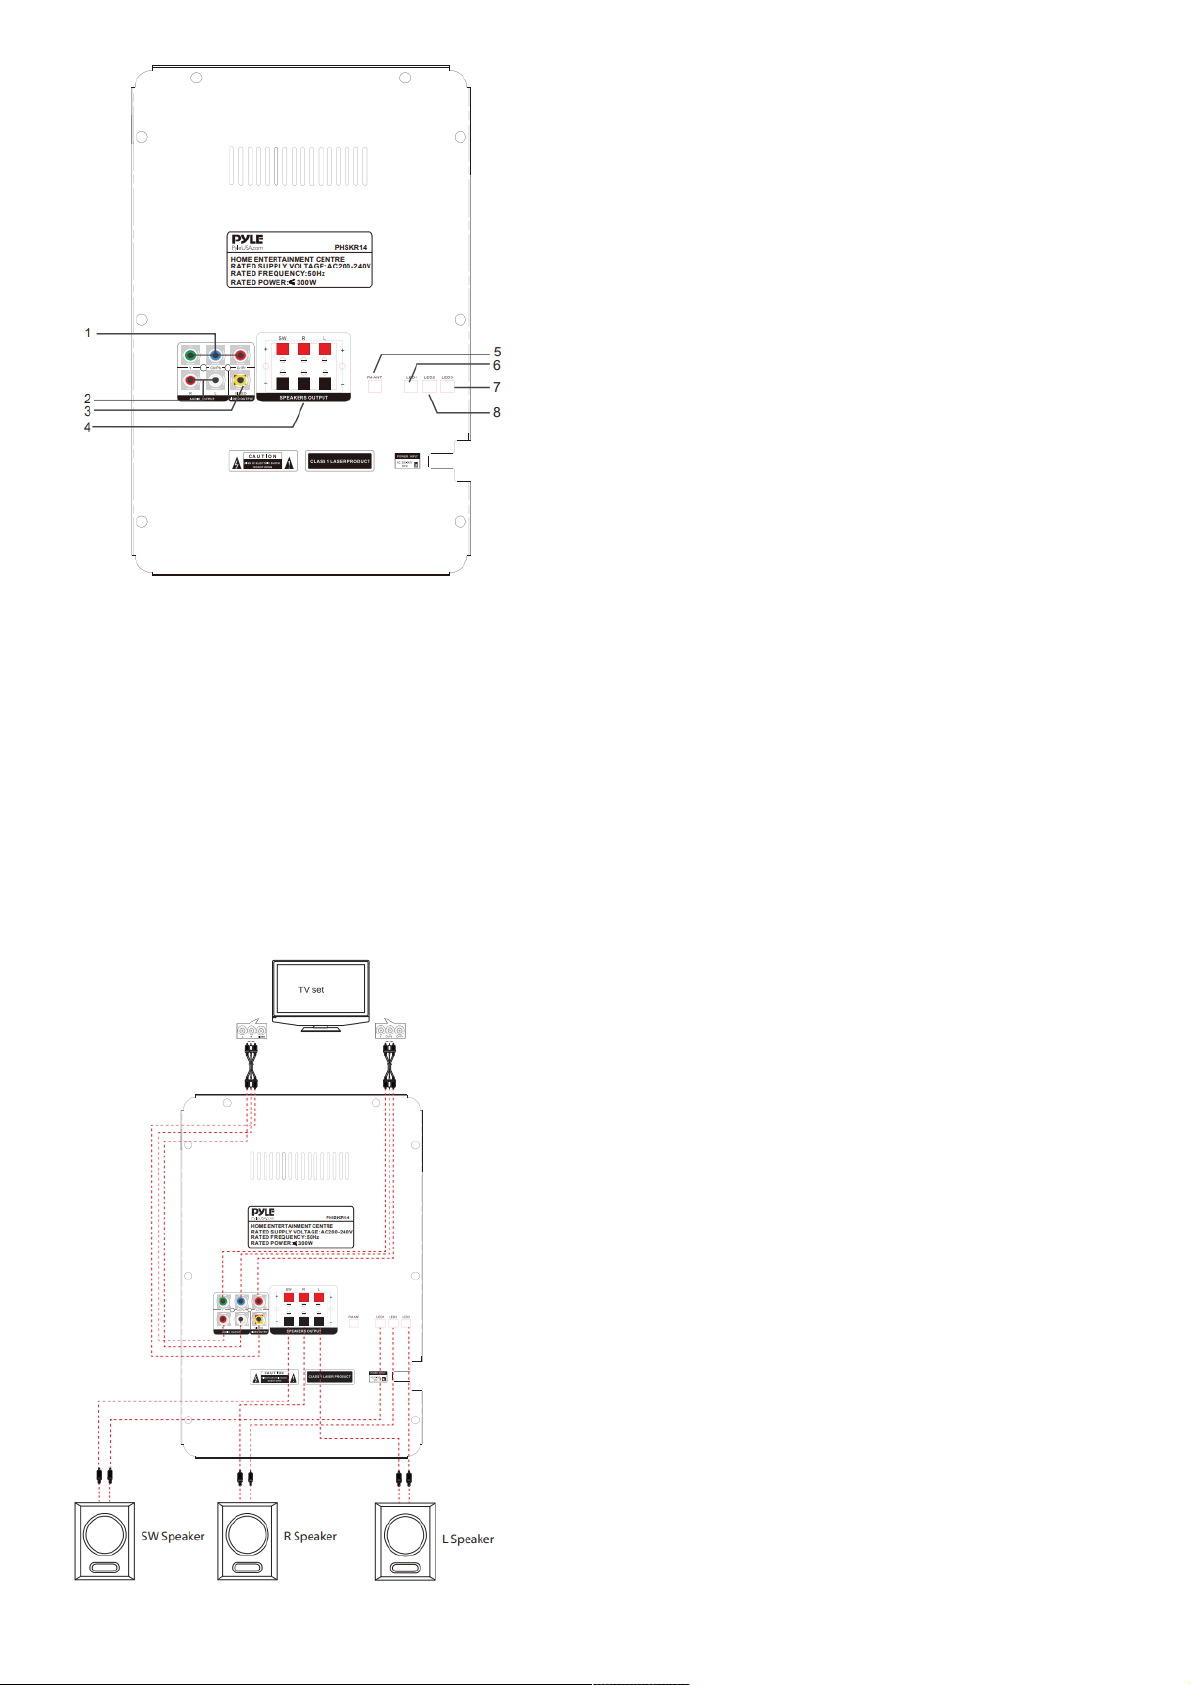
1. Y Cb/Pb Cr/Pr OUT
2. R/L OUTPUT
3. VIDEO OUT
4. SPEAKERS OUTPUT
5. FM ANT
6. LED1
7. LED3
8. LED2
CONNECTIONS
Connecting to a TV Set

SYSTEM SETUP FOR DVD MODE
Setup
Follow the steps below to check the connection:
1. Turn on the TV and shift to “VIDEO INPUT”.
2. Turn on other units such as an audio or VCR if they are connected.
Turning the Unit On:
1. Press the POWER button on the panel. The DVD player will automatically read a disc if it has already been
inserted in the player.
2. Press the OPEN/CLOSE button to open the disc tray to insert or replace a disc.
3. Insert a disc onto the disc tray and press OPEN/CLOSE button again to close the disc tray. The screen will
display what type of disc is being played.
4. The DVD player will select the state of play according to the disc format.
DIS C FORMAT STATE OF PLAY
CD/ MP3 First track.
DVD/VCD/SVCD with PBC
From the menu screen, press the PBC
button on the panel or on the remote
control to play back from the beginning.
DVD/VCD/SVCD without PBC Automatically plays from the beginning.
Note: PBC is the abbreviation for PLAYBACK CONTROL. If a disc has PBC, it means that it has a menu from
where you are able to choose a track, chapter or other instruction at the beginning of playback.
ACTION
BUTTON ON
PANEL
KEY ON REMOTE
CONTROL
Play PLAY/PAUSE PLAY
Pause PLAY/PAUSE PAUSE
Next track or
chapter
NEXT NEXT
Previous track or
chapter
PREV PREV
Stop STOP STOP
Turning the Unit Off:
Press the STOP button, then press the OPEN/CLOSE button to open the disc tray. Remove the disc and close the
disc tray by pressing the OPEN/CLOSE button again. Then press the POWER button to turn off the player. It is
recommended that discs are removed before the player is turned off. Remove the plug from the outlet on the wall if
the player will not be used for a long time.

REMOTE FUNCTIONS
NO. OPERATION DISC INSTRUCTION
1
STOP RESUME
ALL
FORMATS
Press STOP button to enter Stop mode. The TV
screen will display the starter logo. With certain
disc types, such as DVD, the player can resume
playback from the point where it was stopped.
Press RESUME to resume playback from the
location where playback was stopped or from
the beginning of the disc. Please note: The
player will go into SCREEN SAVE MODE if
there is no activity within one minute. Press any
key to return to NORMAL mode.
2
STEP
DVD SVCD
VCD
Press STEP continuously to single step forward
to the next frame in the video. Press PLAY to
resume normal playback.
3
FAST
FORWARD
VCD SVCD
DVD
Press FWD button to fast forward through the
disc. Each time the FWD button is pressed, the
fast forward motion speed changes. Press
PLAY to resume normal playback.

4
REWIND
DVD SVCD
VCD
Press REV button to rewind through the disc.
Each time the REV button is pressed, the
rewind motion speed changes. Press PLAY to
resume normal playback.
5
SLOW
DVD SVCD
VCD
By continuously pressing the “SLOW” button,
the following mode and information will appear
on the screen – slow forward 1/2.1/8.1/16.1/32.
Press the “PLAY” button at anytime to return to
normal playback mode.
6
REPEAT
DVD
To repeat a chapter, DVD title or the whole DVD
content, please see below:
– Press REPEAT once to repeat the contents
of the chapter.
– Press it twice to repeat the contents of the
title.
– Press it three times to repeat the contents of
the DVD disc.
– Press it four times to cancel the repeat mode.

7
A-B REPEAT
ALL
To repeat a specific section of the DVD content,
please follow the steps below:
Press the A-B key to set Point A as the starting
point. Press the key again to set Point B as the
end point. The part between A and B will be
played repeatedly.
Press A-B key a third time to cancel this
function.
8
ZOOM DVD SVCD
Press the “ZOOM” button continuously to
increase the size of the picture by X1, X2 or X4.
Use the “UP”, “DOWN, “LEFT” and “RIGHT”
buttons to move the picture.
9 RETURN
SVCD
VCD2.0
Press this key to return to the main menu.
10
PBC
(Playback
Control)
DVD SVCD
VCD2.0
The PBC allows the user to play Video CDs
interactively.
If PBC is ON, the user can use the digit buttons
to select a track but only from the menu. If PBC
is OFF, the user can select the track directly.

11 TITLE DVD Press this key to plav the selected menu.
12 MENU DVD Press this key to play the selected menu.
13
DIRECTION&
ENTER
ALL
Press this key to choose the selected column
you want, and then press “ENTER” to confirm.
14 ANGLE DVD
Press this key to watch the same scene from
different angles. A multi angle icon will be
shown on the bottom left corner of the TV
screen to prompt you to shift from this angle
to another angle.
15
LANGUAGE
SUBTITLE
DVD
Press this key to shift from one
language(subtitle)
to another(need disc support).

16
UR
DVD SVCD
VCD
Continuously press this key to select left
channel, right channel or stereo. You should
first choose audio output as 2 CH in the setup
menu.
17
MUTE
VOLUME+/-
ALL
FORMATS
Press “MUTE” to turn off sound and press
again to turn on. Press “VOLUME” to increase
and decrease the sound.
18
OSD
DVD SVCD
VCD
On Screen Display (OSD). Users can select
the whole setup menu and on-screen display
language.
19 N/P DVD
Continuously press this button to shift
between PAL and NTSC TV systems.
Choose the correct system to fit your TV set,
otherwise you may only get a black/white or
unstable image.
20 FREEZE
DVD
SVCD/DVD
Press this key once to “freeze” image while
sound is still on. Press the button a second
time to cancel.

21 RAND
ALL
FORMATS
Press this key once to get random playback.
Press it a second time to cancel.
22
REMAIN
DVD
Press the REMAIN button to check total
remaining time of a title or chapter being
played. Each time the REMAIN button is
pressed, the information changes.
SVCD VCD
CD
Press the REMAIN button once to check the
remaining time of the track, a second time to
check the remaining time of the chapter and a
third time to check the remaining time of the
disc.
23
PROG
SVCD VCD
CD
Press the PROG button to setup the playback
sequence manually, i.e. if you want to
playback track 2, 11 and 102, do the
following:
1. Press 2,
2. Press+10,1
3. Press +10 ten times, then 2.
Finally, press “PLAY” to go to your chosen
track.

24
SETUP
ALL
FORMATS
Press the “SETUP” button to select the
various functions of your player, for example,
audio output, parental control, etc. Refer to
chapter 6 for further details.
25
NUMERICS
& SEARCH
ALL
FORMATS
Press these buttons to go directly to where you want
to watch from or listen to. Refer to the next
chapter for details.
HOW TO SEARCH
DISC OPERATIONS TV SCREEN
DVD
Press the TIME button once to display the
Screen Search menu. Press twice to
cancel. In the Search Menu, you can use
the UP/DOWN cursor buttons to select an
item. Then press PLAY to confirm.
TITLE :1/2 CHAPTER :2/18

DVD
• To play Title 2, press TIME on the
remote control, then press 2 and then
PLAY.
• To play Title 1 chapter 5, press TIME on
the remote control, RIGHT, then press 5
and PLAY.
• Press “TIME” again to directly input a
specific time for example:
• If you want to play the DVD at 1:23:45
point (one hour, twenty third minute and
forty fifth second) input 1,2,3,4,5 and
press PLAY.
• If you want to play the DVD at the
00:23:45 point (twenty third minute and
forty fifth second) input 2,3,4,5 and press
PLAY.
TITLE: 2/2

SVCD/
VCD/
CD/
Press “TIME” to directly input the time.
Please note:
1. Turn off PBC for SVCD and VCD 2.0
before
using the search function.
2. CD: You may directly input the track
number you want to listen to. In other
words, you do not need to use the search
function.
MP3
The search function is not available when
playing MP3 discs.
Choose your favourite song by following
the instructions below:
1. Please make reference to Fig 1 on the
right hand side – this is the interface when
playing MP3 discs. The highlighted song
is the song that is currently playing. Press
NEXT/PREV to select another song. The
selected song will automatically play. You
can also press UP, DOWN, LEFT or
RIGHT to
select a specific song then press PLAY.
SONGLIST 01/02 DIR: DIR
NAME 01/15 TRK: 001/155
00:05
SONG1 SONG2 SONG3
SONG4 SONG5 SONG6
SONG7 SONGS
SONG9 SONG10
Fig 1

ALBUMLIST 01/02
SONG NUMBER:155
ALBUM1 ALBUM2
ALBUM3 ALBUM4
2. Press “RETURN” to go back to main
menu, (see Figure 2 on the right hand
side). Press NEXT to select an album
then press NEXT again to select a song.
Or you can input the required track
number
directly to play a specific song.
ALBUM5 ALBUM6
ALBUM7 ALBUM8
ALBUM9 ALBUM10
Fig. 2
SYSTEM SETUP
1. MAIN MENU
Press the “SETUP” key on the remote control to enter the Setup menu.
Then press UP/DOWN/LEFT or RIGHT to highlight the option you want to adjust in the menu and then
press “ENTER” to enter. To exit the Setup menu, press the “SETUP” key.
2. LANGUAGE SETUP
Some DVD players support multiple languages. Press the Language key, and the first audio selection will
appear on the screen. Select your required option.
Please see all options below:

SUB-
MENU
CHOICE REMARK
OSD ENGLISH/ESPANISH
Select the language for the OSD
Setup menu.
MENU 1-8
Select the language for the DVD
menu.
AUDIO 1-8 Select spoken language.
SUB-
TITLE
1-8 Select subtitle language.
RETURN Return to the Main menu.
3. SCREEN SETUP
This DVD player supports a variety of Video Outputs.
SUB-MENU CHOICE REMARK
TV TYPE 16:9/4:3PS/4:3LB
Please select the mode that is the
most
compatible with your TV.
SCREEN
SAVER
ON/OFF
Choose whether to have a screen
saver or not.
TV SYSTEM PAL/NTSC/AUTO Select suitable TV system.
BRIGHTNESS
NORMAL/
BRIGHT/SOFT
Adjust the brightness of the video
output.
CONTRAST -4-4
Adjust the contrast of the video
output.
RETURN Return to the Main menu
4. PARENTAL LOCK SETUP
This DVD supports parental control password protection to prevent children from watching unsuitable movies or
images.
SUB-MENU DESCRIPTION TV SCREEN
PARENTAL
CONTROL
You will be asked to input a
password once Parental
Control is selected. The
Parental Control level can
only be changed once the
correct password has been
entered. There are a total of
eight levels. The higher the
level,
i.e. level 8, the less the
control over what movies
can be viewed.
PARENTAL
CONTROL
SETUP
LEVEL :8
PRESS “LEFT”,
“RIGHT” TO
CHANGE VALUE
CHANGE
PASSWORD
Only once the correct
password is entered, can
the Parental Control be
activated. The default
password is
“0000”.
ENTER
PASSWORD
THEN PRESS
“ENTER”
5. AUDIO SETUP
The setup operations are as follows:

SUB-MENU CHOICE REMARK
OUTPUT
2CH Left or right output.
5.1CH Decoded AC-3 5.1 channel output.
SPDIF
No-decoded AC-3 or DTS digital signal
output. Make sure to select this output if
you are using a coaxial or optical output to
the audio amplifier.
CENTER ON/OFF To turn the centre speaker output On/Off.
REAR ON/OFF
To turn the rear surround speaker output
On/Off.
SUBWOOFER
ON/OFF
To turn the subwoofer speaker output
On/Off.
Please note:
1. These six speaker setups are only
available when output type is 5.1 CH.
2. The signal of turn -off channel will be
distributed to other
channels.
LPCM 48/96kHz
TROUBLESHOOTING
Before repairing, please take a look at the following problems and possible solutions first.

NO. PROBLEM SOLUTION
1.
“No Disc”
displayed on
screen.
If you place the disc on the tray and the player displays
“NO DISC” once loaded:
1. Check whether the disc is placed correctly (label side
up).
2. Check the format of the disc.
3. Check whether the disc is dirty or damaged.
4. Clean the lens – this usually needs to be done after
20
hours of playback.
2.
No sound.
1. Set to current connecting channel.
2. Replace audio connection or connect correctly.
3. Ensure connected unit works properly or turn volume
up.
USB COPY
1. The USB storage capacity range must not exceed 16GB.
2. Only insert a USB where there is no disc in the tray.
3. Press “MODE” button on the unit or “SOURCE” on the remote control:

DVD and USB will appear on the TV screen. Please use and buttons to select USB. Then
press “ENTER” for the USB to be read.
Please note: If a disc needs to be read after a USB has been read, please press “MODE” on the unit or“
SOURCE” on the control and use and buttons to select DVD.
To Copy an MP3 File:
When playing an MP3 disc, press “COPY” button on the remote and enter the copy selection interface; the
content that can be copied are the tracks of the current disc being played.
To Copy an MP4 File:
When playing an MPEG4 disc, press the “STOP” key to return to the menu interface then press the
“COPY” key on the remote and enter the copy selection interface; the content that can be copied are the
tracks of the current disc being played.
Create ID3 Information:
Move the highlight bar to “CREATE ID3 TAG” option, then press “ENTER” key to select or cancel. By
selecting this option during the copying process, the file will be created with ID3 information which is
produced automatically by the system. When selecting, press the Direction and Confirm buttons.
Once the selection is complete, move the cursor to the program.
Selecting a Program to Copy:
Move the Direction cursor over the program to be copied. If only some of the program is to be copied,
move the cursor over the upper program selection, then press Confirm to cancel the selection. Press the
Direction buttons on the remote control to select the program to be copied, then press the Confirm button.
Copy:
Move the highlight bar to “START” option; at this time, the information about this copy will be shown
on the right hand side (TOTAL TRACKS, TOTAL TIME and TOTAL SIZE). Then press “ENTER” key
to start copying and the system will write the CD in MP3 format onto the designated USB. When
copying at normal speed, you can listen to the content to be copied at the same time; when selecting
4 times speed, it will be mute.
Please note: When you press the “ENTER” key to switch speeds, there will be a slight sound which
continues for a few seconds.
Cancel Copy:
During copy, you can move the highlight bar to “CANCEL” option and press “ENTER” key to confirm.
Return from Copying Screen:
Move the highlight bar to “RETURN” option and press “ENTER” key to confirm return.
Please note: Before copy, ensure that the available space on the USB is enough for the size of the
file(s) to be copied.
COMMON OPERATION
Wireless BT Connectivity:
Hassle-Free Pairing, Simple Music Streaming
Compatible with All of Today’s Latest Wireless BT Devices (Smartphones, Tablets, Laptops, Computers, etc.)
Wireless BT Version: 5.0V
Wireless BT Network Name: ‘PHSKR14’
Wireless BT Range: Up to 30.0’ ft.
To connect an external device to this unit via BT:
1. Press “SOURCE Switch” on the remote control or on the panel to select the BT function. The corresponding
screen will then display “BT” indicating that the BT function is on.
2. Ensure the BT function is on on the external device and search for PHSKR14. Once found, click on it and pair.
Some devices may need a pin code to connect; try 0000 or 1234. Once connected, you will hear a signal
indicating that the connection is successful.
Aux In Function Operation
Switch on the unit. Press the MODE button to switch to AUX IN mode. Connect the external music player using the
cable. The unit will start playing the selected music on the external player. Using the remote control, play, pause or
stop the music being played. Please note that in Line Input mode, some functions may not be available.
FM Radio Function Operation
Switch on the unit. Press the MODE key to switch to FM mode, then press the SCAN key to automatically
search and store radio channels.
When the search is complete, the unit will play the first stored channel.
Press NEXT or PREV button to select the next or previous radio station. If the signal is not good, you can adjust
the signal by pressing the REV or FWD button. For better sound quality, make sure that the antenna is fully
extended.
Features:
Compact & Portable Media Entertainment Unit
Built-in BT for Wireless Audio Streaming
Sound System: 8” Subwoofer – 5.25” medium speaker -3” Tweeter
LED Digital Display Screen
DVD/CD function
FM Radio
USB Flash Drive
Aux (3.5mm) Output
1/4” Two Microphone Inputs
EQ Mode (Jazz, Class, Rock, Flat, POP)
Connect & Stream Audio from External Devices
Dual Amplifier for Better Sound Performance
Audio-in for Portable Music Playback
High-Quality Sound, Powerful Bass
Sleek and Compact Design
Treble and Bass Adjustment
Lights on Knob and Speakers (Blue)
Blue Colored Speaker Lights
DVD/BT/FM Radio/USB/AUX/Karaoke
Digital Amplifier IC for Strong Sound
What’s in the Box:
Wireless BT Streaming DVD Stereo System
Remote Control
AC/DC Power Cord
FM Antenna Cable
Technical Specs:
Power Output: 1000 Watt MAX
Impedance: 4 Ohm+8 Ohm
Frequency Response: 120Hz-15KHz
Sensitivity (1w/1m): 650mV
Signal to Noise Ratio: 52dB
T.H.D.: <10%
Low Frequency: 120Hz-4KHz
High Frequency: 4KHz-15KHz
Remote Control Battery Operated, requires (2) x ‘AAA’ Batteries (not Included)
Digital File Support: MP3, MPEG4, WMA, WAV, AVI, MPG, 3GP, FLV, FLAC.
PYLE PPSPKR131 Wireless BT Streaming Mini Speaker User Manual
PPSPKR131 Wireless BT Streaming Mini Speaker In order to have a better
experience of the product, please read…
PYLE Wireless BT Tube Amplifier Stereo Receiver User Manual
USER MANUAL PVTA80 Wireless BT Tube Amplifier Stereo Receiver 4
Vacuum Tube Power Amp, Built-in USB Playback, LED…
Maximum USB Flash Support: 32GB
Power Supply: 110/220V
Dimensions (L x W x H): 12’’ x 15.6’’ x 36’’ –inches
HAVING A QUESTION
Questions? Issues?
We are here to help!
Phone: (1) 718-535-1800
Email: support@pyleusa.com
Documents / Resources
PYLE PHSKR14 3-Piece Wireless BT Streaming Stereo System [pdf] User Guide
PHSKR14, 3-Piece Wireless BT Streaming Stereo System, Wireless BT Streaming Stereo System,
BT Streaming Stereo System, PHSKR14, Stereo System
References
Pyle USA Electronics | Home Audio | Car Audio & More
Related Manuals / Resources
PYLE PHSKR12 3 Piece Wireless BT Streaming Stereo System User
Guide
PYLE PHSKR12 3 Piece Wireless BT Streaming Stereo System Please
read these instructions carefully and retain for future…
PYLE PPHP122SM Wireless BT Streaming PA Speaker User Manual
PYLE PPHP122SM Wireless BT Streaming PA Speaker WARNING DO
NOT place objects on top of the device, as…
Leave a comment
Your email address will not be published. Required fields are marked *
Comment *
Name
Email
Website
Save my name, email, and website in this browser for the next time I comment.
Post Comment
Manuals+,
home
privacy