INSTRUCTION MANUAL
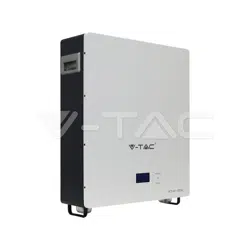
BATTERY STORAGE
IN CASE OF ANY QUERY/ISSUE WITH THE PRODUCT, PLEASE REACH OUT TO US AT: SUPPORT@V-TAC.EU
FOR MORE PRODUCTS RANGE, INQUIRY PLEASE CONTACT OUR DISTRIBUTOR OR NEAREST
DEALERS. V-TAC EUROPE LTD. BULGARIA, PLOVDIV 4000, BUL.L.KARAVELOW 9B
TECHNICAL DATA
Battery type LFP
Rated capacity of battery pack 200Ah
Rated voltage of battery pack 51.2V
Maximum charging vo ltage 57.6V
Minimum discharge voltage 40V
Rated charge/discharge current 100A
Maximum charge/discharge current 120A
Charging temperature range 0 to +45°C
Discharge temperature range
-20°C to +50°C
Depth of discharge >80%
Discharge magnificatio n <1C
Self-discharge (25°C) <3%/Month
Cycle life >5000 times(<0.5C
)
Interactive mode (APP)
LCD+Button+Bluetooth
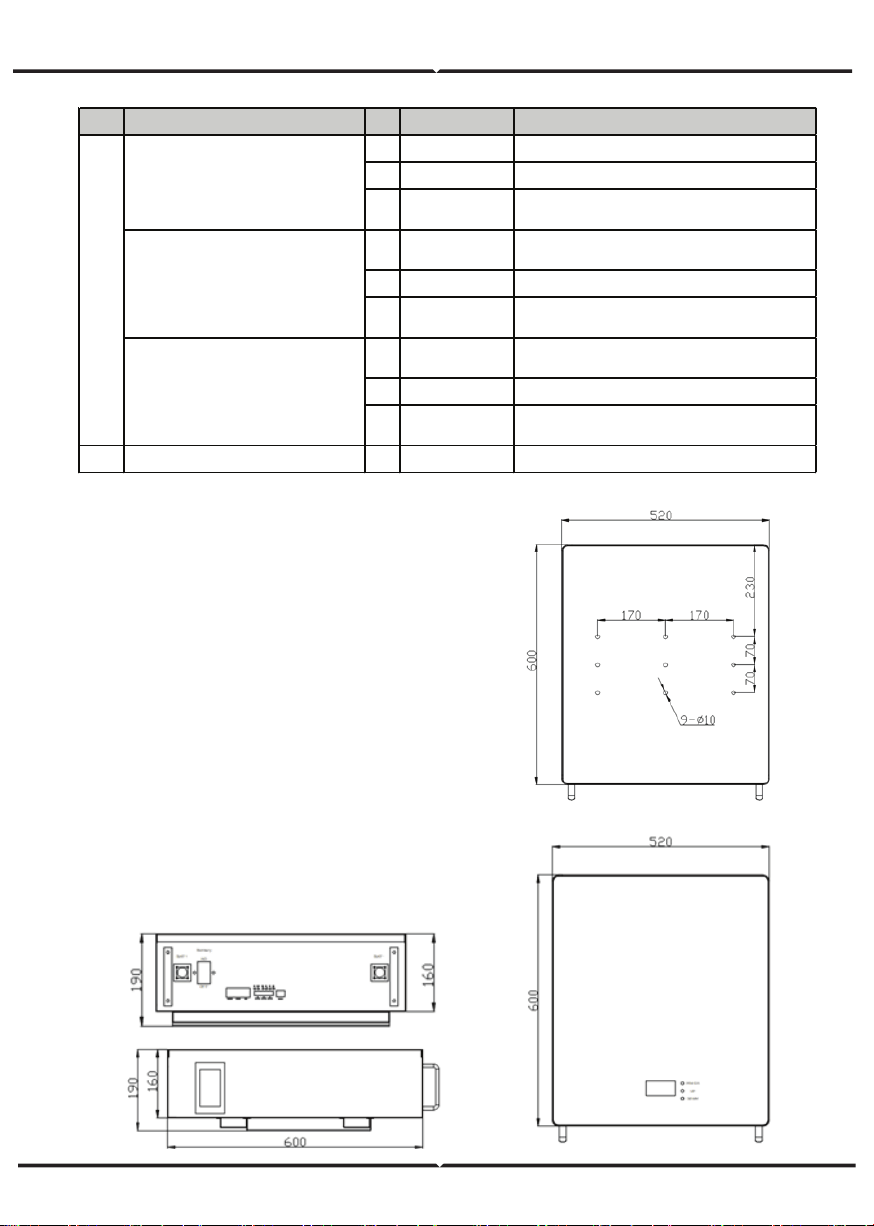
Dimensio n
700*515*250mm
(Error±2mm)
Weight About 65KG
Compatible with Solar Inverter [VT-66036103, VT-6605103, VT-12040]
Thank you for selecting and buying V-TAC Product. V-TAC will serve you
the best. Please read these instructions carefully & keep this user manual
handy for future reference. If you have any another query, please contact
our dealer or local vendor from whom you have purchased the product.
They are trained and ready to serve you at the best.
INTRODUCTION
Multi-Language Manual QR CODE
Please scan the QR code to access the manual
in multiple languages.
WARNING
HUMAN-COMPUTER INTERACTION CONTENT
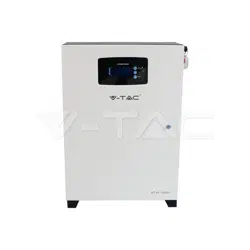
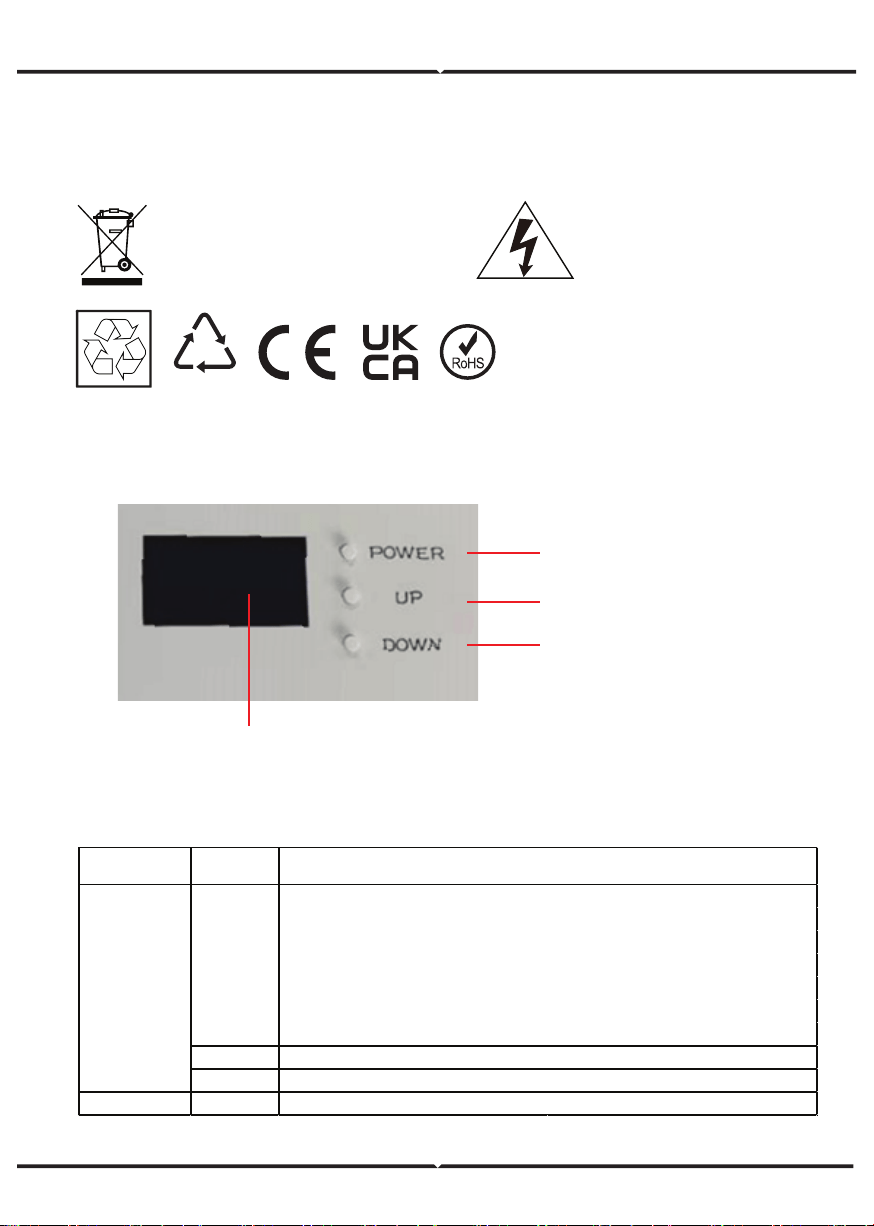
CONTROL PANEL
1. Please make sure to turn off the power before starting the installation.
2. Installation must be performed by a qualified electrician.
Caution, risk of
electric shock.
This marking indicates that this
product should not be disposed
of with other household wastes.
20
PAP
POWER BUTTON
UP BUTTON
DOWN BUTTON
LCD SCREEN
Proje ct Function
UP
DOWN
Switch
DC OUTPUT
Re ma rk
When Powered on:
1. Short press: invalid
2. Long press (press for 4~6 seconds and release): power off
When powered off:
1. Short press: invalid
2. Long press (press for 4~6 seconds and release ): turn on
Page down
Use the key to open the front panel before switching on and off
Button
POWER
Page up

HUMAN-COMPUTER INTERACTION CONTENT
Proje ct Function
E11: Level 1 alarm of module equipment failure
E12: Module equipment failure secondary alarm
E21: Level 1 alarm of module communication abnormality
E22: Module communication abnormality secondary alarm
E31: Module address is abnormal level 1 alarm
E32: Module Address Abnormal Level 2 Alarm
E41: Module balancing abnormal level 1 alarm
E42: Module balance abnormal secondary alarm
E51: Module total voltage overvoltage level 1 alarm
E52: Module total voltage overvoltage secondary alarm
E61: Level 1 alarm of module total voltage undervoltage
E62: Second-level alarm of module total voltage undervoltage
E71: Module charging overcurrent level 1 alarm
E72: Module charging overcurrent secondary alarm
E81: Module discharge overcurrent level 1 alarm
E82: Module discharge overcurrent secondary alarm
E83: Module discharge load short circuit (serious)
E91: Single battery overvoltage level 1 alarm
E92: Single battery overvoltage secondary alarm
E101: Single battery undervoltage level 1 alarm
E102: Single battery undervoltage secondary alarm
E111: Module battery high temperature level 1 alarm
E112: Module battery high temperature secondary alarm
E121: Module battery low temperature level 1 alarm
E122: Module battery low temperature secondary alarm
There are 6 display interfaces in total:
1. Main interface information (voltage/current/SOC/status code);
2. Secondary main interface information (maximum and minimum cell
voltage/maximum and minimum temperature);
3. Display 1~4cell voltage;
4. Display 5~8cell voltage;
5. Display 9~12cell voltage;
Error code
LCD
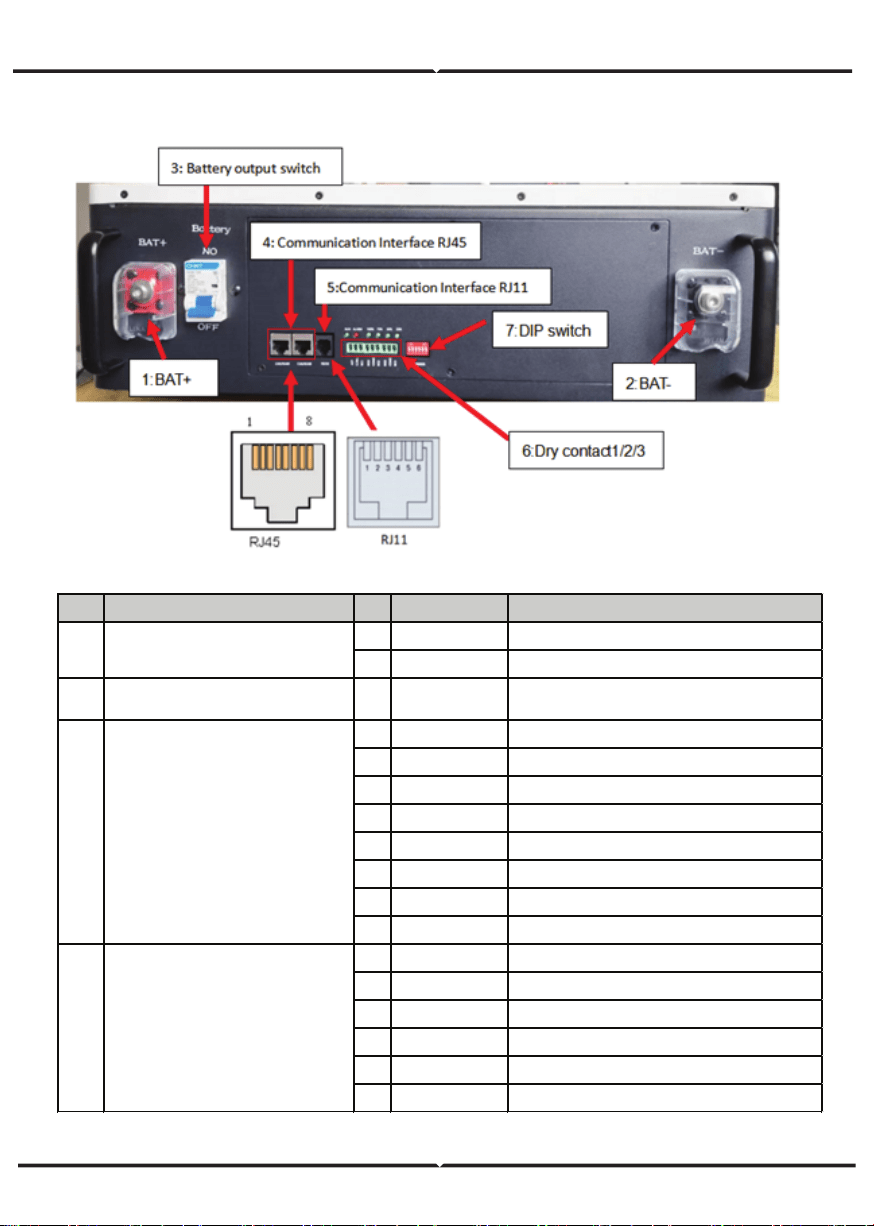
INTERFACE DEFINITION
Port Port type NO Signal name Re ma rk
1 BAT+ Battery positive output interface
2 BAT- Battery negative output interface
3 Battery output switch - Battery
Battery output switch (control
positive)
1 CAN-H CAN bus high level
2 CAN-L CAN bus low level
3 null null
4 485-A RS485-A
5 485-B RS485-B
6 null null
7 GT1 communication place
8 GT1 communication place
1 232-RXD 232 receive signal
2 232-TXD 232 send signal
3 GT1 communication place
4 GT1 communication place
5 null null
6 null null
1,2 Battery output interface
4
5
Communication Interface
(RJ45)
Communication Interface
(RJ11)
Port Port type NO Signal name Re ma rk
1 NO1 Dry contact 1
2 COM1 Dry contact 1public Terminal
3 NC1
Dry contact 1 normally closed
Te rmina l
1 NO2
Dry contact 2 normally open
Te rmina l
2 COM2 Dry contact 2 public Terminal
3 NC2
Dry contact 2 normally closed
Te rmina l
1 NO3
Dry contact 3 normally open
Te rmina l
2 COM3 Dry contact 3 public Terminal
3 NC3
Dry contact 3 normally closed
Te rmina l
7 DIP sw itch - ADDRESS Binary dial mode
Dry contact 3 (3.81 3P
Phoenix Terminal)
6
Dry contact 1 (3.81 3P
Phoenix Terminal)
Dry contact 2 (3.81 3P
Phoenix Terminal)
INSTALLATION
1. Refer to the figure below to install the
battery module, the fixing feet are on the
ground, the module body is fixed on the
wall, and the screws are 4~6mm combina-
tion screws. The reference tightening
torque is 35 N.m. (unit mm)
2) Check whether the battery module is firm
and safe. (Avoid damp, rain, and direct
sunlight as much as possible)
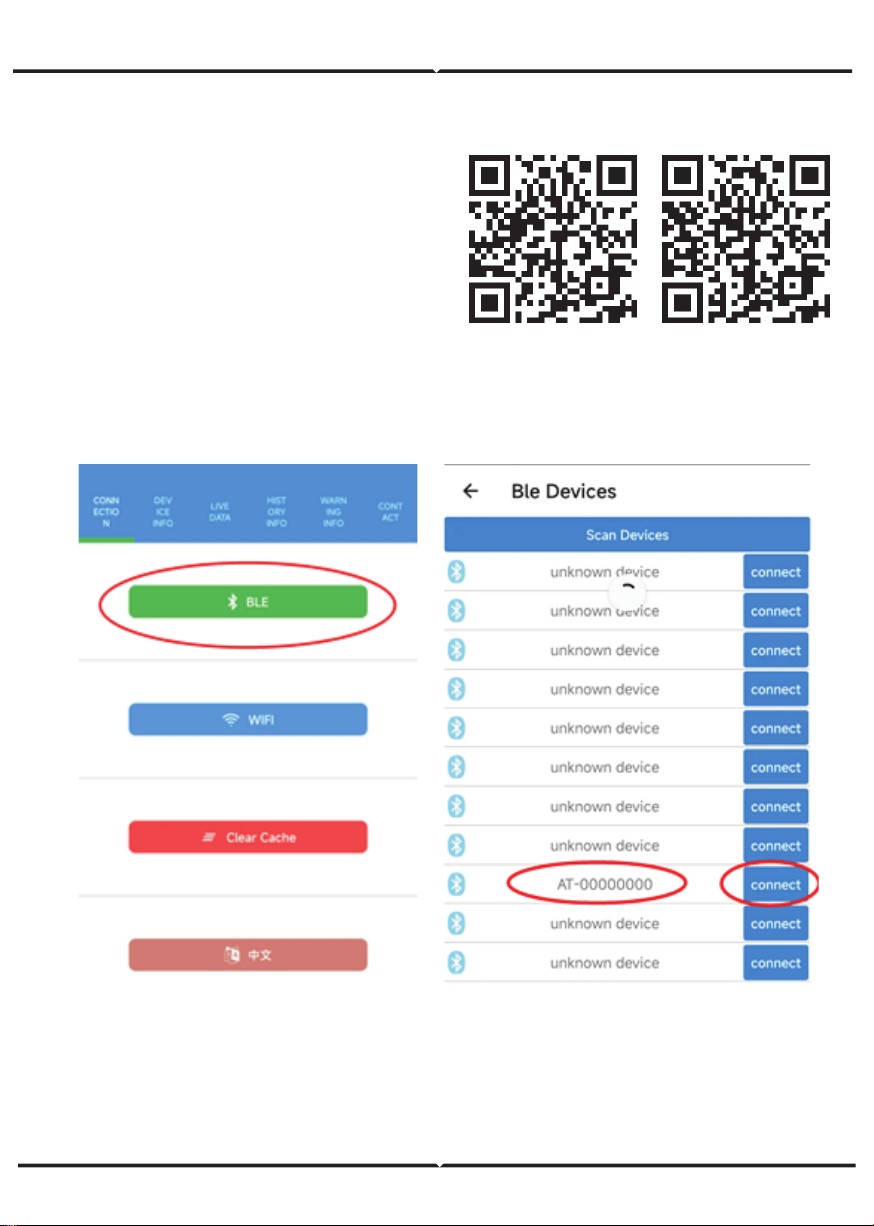
APP INSTALLATION
Step 1: Scan the given QR code to download
App then install the app.
"BLE" to connect to Bluetooth
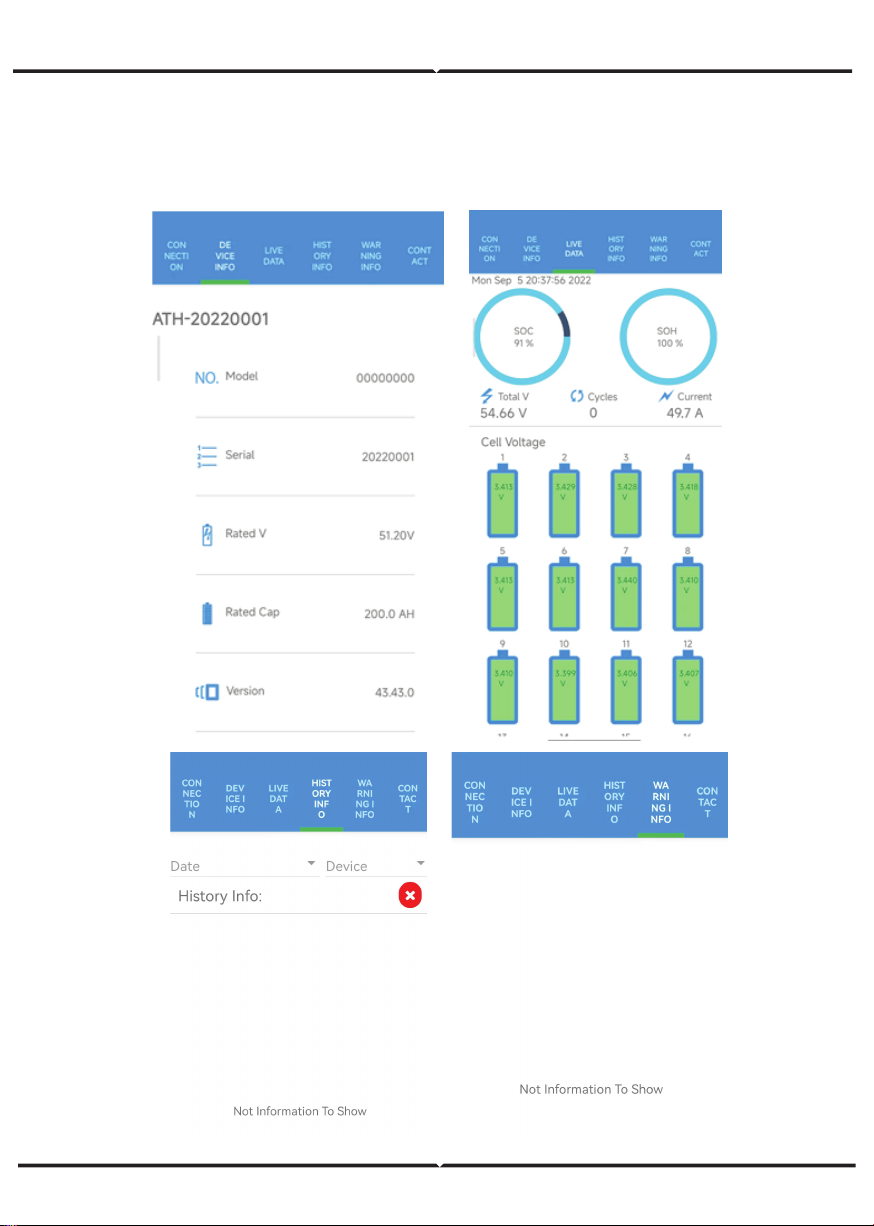
Step 5:
CONTACT" to switch (See the below pic).