Loading ...
Loading ...
Loading ...
7
Tool Operation
Read sections titled “Safety Warnings” before operating tool.
Read and understand all in-structions. Failure to follow all instructions listed below may
result in electric shock, fire and/or serious personal injury.
WARNING
Do not use this product if it is not completely assembled or if any parts
appear to be missing or damaged. Use of a product that is not properly and completely
assembled or with damaged or missing parts could result in serious personal injury.
WARNING
Do not attempt to modify this product or create accessories or attachments not
recommended for use with this product. Any such alteration or modification is misuse
and could result in hazardous conditions possibly leading to serious personal injury.
I any parts are damaged or missing, please call 1-800-543-4596 for assistance.
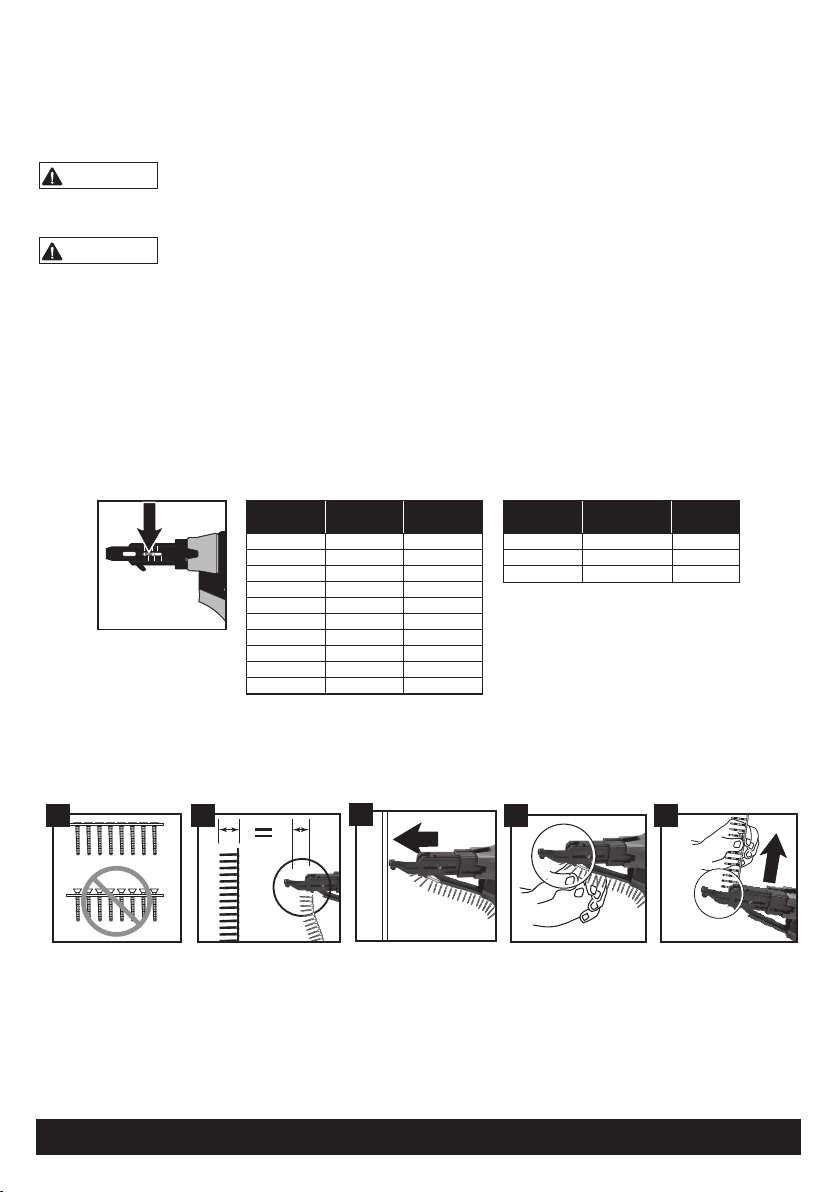
ADJUSTING FOR FASTENER LENGTH
1. Unplug tool from electrical supply before adjusting nose-piece for fastener length.
2. Depress the screw selector pin until it is flush with nosepiece and slide the nosepiece to the desired
setting by aligning hatch marks with the silver adjustment pin.
3. Release pin and make sure it is fully engaged in selected nosepiece slot for proper operation.
DS242-AC DS245-AC DS342-AC
1"
1 1/4"
1 1/2"
1 3/4"
1 5/8"
2"
1"
1 1/4"
1 1/2"
1 3/4"
1 5/8"
2"
1"
1 1/4"
1 1/2"
1 3/4"
1 5/8"
2"
2 1/4"
2 1/2"
2 3/4"
3"
Bit Type DS242/DS245 DS342
Phillips
Square
Rex
EA0297
EA0298
EA0299
EA0400
EA0401
EA0402
1
1-1/2
1-5/8
1-1/4
1-3/4
2
LOADING THE TOOL
1. Check to be sure the heads of the screws are resting on top of the plastic collation material.
This will ensure proper strip advancement and prevent jamming.
1 52
3
4
2. Check for proper fastener length setting (see “Adjusting for Fastener Length” above).
3. Feed the strip into the strip guide track up toward the nose of the tool.
4. Feed the strip into the slide body until the first screw is aligned with the bit. The tool will feed all
subsequent screws automatically as the tool is pulled back off the work surface, returning to its
relaxed state.
5. To remove the strip, pull it through from the top of the side body.
Loading ...
Loading ...
Loading ...