TM
1
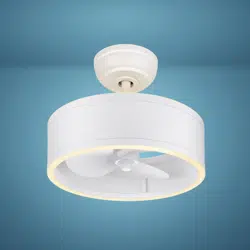
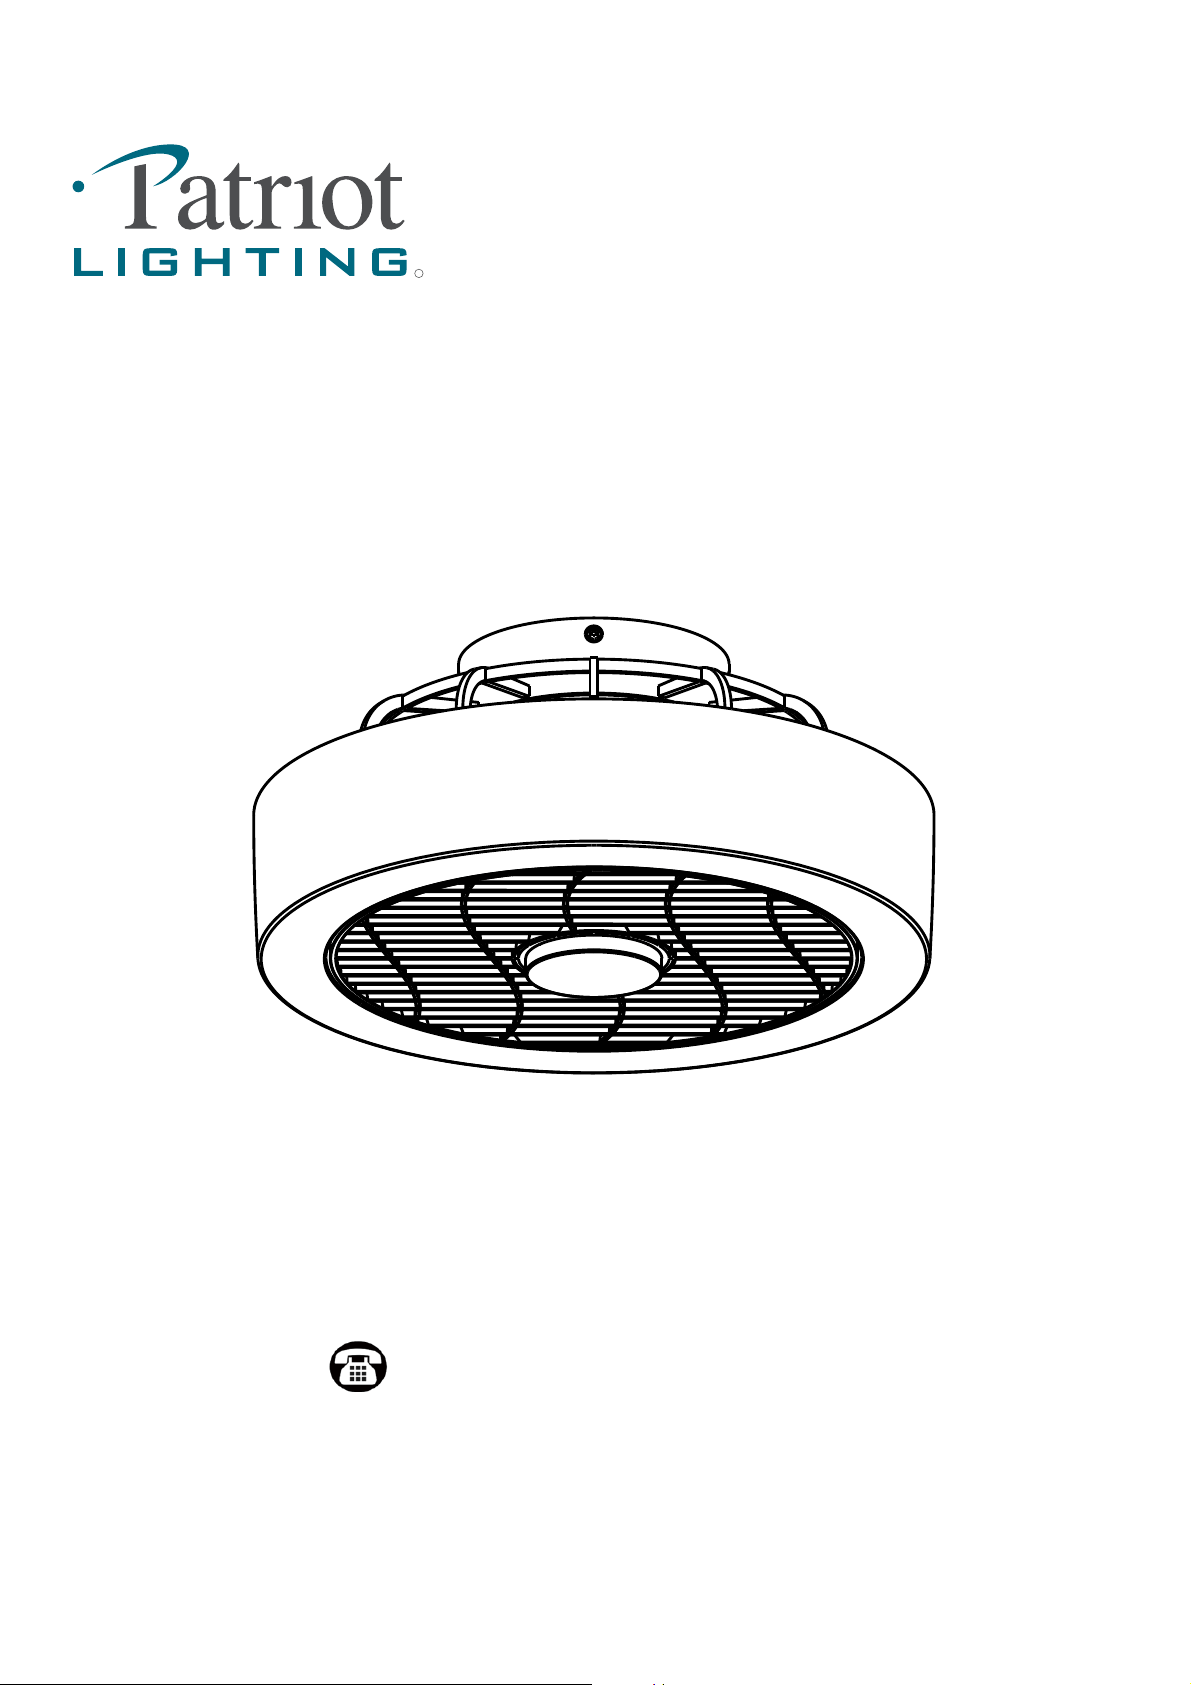
16" SWANK FLUSH-MOUNT
CEILING FAN
Questions, problems, missing parts?
Before returning to your retailer, call our customer service
department at 1-833-695-2045, 8:30 a.m. - 5 p.m., EST, Monday - Friday.
Sku Number: 355-0718
Model Number: 37591-MNDC
Please read and understand this entire manual before attempting to assemble, operate, or install the product.
All set screws must be checked and retightened where necessary before installation.
To reduce the risk of personal injury, do not bend the blade brackets when installing, balancing the blades, or cleaning the fan.
Do not insert foreign objects in between rotating fan blades.
Before changing the fan direction, turn off the fan and wait for the fan blades to stop completely.
If a stationary appliance is not provided with a supply cord and a plug, or with other means for disconnection from the mains supply having
a contact separation of at least 3 mm in all poles, a means for disconnection must be incorporated in the fixed wiring in accordance with
the wiring rules.
NOTE:The safeguards provided by these safety instructions and by the separate installation instructions are not meant to cover all possible
conditions and situations that may occur. It must be understood that common sense, caution and care are factors which cannot be built into
this product.These factors must be supplied by the person(s) installing, caring for, and operating the fan.
RISK OF FIRE-Use bulbs specified by the marking and/or labels on the ceiling fan. Consult a qualified electrician to ensure correct branch
circuit conductor.
This product must be installed in accordance with the applicable installation code by a person familiar with the construction and
operation of the product and hazards involved.
RISK OF ELECTRIC SHOCK-Prior to installation of this ceiling fan or removal of a previous ceiling fan, disconnect the power by turning
off the circuit breaker or by removing the fuse at the fuse box.
Read all instructions before installing.
Consult a qualified electrician for installation of this fan.
To reduce the risk of injury, install the fan so that the blades are at least 2.10 Meters (7 Feet) above the floor and at least 0.5 Meters
(18 inches) from the tip of the blades to the wall.
2
SAFETY INFORMATION
WARNING
CAUTION
Lighting Fixture Warranty
Patriot Lighting fixtures, components, and electronic products, when properly installed and under normal conditions of
use, are warranted to be free from defects in materials and workmanship for one year from date of sale.
3
Ceiling Fan Warranty
This Limited Lifetime Warranty includes motor and motor-related parts only, which will be replaced or repaired as
determined by Patriot Lighting during the period in which this warranty is in effect, as further defined below.
The limited lifetime warranty covers this Ceiling Fan, for residential use by the original purchaser, against defects in
material or workmanship as follows:
If your Patriot Lighting Ceiling Fan motor fails at any time during the lifetime of the original purchaser due to defects in
material or workmanship, we will provide a replacement part free of charge.
If your Fan motor fails at any time within one year after the original date of sale to the original purchaser due to defects
in material or workmanship, we will provide labor to repair the defect, with the exception of take down/reinstallation,
free of charge. The original purchaser will be responsible for all labor costs after this one year period.
If no replacement parts are provided for any part of your Fan motor that fails at any time during your lifetime due to
defects in material or workmanship, we will refund the original purchase price of your Fan.
If your Fan blades, remote controller / pull chain switch, reverse switch, or any accessory, except glass globes and light
bulbs, fails at any time within one year after the original date of purchase due to a defect in material and workmanship,
we will repair or, if we choose, replace the defective blades, switch, or accessory free of charge, with the exception of
take down/reinstallation services.
If the original purchaser ceases to own the Fan, this warranty and any implied warranty, including but not limited to any
implied warranty of merchantability or fitness for a particular purpose, become void. This warranty and any implied
warranty, including but not limited to any implied warranty of merchantability or fitness for a particular purpose, do not
cover glass globes, light bulbs, or finish on any metal portions of the Fan.
This warranty is in lieu of express warranties. The duration of any implied warranty of merchantability or fitness for a
particular purpose, with respect to any Patriot Lighting Ceiling Fan motor, blades, switch, or accessories, is expressly
limited to the period of the express warranty set forth above for such motor, blades, switch, or accessories.
This warranty excludes defects, malfunctions, or failures of any Patriot Lighting Fan that are caused by repairs by
persons not authorized by us, use of parts or accessories not authorized by us, mishandling, improper installation,
modifications or damage to the Fan while in your possession, or unreasonable use, including failure to provide
necessary maintenance.
To obtain service, contact Patriot Lighting Service Department at 1-833-695-2045, 8:30 a.m. - 5 p.m., EST, Monday -
Friday. You will be responsible for all insurance and freight or other transportation charges to our factory or service.
center. A copy of sales receipt is required in order to obtain service. We will return your Fan freight prepaid. Your Fan
should be properly packed to avoid damage in transit, for we will not be responsible for any such damages.
In no event shall Patriot Lighting Fan be liable for consequential or incidental damages.
Some states do not allow the exclusion or limitation of consequential or incidental damages, in which case the above
limitation or exclusion may not apply.
This warranty gives you specific legal rights and you may also have other rights which vary from state to state.
LIMITED LIFETIME WARRANTY
4
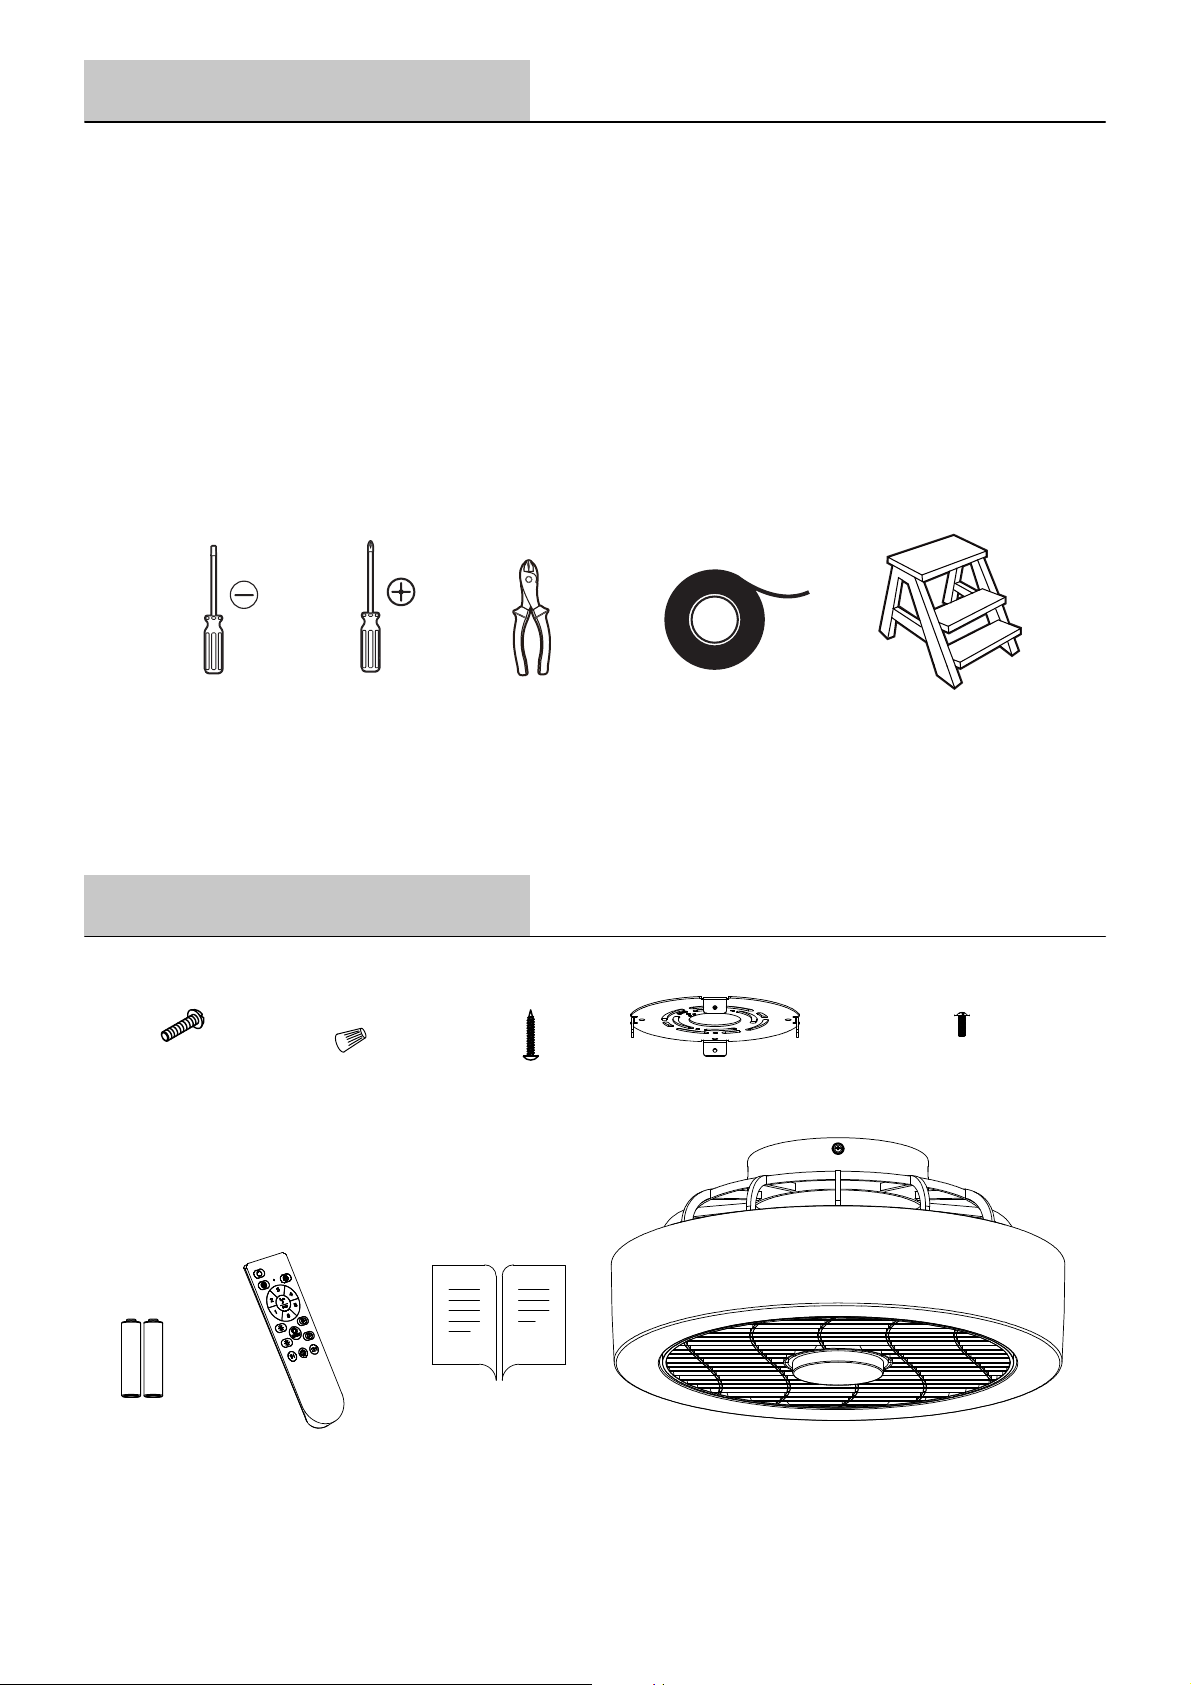
PACKAGE CONTENTS
Transmitter
X1
Installation Instruction
X1
Finished Product Lamp
X1
PRE-INSTALLATION
PREPARATION
To avoid damaging the product, assemble it on a soft, non-abrasive surface, such as carpet or
cardboard. Inspect each part for defects such as the wire insulation for any cuts, abrasions, or
exposed copper that may have occurred during shipping. If there is a defect in the wire, do not
continue the assembly process.
Estimated Assembly Time: 20-30 minutes
TOOLS REQUIRED
Hanging Board
(Preassembled)
X1
Hanging Board Screw
(Preassembled)
X4
Flathead
screwdriver
Phillips
screwdriver
Electrical tape
Step ladder
Wire cutter
Mounting Screw
X2
Wire Connector
X3
Tapping Screw
X2
AAA Battery
X2
5
L
N
2
5
6
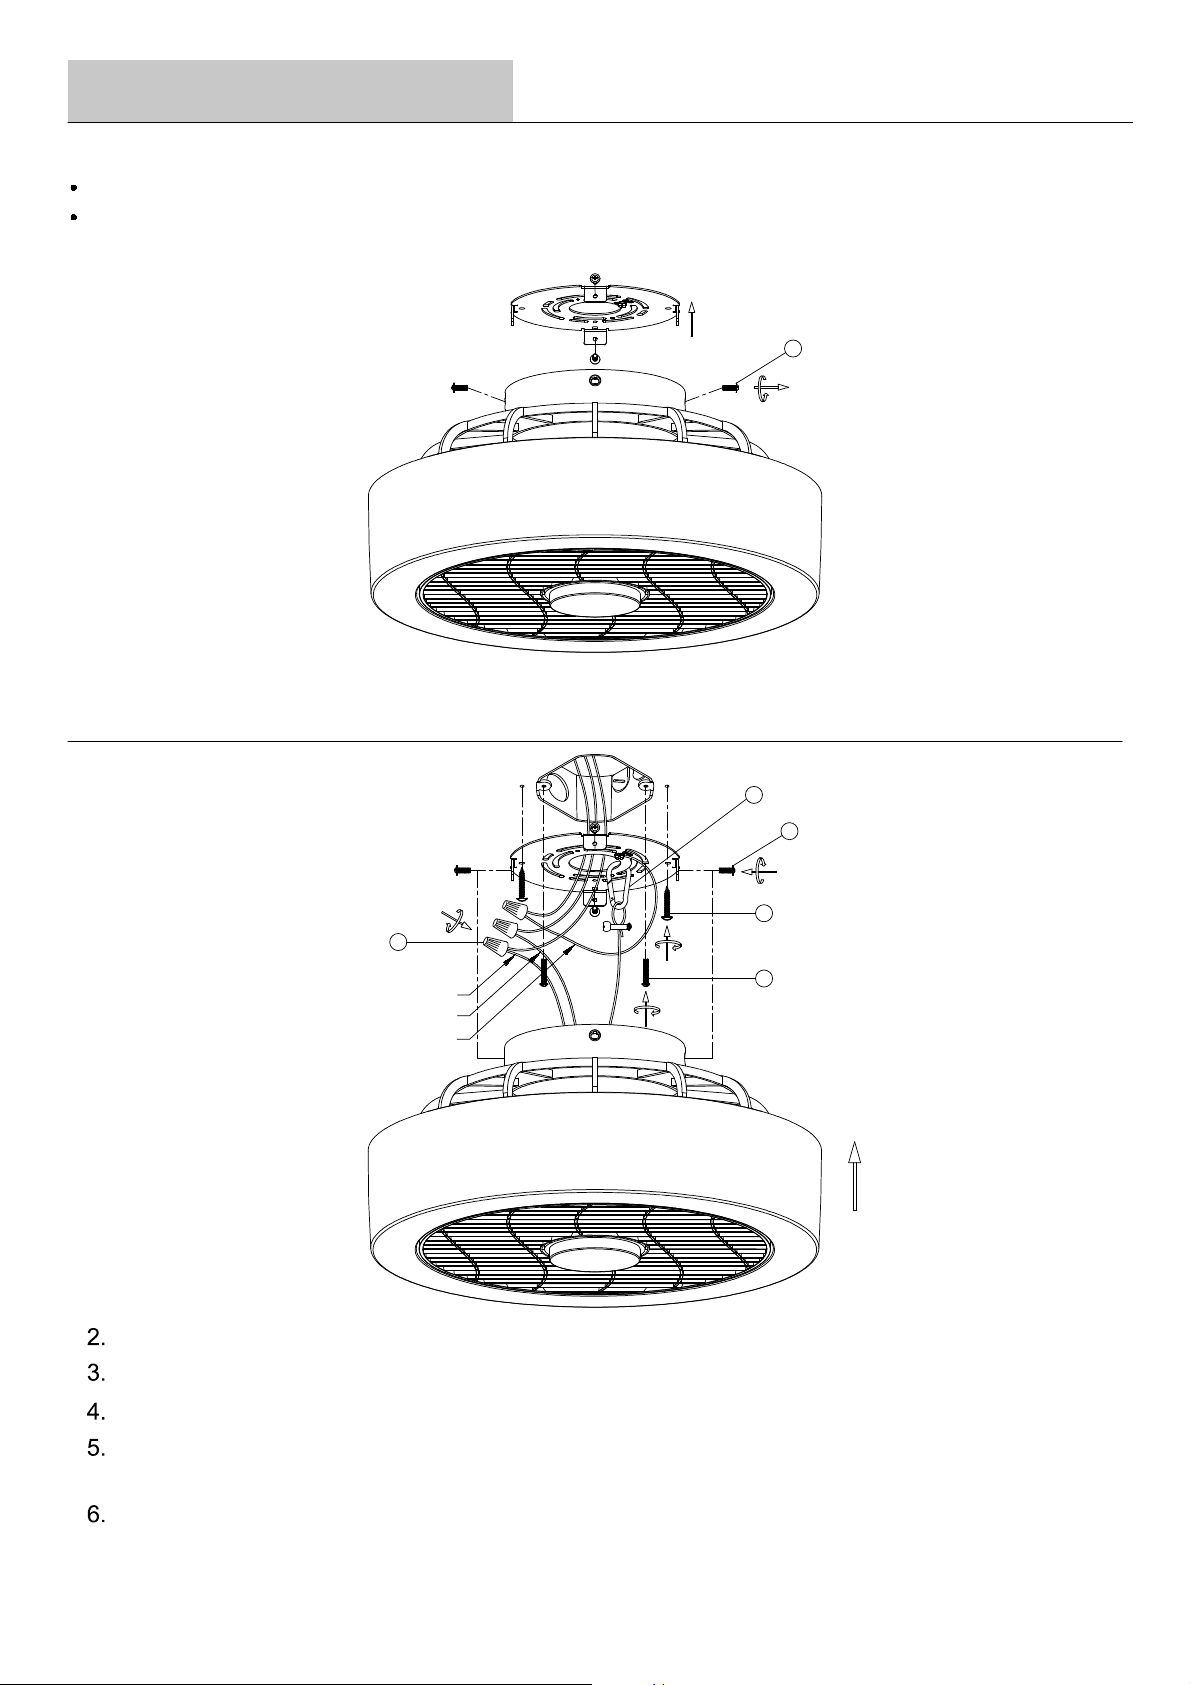
WARNING:
Turn off the power at fuse or circuit box.
To reduce the risk of fire, electric shock or personal injury, mount to outlet box marked "Acceptable
for fan support of 14.5 kg (32 lbs) or less", and use mounting screws provided in assembly kit.
1
1.The hanging board is dismounted from the lamp body.
ASSEMBLY INSTRUCTIONS
3
Whiet
Black
brass
GND
4
The hanging board is mounted on the outlet box with mounting screws.
Tapping screws are mounted on the wooden ceiling.
Fix the wire rope on the hanging plate.
Connect the black to black (power), white to white (neutral) and brass
wire to ground wire with supplied wire connectors.Tuck all wires into outlet box.
The lamp body is fixed on the hanging board with hanging board screws.
6
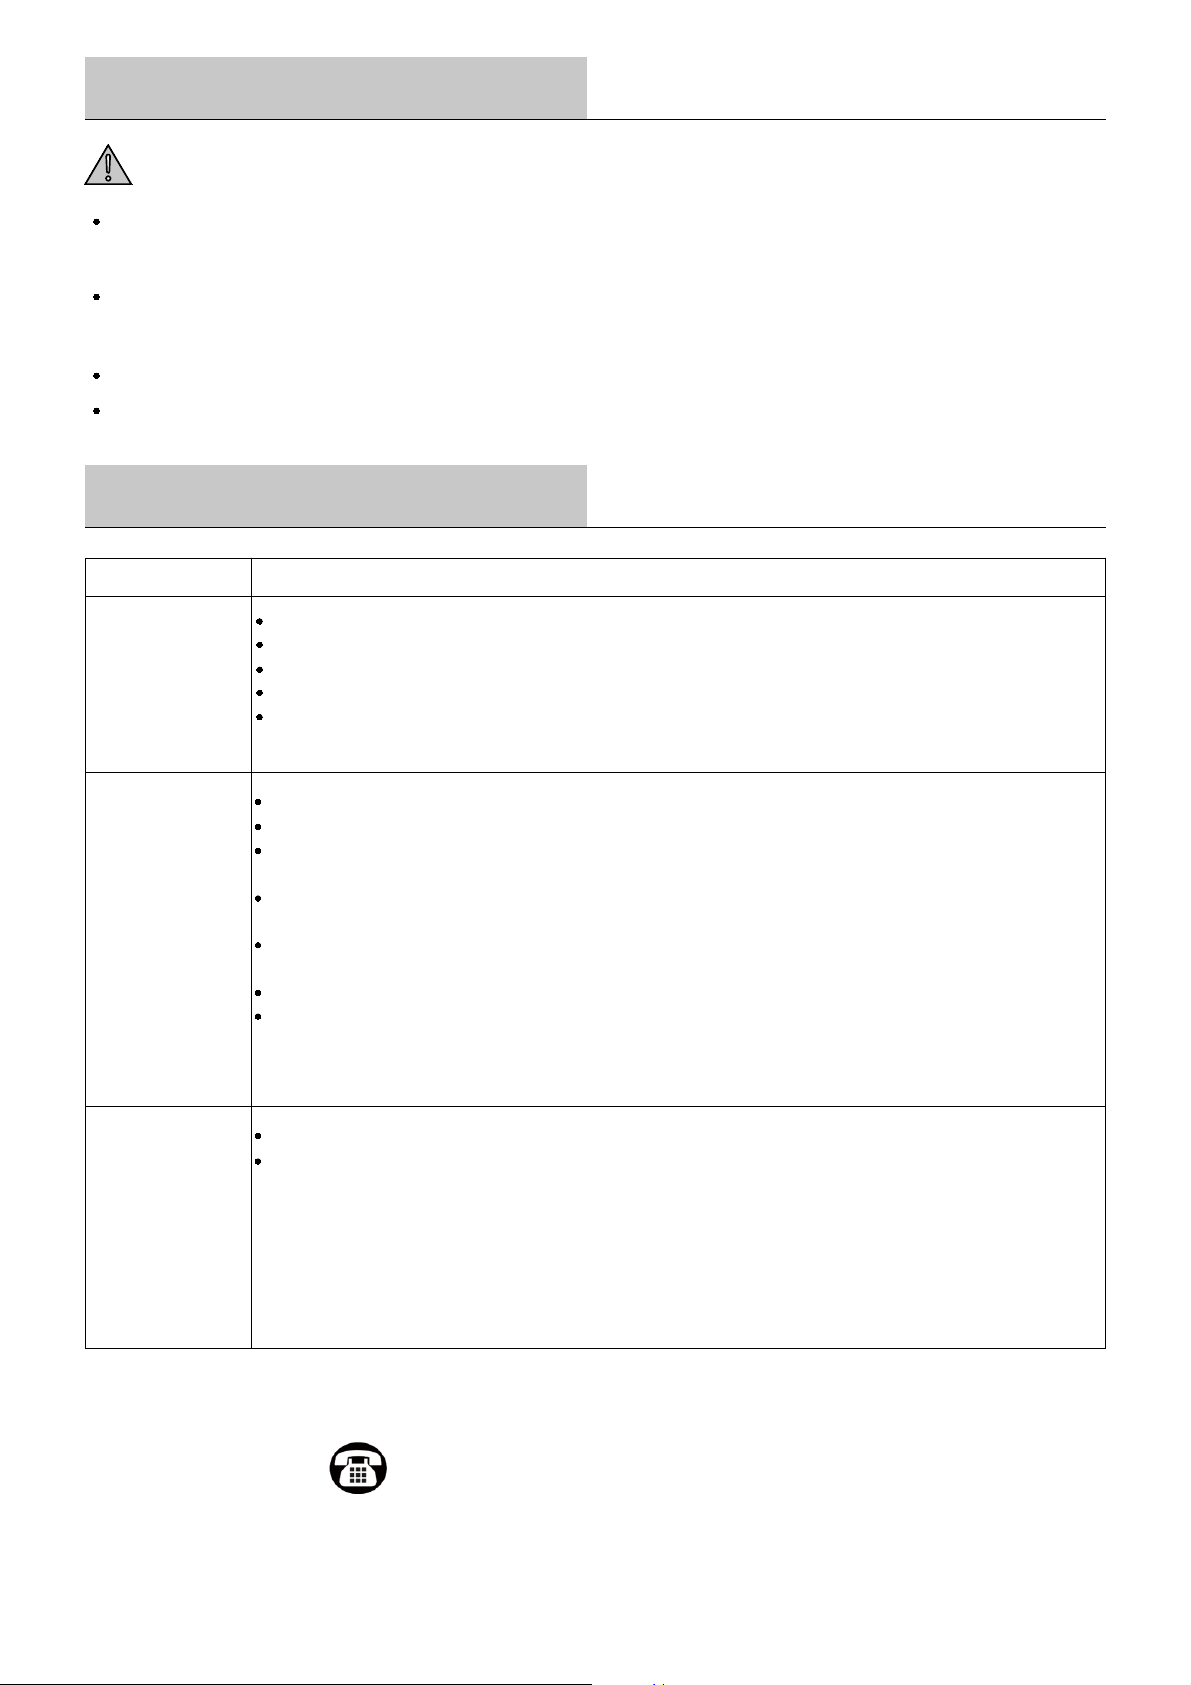
TRANSMITTER SPECIFICATION
Transmitter
1
2
3
4
5
6
Stop
ON/OFF
1H 2H
1
2 3
7
6
8
9
13
14
17
15
5
4
10
11
12
16
18
1. All OFF
2. Reverse function
3. Fan reversible
4. Fan gear: 1
5. Fan gear: 2
6. Fan gear: 3
7. Fan gear: 4
8. Fan gear: 5
9. Fan gear: 6
10. Fan stop
11. Dimming +
(Press and hold to increase the brightness)
12. Dimming -
(Press and hold to decrease brightness)
13. Light temperature +
(Press and hold to increase the color temperature,
the highest color temperature is 5000K)
14. Light temperature -
(Press and hold to decrease the color temperature,
the lowest color temperature is 3000K)
15. Light ON/OFF
16. Timing function: 1H
17. Timing function: 2H
18. Light temperature
(Adjust to the color temperature of the set value,
3000K, 4000K, 5000K)
Fig 1
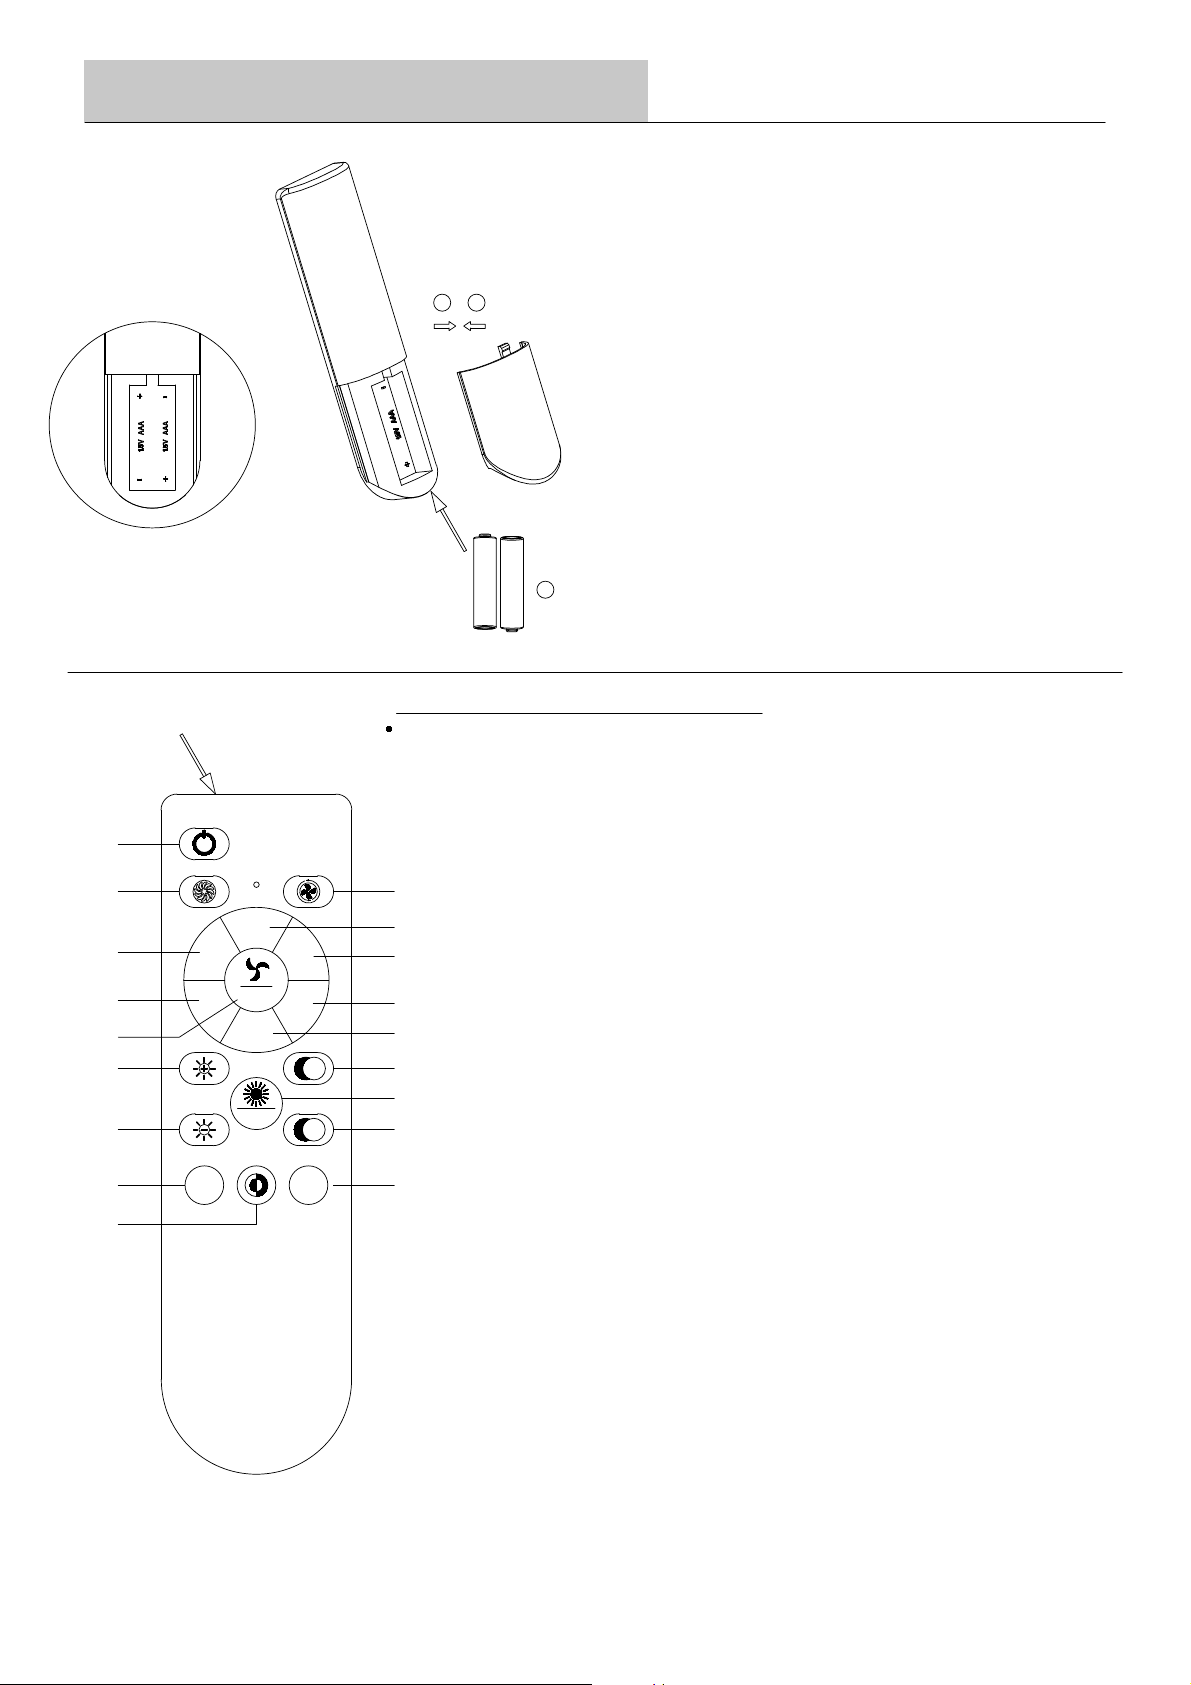
7.Remove the transmitter battery back cover.
9.Install the battery rear cover.
8.Install two AAA batteries, fig 1.
+
+
8
7
9
Transmitter decoding operation:
Turn on the power to turn the light on. Press the Stop (10) button within 5 seconds,
after you hear the "beep" prompt, the code checking is completed successfully.
K+
K-
7
CARE AND MAINTENANCE
WARNING: Make sure the power is off before cleaning
your fan.
Because of the fan’s natural movement, some connections may become loose. Check the support connections,
brackets, and blade attachments twice a year. Make sure they are secure. It is not necessary to remove the fan
from the ceiling.
Clean your fan periodically to help maintain its new appearance over the years. Do not use water when cleaning,
as this could damage the motor, or possibly cause an electrcal shock. Use only a soft brush or lint-free cloth to
avoid
scratching the finish. The plating is sealed with a lacquer to minimize discoloration or tarnishing.
You do not need to oil your fan. The motor has permanently-lubricated sealed ball bearings.
Always unplug the fan before cleaning, disassembly or servicing.
TROUBLESHOOTING
Check the main and branch circuit fuses or breakers.
Check the line wire connections to the fan and switch wire connections in the switch housing.
Check the battery in the remote control.
Ensure you are in the normal range of 10-20 feet.
Turn the power off and ensure that the dip switch settings are the same on the remote control
and receiver.
Ensure all motor housing screws are snug.
Ensure the screws that attach the fan blade bracket to the motor hub are tight.
Ensure the wire nut connections are not rattling against each other or the interior wall of the
switch housing.
Allow a 24-hour “breaking in” period. Most noises associated with a new fan disappear during
this time.
If you are using the Ceiling Fan light kit, ensure the screws securing the glassware are tight.
Check that the light bulbs are also secure.
Ensure the canopy is a short distance from the ceiling. It should not touch the ceiling.
Ensure your outlet box is secure and rubber isolator pads were used between the mounting
plate and outlet box.
Check that all blade and blade arm screws are secure.
Most fan wobble problems are caused when blade levels are unequal. Check this level by
selecting a point on the ceiling above the tip of one of the blades. Measure from a point on
the center of the blade to the point on the ceiling. Rotate the fan until the next blade is
positioned for measurement, and measure from the same point on each blade to the ceiling.
Repeat for each blade. Any measurement deviation should be within 1/8 in. Run the fan for ten
minutes. If the fan continues to wobble please contact Patriot Lighting Customer Service and a
balancing kit will be sent to you at no charge.
Problem
Solution
The fan will not
start
The fan is noisy
The fan wobbles
1
2
4
6
10
11
5
8
7
9
Transmitter
1.Pilot switch
2.Light ON
3.Light OFF
3
4.dimming +
5.dimming -
6.light temperature +
7.light temperature -
8.light temperature
9.Fan gear: Low /Mid /High
10.Timing function: 1H / 2H
11.Fan stop
Questions, problems, missing parts?
Before returning to your retailer, call our customer service
department at 1-833-695-2045, 8:30 a.m. - 5 p.m., EST, Monday - Friday.