Loading ...
Loading ...
Loading ...
SERVICING - WARNING
Disconnect from electricity and gas before servicing. Check appliance is safe when you have nished.
12
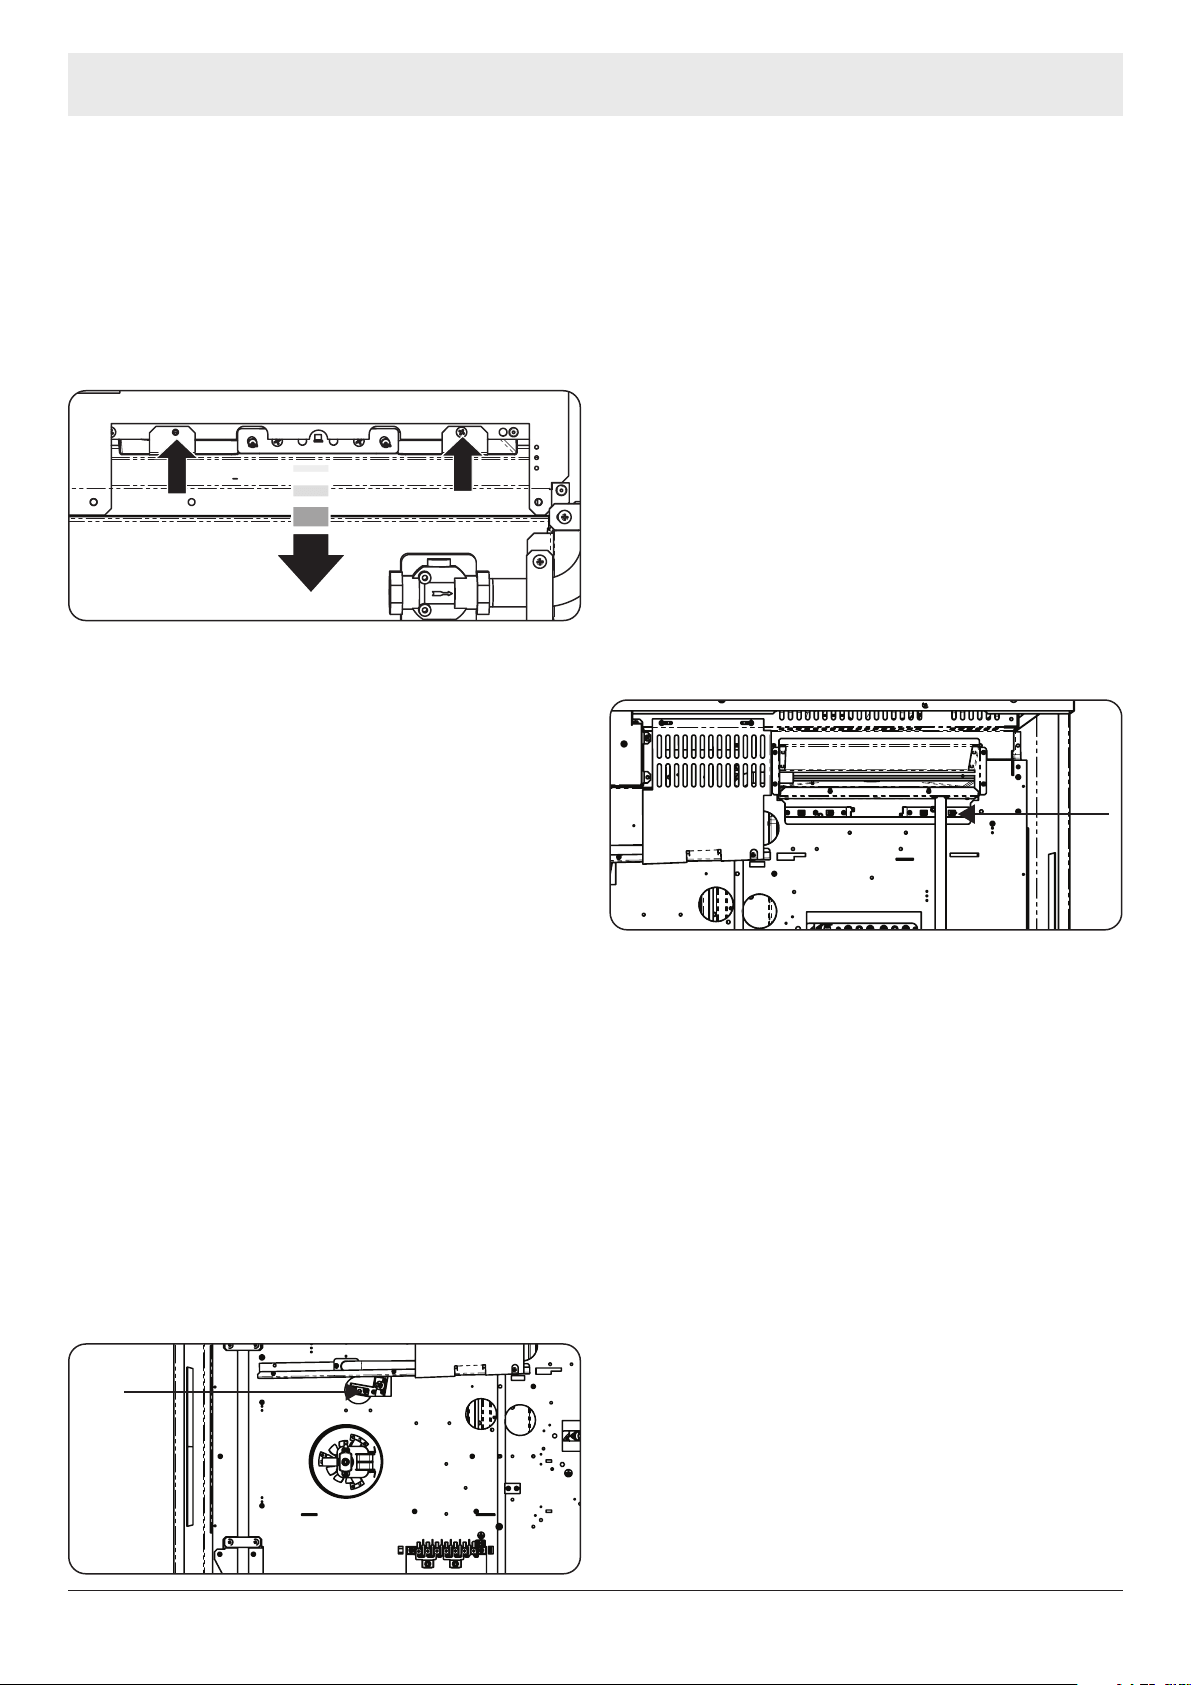
15. Left Hand Oven Elements (Base Element)
a. Make sure the oven is cold before starting work
b. Disconnect the wires from the bottom element,
noting the colours and location on the elements. If
there is an Earth connection, remove this also.
c. The lower element is located on a base tray. Locate
the (x2) securing screws for the base plate, remove
and allow the base plate to drop down.
d. Locate and remove the (x2) element retaining screws
and withdraw the element from the base tray.
e. Re- Assembly: Reassemble in the reverse order, take
care to ensure all wires situated on the rear of the
appliance are clear of the wire covers.
f. Check the electrical safety of the appliance by
carrying out the appropriate electrical safety
checks, earth bond and high Voltage Hi Pot tests.
16. Right Hand Oven Elements
(Fan Element)
a. Move the appliance away from the wall so access can
be gained to the rear covers, taking care to provide
protective means on the ooring.
b. Make sure the oven is cold before starting work.
c. Remove the rear covers (8. Remove the Wire Covers
x 3)
d. Remove the Oven Bae Plate (12. Remove the Oven
Bae Plate)
e. Locate the Oven Element that you need to replace,
locate from the rear of the appliance
f. Remove the element securing screws (x2)
g. Remove the wiring from the oven element, ensure to
make a note of the wire colours and positions on the
element.
Fan Element
h. Re- Assembly: Reassemble in the reverse order, take
care to ensure all wires situated on the rear of the
appliance are clear of the wire covers.
i. Check the electrical safety of the appliance by
carrying out the appropriate electrical safety
checks, earth bond and high Voltage Hi Pot tests.
17. Removing Broiler Elements
Disconnect the appliance from the electricity Supply
Disconnect from the Gas Supply – Remove any
Safety Chains that may be present.
a. Make sure the oven is cold before starting work
b. Remove the wires from the broiler elements, making
a careful note of the wire colours and positions on
the (x2) elements.
c. Open the Broiler cavity, remove the broiler pan/ grid
and frame.
d. Each Broiler element is secured with (x2) screws,
locate and remove. Withdraw the element from the
front of the Broiler cavity.
e. Re- Assembly: Reassemble in the reverse order, take
care to ensure all wires situated on the rear of the
appliance are clear of the wire covers.
f. Check the electrical safety of the appliance by
carrying out the appropriate electrical safety
checks, earth bond and high Voltage Hi Pot tests.
18. Remove the Function Switches
Disconnect the appliance from the electricity Supply
Disconnect from the Gas Supply – Remove any
Safety Chains that may be present.
The appliance has four (x3) function switches, these are
situated under the gas hotplate.
• P028728 x1
• P033458 x2
a. Remove the side panels (4. Remove the side
panels).
b. Remove the facia (5. Removal Facia Assembly).
c. Remove the gas hotplate (6. Removal of the Gas
Hotplate).
d. Access is now available for the Function Switches.
Loading ...
Loading ...
Loading ...