
Loading ...
Loading ...
Loading ...
8
9
DESCRIPTION
Description of the appliance
(page 3 - A )
A1. Control panel
A2. Grinding adjustment dial
A3. Cup shelf
A4. Beans container lid
A5. Pre-ground coee funnel lid
A6. Pre-ground coee funnel
A7. Beans container
A8. Main switch
A9. Water tank
A10. Infuser door
A11. Infuser
A12. Coee spout (adjustable height)
A13. Coee grounds container
A14. Condensate tray
A15. Cup tray
A16. Drip tray water level indicator
A17. Drip tray
A18. Cappuccino maker
A19. Steam/hot water dial
Description of the control panel
(page 2 - B )
B1. Lights
B2. button: turns the appliance on and o.
B3. button: to make 1 cup of espresso coee
B4. button: to make 2 cups of espresso coee
B5. button: to rinse or descale the appliance
B6. Selection dial: turn to select the required quantity of
coee or use pre-ground coee
B7. button: to deliver steam to make hot drinks with
milk.
B8. button: to make 1 cup of espresso coee
B9. button: to make 2 cups of espresso coee
Description of the accessories
(pag. 2 - C )
C1. Measure
C2. Descaler bottle
C3. Water softener lter
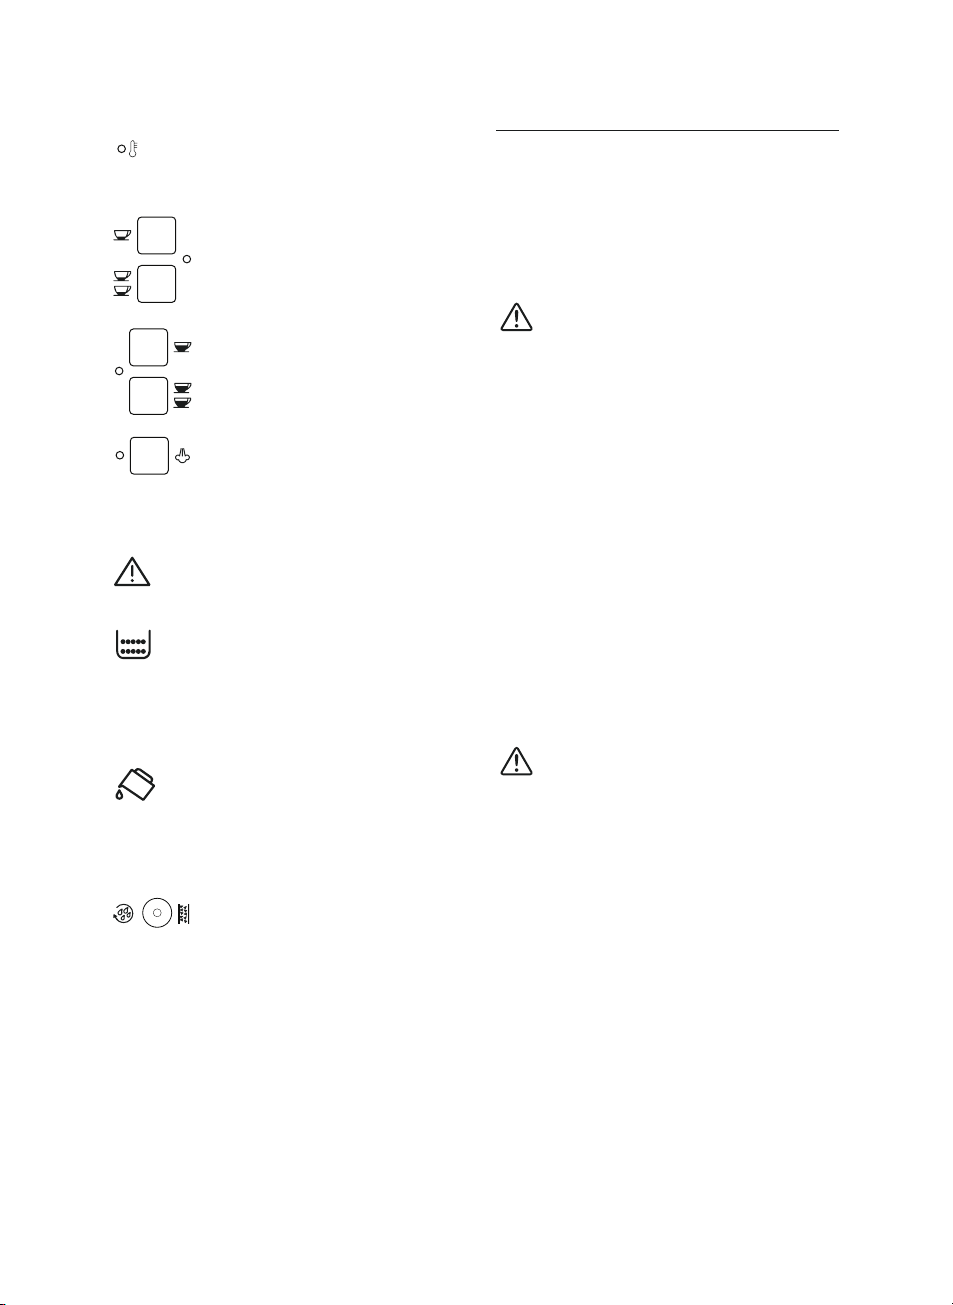
Description of lights
Light ashing: the machine is heating up or a
rinse cycle is underway.
The appliance is delivering one or two cups of
espresso coee.
The appliance is delivering one or two cups of
long coee.
Light on steadily: the “steam” function has
been selected;
Light ashing: you must turn the steam dial.
An alarm is displayed on the control panel (see
the section: “Explanation of lights” on page
17).
Light on steadily: the grounds container is
missing and must be inserted in the appliance;
Light ashing: the grounds container is full and
must be emptied.
Light on steadily: the water tank is missing;
Light ashing: there is not enough water in the
tank.
Light ashing: the appliance must be descaled
(see the section “Descaling”).
Light on steadily: the appliance is performing
a descaling cycle.
ECO ECO “Energy Saving” mode is active.
PRELIMINARY CHECKS
Checking the appliance
After removing the packaging, make sure the product is
complete and undamaged and that all accessories are present.
Do not use the appliance if it is visibly damaged.
Contact De’Longhi Customer Services.
Installing the appliance
Important!
When installing the appliance, respect the following safety
warnings:
• Theappliancecouldbedamagedifthewateritcontains
freezes.
Do not install the appliance in a room where the
temperature could drop below freezing point.
• Theappliancegivesoheat.
After positioning the appliance on the worktop, leave
a space of at least 3 cm between the surfaces of the
appliance and the side and rear walls and at least 15 cm
above the coee maker.
• Waterpenetratingthecoeemakercouldcausedamage.
Do not place the appliance near taps or sinks.
• Arrangethepowercableinsuchawaythatitcannotbe
damaged by sharp edges or contact with hot surfaces
(e.g. electric hot plates).
Connecting the appliance
Important!
Check that the mains power supply voltage corresponds to
the value indicated on the rating plate on the bottom of the
appliance.
Connecttheappliancetoanecientlyearthedandcorrectly
installed socket with a minimum current rating of 10A only.
If the power socket does not match the plug on the appliance,
have the socket replaced with a suitable type by a qualied
professional.
Loading ...
Loading ...
Loading ...