Loading ...
Loading ...
Loading ...
English • 5Installation Guide • FreeSpace FS2P
PRO.BOSE.COM
Installation
Preparing the Installation
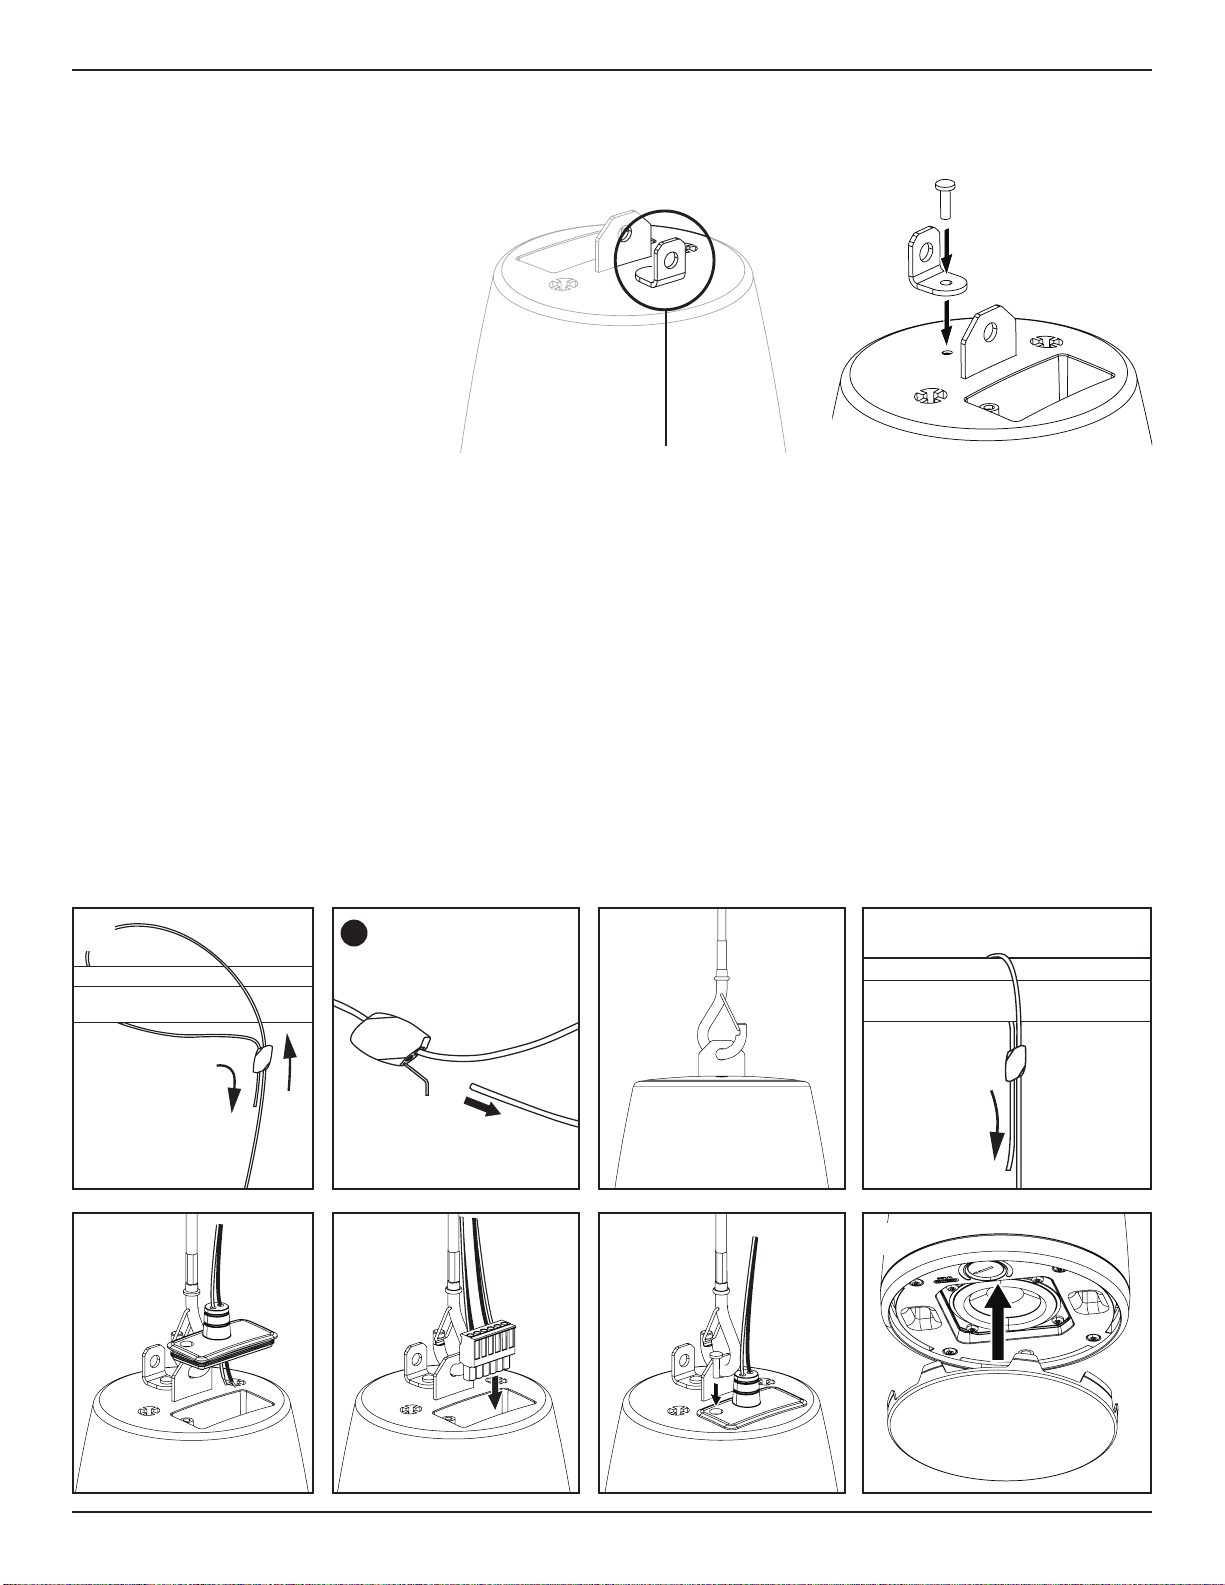
Using a Safety Cable
Some regional construction codes require
the use of a secondary method of securing
loudspeakers to support structures to
provide additional safety. Choose a
mounting position, method, and hardware
consistent with local building codes and
regulations.
Bose recommends using (1) a safety
wire or (2) a safety cable as a secondary
securing mechanism (not included).
See the diagram to the right for safety
attachment points.
Follow the manufacturer’s instructions
for any secondary securing mechanism
implemented.
qw
Mounting the Loudspeaker
1. Insert the included suspension cable through the cable fastener and wrap the cable around a support structure; secure the cable
using the cable fastener. Note: Arrows on the cable fastener indicate the cable direction.
A. To loosen the cable, insert the fastener tool into the release hole and adjust the cable.
2. Secure the cable clip to the loudspeaker suspension cable attachment point.
3. Pull the loose end of the suspension cable to adjust the loudspeaker to the desired height. Once you've reached the desired
loudspeaker height, cut away any excess cable.
Note: Trim any frayed filaments with wire cutters after cutting to length.
4. Insert the loudspeaker wiring through the rubber conduit of the input cover (see Preparing the Input Cover on page4).
5. Wire the connector and insert the connector into the loudspeaker. For wiring information, see Wiring the Loudspeaker on page4.
6. Place the input cover over the connector and press it firmly against the loudspeaker to create a tight seal. Secure the input cover
using the input cover screw.
7. Use the included cable ties to secure the wiring to the suspension cable.
Note: Before attaching the grille, adjust the loudspeaker tap settings to the appropriate setting for the installation. See Loudspeaker
Settings on page 4.
8. Line up the grille with the inside of the loudspeaker enclosure so that the two smallest grille tabs are on either side of the tap switch.
Push the grille on the loudspeaker until it is secured into place. If necessary, push the grille tabs inward to properly fit into the
loudspeaker enclosure.
q
A
w
e
r
t
y
i
Loading ...
Loading ...
Loading ...