
Loading ...
Loading ...
3
1
7
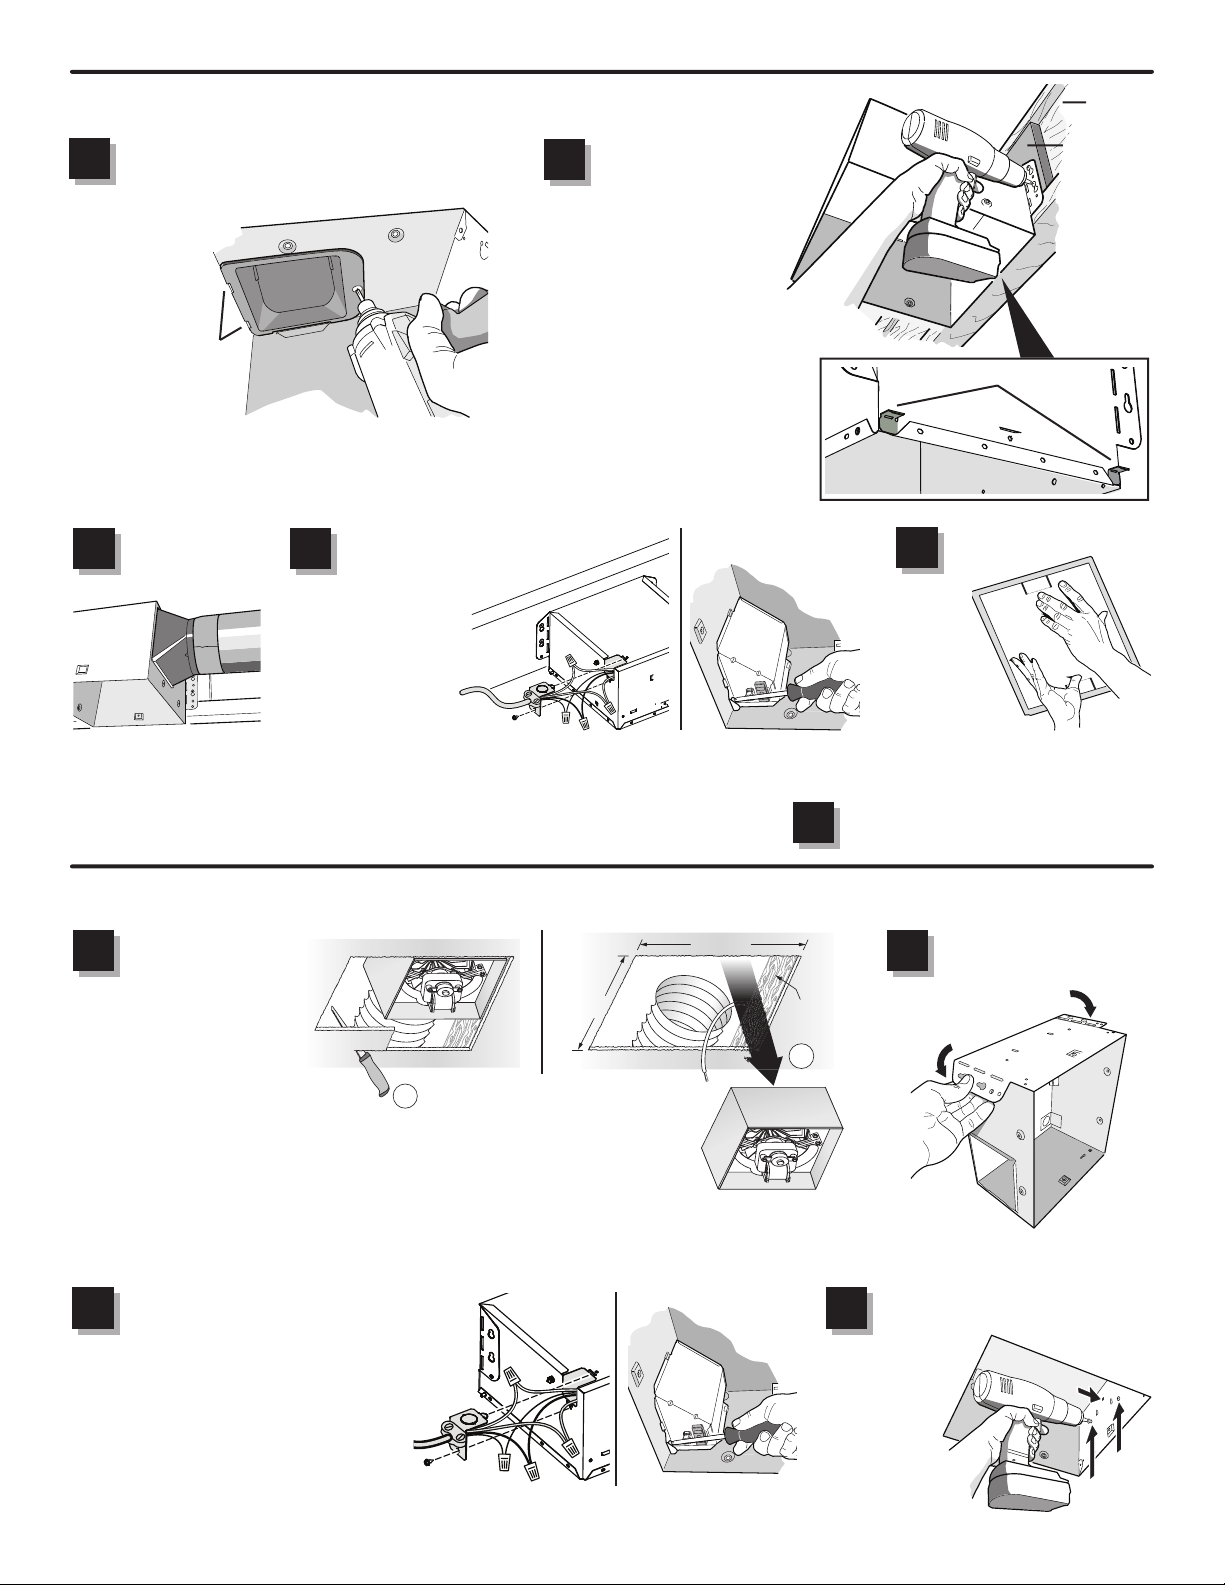
Connect wiring.
Connect power cable to wiring
plate (from parts bag) using UL
11
7 8
Connect 4-in.
round duct.
Connect
wiring.
Connect power cable
to wiring plate (from
parts bag) using UL
approved connector.
Connect house
wiring to fan wiring.
Refer to wiring
diagrams for connection details. Use screw
(from parts bag) to secure wiring plate to fan
housing. Re-install wiring panel and secure with
screw from parts bag.
Place
mask
into
housing
opening to
prevent
drywall spray
and construction dust from
damaging sensor.
Le
a
ve this mask in place
to p
r
ev
ent
constr
uction dust, d
r
y
wall sp
r
a
y
, or paint
f
r
om damaging inside of p
roduct.
REM
O
VE M
A
SK BEFORE
IN
S
TALLING GRILLE.
Laissez ce masque en place pour empêcher
la poussièr
e de construction, le plâtre ou la
peintu
r
e
, etc
.
d’endommager
l’intér
ieur du p
r
oduit.
ENLEVEZ CE M
A
S
Q
UE
AV
ANT
D’INSTALLER LA GRILLE.
Deje es
t
a cubierta en su lu
gar par
a
e
vitar
que po
l
vos de construcción, r
ocíos de y
eso
o pintu
r
a dañen el in
t
e
r
ior del produc
to
.
Q
UITE LA CUBIERT
A
ANTES
DE IN
S
T
ALAR LA REJILLA.
99352432A
1
9
Install housing
mask.
Finish ceiling.
Then continue with Step 11.
1
10
RETROFIT INSTALLATION
Remove old
fan and prepare
ceiling.
2
10½-in.
9¾-in.
JOIST
1
Fold mounting ears
at against housing.
1
5
1
6
Existing fan housings are typically attached to the structure:
•
with screws, nails, or staples, which must be removed.
•
with hangers or rails which are fastened to joists and must be removed along with housing.
A pry bar may be needed to remove the old housing.
Leave ductwork and wiring in place.
Enlarge ceiling opening (if
necessary) to 9¾” parallel to
joist) by 10½” (perpendicular
to joist). (Some models have
a cut-out template on side of
carton.)
Mount fan to ceiling structure.
Mount housing
to ceiling
structure with
appropriate
fasteners
in locations
shown.
1
8
approved connector. Connect house wiring
to fan wiring. Refer to wiring diagrams for
connection details. Use screw (from parts
bag) to secure wiring plate to fan housing.
Re-install wiring panel and secure with
screw from parts bag.
1
5
Attach damper/duct connector to
fan housing.
Mount housing to
ceiling structure.
TABS
Push connector
through opening
from inside of
housing.
Engage tabs
and secure with
screw from
parts bag.
Make sure bottom of housing will
be flush with finished ceiling.
For proper location using ½”
ceiling material: Bend out
housing tabs (on outside of
housing) to fit against bottom of
joist.
Secure housing through
mounting ears with appropriate
fasteners. If mounting housing
to I-joist, use wood blocking as
shown.
NEW INSTALLATION
1
6
HOUSING TABS
I-JOIST
WOOD
BLOCKING
Loading ...
Loading ...
Loading ...