
Loading ...
Loading ...
Loading ...
BRT5008 Page
9
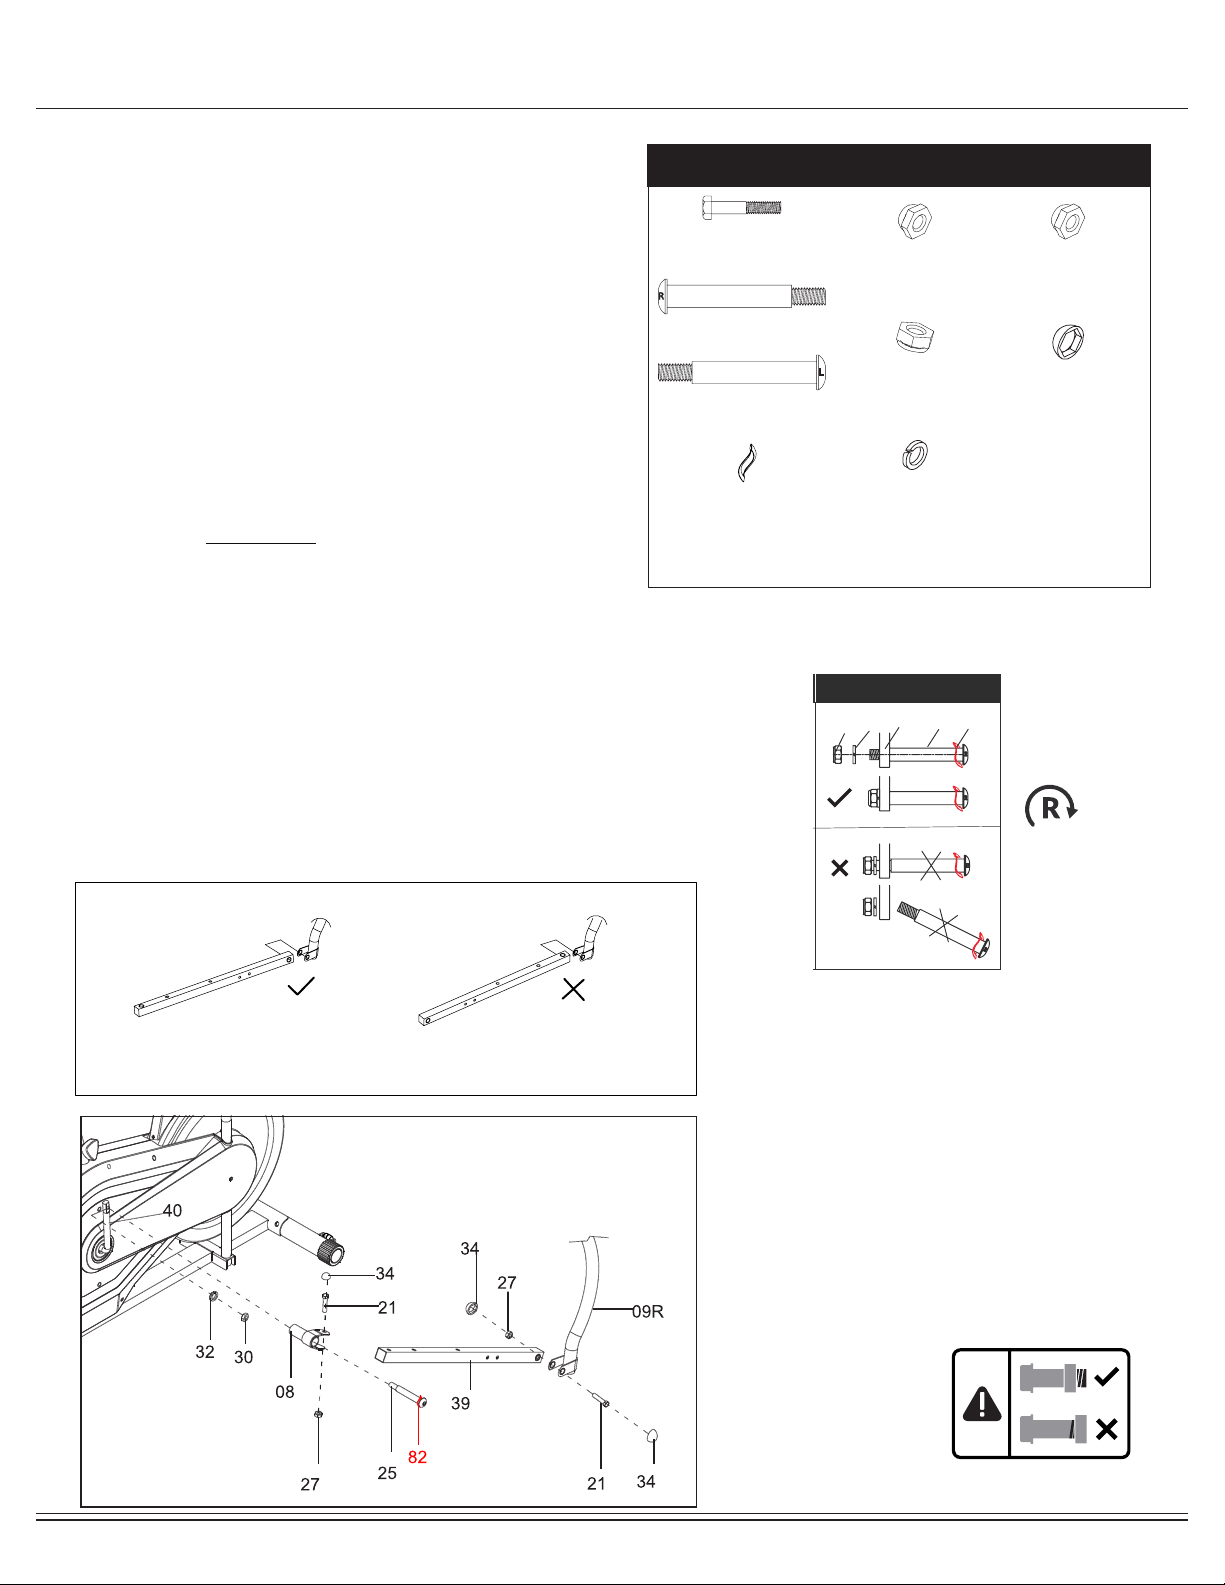
26 2540 4032 3229 30
LEFT CRANK RIGHT CRANK
82
82
counter-
clockwise
clockwise
Assembly STEP 3A
Hardware Required
#29
Left Nylon Nut
[1 piece]
#30
Right Nylon Nut
[1 piece]
#27
Nylon Nut (M10)
[4 pieces]
#34
Bolt Cap (S17)
[6 pieces]
#32
Spring Washer
(1/2")
[2 pieces]
#21
Hex Bolt (M10x55 mm)
[2 pieces]
#26
Left Pedal Hinge Bolt
[1 piece]
#25
Right Pedal Hinge Bolt
[1 piece]
#82
Wavy Washer
[2 pieces]
Note :
Keep the Right/Left Pedal Hinge Bolt (#25/26) perfectly
straight as they go through the Pedal Connection Joint
(#08) and the Crankshaft (#40).
If the Right/Left Pedal Hinge Bolt (#25/26) are connected
to the Crankshaft (#40) incorrectly, damage to the Right/
Left Pedal Hinge Bolt (#25/26) and Crankshaft (#40) will
occur.
The Pedal direction drawing
Remove Hex Bolts (#21) and Nylon Nuts (#27) that are
pre-assembled on the Left/Right Couple Bar (#09L/09R) and set them
aside as they will be used in later in this step.
Attach the Right Pedal Tube (#39) to the Right Coupler Bar (#09R).
Secure with one Hex Bolt (#21) and one Nylon Nut (#27).
Repeat the this process on the LEFT side.
Remove Hex Bolts (#21) and Nylon Nuts (#27) that are
pre-assembled on the Pedal Connection Joint (#08) and set them
aside as they will be used in later in this step.
Align and attach the Pedal Connection Joint (#08) to the right
Crankshaft (#40). Insert the Right Pedal Hinge Bolt (#25) with Wavy
Washer (#82) through Pedal Connection Joint (#08) and Crankshaft.
Secure the Right Pedal Hinge Bolt (#25) tightly into the Crankshaft
(#40) by turning CLOCKWISE. Then, secure with one Spring Washer
(#32) and a Right Nylon Nut [w/white inner nylon ring] (#30).
Attach the Pedal Connection Joint (#08) to the Right Pedal Tube
(#39). Insert one Hex Bolt (#21) through the upper bracket of the
Pedal Connection Joint (#08), followed by Right Pedal Tube (#39)
then the lower bracket of the Pedal Connection Joint (#08). Secure
them with one Nylon Nut (#27).
Attach three Bolt Caps (#34) over three Bolts as illustrated in the
drawing.
Loading ...
Loading ...
Loading ...