Loading ...
Loading ...
Loading ...
33
CARE AND CLEANING
Replacing the oven light
Replacing the oven interior light bulb:
1. Turn electrical power off at the main source or unplug
the appliance.
2. Remove interior oven light shield by turning a quarter
turn. Replace bulb with a new T-4 type Halogen 25 watt
appliance bulb. Do not allow your fingers to touch the
new bulb when replacing. Use a paper towel or cotton
glove while handling the new bulb when installing.
3. Replace glass oven light shield.
4. Turn power back on again at the main source (or plug
the appliance back in).
5. Be sure to reset the time of day on the clock.
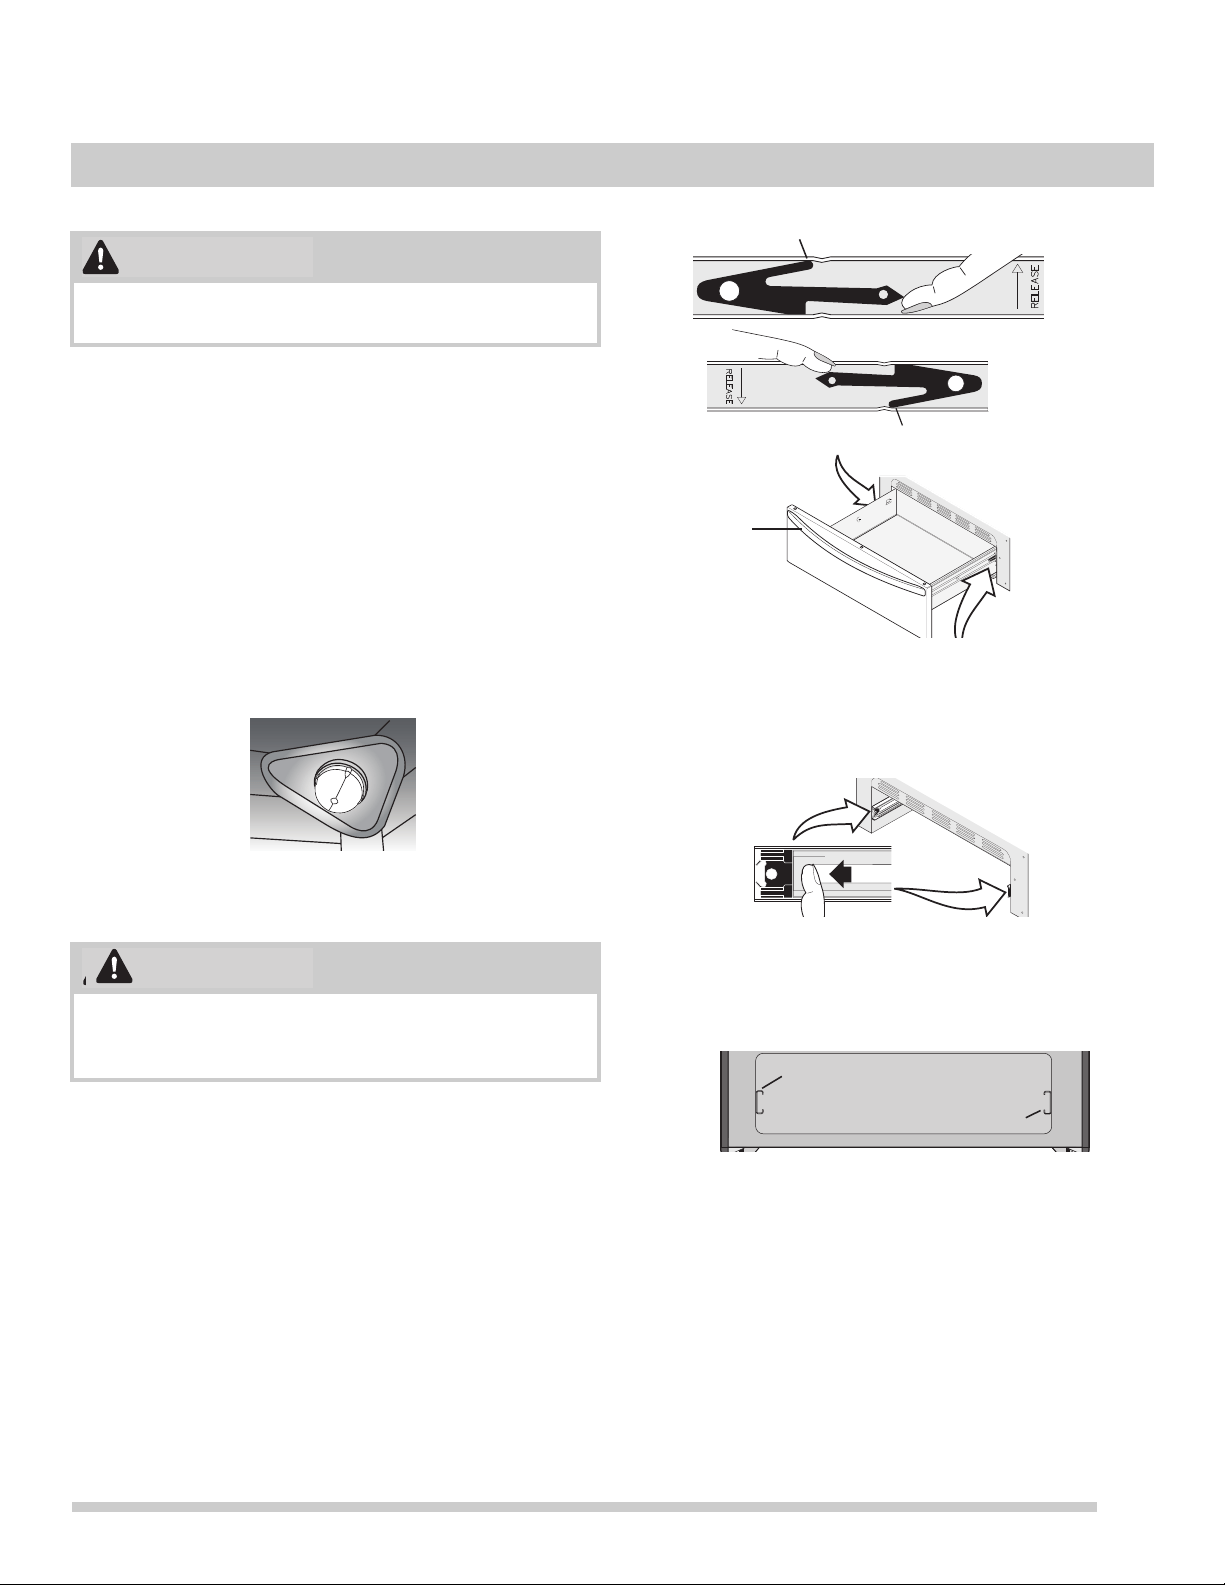
Removing the Warmer Drawer
1. Open the warmer drawer completely.
2. On left warmer drawer rail, locate black release lever
and press up with finger while pulling out slightly on the
oven drawer handle. On right warmer drawer rail, locate
black release lever and press down while pulling out
slightly on the warmer drawer handle (
Figure 28).
3. The warmer drawer should now be released from the
rails. Remove warmer oven drawer completely out and
away from the appliance.
To replace the warmer drawer:
1. Pull the bearing glides to the front of the outer compart-
ment glide channels until they snap into place.
2. Carefully line up both sides of the warmer drawer glide
rails to the outer compartment glide channels located
inside the empty warmer drawer compartment.
3. While holding the warmer drawer level and square
using the warmer drawer handle, push the warmer
drawer all the way into the outer compartment glide
channels all the way into the range. Open the warmer
drawer again to verify the glides have seated.
4. If you do not hear the levers “click” or the bearing glides
do not feel seated remove the warmer drawer and
repeat Steps 1 through 3 again.
Be sure the oven is unplugged and all parts are cool
before replacing oven light.
Figure 27: Halogen light
Electrical shock hazard can occur and result in serious
injury or death. Disconnect appliance from electric power
before cleaning and servicing the warmer drawer.
CAUTION
WARNING
WARNING
Figure 28: Removing the warmer drawer
Figure 29: Bearing glide placement
Figure 30: Channel alignment
Left-hand rail and release
Right-hand rail and release
Warmer
drawer
handle
Left-hand channel
Right-hand channel
Loading ...
Loading ...
Loading ...