Loading ...
Loading ...
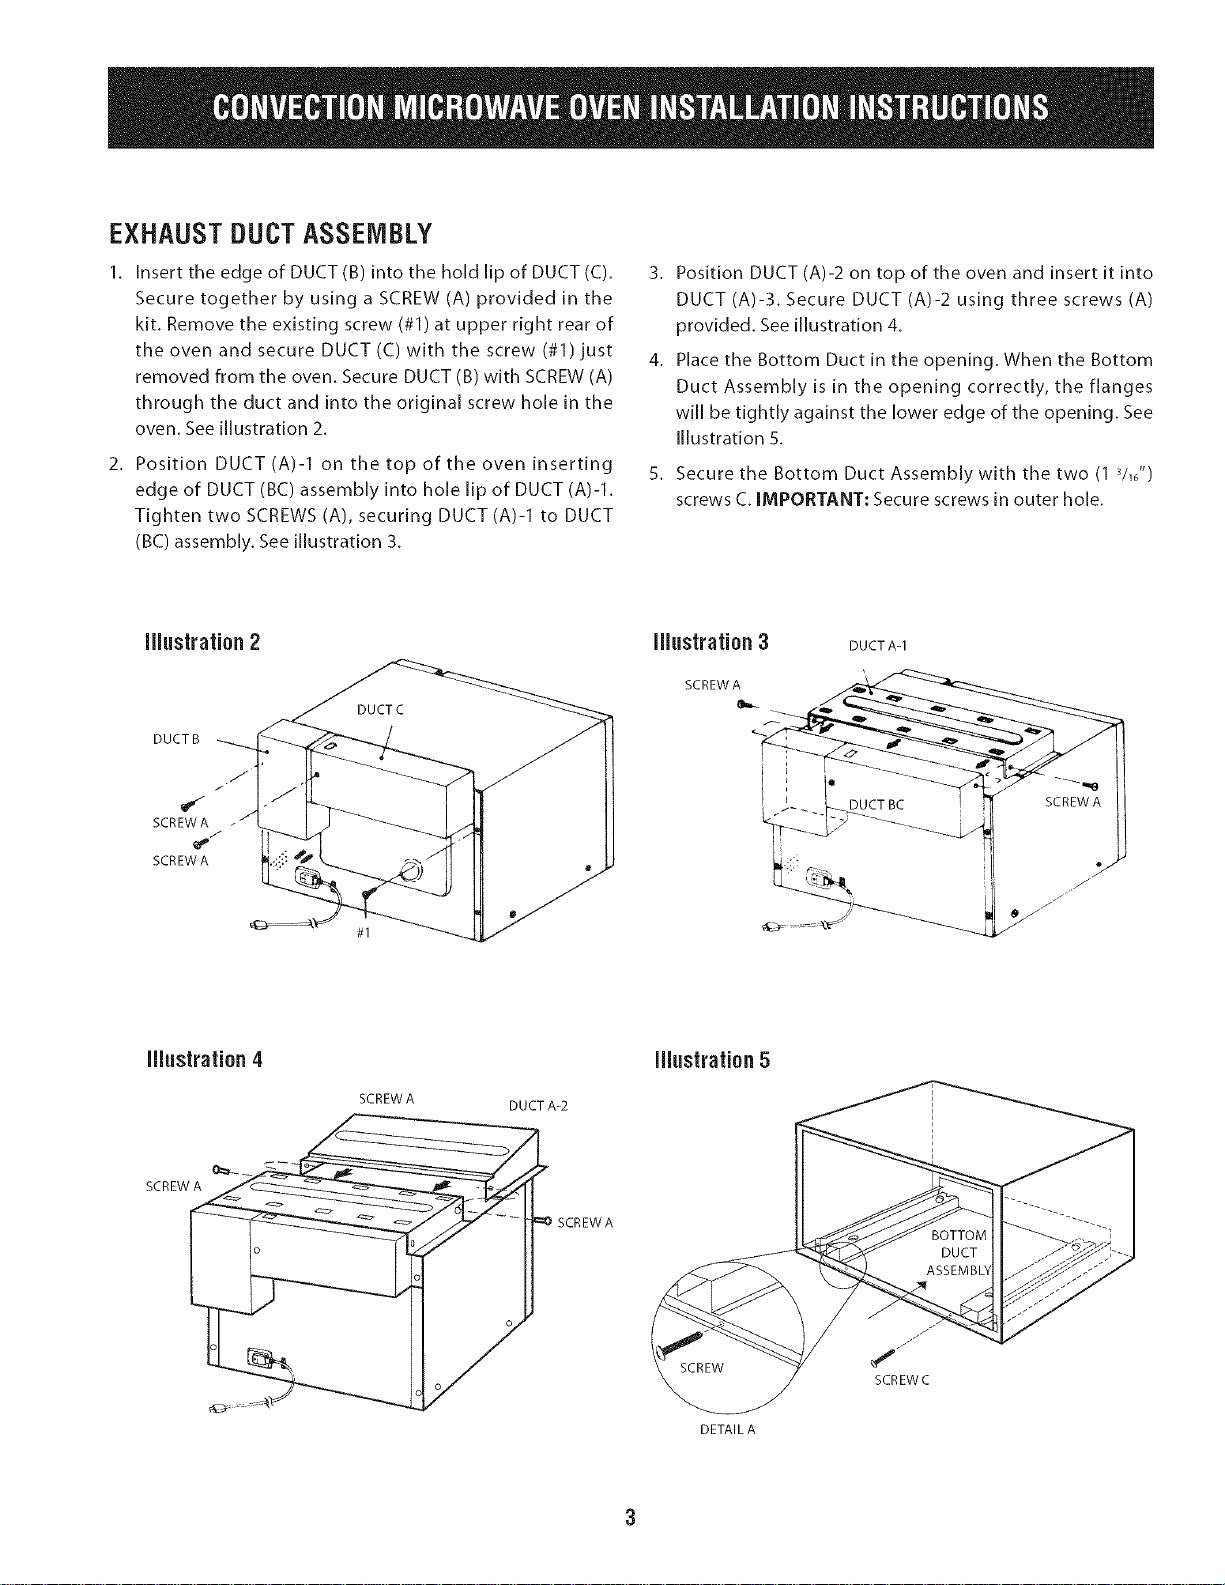
EXHAUSTDUCTASSEMBLY
1. Insert the edge of DUCT(B) into the hold lip of DUCT(C).
Secure together by using a SCREW (A) provided in the
kit. Remove the existing screw (#1) at upper right rear of
the oven and secure DUCT (C) with the screw (#1) just
removed from the oven. Secure DUCT (B) with SCREW (A)
through the duct and into the original screw hole in the
oven. See illustration 2.
2. Position DUCT (A)-I on the top of the oven inserting
edge of DUCT (BC) assembly into hole lip of DUCT (A)-I.
Tighten two SCREWS (A), securing DUCT(A)-1 to DUCT
(BC) assembly. See illustration 3.
3. Position DUCT (A)-2 on top of the oven and insert it into
DUCT (A)-3. Secure DUCT (A)-2 using three screws (A)
provided. See illustration 4.
4. Place the Bottom Duct in the opening. When the Bottom
Duct Assembly is in the opening correctly, the flanges
will be tightly against the lower edge of the opening. See
Illustration 5.
5. Secure the Bottom Duct Assembly with the two (1 VJ)
screws C. IMPORTANT: Secure screws in outer hole.
Illustration 2
DUCTB
/
SCREWA
SCREWA
Illustration 3
SCREWA
DUCTA-1
oDUCT BC
Illustration 4
SCREW A DUCT A-2
SCREW -- _--
==OSCREWA
Illustration 5
///"
SCREWC
DETAIL A
Loading ...